Want to create a site-specific WordPress plugin on your site? Creating a site-specific plugin is one of the best ways to add custom functions to your WordPress site.
In this article, we’ll explain everything you need to know about using a site-specific WordPress plugin.
Extending Your Website Features with a Site-Specific Plugin
WordPress is so flexible that it allows you to easily enhance the functionalities of your site on your own without hiring a developer. You can enhance the functionalities in 2 ways: either by installing a plugin or adding a custom code snippet to your site.
Although installing a plugin is an obvious way (especially for non-developers) to extend your site’s functionality, at times, it’s hard to find a plugin that addresses your needs exactly. On the flip side, you can find WordPress tutorials that recommend adding a code snippet to solve your specific needs.
There’re 2 ways to add a code snippet to your WordPress website in order to enhance the functionalities:
- Build a site-specific plugin and add a custom code snippet to it.
- Insert a snippet to your functions.php file.
The main drawback of copying a snippet to your functions.php file is that the functionality will disappear when you switch over to a new WordPress theme. This is where a site-specific plugin comes in.
A site-specific WordPress plugin is independent of your theme, which allows you to add custom snippets to your site.
Let’s take a look at how to use a site-specific WordPress plugin on your site.
- Method 1: Using the Code Snippets plugin (the easy way)
- Method 2: Using a site-specific plugin (manual creation)
Method #1: Using the Code Snippets Plugin (the Easy Way)
If you’re not interested in creating a site-specific plugin manually, which can be time-consuming, then this method is for you.
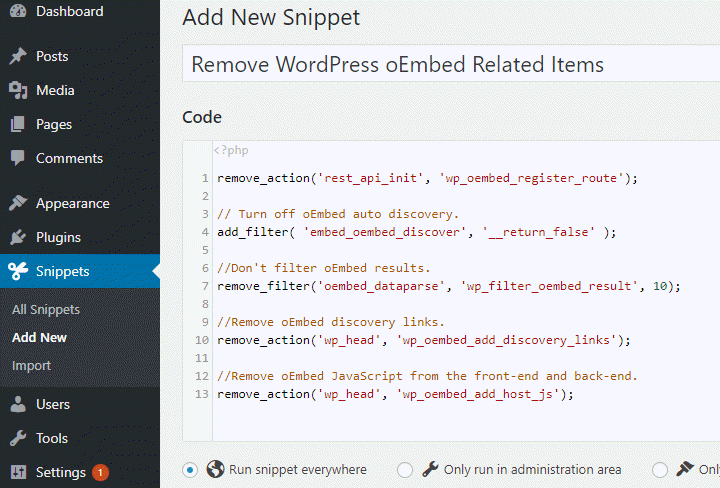
Go ahead and simply install and activate the Code Snippets plugin on your WordPress site. This plugin provides a graphical interface for managing snippets similar to the Plugins menu. You can activate or deactivate Snippets, just like plugins. Once the plugin is activated, you can find a WordPress admin menu called Snippets.
To add a custom code snippet, go to Snippets » Add New and then copy the snippet to the Code field.
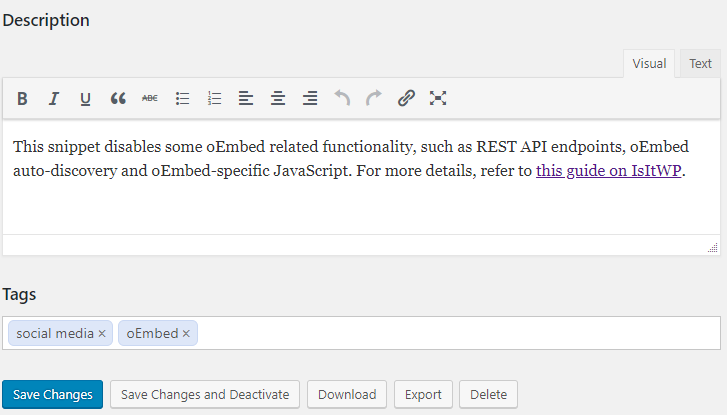
Make sure to specify a title, description, and tags for your snippet as reference for yourself down the line. Once done, click Save Changes and Activate.
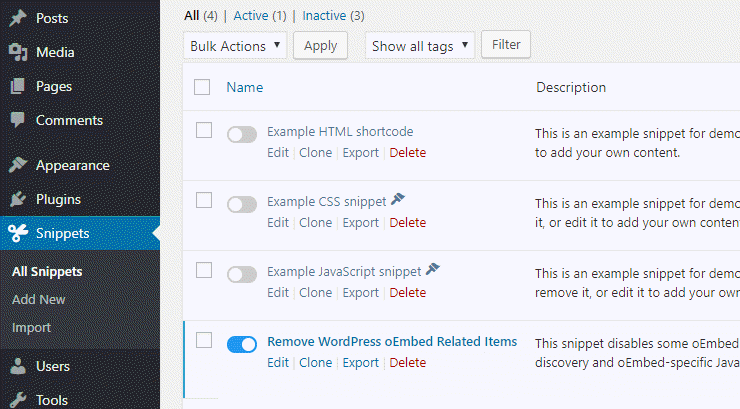
To manage your snippets, you can click on the All Snippets menu. Here, you can activate or deactivate the snippets, just like WordPress plugins.
Method #2: Using a Site-Specific Plugin (Manual Creation)
Step 1: Create a Site-Specific Plugin
Open a text editor on your computer, such as Notepad or TextEdit. Your plugin file needs a specific header code so that WordPress can recognize it as a plugin. Copy the following header code to your Notepad:
<?php
/*
Plugin Name: Site Plugin for example.com
Description: Site specific code changes for example.com
*/
/* Start Adding Functions Below this Line */


/* Stop Adding Functions Below this Line */
?>
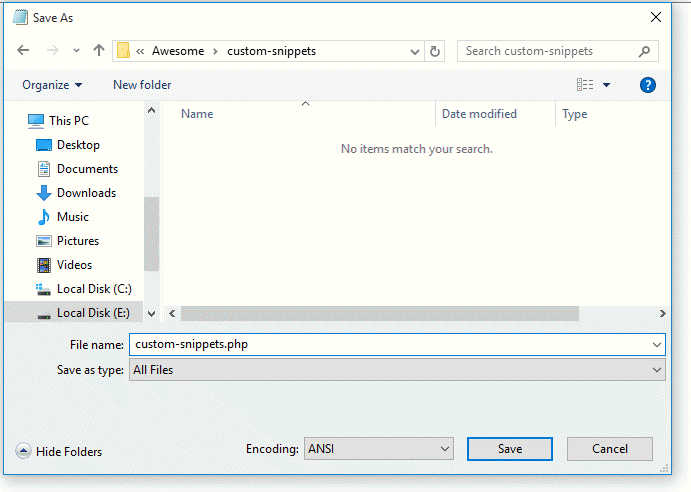
Let’s name your site-specific plugin file custom-snippets.php. Bear in mind that in order to save your file as a PHP file, you’ll need to choose All Files as your Save as type.
Now create a new folder named custom-snippets and move the PHP file you’ve just created to the folder.
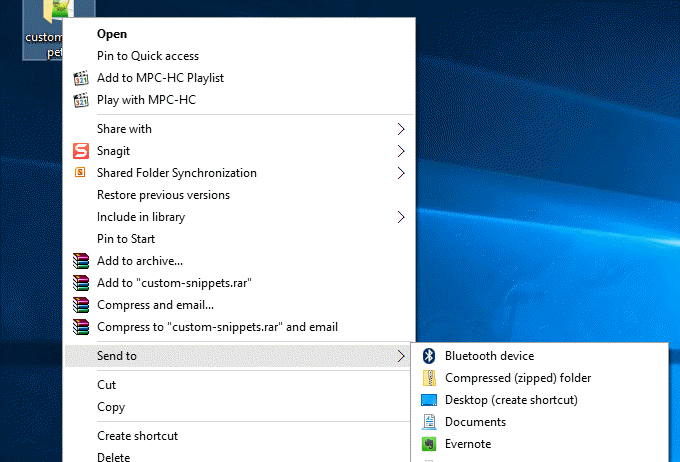
Next, you’ll need to compress your site-specific plugin folder, custom-snippets. Here’s how to do it:
Windows users can right-click on the folder and then click Send to » Compressed (zipped) folder.
If you’re on Mac, right click and select Compress “custom-snippets”.
Step 2: Install the Site-Specific Plugin
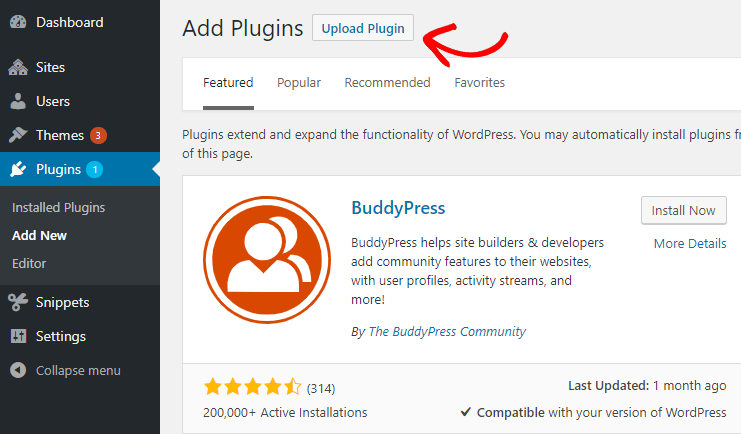
Now that you have created the plugin’s zip file, go to your WordPress dashboard and upload it by navigating to Plugins » Add New. Then click Upload Plugin. You’ll now be prompted to choose the correct plugin file and install it.
After installing the plugin, go ahead and activate it so you can start using the site-specific plugin.
Step 3: Using the Site-Specific Plugin
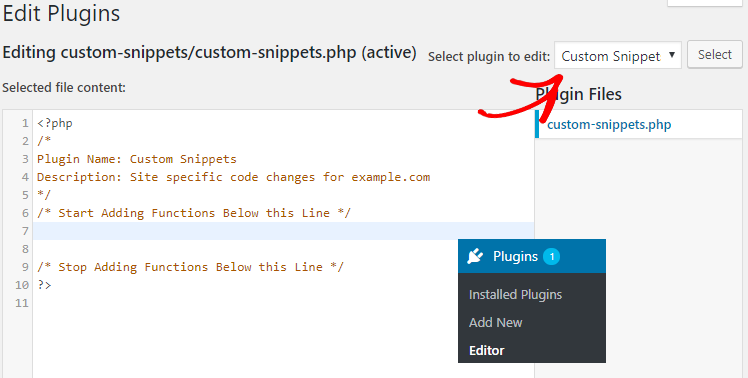
In order to add a snippet to your recently uploaded site-specific plugin, go to Plugins » Editor. On the right-hand side, you’ll see a dropdown menu Select plugin to edit. Let’s choose Custom Snippet and then click Select. You’ll now be directed to the custom-snippets.php file of your plugin.
Here, you can add the snippet of your choice below the line: /* Start Adding Functions Below this Line */
After inserting your snippet, click on Update File.
That’s it!
We hope this article helped you learn how to create and use a site-specific plugin on your WordPress site. Now go ahead and find some code snippets that you can add to enhance your WordPress functionalities.
You may also want to check out our guide on fixing the error establishing database connection in WordPress.

Thank you for this tutorial!
Do you recommend this more direct method over using the actual code snippets plug-in?
It seems like less can go wrong by doing one’s own custom functions file as you’ve stated here.
I’d love an answer if you have the time thank you very much
The Code Snippets plugin is generally the safer way to go for a short snippet. Even if you make a site-specific plugin, the Code Snippets plugin can be a great way to test the code quickly.
For a bigger set of code, a custom plugin may be a better option.
What a great tutor. Thanks so much for the help, it’s life saving 😊.
For those having issues with plugin not showing up, Make sure you follow the instruction properly, change the plugin name and description in the php file, reinstall and activate. It worked for me. Bless 🙏
Glad you find it helpful
Heloo,
I created the plugin loaded and activated it in my website, but it does not appear in plugins lists nor plugin editor.
Any idea why it isnot displaying ?
Thanks
Thanks very much for this helpful article Shahzad. I have manually created a plugin for code snippets and am hoping you can help with a follow-up question. If I want to add several several snippets, should I add them all to the same php file, using a single plugin for everything? Or should I create a new plugin for each snippet in order to organize the code more easily? The benefit of using Code Snippets is the neat organization, and I may switch to that approach but I’m a bit reluctant because in various forums I’ve seen many people struggling with their sites breaking and having to do a lot of trouble-shooting with Code Snippets. Your advice is appreciated. Thanks.
Hey Leslie,
Glad you find this article helpful.
Yes, you can add as many snippets as you want to the same php file.
Hello Sir
I am really happy to find such information here. Could you explain how many sites are creating Update plugins for the GPL themes and plugins they sell on their sites.Can we make such plugin and how. Providing code will be highly appreciated.
Thanks Bro! it’s really helpful. I did try it another method from somewhere it did not work. Now, it’s working
Glad you find it helpful
Thanks, for compiling all this info in a simple form.
You’re welcome, Sushant