
Do you want to use popups to improve engagement, leads, and sales on your WordPress site?
Popups can help you grab a visitor’s attention to get them to take action like sign up for a newsletter, buy something, visit a flash sale, and more.
There are so many possibilities with popups! In this tutorial, we’ll show you the best way to create a popup in WordPress.
Things to Know Before You Create a Popup in WordPress
Not too long ago, popups had a bad reputation for being intrusive, pushy, and just plain annoying. And for good reason. Websites overused popups and displayed them anywhere they could.
This kind of strategy won’t drive conversion rates but may drive your visitors away from your site.
Instead, you’ll want to target your customers at the right time and place where they’re most likely to convert. By showing them a relevant offer or call to action, you have a greater chance of converting them into subscribers and customers.
To create beautiful popups that actually work and bring in results, we recommend using a powerful tool like OptinMonster.
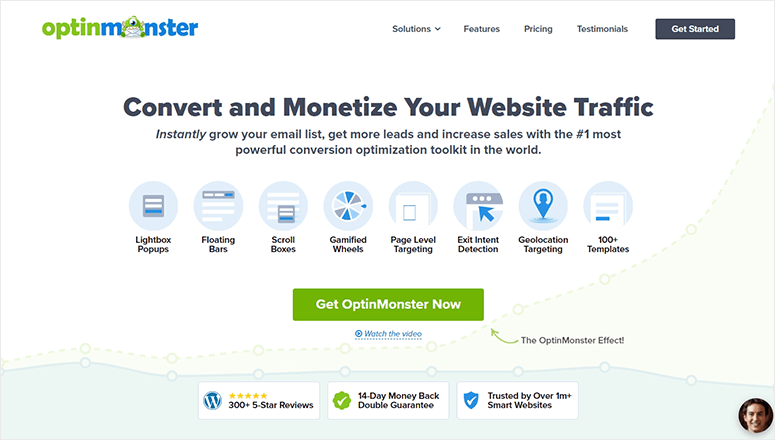
OptinMonster is hands down the best popup maker plugin for WordPress. It lets you create any kind of lead generation or conversion campaign on your site. This means you won’t be limited to popups. You can also create floating bars, slide-ins, scroll boxes, inline forms, fullscreen mats, and more.
OptinMonster works with any website including Shopify, BigCommerce, and HTML sites. For WordPress and WooCommerce sites, there’s a dedicated plugin available in the WordPress repository. This lets you access the OptinMonster popup builder right inside your website’s admin panel.
OptinMonster is designed to be easy for anyone to make stunning campaigns without any design or coding skills.
There are beautiful templates that are responsive and ready to use out of the box. You’ll find a template for almost every marketing goal and holidays like Christmas and Black Friday!
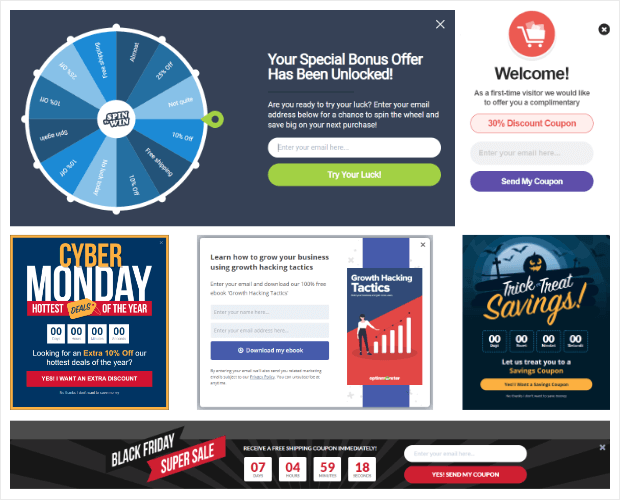
Once you pick a template, you can customize it using the easy drag and drop campaign builder.
Now the main reason why we recommend OptinMonster is because it comes with powerful targeting rules and campaign triggers. Some of them include:
- On-click: Display a popup when a user clicks on a button, link, or image
- Scroll depth: Interact with visitors that are interested in your content
- Geolocation: Engage with visitors based on their local area
- Time and date: Schedule campaigns to appear at set dates and times
- Exit intent: Recover abandoning visitors
- Page level: Tailor campaigns to match the page intent
And these are just a few popular rules. Inside OptinMonster, you’ll get complete control over where, when, and to whom your popup appears.
Added to all of this functionality, OptinMonster integrates seamlessly with email providers and other marketing tools.
Once your popup has received some engagement, OptinMonster tracks its performance and gives you valuable insights to see how many people viewed it and how many converted.
Ready to learn how to make a high-converting popup for your WordPress site? Let’s dive right into the tutorial.
The RIGHT Way to Create a Popup in WordPress
To follow along in this tutorial, you’ll need to sign up for an OptinMonster account.
OptinMonster doesn’t have a free version but its plans are affordable and worth every penny. You can get started for as low as $9 per month with a 14-day money back guarantee.
After you’ve signed up, head over to your WordPress site and install the OptinMonster plugin.
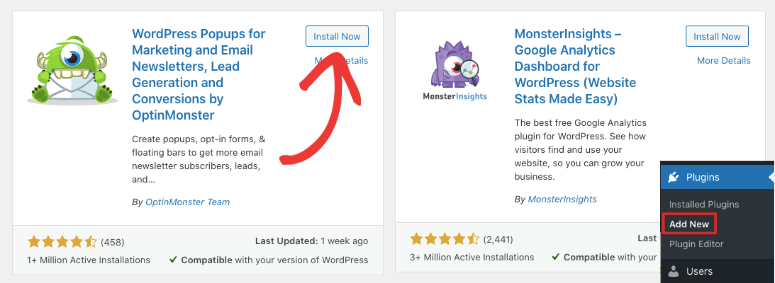
This is a WordPress connector plugin that’s available for free in the WordPress repository.
When you activate the WordPress plugin, there’s an automated setup wizard that will help you connect your site to your OptinMonster account.
If you need more help, follow this tutorial: How to Connect OptinMonster to WordPress.
Once you’re all set up, you can access the OptinMonster dashboard right inside your WordPress admin panel and start building campaigns.
Here’s a sample of the kind of popup we’ll create today. It’s designed to get website visitors to sign up for newsletters by offering them a lead magnet.
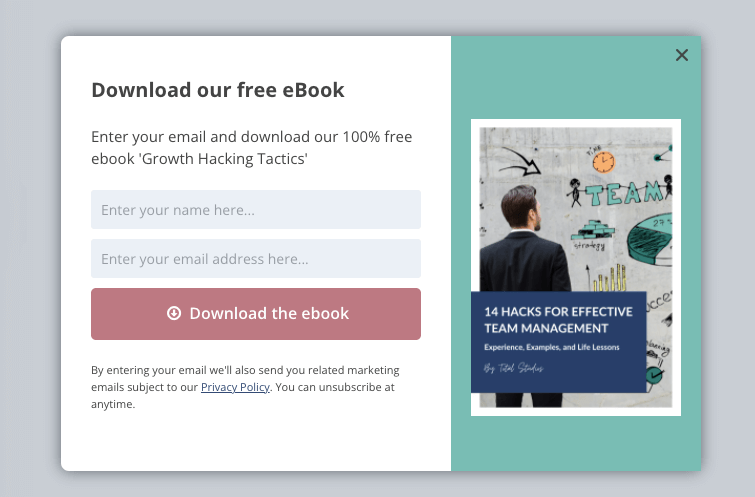
Keep in mind that OptinMonster has tons of templates so you can choose a design that suits your marketing goals. You can create any type of popup including discount, sale, notification, contact form popups, and much more.
Step 1: Create a Popup Campaign
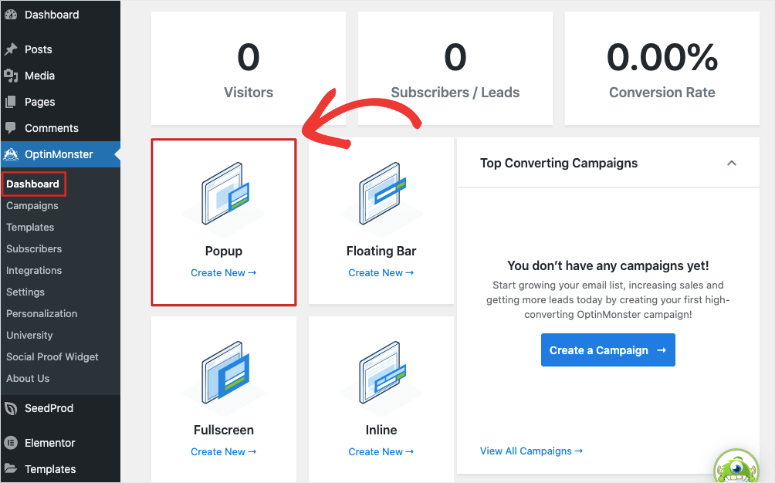
In your WordPress dashboard, open the OptinMonster plugin page. Here, you’ll see the different campaign types available. Let’s go ahead and select a ‘popup’ campaign.
This will open up the template library where you can browse, preview, and select the template you like. For this tutorial, we’ll pick the Magnet template that comes prefilled with an optin form, CTA (call to action), and a stunning image.
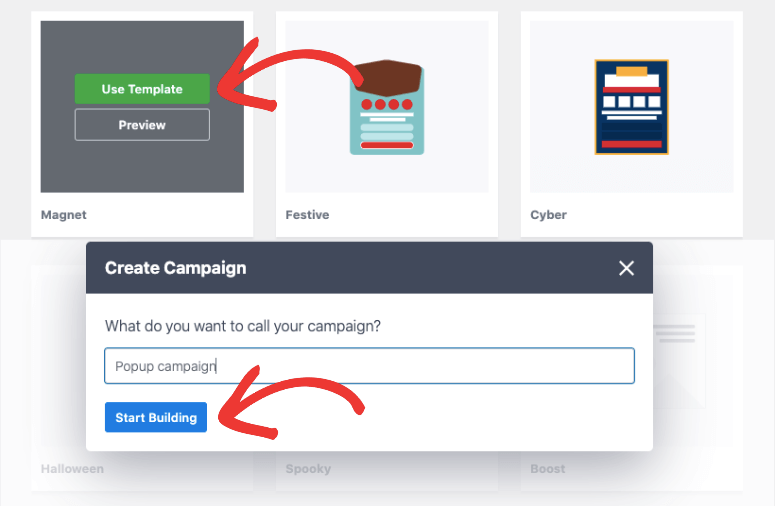
Feel free to choose any template you like. For all popup themes, the steps below will remain the same.
When you choose a template, OptinMonster will ask you to add a name so that you can identify the new popup later from the list of campaigns you create. Then, hit the ‘Start Building’ button.
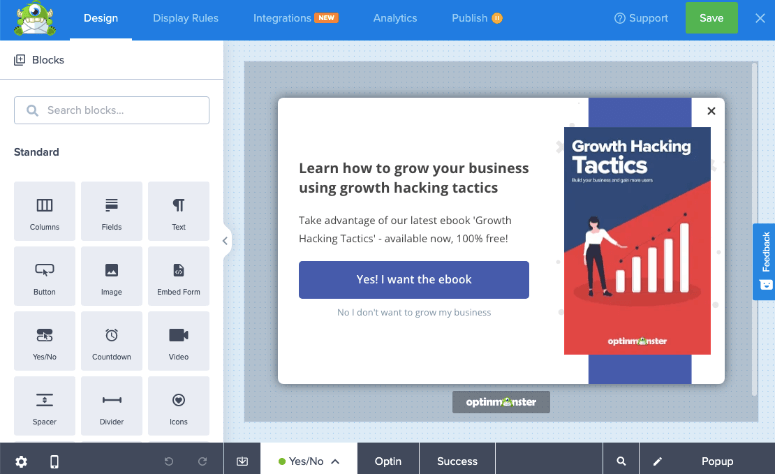
Now you’ll be inside the OptinMonster campaign builder where you can customize your popup design.
Step 2: Customize the Popup
OptinMonster has a visual drag and drop builder that is incredibly easy to use. You’ll see a preview of your campaign which you can make edits to directly.
If you’re using OptinMonster for the first time, when you open the builder, you’ll see an onscreen tutorial that will quickly show you how to use the builder and navigate the settings menu.
Keep in mind the templates look great on their own so you won’t need to change much. We’ll show you how to customize the popup template so that it matches your goal or purpose.
First, when you select the text box, it instantly becomes editable. You can simply delete the existing content and type in your own.
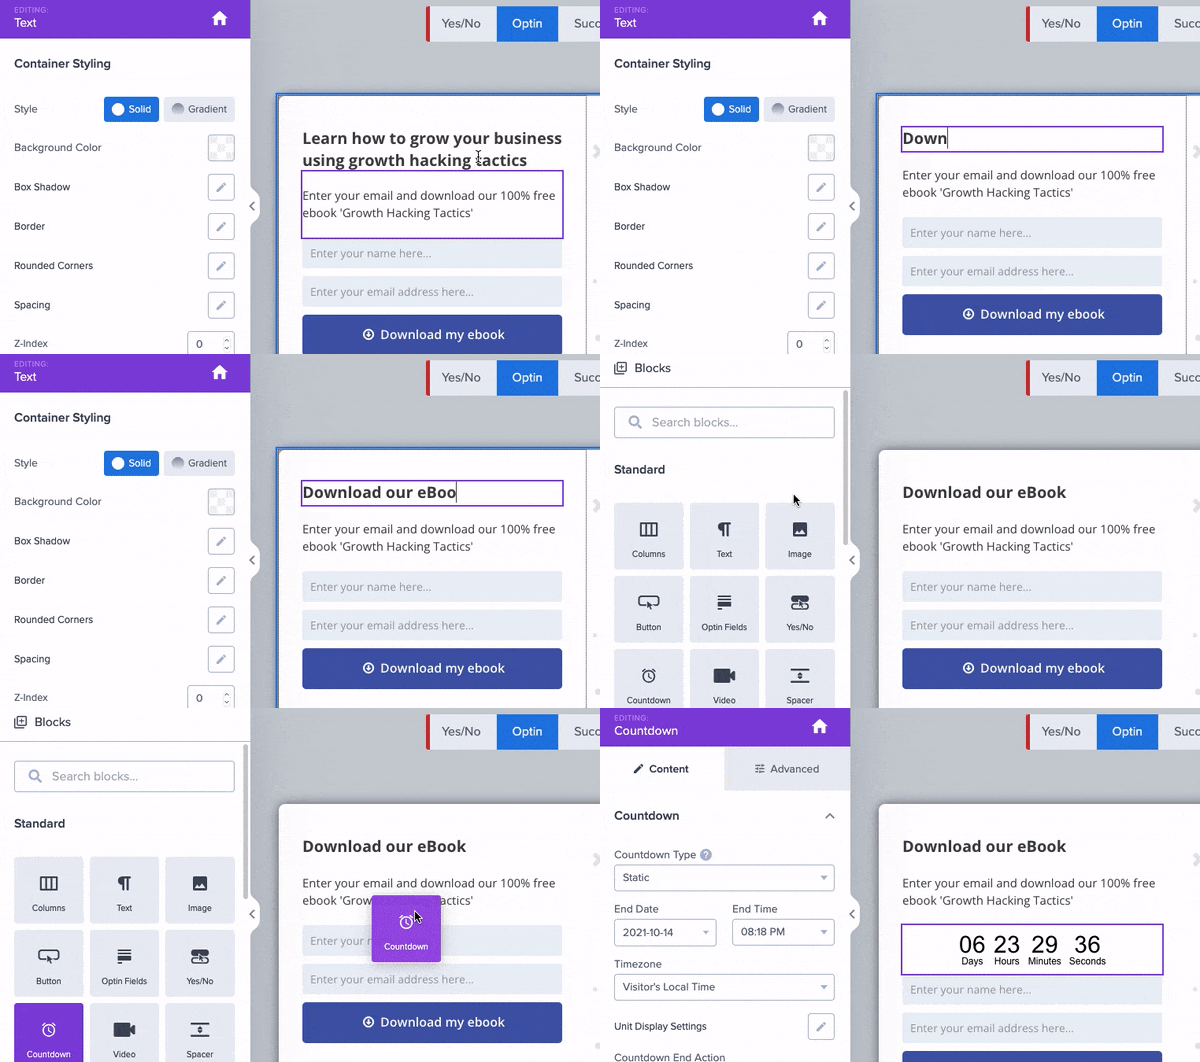
If you want to add new blocks, simply select the desired one from the left menu and drag and drop it into your popup design.
Like this, you can add, delete, and edit every element in the popup template. You can also change colors, fonts, size, and more.
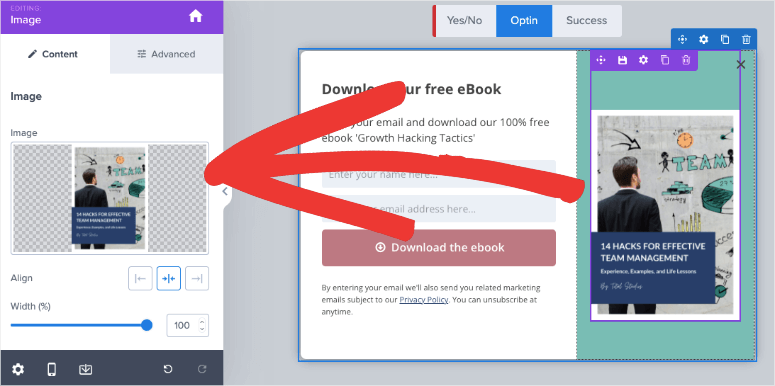
Next, to update the image, simply select it and upload your own in the left menu.
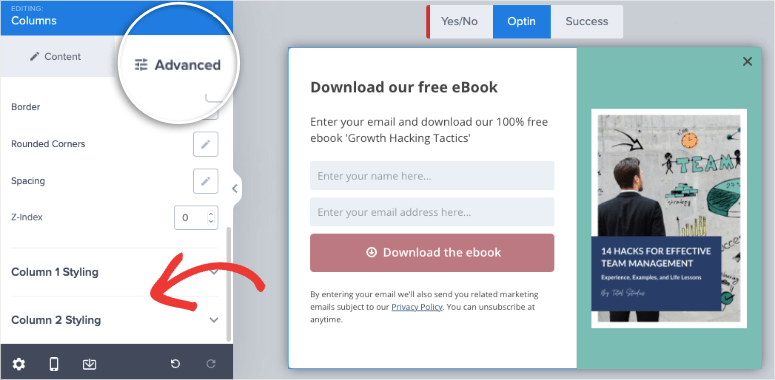
In the Advanced settings tab, you can change the background color, border, spacing, and corner style. You’ll even see options to customize each column in this section.
Once a visitor fills and submits the optin form, you can display a success message to thank them for signing up.
To customize the form submission message, open the Success tab. You’ll see the same template design with a confirmation message.
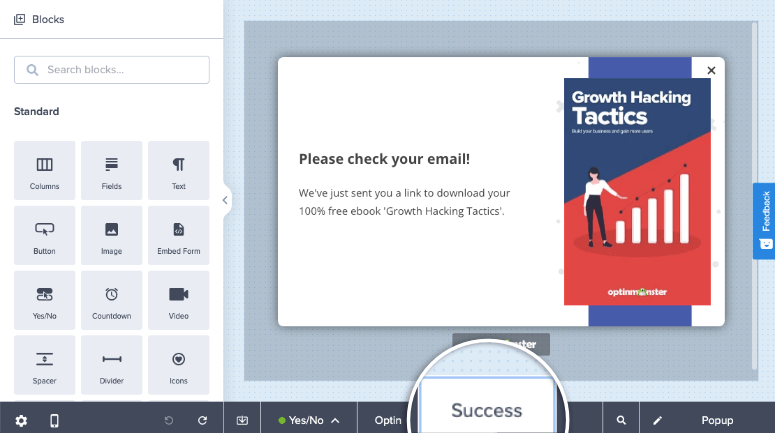
You can customize the message in the same way you customized the popup design.
OptinMonster’s builder is designed to be easy for anyone to use. You can explore more settings on your own to design your campaign just the way you want it.
Now your popup design is ready. We recommend saving your design to store your customizations. Next, we’ll show you how to change your popup settings and add targeting rules.
Step 3: Add Popup Targeting Rules
To control where and when your popup appears on your site, head over to the Display Rules tab.
Here, you’ll see that by default, OptinMonster displays the popup up to website visitors who spend at least 5 seconds on any webpage of your site.
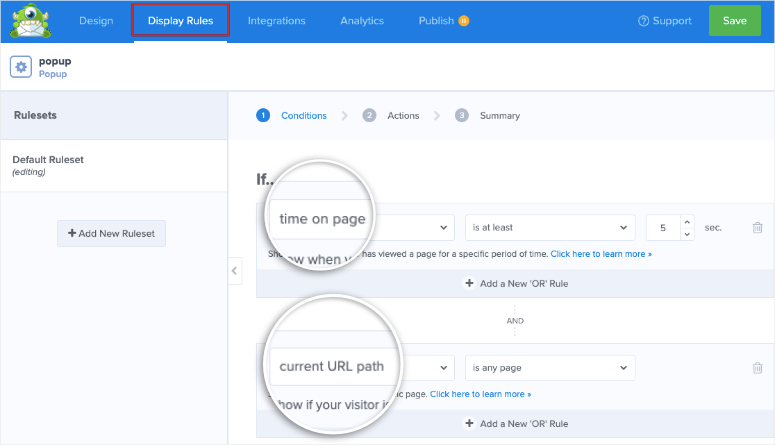
You can start by editing the existing rules to add your own. When you open the dropdown menu that is set to ‘time on page’, the list of rules will appear.
Since there are so many rules, they’re neatly categorized so you can find what you need fast. The filters include:
- Popular
- Trigger
- Targeting
- Personalization
- eCommerce
We’ll show you how to add 2 rules here to display the popup to visitors who are on a specific page and are about to exit your website.
To target visitors on a specific page, choose the Page Targeting rule.
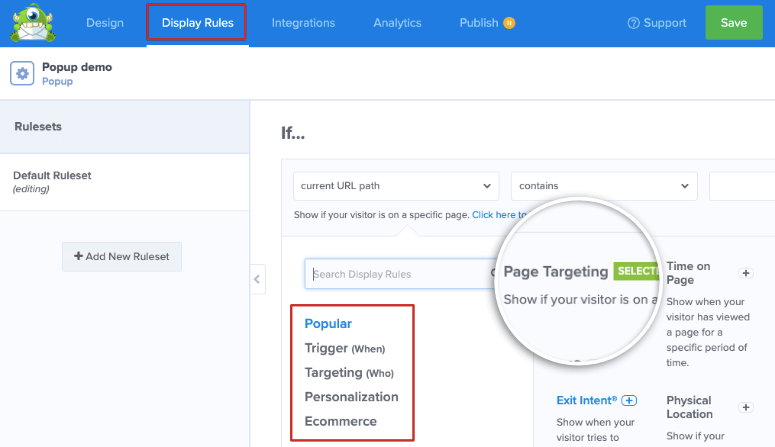
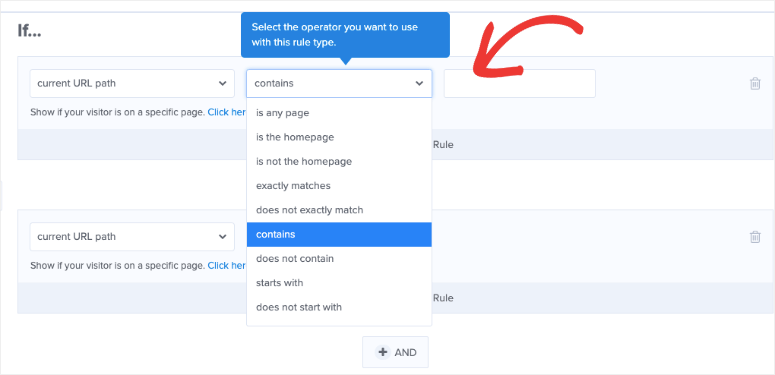
Then you can choose a filter to determine which page or pages you want. You can choose to display it only on the homepage, specific landing pages, pages that match a keyword, and much more. Finally, in the last column, you can enter the page URL or keyword where you want to show the popup.
Next, edit the second rule and choose the Exit-Intent® rule. This will auto-detect when a visitor is about to leave your site and display the popup to get them to sign up for emails.
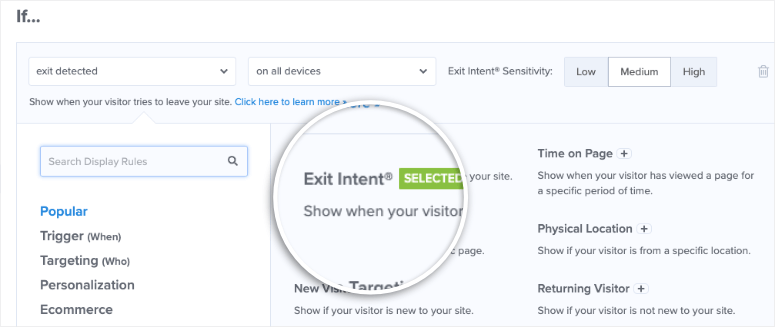
See how easy is to add campaign triggers and audience targeting rules? OptinMonster makes it as easy as 1 click.
Now that you’ve learned how to add display rules, you can integrate the popup with your email account.
Step 4: Sync Your Email Account
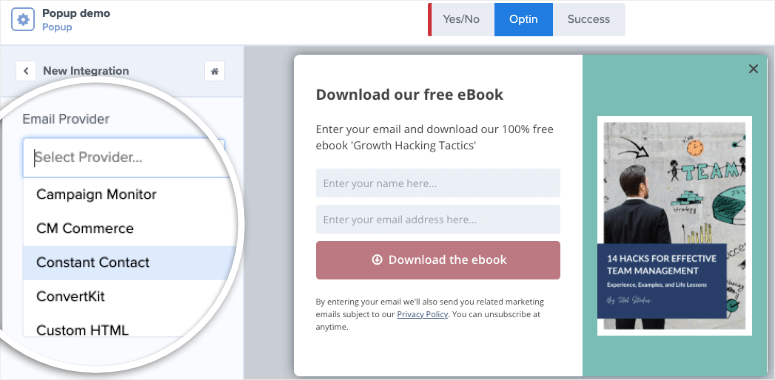
OptinMonster connects to all popular email services including Constant Contact, Mailchimp, AWeber, and Drip.
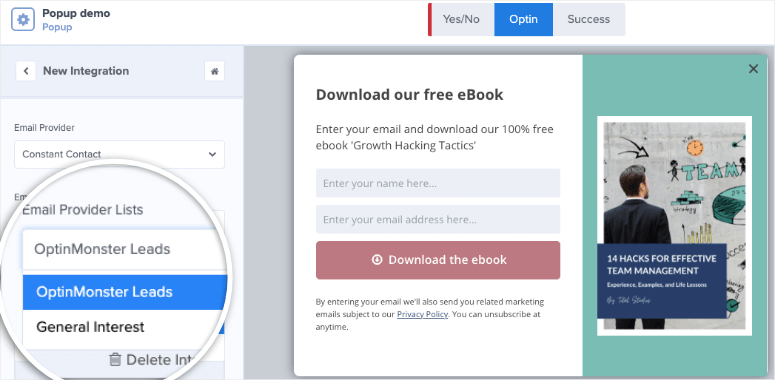
By syncing your popup with your email marketing account, all new leads will automatically be added to your email contact list.
To do this, in the OptinMonster builder, open the Integrations tab. Then click on the ‘Add new integration’ button.
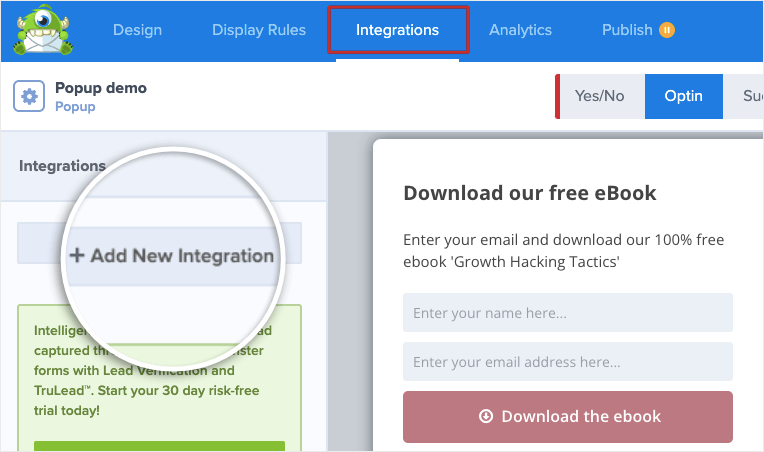
Now you’ll see a dropdown menu with the available integrations. Select your email service provider and follow the onscreen instructions to connect your account.
Once done, you’ll also be able to segment your leads and add tags to keep your email list organized. That way, you can send emails targeting your audience based on what they signed up for.
That’s it! Your popup is designed and properly configured! All that’s left to do is make the popup go live on your WordPress site.
Step 5: Publish Your WordPress Popup
To publish your popup on your WordPress site, navigate to the Publish tab. Here, you can preview a sample of your popup as it would appear on your live WordPress website.
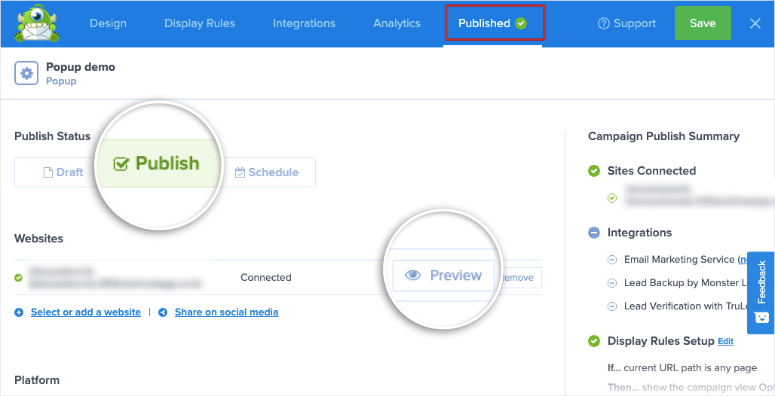
Then, set the status to ‘Publish’ and your popup will go live.
Next, head over to your WordPress admin panel. Open the OptinMonster » Campaigns page. Make sure the status of your campaign is set to Published here as well.
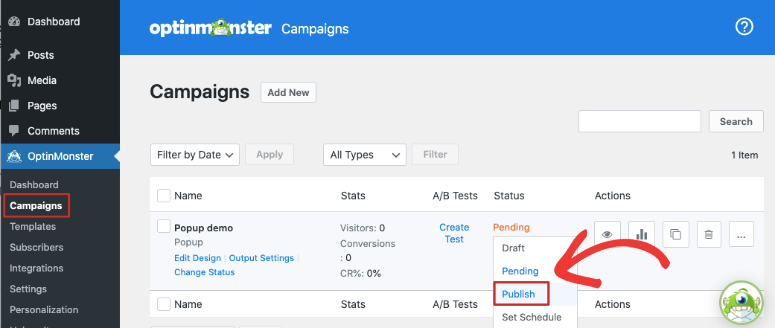
Now you can visit your site and you’ll see your popup window appear according to the display rules you set.
It’s really that simple. You won’t need to design with CSS and HTML or embed popup shortcodes on your site.
In case you’re using OptinMonster to create inline forms, you’ll find readymade widgets in WordPress to easily add the form to pages, posts, and sidebars.
This really makes OptinMonster the best WordPress popup plugin on the market.
With that, you’ve learned how to create a stunning high-converting popup in WordPress. You can continue to use OptinMonster to create more campaigns like floating bars, slide-ins, and scroll boxes!
You may also be interested in creating recent activity notifications for your site to boost conversions and signups. Learn more about that here: How to Grow Your Email List With Social Proof Notifications.
We hope you found this tutorial on creating a WordPress popup form helpful. You’ll also be interested in reading these resources:
- How to Create a Lead Capture Page in WordPress
- How to Make a High-Converting Squeeze Page in WordPress
- 11 Powerful WordPress Lead Generation Plugins Compared
These WordPress tutorials and plugin reviews will help you generate more leads from your website so that you can widen your audience and build your brand.

Comments Leave a Reply