Looking for a slider plugin for your WordPress site?
Want to know if Smart Slider 3 is the right slider plugin for you? In our Smart Slider 3 review, we’ll take a look at its features and help you decide if it’s the best slider plugin for your needs and budget.
About Smart Slider 3

Smart Slider 3 is one of the most powerful and easy-to-use slider plugins for your WordPress site. It’s released by Nextend, a team from Hungary that sells premium-quality software for WordPress and Joomla.
Smart Slider 3 is a freemium plugin with 900,000+ active installs for their free version. Its free version provides more features than any other plugin in the WordPress repository. With the pro version, you get updates for a lifetime and hundreds of sample sliders.
Smart Slider 3 Review: Tons of Templates With Easy-to-use Interface
The best thing about Smart Slider 3 is that even if you’re an absolute beginner, you can build a stunning slider with ease.
Unlike most slider plugins, the interface is NOT bloated with too many features. This makes it easy for anyone to create a slider, regardless of their skill set.
Here’s How Smart Slider 3 Works
After installing and activating the plugin, you can head over to the Smart Slider dashboard to create a new slider. You can find 2 options: New Slider and Template Library.
- New Slider: Use this option if you want to create a slider from the ground up.
- Template Library: Use this option if you want to import a readymade slider from the library and then customize it. Not only does it save time, but it also lets you build a slider with the perfect color palette and design.
In addition to these 2 options, you can also find a sample slider that helps you understand how Smart Slider works even before you create one for your site.
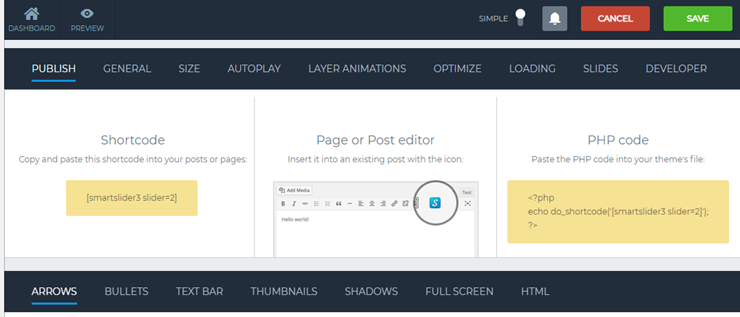
Upon clicking New Slider button, you’ll be prompted to choose a slider preset. You can specify the slider name, and width and height of your slider. Select a slider preset and click Create.
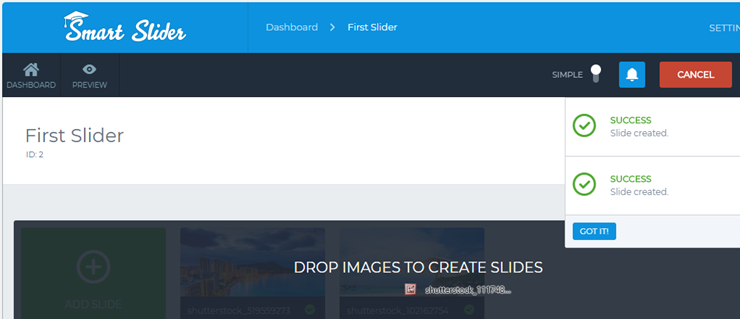
Next, you’ll be asked to upload images or videos for your slider. You can simply drag and drop the files and position them per your preference. As you scroll down, you’ll be shown all available customization options and instructions explaining how to publish a slider.

To preview the slider, you can click on the Preview button at the top.
Features in Smart Slider 3
Now that you know how easy it is to build a slider from scratch with Smart Slider 3, let’s take a deeper look at other features.
1. 180+ Slider Samples:
Building a custom slider could be a tedious task especially if you’re not a designer and often end up creating mediocre graphics and slides. With a slider sample, you can rest assured that your slider always looks professional with the right color combination and elements.
All you have to do is choose the right slider sample from the library and customize it per your needs.
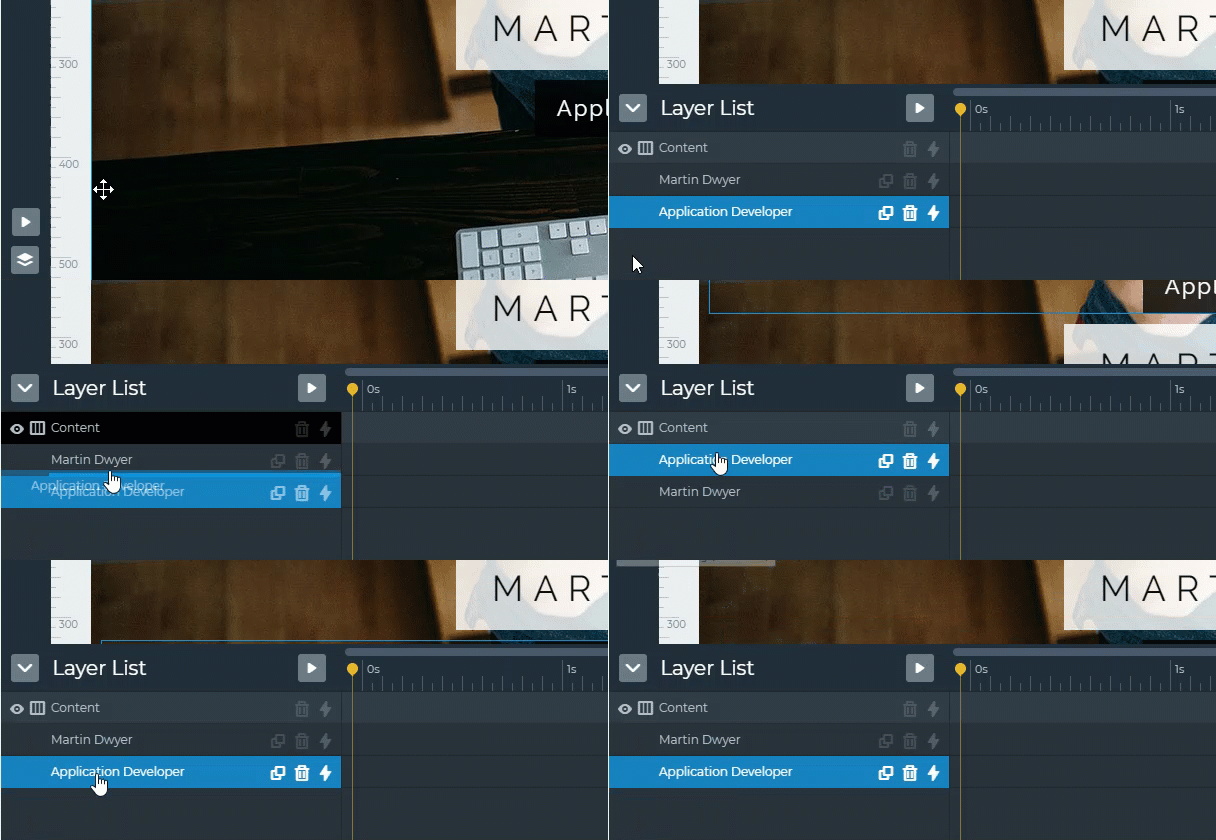
You can easily add new layers from the left taskbar within the slider builder. Best of all, the added slides are neatly organized like in Photoshop.
2. Animation:
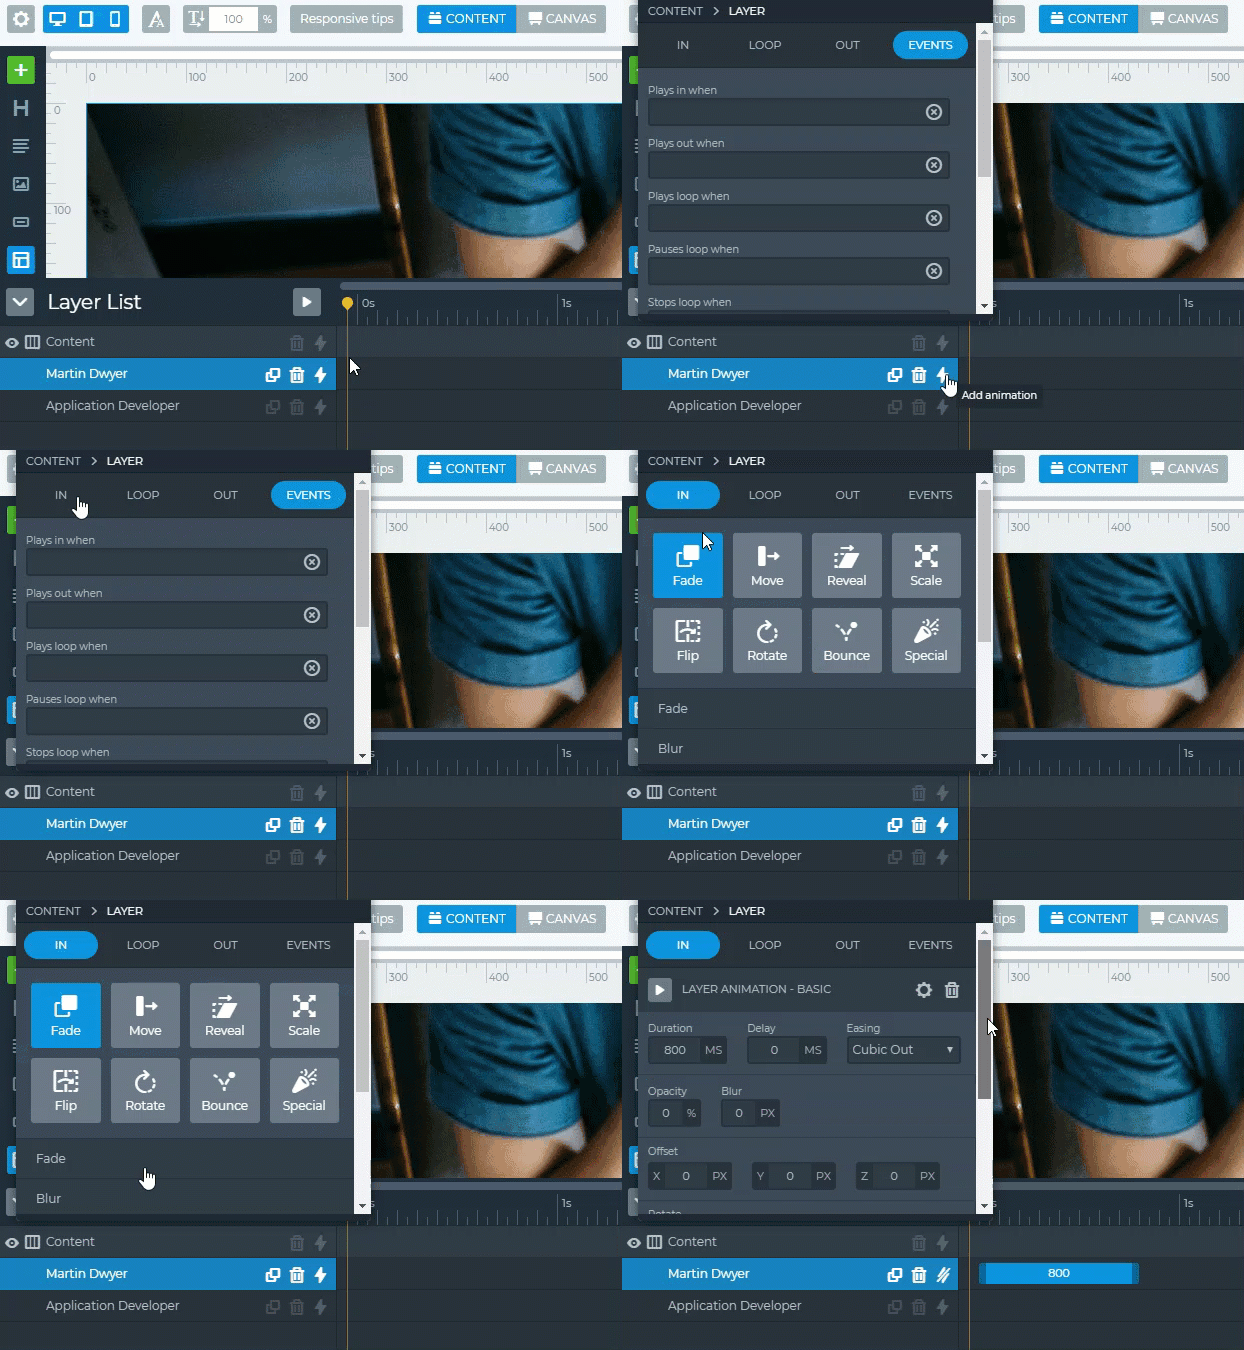
You can easily add animation to each layer. The plugin also features an interactive visual timeline for each layer where the details can be customized easily.
The plugin supports different effects, such as the Ken-burns effect, text effect, background animation, reveal animation, etc.
3. Easy-to-Use Interface:
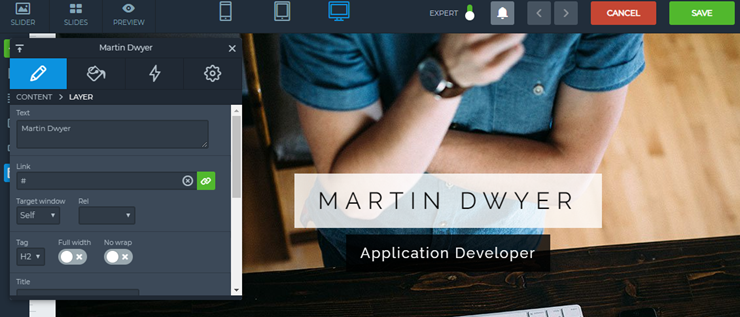
Smart Slider 3 makes it easy to build an eye-catching slider thanks to the easy-to-use interface. With its drag and drop builder, you can customize the slider like you customize the content in a page builder.
Creating a slider with this plugin is a no-brainer. Simply navigate to the Smart Slider option in the admin menu and then click on the Add Slide button.
As you upload media files to the slider, you’ll be shown how to publish that slider on your posts, pages, and theme files. Just scroll down the page, and you can find customization options as well.
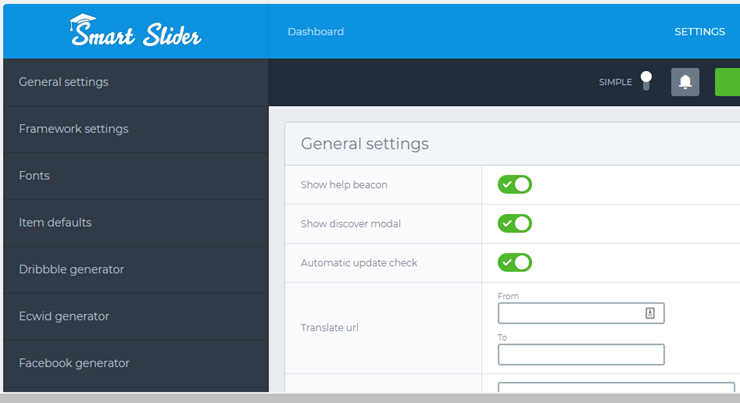
The best thing is that if you want to extensively customize the appearance of your slider, you can enable Expert mode. This will show advanced customization options.
4. Build Sliders for any Purposes
Smart Slider 3 allows you to create a slider for any purpose. A few use cases are:
- Create a slideshow to showcase your portfolio
- Dynamically show your blog posts, YouTube videos, Instagram posts, etc.
- Display a full-page slider that covers the above-the-fold area in your landing page.
Support and Pricing for Smart Slider 3
Smart Slider 3 has extensive documentation that guides you through every aspect of building and publishing sliders on your WordPress site. They also run a YouTube channel where they cover all Smart Slider 3 tutorials, step by step.
Smart Slider 3 only offers ticket-based support. You can get in touch with them via their contact form published on the support page.
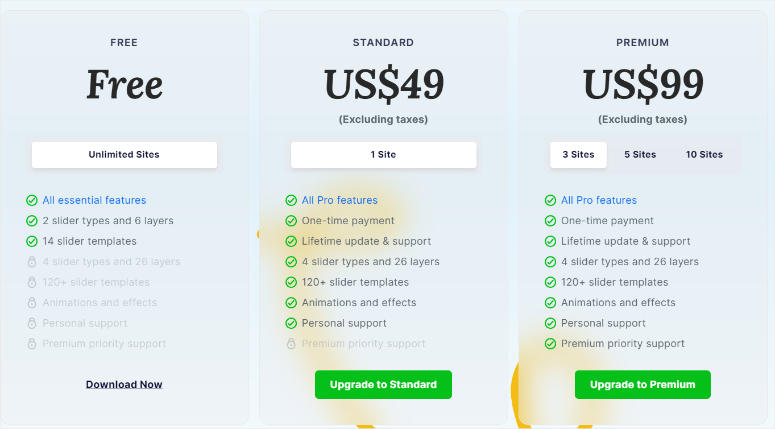
Best of all, with any pro license, you’ll get ALL the features of Smart Slider 3. There are 3 different pricing plans:
- Free: You can use this on unlimited sites although the features are limited
- Standard: Costs $49 and can be used on 1 site with lifetime updates
- Premium: This one-time plan starts at $99 for 3 sites. It increases if you want a license for 5 or 10 sites
Smart Slider 3 vs. Soliloquy
Both Smart Slider 3 and Soliloquy are 2 of the best slider plugins for WordPress. Let’s have a head-to-head comparison between each slider, so you can decide which one is the best choice for your needs.
User Interface Comparison:
The Soliloquy interface will make you feel like it’s a part of your native WordPress environment. On the other hand, the Smart Slider 3’s interface looks a bit different. It’s designed to make the slide creation process quick and easy, even for beginner-level users.
If you want a minimalistic dashboard for your slider plugin, then you might want to check out Soliloquy.
With Smart Slider 3, even though the dashboard isn’t as sleek as Soliloquy, there’s little to no learning curve to tackle for building a slider.
Features & Pricing Comparison
Soliloquy comes with a lot of built-in features and addons. Conversely, Smart Slider 3 is focused on providing hundreds of slider samples, so users can quickly build a slider without having to build it from scratch.
Currently, Smart Slider 3 offers 4 slider types, 26+ layer types, and 120+ sample sliders.
The pricing for Soliloquy starts at $17. But the starter plan only provides you with basic features. To get full features, you’ll have to subscribe to its Developer plan for $89.
The pricing for Smart Slider 3 starts at $49. You’ll get all the features of this plugin and automatic updates for a lifetime.
Other Smart Slider 3 alternatives include Slider Revolution and Meta Slider. With these options, you have enough information to make a decision on the WordPress slider you want.
Our Verdict on Smart Slider 3
Smart Slider 3 is the best choice for users who want an easy-to-use slider plugin that comes with tons of readymade slider templates. For $49, you can purchase a pro version that offers all available features.
Plus, all sliders are 100% responsive, meaning they’ll look good on phones, tablets, and computers.
We hope this article helped you decide whether Smart Slider 3 is the best choice for your website.
If you enjoyed this article, you might also want to check out our review on the Soliloquy plugin.


 4.0 / 5.0


 4.0 / 5.0


 4.0 / 5.0


 5.0 / 5.0


 4.0 / 5.0


 5.0 / 5.0

Hi there, I would like to buy this Slider, however, I have had numerous problems with other companies’ support and their slider not doing what they say they can. So I want to find out:
1) If I add an image will it resize to the size of each device?
2) In the free version it cuts off some of the images at the bottom, can this be rectified without squashing the image?
Amazing slider! I just have one question: is it possible to click on the images to make them open on full size? They are too small on mobile and I want users to be able to zoom them.
The issue I have with this plugin is that it does not automatically adjust to different devices. You have to fix things to fit that screen size (aka a phone) and then it messes up the desktop view which is super annoying.
Hi Morgan!
We discussed this topic in your support ticket. But for the case if somebody would also experience a similar problem, I clarify here what could cause such problems.
Smart Slider 3 has two responsive modes Content mode which works like a page builder, with good responsive behavior and Canvas mode where you can drag&drop layers on the Canvas. These two modes work completely different and layers added in one mode has no relation ship to layers added in the other. Here we list some of the differences of these two modes: https://smartslider3.helpscoutdocs.com/article/1522-canvas-vs-content-mode
The problem was related to that some layers were added in Content mode and others in Canvas. Since layers added in Canvas mode are just floating over the canvas, they overlapped the content mode layers.
Morgan managed to fix the problem by moving these overlapping layers from Canvas to Content mode.
And to make adjustments to certain devices, we have device specific options. Those settings that has a small screen icon next to their names – like: https://smartslider3.helpscoutdocs.com/article/1547-changing-a-layer-in-mobile-view-affects-the-desktop-view – are device specific options, meaning that they can be adjusted differently on all views ( desktop/tablet/mobile ). Other settings are shared settings, meaning that changing them in one view, will also affect the others.