Do you know what pop star Justin Bieber, actor-cum-musician Donald Glover, and actor Dylan O’Brien have in common?
Spoiler alert!
They were YouTubers / vloggers before becoming mainstream stars.
They all had a successful YouTube channel with several million subscribers, and later, those vlogs became media empires.
And guess what?
They all did it when gaining a following was a lot harder. Today, short-form video social media platforms like TikTok and Instagram can help you gain a huge following. You can then redirect this traffic and user base to your vlog.
With Google now focusing heavily on first-hand content, there hasn’t been a better time to start a vlog.
A vlog can help you showcase or demonstrate your products and services from a user point of view and show how it can help with pain points. You can also do tutorials and before and after videos to show how helpful your products are.
On top of that, you can use vlogs to educate, share testimonials, highlight company culture, showcase behind the scenes how your product is made, and more.
As you can see, vlogs are a great way to earn user trust.
Because of this, the IsItWP team has worked with many of our clients to help them establish a vlog that adds personality to their brand.
Want to start a vlog but don’t know how to get started?
Then you’re at the right place…
How to Start a Vlog
Obviously, starting a successful vlog is not easy. But with hard work and perseverance, it’s totally possible to build a successful vlog and make a living from it in just 6 months from now. In this article, we’ll show you how to build a vlog on YouTube, step by step.
This article is divided into a few different sections.
- What Is a Vlog?
- How to Choose a Topic for Your Vlog
- Is It Too Late for You to Start a Vlog
- Things You Need to Start a Vlog
- Creating Your YouTube Channel
- Recording and Editing Your Content
- Optimizing Your Vlog for Growth
- Promoting Your Content
1. What Is a Vlog?
Vlog or video blogging is a way of sharing content with your users in the form of videos. Usually, vloggers create and publish their videos on YouTube. However, some vloggers only publish content on other channels, like Facebook.
The benefit of YouTube vlogging is that monetizing your videos on YouTube is comparatively easier. Unlike other channels, YouTube shares a fixed percentage of ad revenue with the vloggers.
2. How to Choose a Topic for Your Vlog

As a vlogger, you can vlog about anything. It might be difficult to think of a topic when you’re just starting out. For inspiration, you can check out what other vloggers are covering on their vlogs.
You’ll find several topics that can inspire you to get started. But remember that its challenging to create fresh content on the same topic repeatedly. Here are some tips to help you find the best topic for your vlog.
- Instead of randomly picking a topic, it’s important that you select a topic that you love and are excited about. This will keep you going in the long run.
- Do some research on what potential viewers want to see. The best way to do that is to first figure out your target audience and then find out what they are searching for.
- Figure out the direction in which you want your channel to go. Do you want it to be educational, entertaining or promotional? This will give you a better idea about what type of content you want to create.
- Be yourself and be real. Your viewers want to watch your content, so there’s no need to be superficial or to imitate others just because they are successful.
3. Is It Too Late for You to Start a Vlog?
This is a common question that most aspiring vloggers ask. With so many professional vloggers creating amazing content every day, the concern seems genuine. But the good news is that there’s still room for new content and YouTube channel.
YouTube has more than 2 billion users today. Despite stiff competition, viewers are constantly looking for unique and engaging content.
4. Things You Need to Start a Vlog
Let’s now move on to check the list of things you need to start a vlog.
- Your own YouTube channel (can be created for free)
- A good quality camera
- A microphone
- Editing software (some good ones are available for free)
Step 1: Creating Your YouTube Channel
To build a vlog, the first thing you need to do is to create a YouTube channel. You can do it for free and it only takes a few minutes. For that, head over to the YouTube and click on the sign in button on the top right corner of your screen.
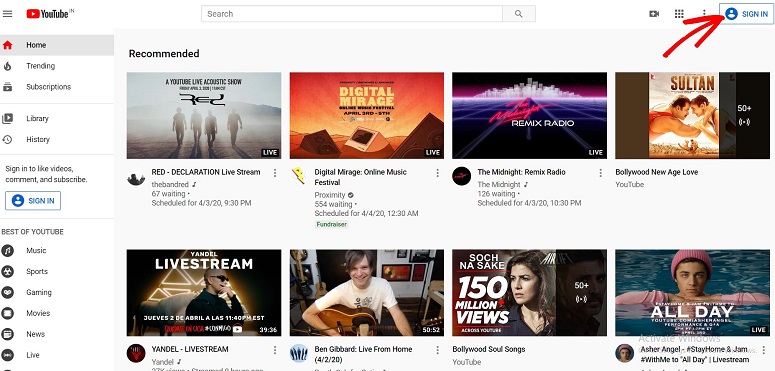
Now add your email address and password to create an account. You’ll now be in your YouTube account. Click on the account option on the top right corner of your screen. You’ll see several options here, one of which is Create a channel.
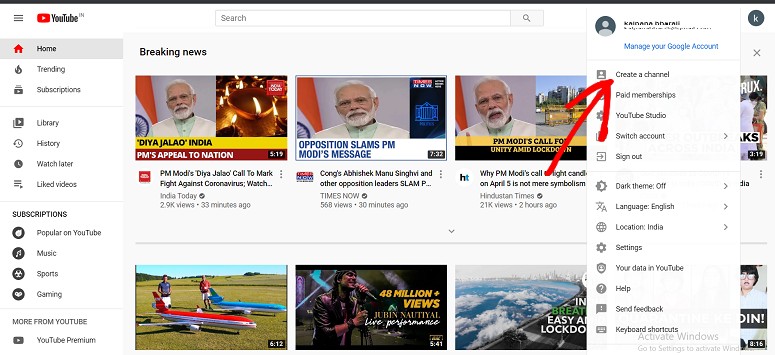
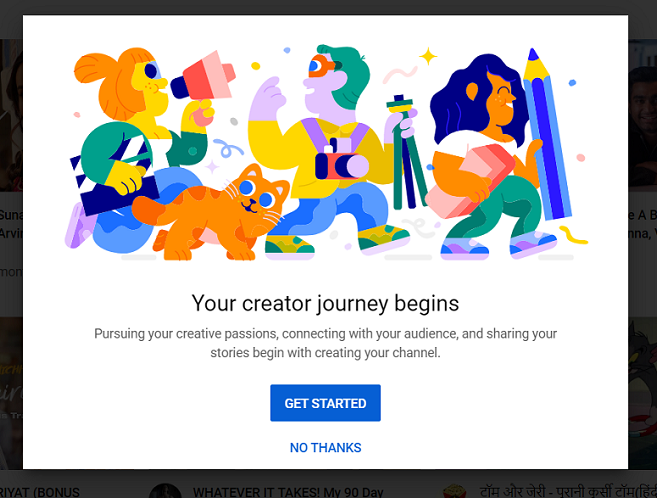
You’ll now be directed to a new page. Here, click on the Get Started option.
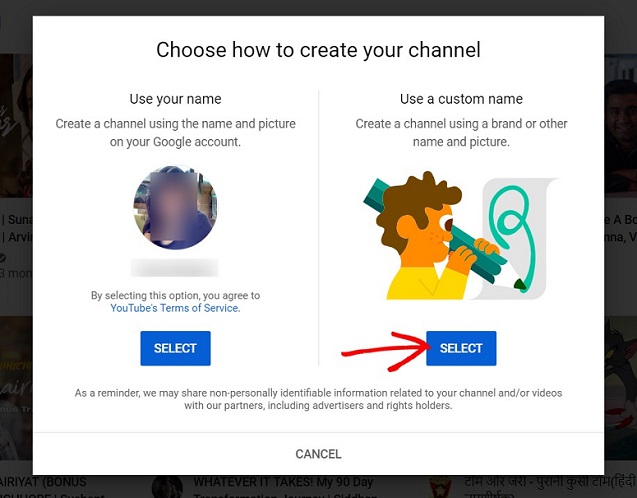
In the next step, you’ll be asked which name you want to use, your account name or a custom name. For this tutorial, we’ll select a custom name.
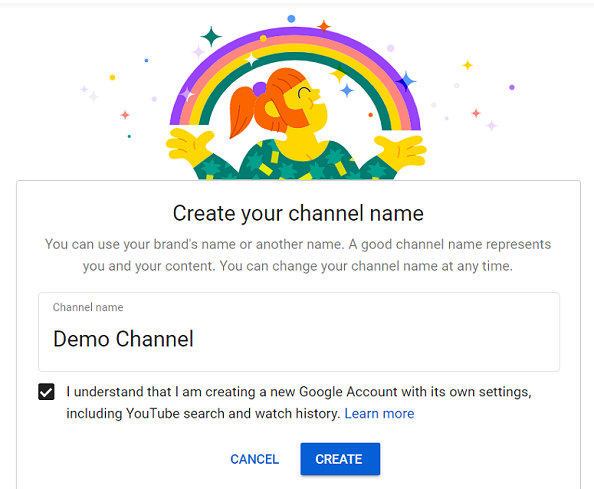
Now you can add a name to your channel. You also need to select the checkbox declaring that you’re creating the account with Google settings. Once done, hit the Create button.
And that’s it. Your channel has been created. Now you can upload a profile picture, and add a channel description.
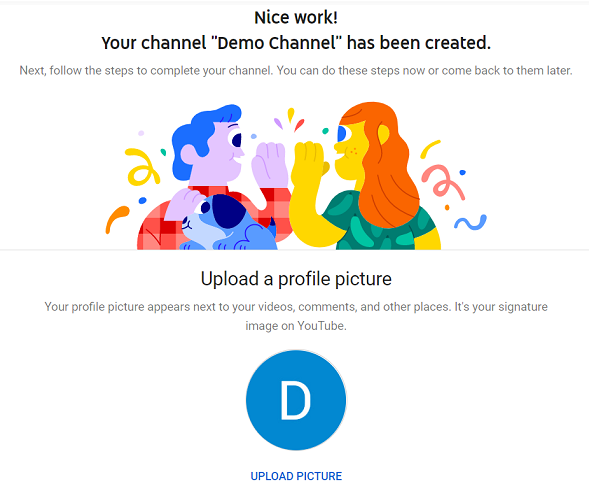
By scrolling further down the screen, you’ll see options to add social links, etc to your channel. Once done, click on the Save and Continue button.
And that’s it. Your channel is now ready, and you can start uploading your videos.
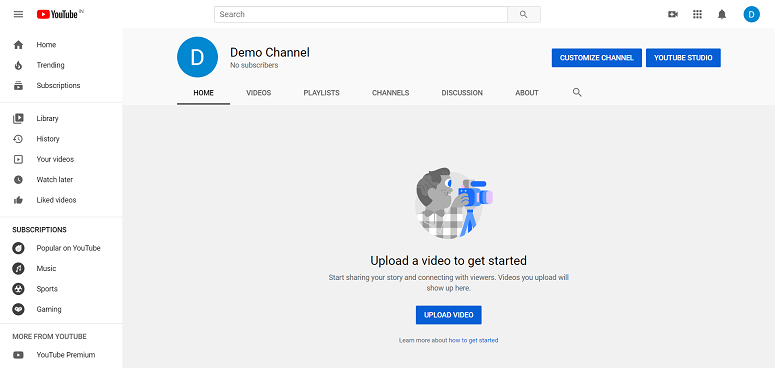
The next step is to film and edit your content. Once it’s ready, you can use the Upload Video button to upload your videos.
Step 2: Film and Editing Your Content
Content
Before you jump in and film a YouTube video, make sure you have a script to start with. This doesn’t necessarily mean you need a formatted screenplay. It’s enough to just scribble down your ideas and what you’re going to speak. This helps you to keep your work on track when you start shooting, which could potentially save you time as well.
You might also want to read out your script and practice once before you start your actual shoot.
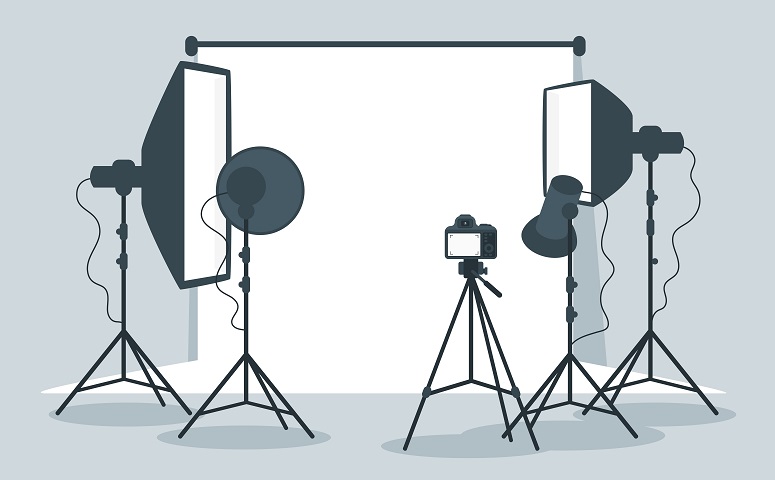
Lights
The next step is to set lights for your shoot. If you’re doing an indoor shoot, try facing the window. Do remember not to have a window in your background. This will make it difficult to get a balanced exposure. Also, watch out for mixed-color temperatures. Most light bulbs put out a different color of light than the sun. This may lead to the shadows being too blue or highlights being too orange, etc.
Similarly, if you’re shooting outdoors, try avoiding direct sunlight. Instead, find a shady area.
Sound
One of the most important tools for your recordings is a good-quality microphone. Make sure you aren’t using an omnidirectional microphone. Such microphones record sounds coming from any direction. This means it will also record a lot of unnecessary sound in the background, which in turn will degrade your recording quality.
Here are some good microphone options for you to check out.
- Rode VideoMic GO Light Weight On-Camera Microphone: It’s a compact and lightweight microphone that records great quality audio. If you want crisp and clear sound quality for your vlog, this microphone could be a great choice for you.
- Rode SmartLav+ Omnidirectional Lavalier Microphone for iPhone and Smartphones: This one is great for anyone who is looking for a compact option. Rode SmartLav + Omnidirectional Lavalier is a wearable microphone that can be plugged into your phone or laptop, and it’s ready to record your audio. That’s how easy it is to use.
Camera
You don’t really need to have an expensive and fancy camera to get started. Instead, stick to a basic camera that you are familiar with.
You can get started with your phone camera, a GoPro, or an entry-level DSLR camera.
Here are some good options for you.
- Canon PowerShot G7 X Mark III: Canon PowerShot G7 Mark III comes with a microphone socket which makes it easier to record great videos with quality audio.
- Sony A6400: Sony A6400 is a popular camera amongst vloggers. It offers a 4K HDR (HLG) for instant playback, and you also get an option to transfer the videos easily to your smartphone.
Record and Edit
Once you’re done, it’s time to edit your videos and make them presentable. Look for good software that makes things easy. Here are some of the video editing tools you can try out.
1. Filmora9
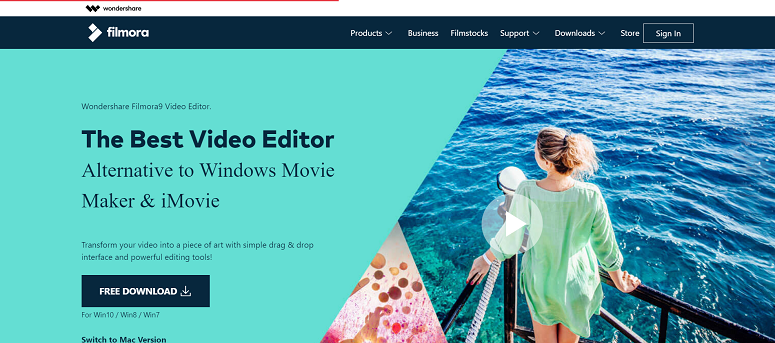
Filmora is one of the best video editing tools for beginners. You can use its built-in features like effects, filters, titles, sound effects, music, etc to make your videos more interesting.
2. KineMaster
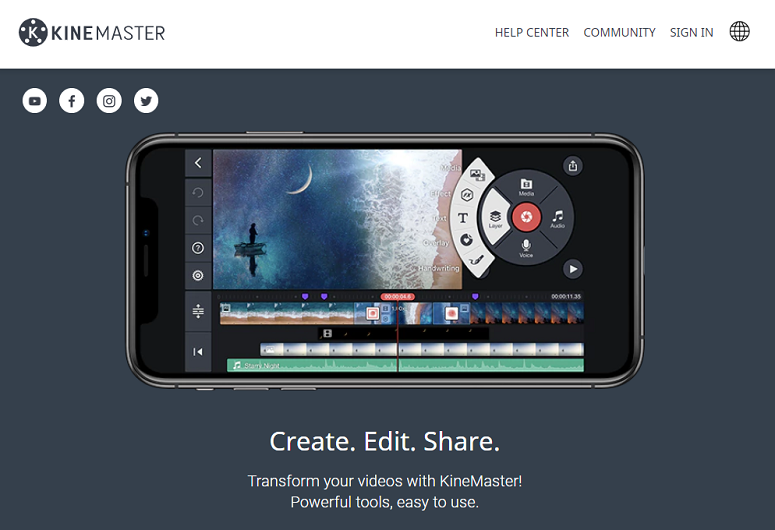
With KineMaster, editing your videos is easy and quick. It lets you edit multiple layers, add handwriting and text annotations, add audio tracks, and more.
Before you focus on growth and increasing the views, you’ll need to film and post a few videos on your channel.
Step 3: Optimizing Your Vlog for Growth
Now that you’ve filmed, edited, and released a few videos, the next step is to focus on expanding the reach and boosting your views. Just like traditional search engine optimization, there are a few YouTube best practices you need to follow.
Here are a few tips to get more clicks on your YouTube videos.
- Use relevant tags.
- Write a strong description for your video. You can do that by writing down what the video is about. This helps YouTube crawler bots understand your content better.
- Use keywords at the beginning of your title.
- Design attractive thumbnails.
- Write catchy titles.
You can also analyze your titles here.
Check out best SEO practices to optimize your vlog, for more details.
Integrate Your Vlog Into a Website
Without a doubt, if vlogging isn’t just a hobby for you, it’s in your best interest to build a website, integrate your videos into it, and promote your website from the videos.
If you’re wondering, here are a few reasons why you need to integrate your vlog into a website.
1. Full Control Over Your Content and Audience:
According to YouTube policies, YouTube can remove a video or the entire channel without the publishers’ consent.
Even in the worst-case scenario of getting your channel suspended or terminated, you could still get ahold of your audience if you’ve run a website and promote it from your vlog from day 1.
2. Maximize Your Monetization Efforts
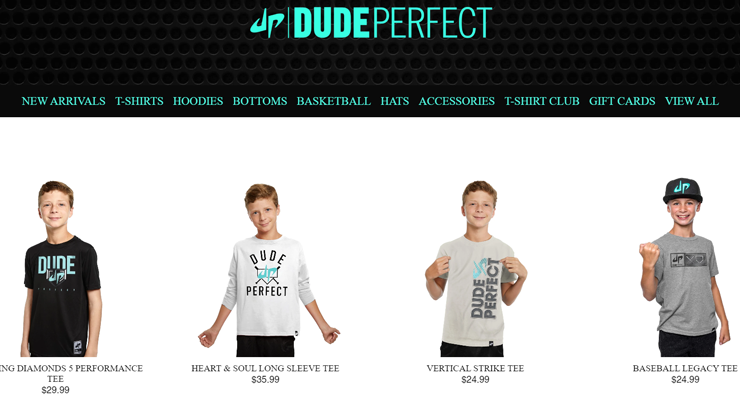
A lot of vloggers make a fulltime passive income by selling merchandise from their websites. That way they can keep 100% of the revenue they make from selling the merchandise as opposed to selling on a third-party marketplace.
3. Build a Portfolio
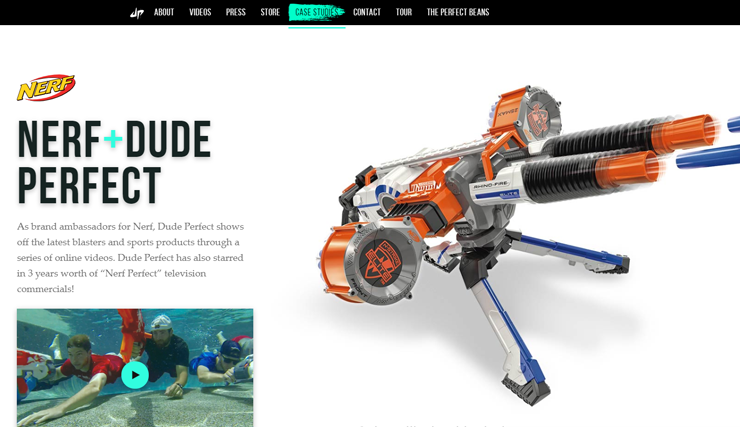
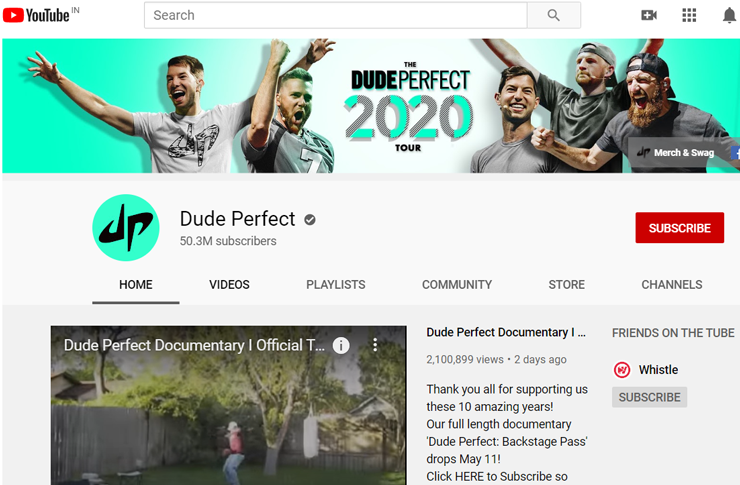
YouTubers like Dude Perfect even publish case studies on their website of their sponsors, revealing how sponsoring their YouTube channel helps grow the sponsors’ brand.
With all the technologies available today, building a website isn’t at all a hassle. All you have to do is to sign up for a web hosting company, like Bluehost or Hostinger.
With Bluehost, you get everything you need to get your website up and running, including a free domain name, free SSL certificate, 1-click WordPress installer, and more.
For more details, check out how to build a website from scratch in 5 easy steps.
Also read our complete Bluehost review.
Once your website is ready, you can start embedding your videos on the website using Feeds for YouTube by Smash Ballon plugin. With this plugin, embedding your YouTube videos on your website is a breeze.
Embedding YouTube Videos on Your Website with Smash Balloon
To embed your video on your site you’ll first have to install and activate the Feeds for YouTube by Smash Balloon plugin on your website.
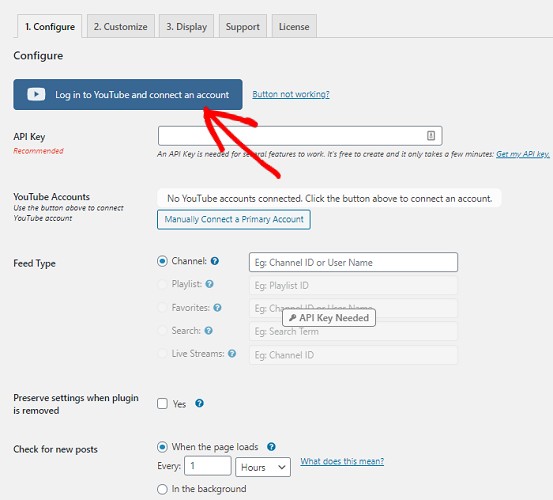
Once done go to your dashboard and click on Feeds for YouTube. You’ll see several tabs here. Go to Configure. Here you can connect your YouTube channel to your WordPress site. You can do that by clicking on Log in to YouTube and Connect an Account button. But before that, don’t forget to add your API key. Here’s how to get your API.
This will take you to a screen where you can log in to your YouTube channel.
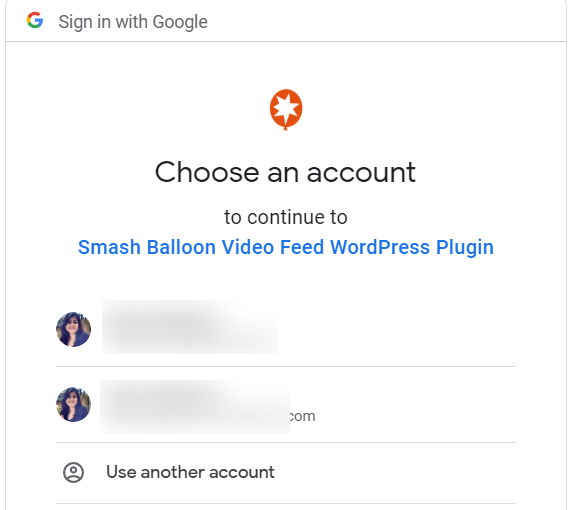
You can select your YouTube account and allow Smash Balloon to access your channel. And that’s it.
Your account will be automatically connected to your WordPress site. On the Configure tab, you can see other options using which you can add your Feed Type, add a specific time in which the plugin will check for new posts, etc.
You can work on these settings as per your requirements. After that, hit the Save button. Just below that, you’ll have an option called Display your feed. Under this, you’ll have a shortcode.
You just need to copy this shortcode and add it to the post or page where you want to display your YouTube videos.

Now go to the next tab which is the Customize tab. Here you can work on the height and width of your feed, add a background color, etc. You can also select the number of columns you want to display.
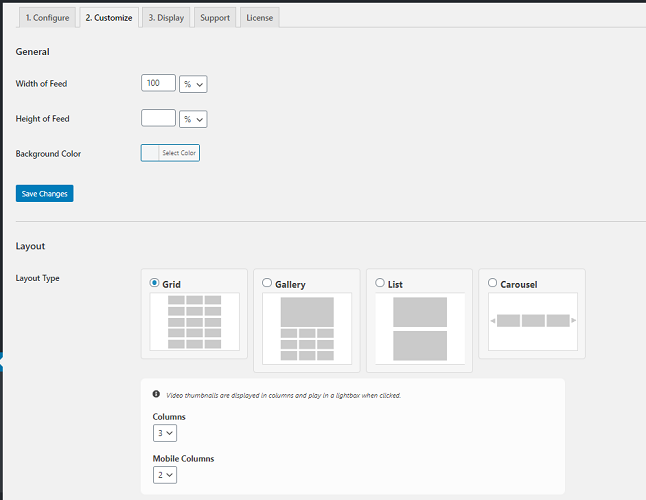
You can also select which information to hide or display, add and customize buttons, and more. Make the changes according to your requirements and hit the Save button.
Next comes the Display tab. Here you’ll have the shortcode that you can use to display your YouTube channel.
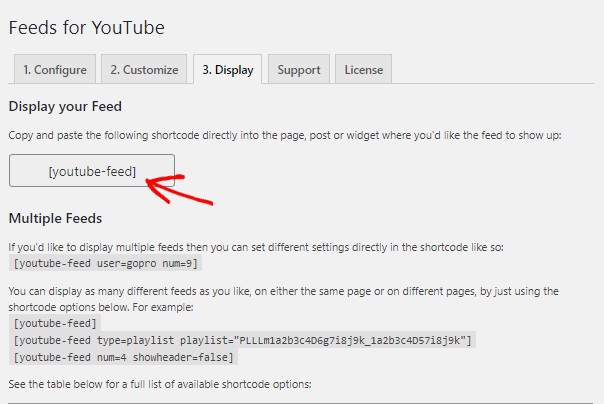
Just copy this and paste it in the post or page you want to display your channel videos and save your changes. Your YouTube videos will start showing right away.
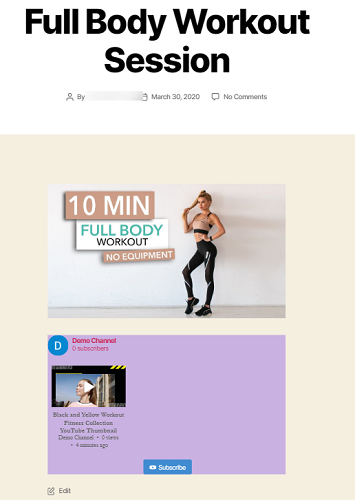
So that’s it. We hope this guide helped you get a head start on building a vlog.
If you liked this article, you might also want to learn about the best WordPress YouTube video gallery plugins to boost your views.

Thank you for a great article.
Glad you liked it, Gary