
Do you want to build a sales page in WordPress?
If you’re looking to sell a product on your site, you’ll need to build a sales page. With a distraction-free sales landing page, it’s easy to engage more users and convert them into customers.
Your sales page design and layout should be appealing to get users’ attention and encourage them to purchase. However, it can be difficult to set up a high converting sales page with no design experience.
In this article, we will show you how to build a sales page in WordPress to increase your sales and revenue.
Why Build a Sales Page?
If you’ve been selling a product on your site, you might be wondering, what difference a sales page can make?
Well, you may add sales and discount details on the homepage or other pages of your site, but those pages also display other content. Since a sales page is designed specifically for a particular product, you can rest assured that it removes all distractions that take your users away from your page.
Here’s what you need to create a sales landing page.
- Remove all distractions: Replace your header, footer, and navigation menu with a custom page template.
- Customizability: While there a lot of different themes that come with a landing page template. But if you can’t customize a template and make a stunning page with it, it will be hard for you to boost conversions.
- A sales page plugin: If you’re not hiring a designer, then you’ll need to use a sales page or a landing page plugin to create a custom landing page.
- A stunning design: With a stunning design, you can increase the chances of boosting conversions
If you’re serious about boosting conversions on your site, we have a list of conversion-optimization tools for you to consider.
Next, let’s take a look at how to build a sales page in WordPress from scratch.
Building a Sales Page in WordPress
Follow the steps below to create a high-converting sales landing page like a pro.
Step 1: Install and Activate WordPress Landing Page Plugin
The first thing you need to do is to install and activate the SeedProd plugin. For more details, you should check out our guide on how to install a WordPress plugin.
Upon activation, you will see the SeedProd welcome page in your WordPress admin area. Start by adding your license key for verification. You can get the license key from your SeedProd account.
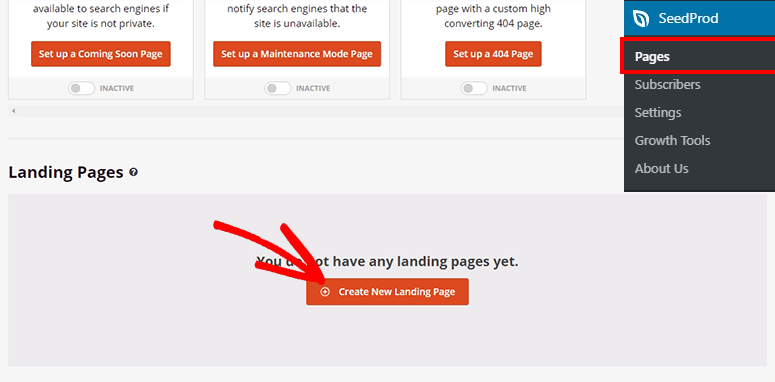
After the verification, you need to visit SeedProd » Pages in your WordPress admin dashboard.
From there, you should click on the Create New Landing Page button.
Step 2: Select Your Sales Landing Page Template
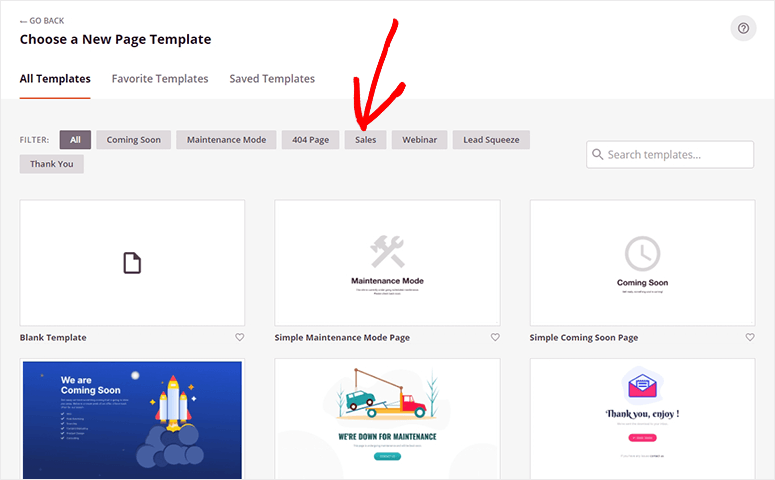
On the next page, you will see multiple built-in landing page templates. These templates are fully ready and accessible in 1-click.
To make it simple, you can go ahead and click on the Sales tab, so it will load all templates for sales pages.
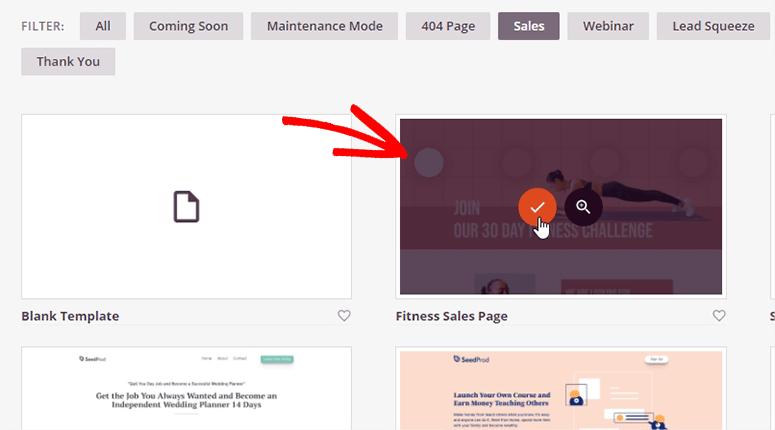
You can select the best template that matches your requirements. Hover over the template and click on the tick (✔) button.
For this guide, we will be using the Fitness Sales Page.
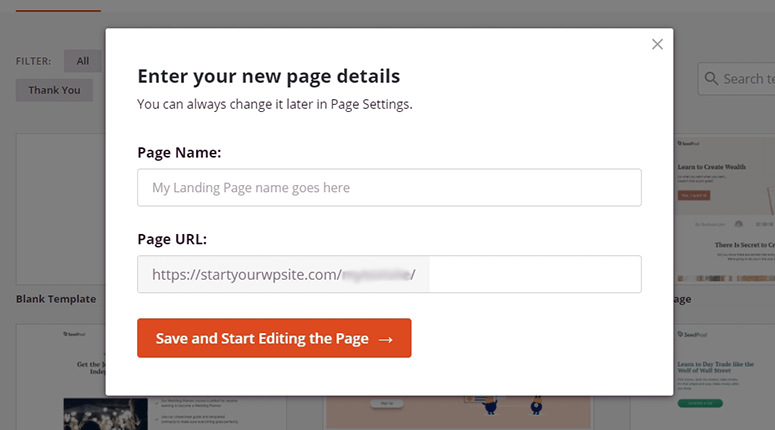
It will open a popup where you need to provide a name for your sales page and the page URL. Specify them for now. You can customize them later for sure.
Click on the Save and Start Editing the Page button to continue.
Step 3: Customize Your Sales Landing Page Template
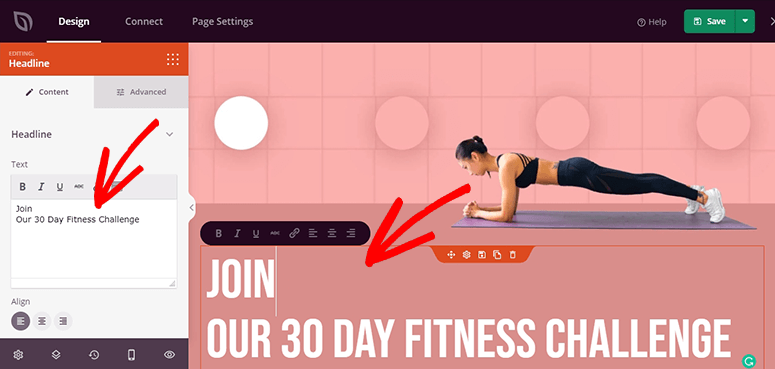
Next, you can edit the template using SeedProd’s drag and drop landing page builder. Since it’s a fully functional sales page template for fitness and gym, you can click on any element to edit or customize it.
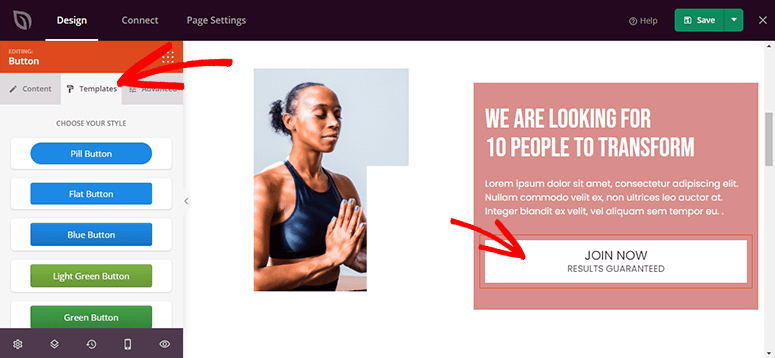
The SeedProd page builder also offers multiple built-in templates for buttons to change the color and design as you need.
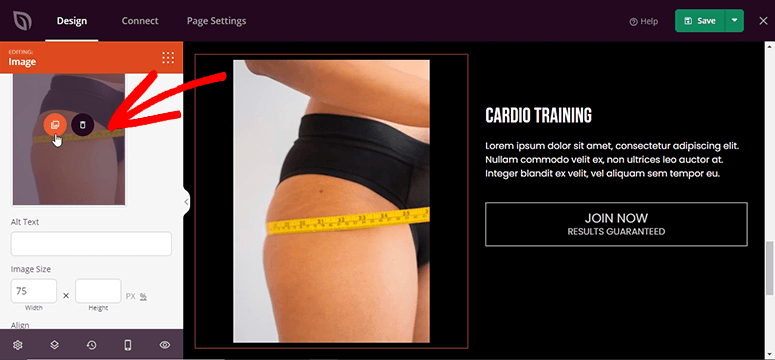
You can also change images and customize the image size from the editor.
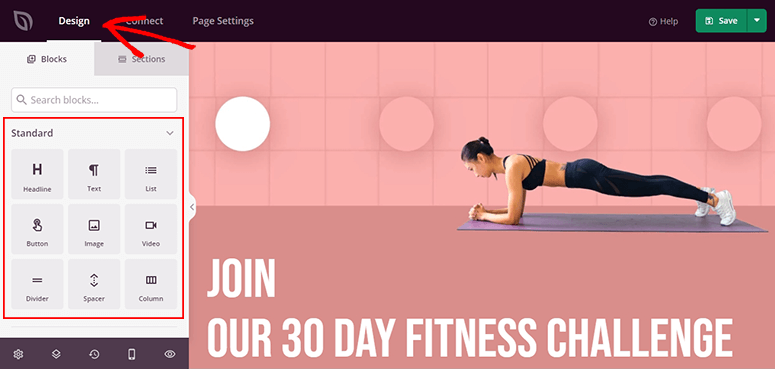
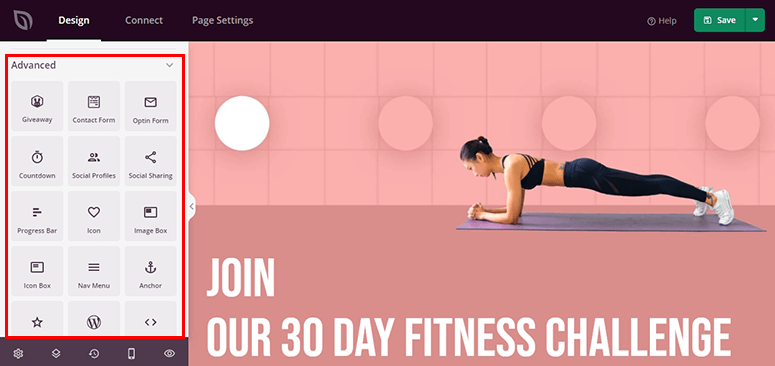
It has dozens of ready-made blocks that you can use to add more content to your sales page. These blocks are divided into 2 categories: Standard and Advanced.
The Standard blocks include headline, text, list, button, image, and so on.
In Advanced blocks, you get some of the useful custom blocks for your sales page, including a giveaway block, contact form block, optin form block, and so on.
If you want to create a successful giveaway or add a contact form to your sales page, then you can choose Advanced blocks.
Once you’re done editing your sales page, click on the Save button at the top right corner to store your settings.
Step 4: Connect an Email Marketing Service to Your Sales Page
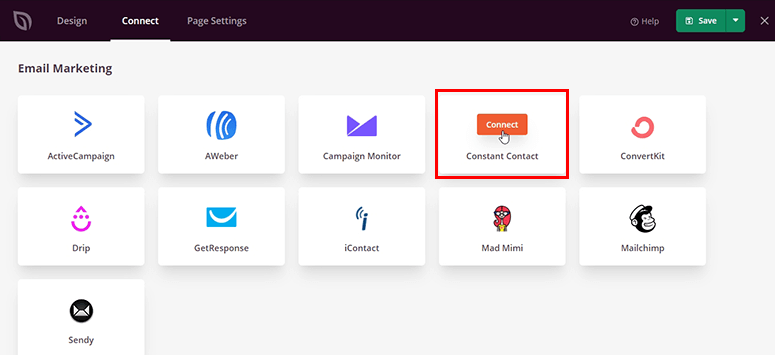
With SeedProd, you can integrate multiple popular email marketing services in just a few clicks. That way whenever someone signs up from your page, you can automatically add them to your email marketing list. Click on the Connect option to see all the available services.
Select an email service, for example, Constant Contact. Hover over the preferred service and click on the Connect button.
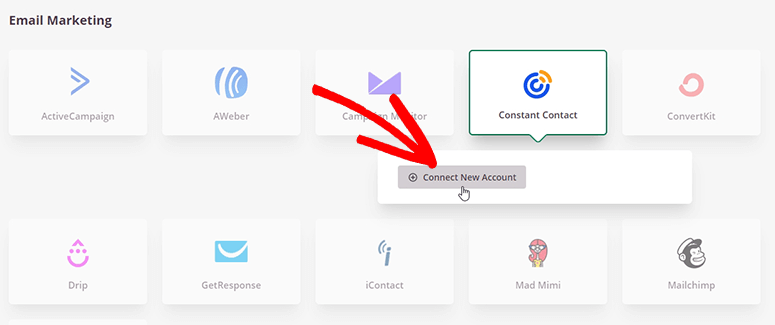
Next, you need to click on the Connect New Account button.
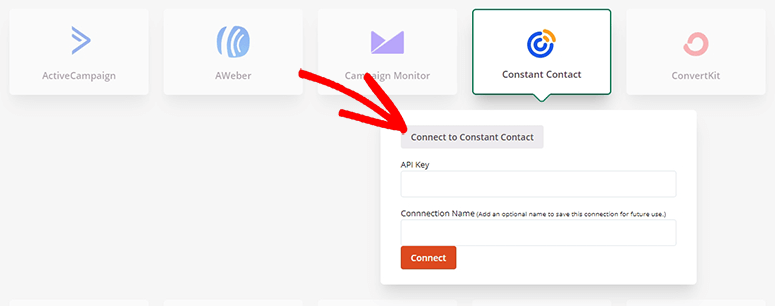
It will ask for an API key and connection name. Click on the Connect to Constant Contact button to sign in and get these details.
After adding the required details, you can click on the Connect button.
Step 5: Manage Your Sales Landing Page Settings
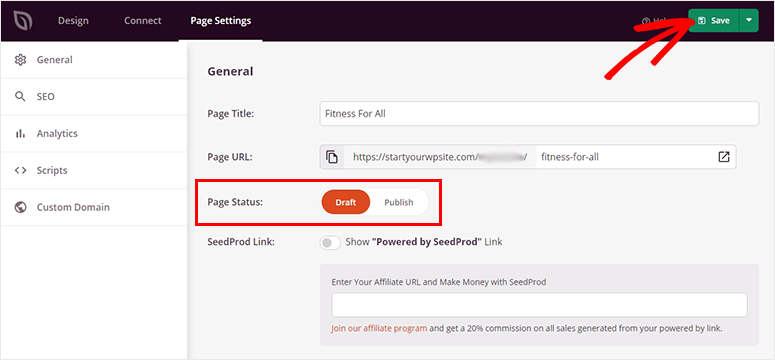
Now that your sales page is ready, you can go ahead and click on the Page Settings option from the top bar.
It includes general settings, SEO options, sales page analytics, and custom scripts.
You can change the page status from Draft to Publish, and then click on the Save button from the top right corner.
Your sales page is ready. On the settings page, click on the arrow next to the Page URL to see the live preview of your sales page.
That’s it. You’ve successfully completed this tutorial.
We hope this article helped you learn how to build a sales page in WordPress. You can use SeedProd to create all sorts of pages including Coming Soon, Maintenance Mode, and Lead Capture pages.
You may also want to check out our guide how to use a content locker in WordPress to get more email subscribers and potential leads.
Next, you can check our guide on how to create recent sales notifications in WordPress. This will help you grab the notifications of new website visitors and shoppers and notify them about new purchases on your site.



Comments Leave a Reply