Want to show real-time notifications in WordPress?
As you already know, there’s a lot of competition in every business niche. That’s why it helps if you can show something to your new visitors to win their trust right off the bat.
Otherwise, they’ll leave your website and never come back.
With real-time notifications, you can display user sign-ups, live purchases, and other updates as social proof. This way, you can build trust, engage website visitors, and get new customers.
In this article, we will tell you how to show real-time notifications in WordPress in just a few minutes.
But first, lets get clear on what real-time notifications are and why you should care about them.
What Are Real-Time Notifications (and Why Do They Matter?)
Real-time notifications are small messages that appear on your website alerting your site’s traffic about activities taking place on your site.
They can be used to display when another customer makes a purchase, signs up for a webinar, or even leaves a review on a 3rd-party website.
But why do they matter?
Your new website visitors may hesitate to take certain actions when they first visit your site. That means you can lose a lot of potential leads and customers.
Real-time notifications may just be the reassurance that a user needs to take that action. So, it’s a smart way to grow your online business.
You can enable real-time activity in WordPress using a social proof notification plugin like TrustPulse.
This software automatically shows welcome notifications, new user sign-ups, and other custom messages in a creative popup on your website.
TrustPulse notifications are easy to set up without needing to know any code. You can fully customize these notifications to match the design with your website.
Instead of each website page, TrustPulse also lets you display user activity on specific URLs which is helpful for landing page optimization.
Now, let’s look at how you can create real-time notifications for your WordPress site.
Showing Real-Time Notifications in WordPress
With TrustPulse, you need to create a new campaign to display real-time notifications. Then, you can go ahead and add it to your WordPress site.
It may sound difficult, but it’s not. Follow these easy steps below, and you will be able to add real-time notifications in WordPress in minutes.
Step 1: Sign Up and Add Your Website to TrustPulse
The first thing you need to do is to sign up for a TrustPulse account. Start by clicking on the Get TrustPulse Now button.
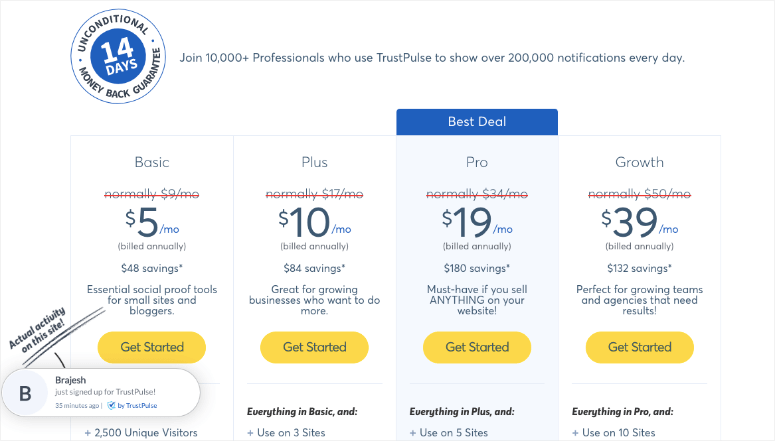
On the next page, you need to select a plan and click on the Get Started button to continue.
After that, you need to add your name and email address to sign up for the TrustPulse 14-day free trial.
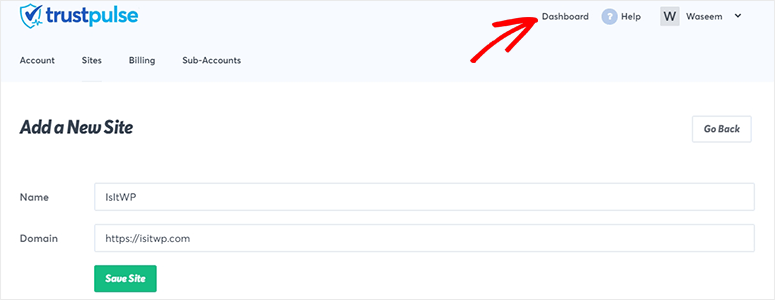
Once logged in, you can go ahead and click on the Dashboard button from the top bar. Now, you need to add your website where you want to show real-time notifications.
Click on the Save Site button to continue to the next step.
Step 2: Create a New Campaign in TrustPulse
From your TrustPulse dashboard, you need to click on the Create Campaign button.
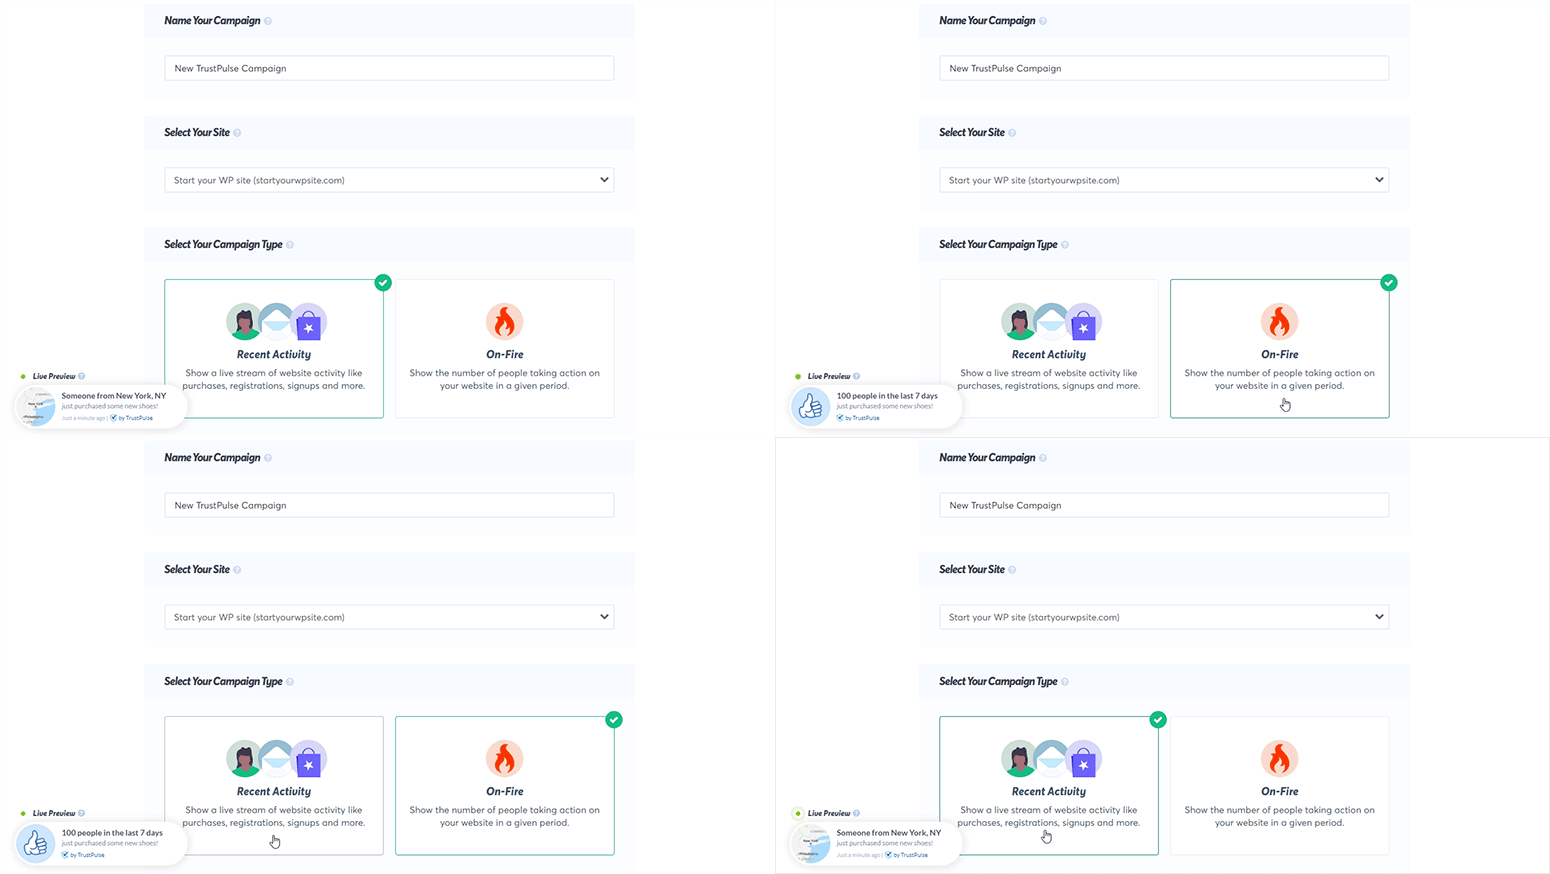
Next, you need to add a name for your new campaign, select the website where you want to show notifications, and choose a campaign type.
TrustPulse offers 2 campaign types: Recent Activity and On-Fire.
Recent Activity will display new user sign-ups and member registrations in real-time. At the same time, the On-Fire campaign will display a total number of people signing up on your website in the last few days.
You can select any of the two campaigns and see the live preview on the bottom-left corner of your screen.
For this guide, we’ll use the Recent Activity campaign.
Click on the Next Step button to continue.
Step 3: Appearance and Design Settings for Notification Popups
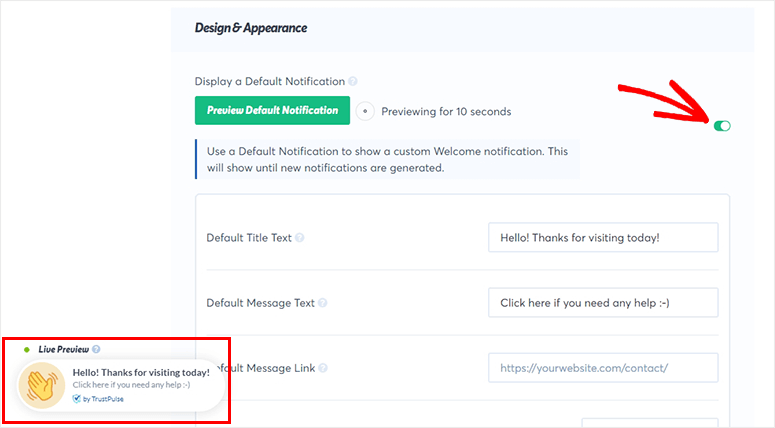
TrustPulse offers a default welcome notification popup. You can enable or disable the welcome notification, customize it, change the icon, and preview the notification.
If you enable the welcome notification, it will appear until the next notification shows up.
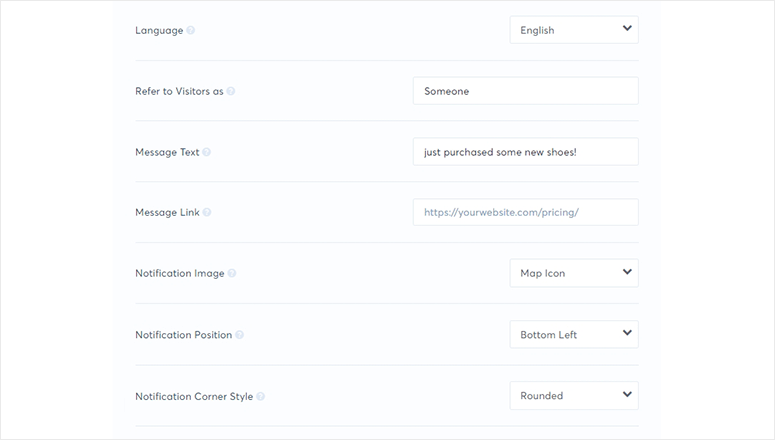
For sign up notification settings, you should scroll down. Here you can offer over a dozen languages, add text to the notification, and change your notification popup position.
Now, you should scroll down further to customize the Advanced Settings. From here, you can change the text color, font, and size. You can also customize the background color, border size, drop shadow, and more.
Once you’re satisfied with the settings, click on the Next Step button.
Step 4: Configure Capture Activity Settings
After designing the notification popup, you need to set up the trigger and action for your real-time notification.
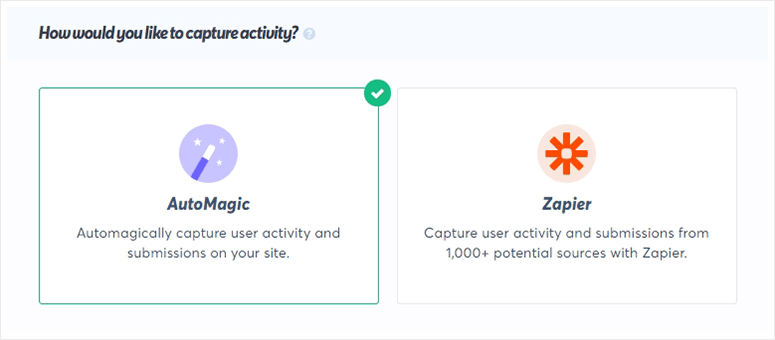
TrustPulse comes with 2 options: AutoMagic and Zapier.
AutoMagic is a recommended solution to trigger the notification popup based on user actions on your website (for example, new user signups)
But Zapier can connect your TrustPulse campaign to thousands of 3rd-party apps.
This is helpful when an action takes place off your website, but you’d like to display it to your site’s customers. That would be like when someone leaves you a review on a site like Google My Business or Yelp.
For today, we’ll use the AutoMagic option for this guide.
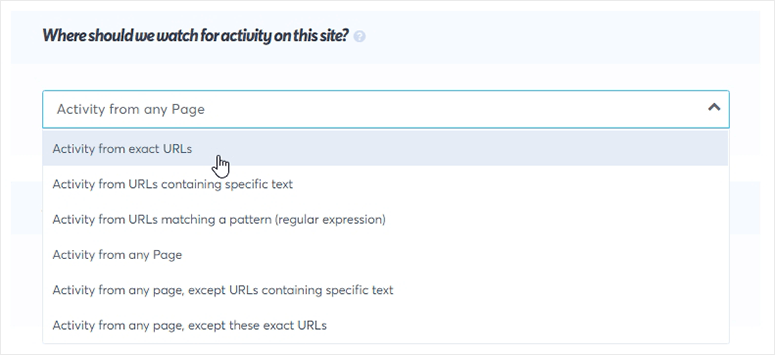
You need to click on the drop-down menu to select the activity. For example, let’s choose the Activity from exact URLs option.
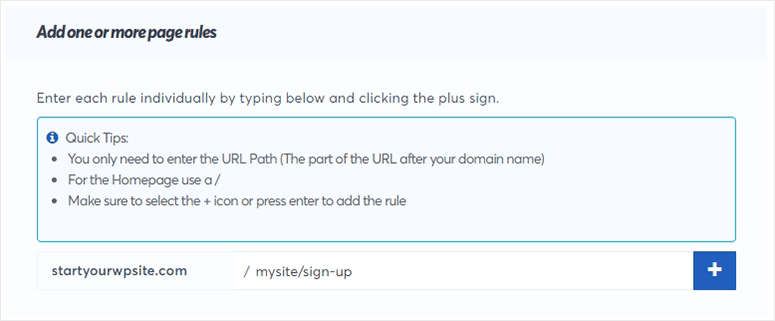
Next, you need to add a page URL so TrustPulse can capture user activity on that specific page and display a notification to new visitors.
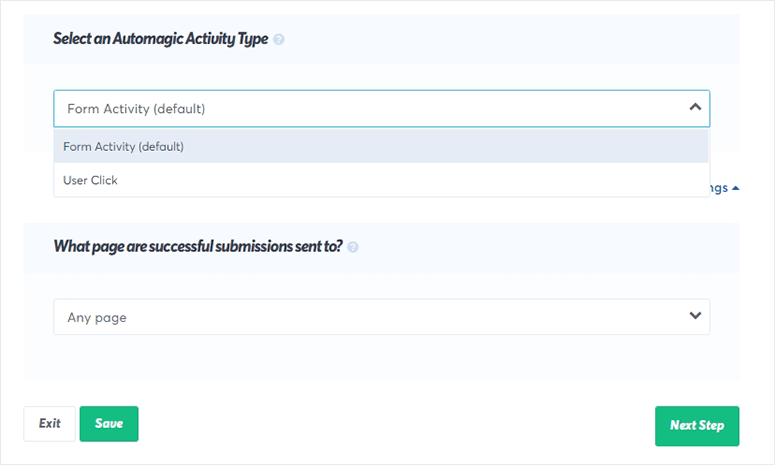
It also lets you select the activity type, which means the trigger can work on default form activity or a user click. In Advanced Settings, you can redirect users to a specific page after successful submission.
Click on the Next Step button to store your settings.
Step 5: Edit Display Rules for Your Notifications
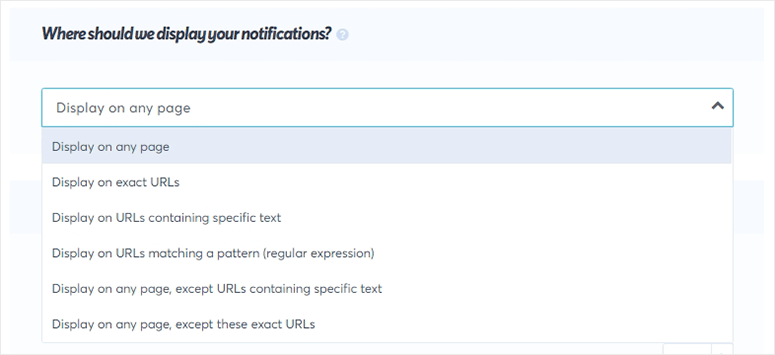
In the Display Rules, you can specify where to show real-time notifications. Click on the drop-down menu to see multiple options, including display on any page, display on exact URLs, and so on.
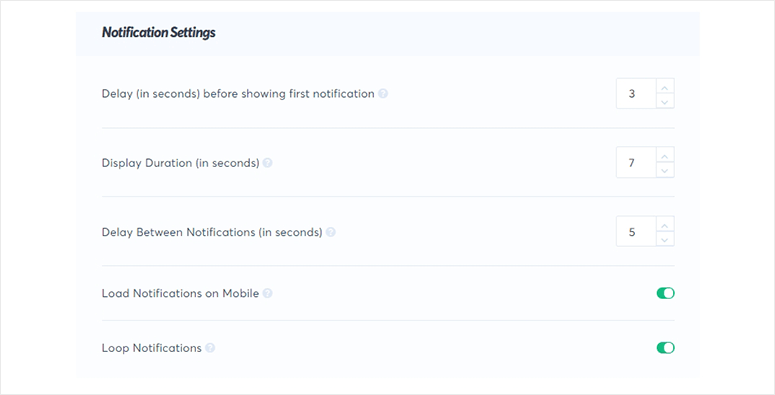
You can also set up the delay and duration of the notifications, along with other more advanced settings.
Now, click on the Next Step button to go to the last step.
Step 6: Connect TrustPulse With WordPress to Display Real-Time Notifications
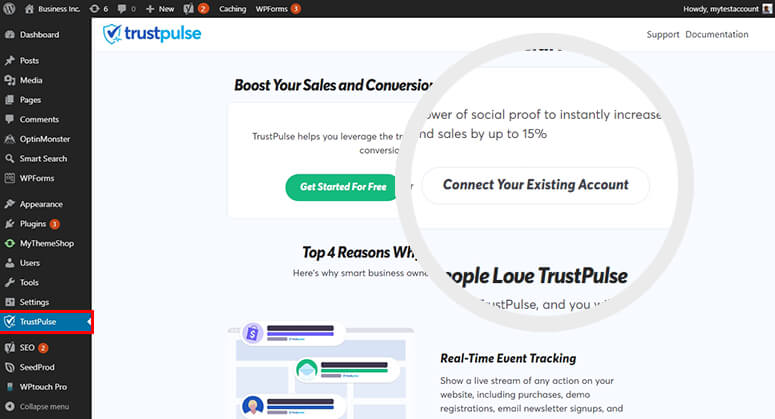
To connect your WordPress website, you need to install and activate the TrustPulse plugin.
For more details, you should check out our guide on how to install a WordPress plugin.
Upon activation, you need to visit the TrustPulse menu in your WordPress admin dashboard. From there, click on the Create Your Existing Account button.
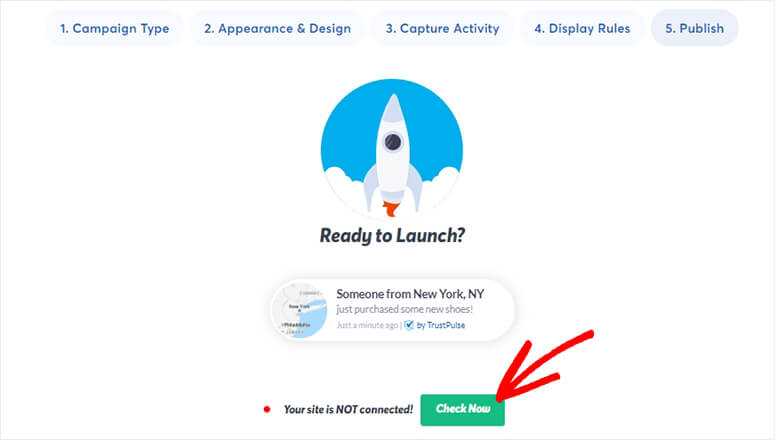
Now go back to your TrustPulse account and click on the Check Now button.
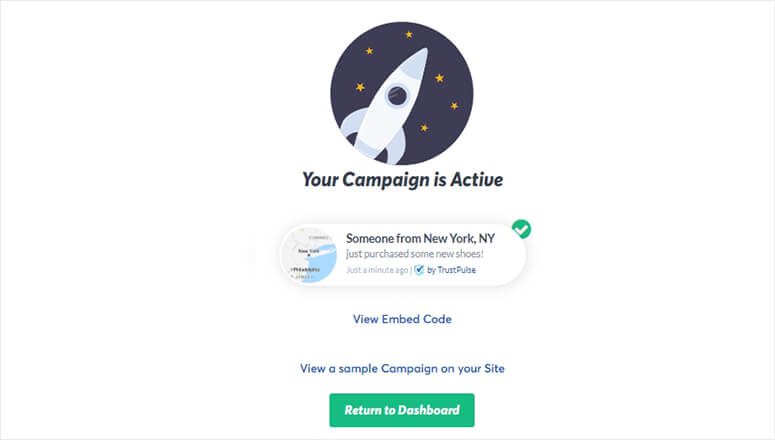
The page will refresh and show a success message that your campaign is active.
And that’s all! Now you can visit your website to see the TrustPulse campaign in action.
We hope this article has helped you learn how to show real-time notifications in WordPress.
You may also want to check out our guide on how to add push notifications to WordPress and get more traffic on your site.





Comments Leave a Reply