
Do you want the most secure but also the easiest way to accept credit card payments on WordPress?
WordPress doesn’t have a default option to add credit card payments but you’ll find many plugins and tools that help you solve this problem. However, when it comes to online payments, you need to be sure that you can trust the third-party tool.
In this tutorial, we’ll show you how to add credit card payments to WordPress with a plugin you can 100% trust.
What You Need to Accept Credit Card Payments
Many users prefer to use their credit cards for online payments because it is more convenient and secure. But before you can integrate credit card payments on your site, you need to have a few things in place:
- SSL – You’ll need to enable HTTPS/SSL on your website to ensure all data transmitted from and to your site is secure. This will safeguard your customers and make sure their payment information is never leaked to hackers.
- Stripe Account – Stripe is the best payment gateway for accepting credit card payments on your site. It is user-friendly and offers tons of tools to manage your transactions. You need to have a Stripe account first and then you can integrate it with WordPress.
- Payment Plugin – You need to install a reliable third-party payment integration tool. The plugin you choose should also allow you to accept payments from multiple payment processors like MasterCard and VISA. This will help you process every transaction on your site regardless of the choice of the customer. And it also gives the customer a better user experience when they can use their preferred card.
There are tons of WordPress plugins that let you accept credit card payments. Our top pick is WP Simple Pay and we’ll tell you why.
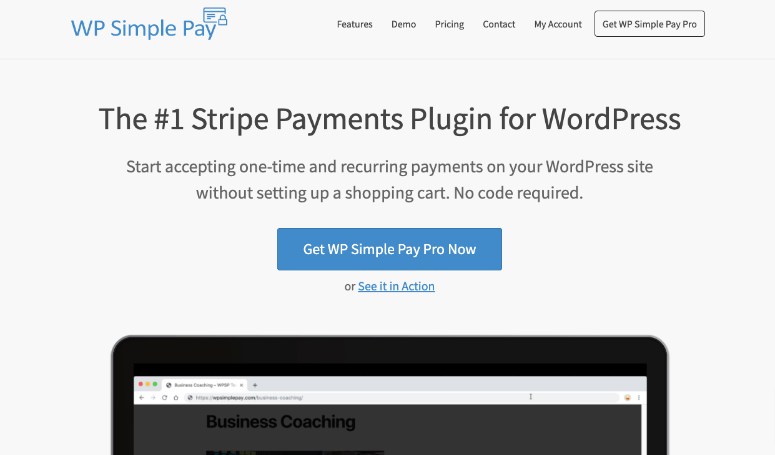
WP Simple Pay is hands down the best WordPress credit card payment plugin. It offers a simple and easy way to accept credit card payments and sell products on your website.
This plugin lets you create any type of payment form you want. Plus, there’s a drag and drop builder to customize it so you can make sure it suits your website and what you’re selling.
Then you can enable credit card payments on your site in just a few clicks. The great thing is that you don’t need to touch a single line of code for any of this.
Inside the dashboard, you’ll find options to set up one-time and recurring payments. You can also add a trial period for your memberships and services.
You can even let the user decide the amount they want to pay. This is perfect if you want to allow users to donate towards a cause or free service you’re providing.
Here are a few more of its highlights:
- Super fast integration with WordPress
- Fully responsive form templates that look great on any device
- Options for Apply Pay and Google Pay buttons
- Discount coupons
- Supports SCA (Secure Customer Authentication) for secure payments
Still not convinced? Take a look at our WP Simple Pay Review for the complete picture.
Now that you know which credit card plugin to use, let’s start our tutorial the right way.
How to Add Credit Card Payment to WordPress
Step 1: Install WP Simple Pay
First, you’ll need to create a WP Simple Pay account.
You can get started with the free version of the plugin which is available on the WordPress repository. But, you’ll want to upgrade to the premium version for advanced features like recurring payments, coupon codes, and more.
After you sign up, you can download the plugin file and copy your license key from your account dashboard. Then, install and activate the plugin on your WordPress site. If you need help, see our easy guide on how to install a WordPress plugin.
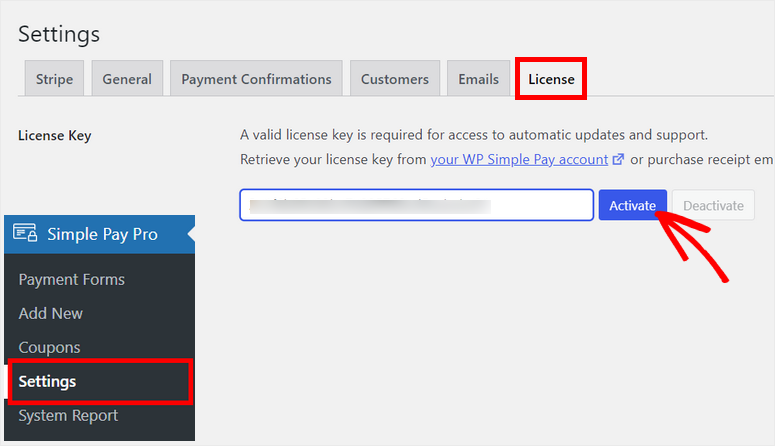
Once the plugin is installed, you need to head over to the WP Simple Pay » Settings page and open the License tab.
Here, enter your license key and click on the Activate button.
Next, you’ll need to connect to your Stripe account.
Step 2: Connect with Stripe
On the settings page, click on the Stripe tab and you’ll see the options to integrate with Stripe.
Before you connect your Stripe account, we recommend enabling Test Mode until you finish setting up credit card payments. This helps you make sure no live transactions are accidentally processed on your site. You can safely check if the connection is working properly or not.
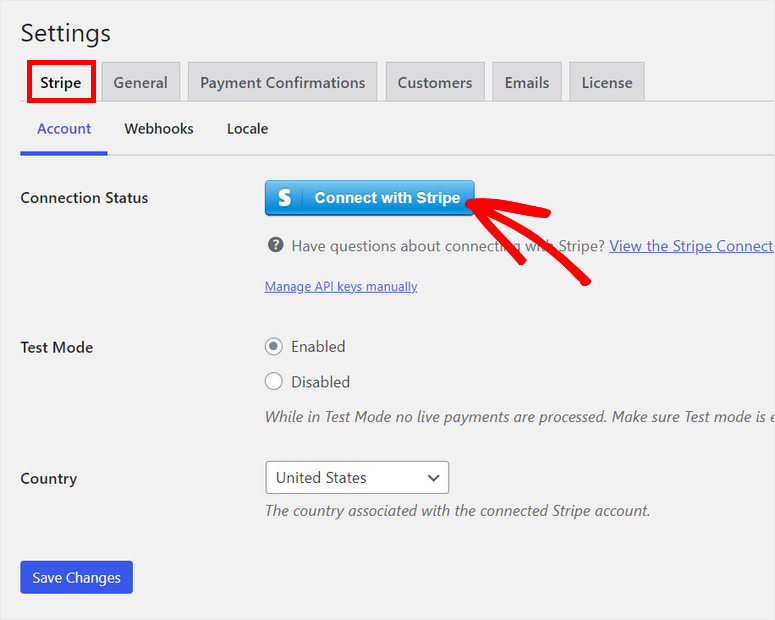
Then, click on the Connect with Stripe button and you’ll see the Stripe website to log in to your account on the next screen. If you don’t have a Stripe account, you can create a new one.
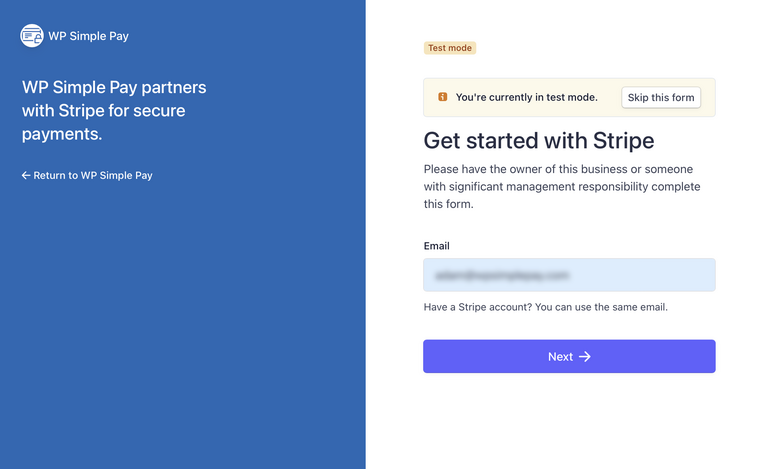
After you connect your account, you’ll be taken back to the settings page on your admin dashboard.
Make sure you click on the Save Changes button after you set up your Stripe account.
Now, you’ll need to create a payment form and add the credit card option.
Step 3: Create a Payment Form
To create a new payment form, navigate to the WP Simple Pay » Add New page. The first thing you’ll see is the General settings where you can add the form title and description. You can also choose the format for your payment form.

There are 3 form type options to choose from:
- Embedded: Embed a payment form directly on any WordPress page or post.
- Overlay: Display a button for payment. When users click on the button, they’ll see the payment form in a popup.
- Stripe Checkout: Redirect users to the Stripe payment page to complete their payments.
We’ll be using the Embedded form format. This way, your customers will never have to leave your website during checkout.
Next, open the Payment tab to set up the pricing options for your form. Here, you can choose the payment mode and add pricing for your products or services.
There are options to add the product Label and Amount. You can even select the desired currency for your payments.
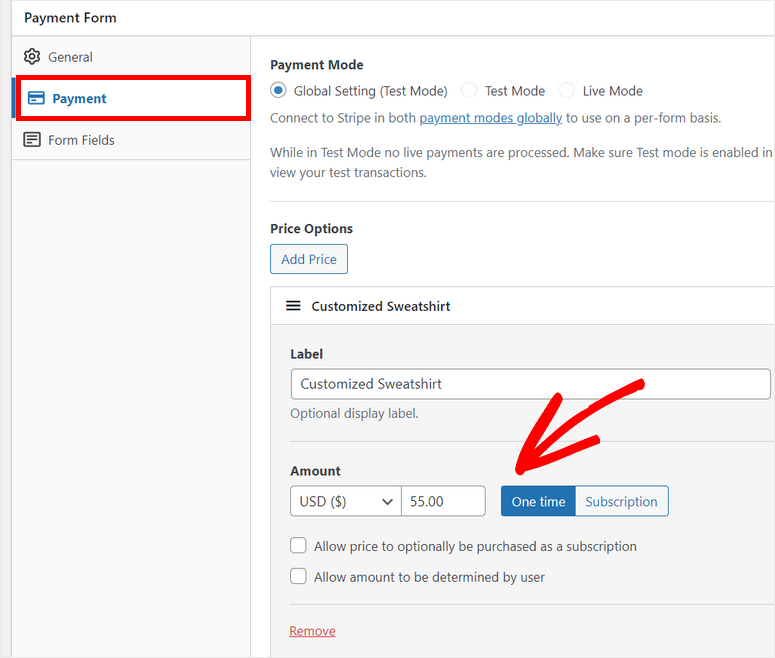
Below the amount settings, you’ll see the Allow amount to be determined by user option With this, your users will be able to enter their own payment amount on the form. This is perfect for creators and non-profit organizations that welcome donations.
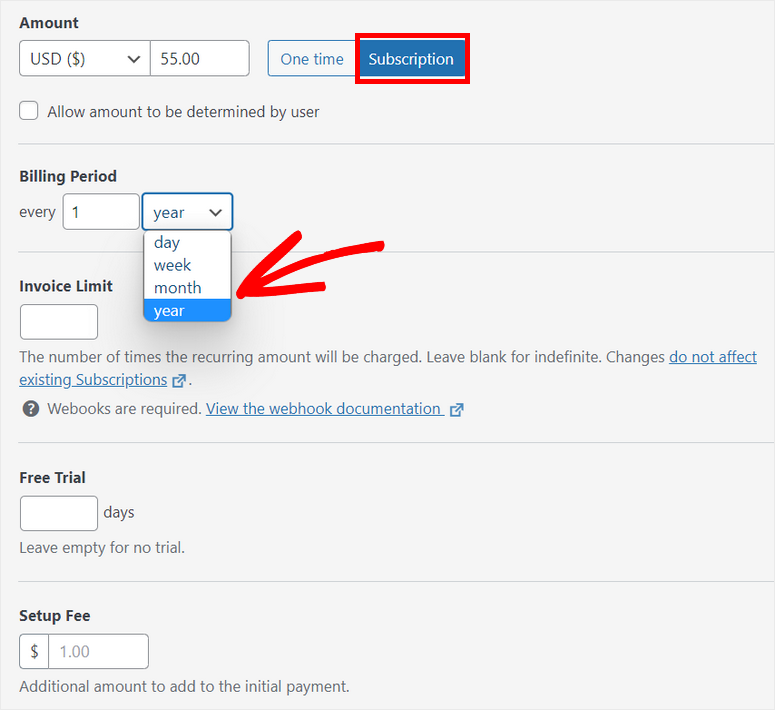
By default, the amount is set up for one-time payments, but you can change that and choose the Subscription option. This allows you to accept recurring payments on your WordPress site.
Once you switch to Subscription, you’ll see the options to choose the billing period, invoice limit, free trial period, and more.
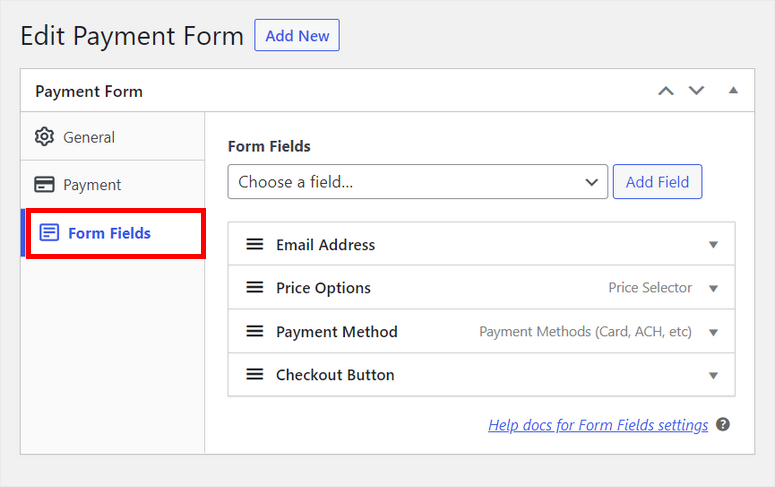
Now, you can customize the payment form fields and add the credit card option. In the Form Fields tab, you’ll see these default fields:
- Email Address: Collects users’ email addresses
- Price Options: Displays the pricing of your products
- Payment Method: Adds one or more payment options like card, Google Pay, and more
- Checkout Button: Lets you edit the checkout button text and style
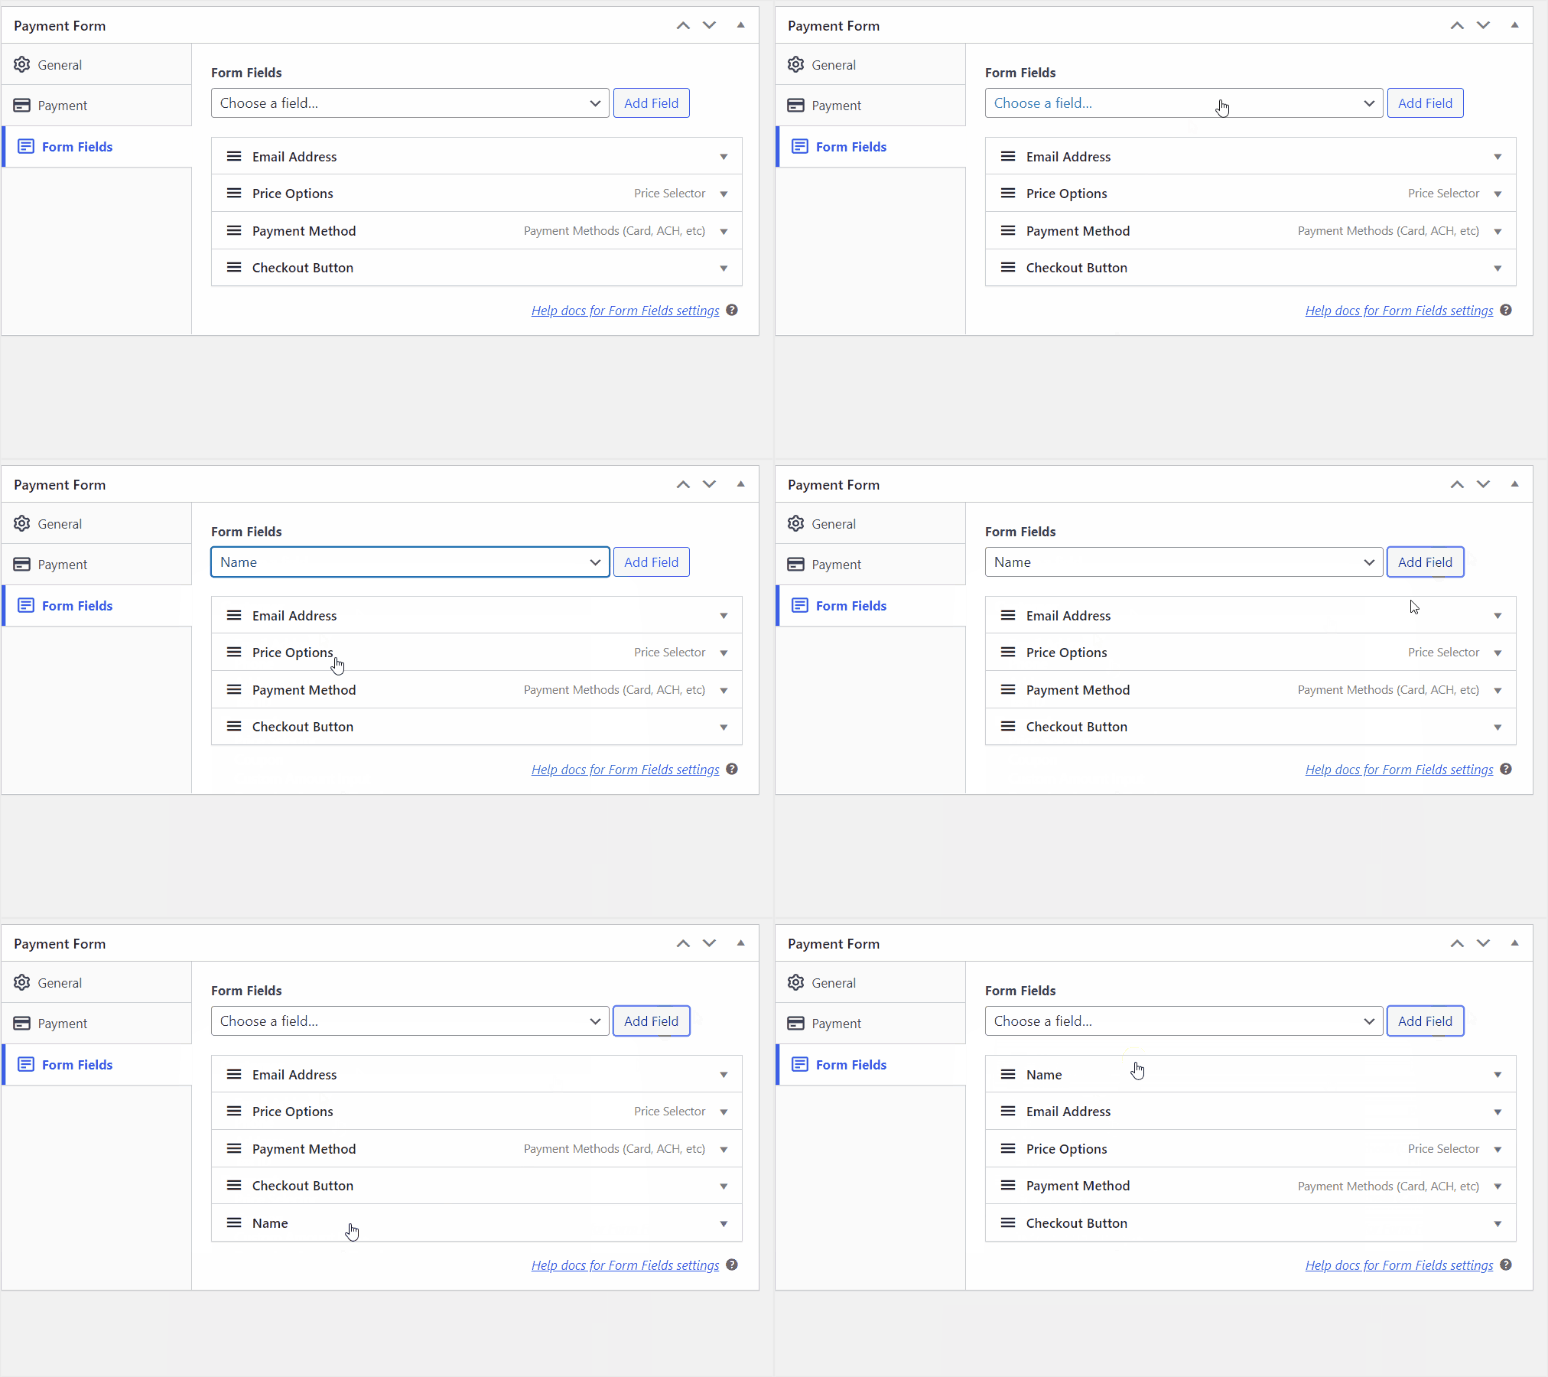
If you want to add new form fields, you can select them from the dropdown menu and click on the Add Field button. Then, simply drag and drop the form fields to arrange the order as you like.
The payment method field already has Card as the default choice so you are good to go. You can also add other payment options if you need them.
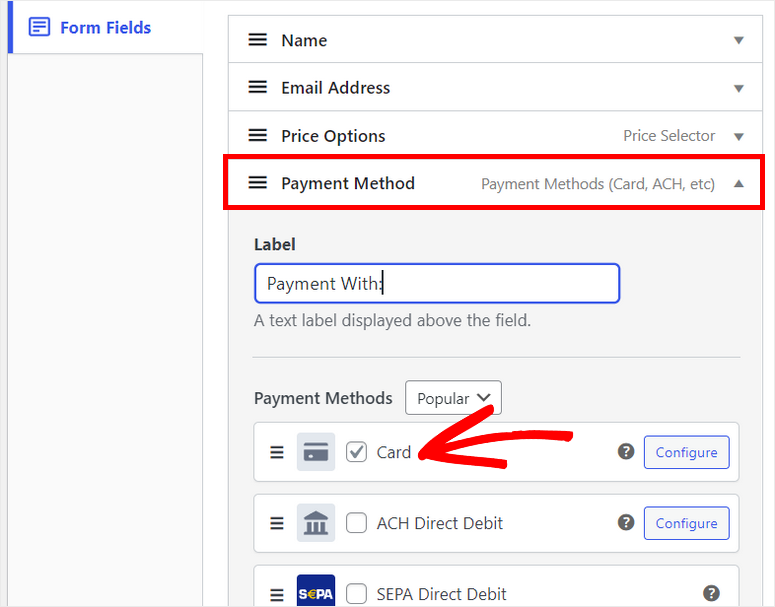
Once you’re done, make sure you save your settings. Now, we’ll show you how to add credit card payment to WordPress.
Step 4: Add the Payment Form to your Site
To add your payment form on any page or post, you’ll need to click on the Publish button on the right side of the form builder.
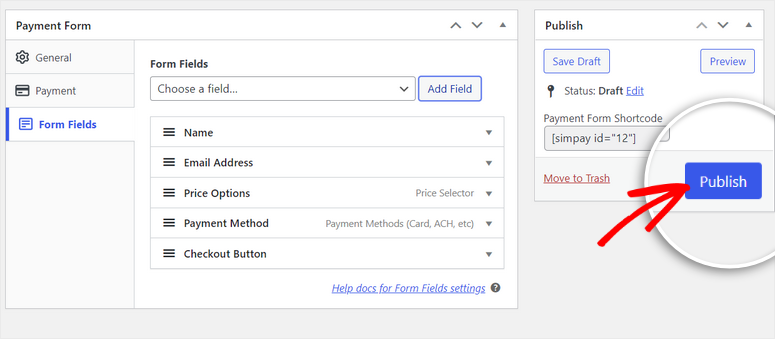
WP Simple Pay offers a simple shortcode for every payment form you create which looks like this: [simpay id=”12”].
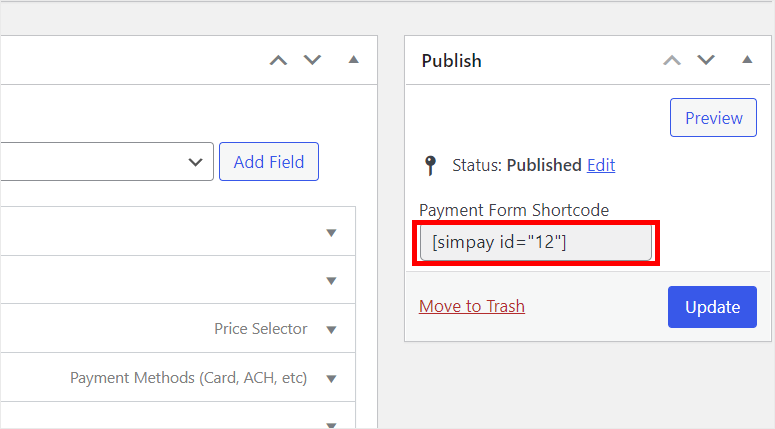
You can simply copy this shortcode and paste it to your WordPress page or post. Once you add the shortcode to the text editor, you’ll see that the Shortcode widget is automatically added.
Then, you can publish the page and preview it to see how it looks on the front end.
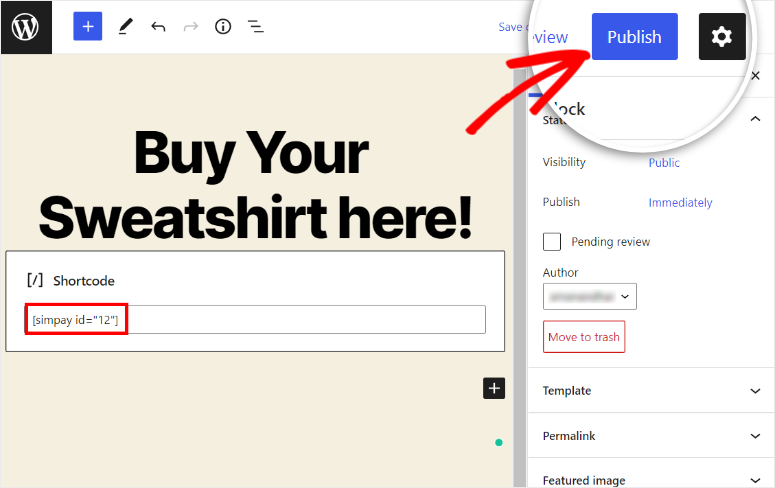
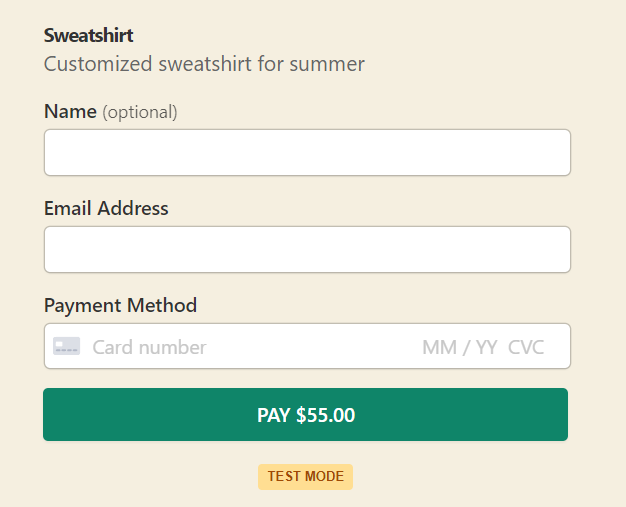
You can view the payment form on the front end. It will look something like this.
Step 5: Test Credit Card Payments
Because we have set up Stripe payments in Test mode earlier, you can perform a test payment on your site to see if it is working properly or not.
So, you can view your payment form on the front end and fill out the form fields with the test card number which you can find on the Stripe website.
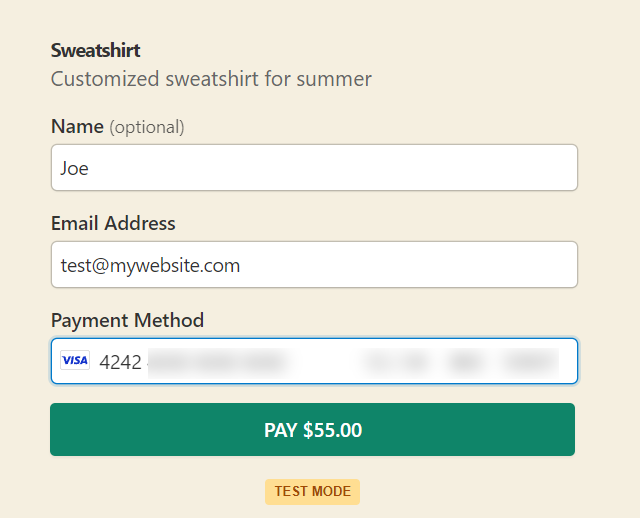
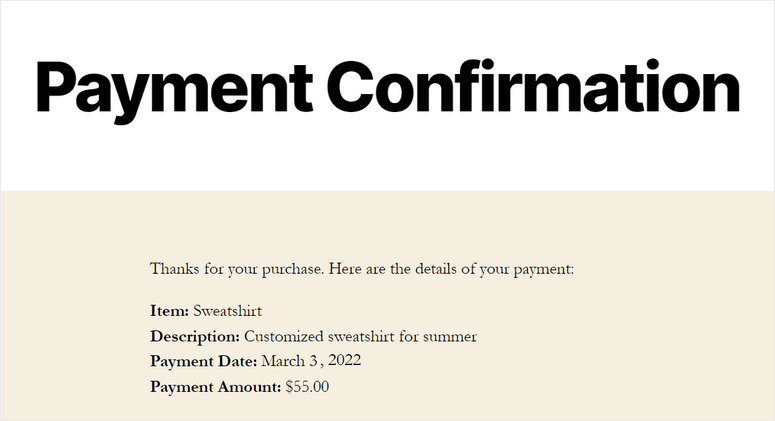
After you click on the Pay button, Stripe will process your credit card payment and you’ll see a confirmation page like this:
If everything is working fine, you can go ahead and turn off the test mode on the WP Simple Pay » Settings page.
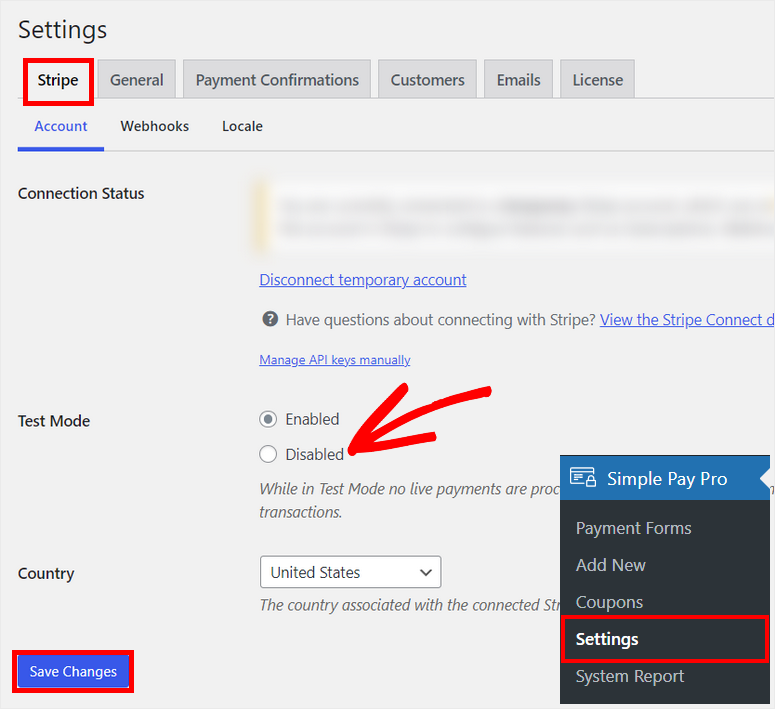
In the end, click on the Save Changes button.
And there you go! You’ve successfully learned how to accept credit card payments on WordPress with the help of the WP Simple Pay plugin.
WP Simple Pay is one of the powerful payment plugins for WordPress sites. It’s user-friendly and lets you add credit card options in minutes.
If you want an alternative method, then you’ll want to see how to accept online payments using WPForms. It’s the #1 form builder with secure online payment options. See our tutorial on How to Accept Stripe Payments in WordPress (Step by Step).
That’s all for today! We hope this article helped you add credit card payments to your website with ease.
For your next steps, check these resources out:
- 7 Best WooCommerce Checkout Plugins to Improve UX and Sales
- Best WooCommerce Upsell & Cross-Sell Plugins
- How to Create a Profitable Online Store – Step by Step
We’ve handpicked these posts to help you boost sales and revenue on your site.

Comments Leave a Reply