
Do you want to add a portfolio to your WordPress site? By doing so, you can showcase your previous work experience and expertise in a beautiful, eye-catching way that’s sure to impress potential clients and employers.
In this article, we’ll show you how to add a portfolio to your WordPress site the EASY way.
Why Add a Portfolio to Your WordPress Site?
A portfolio website lets you showcase your creative work with style and allows you to establish your unique presence online. If you’re running a business, an online portfolio can assist you in successfully branding your business.
While webmasters usually suggest using a portfolio theme for creating a portfolio website, this isn’t recommended if you want to add a portfolio to your existing website. Changing the theme of your existing website can harm your website’s design as well as many other aspects, such as speed and SEO.
So what do you do when you need to add a portfolio to your site without changing your theme?
When you use WordPress, you’re always supported by plugins for additional functionalities on your site. So, in this case, the solution is to use a portfolio plugin.
While there are several portfolio plugins on the market. If you already have an Instagram feed, then you can easily connect it to your WordPress site and display the feed on your site. We recommend using Instagram Feed Pro by Smash Balloon.
Smash Balloon also has plugins to link your Twitter, YouTube, and Facebook feed as well.
In this tutorial, we’ll show you how to create your own portfolio from scratch using the Envira Gallery plugin.
Adding a Portfolio in WordPress Using Envira Gallery
Envira Gallery is a powerful WordPress portfolio gallery plugin that lets you create a stunning online portfolio. Using this WordPress plugin, you can create both visually appealing and feature-rich portfolios on your site.
You can create simple photo galleries using the free version but it doesn’t allow you to create full-fledged portfolios as such. You can purchase its Pro plan for advanced features and addons.
IsItWP readers can get an exclusive 25% Off on their purchase using our Envira Gallery coupon.
Step 1: Install the Plugin and Create a Gallery
First, you’ll need to install the plugin on your WordPress site. Then, you’ll need to verify your plugin license key. You can find the license key within your Envira Gallery account.
Next, you’ll need to create Envira galleries for your portfolio.
Go to Envira Gallery » Add New to create your first Envira gallery. Give a title to your gallery, and then add images to the Envira Gallery.
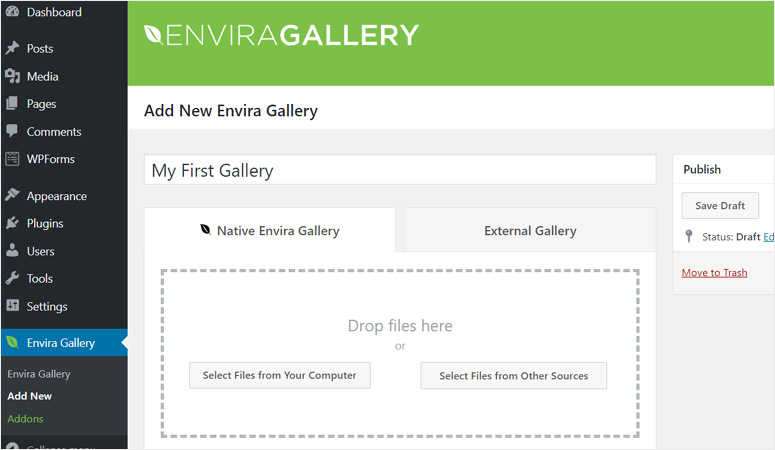
You can upload photos from your computer or select them from your WordPress media library. Click the Select Files from Your Computer button to upload image files from your computer.
If you want to add existing images from your WordPress media library, you’ll need to click the Select Files from Other Sources button and click the Media Library tab.
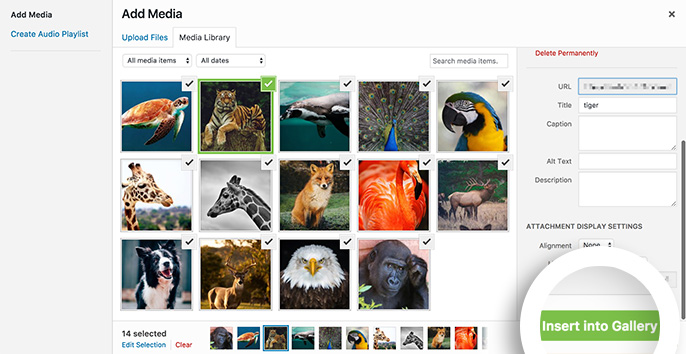
Once you’ve selected the images, you’ll be able to see the image thumbnails, as shown in the picture below.
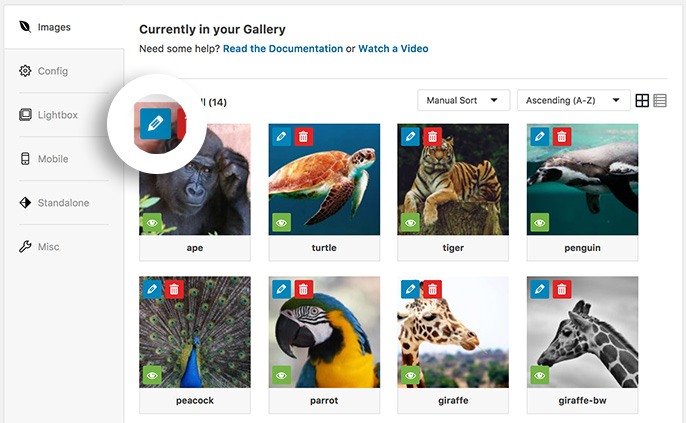
Now, you can reorder the images by simply dragging and dropping them. You can also insert image metadata by clicking the pencil icon on each image.
Then, click the Config tab to configure your image gallery settings.
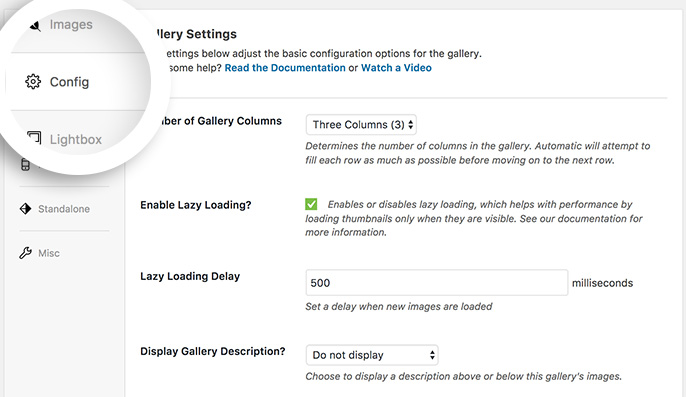
You can set your gallery theme, the number of columns, image dimensions, etc. from this area.
Next, you can configure all the other settings by clicking the tabs underneath the Config tab.
Once you’re done fiddling with your settings, go ahead and publish your gallery.
You can create more image galleries by repeating the same process.
Step 2: Create a Portfolio Album
Once you’ve created multiple libraries for your portfolio, you’ll need to put them into albums.
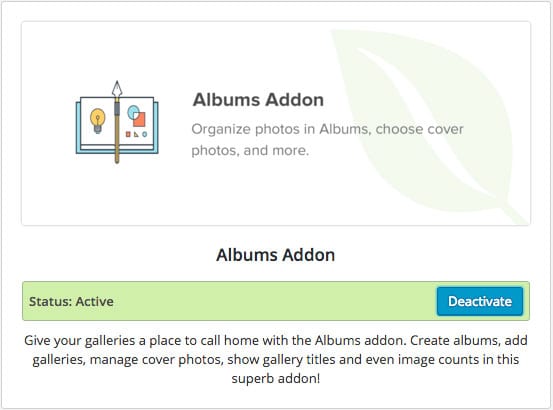
Go to Envira Gallery » Addons from your WordPress admin panel, and install the Albums Addon. Next, click the activate button, and you’ll see the Albums addon become active.
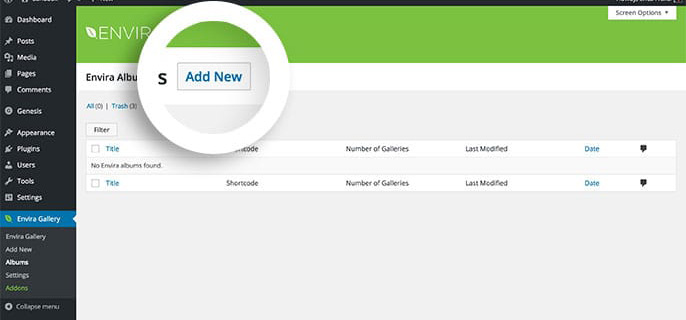
Next, go to Envira Gallery » Albums from your WordPress dashboard, and click the Add New button.
Enter your album name first. Then, drag your galleries from the Galleries tab, as shown below.
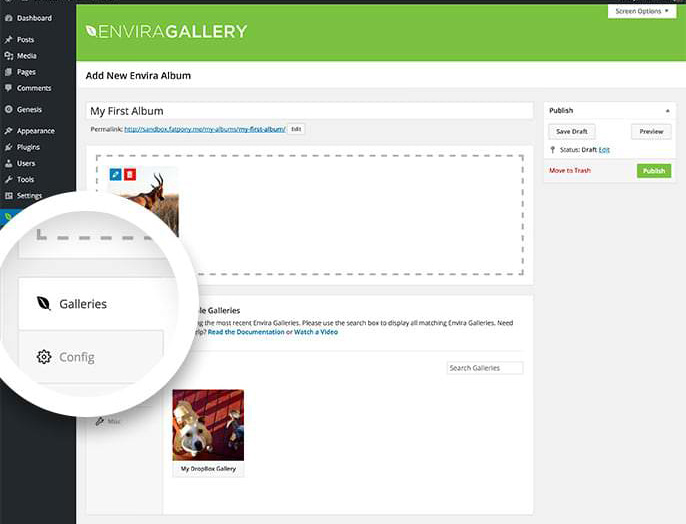
After adding galleries to your album, go to the Config tab to configure your album’s settings.
Once the configuration is complete, go ahead and click the Publish button.
You’ve successfully created your portfolio album. Now, you just need to add it to a page or post to display on your site.
Step 3: Add Your Portfolio Album to a Page
Finally, you have a portfolio album ready for use.
You can either create a new page/post or edit an existing page/post to add your portfolio album.
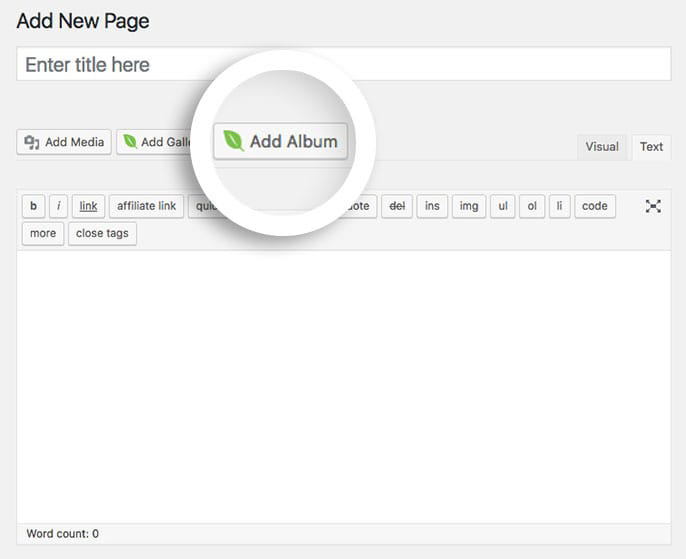
In the page/post editor screen, you’ll see an Add Album button. Simply click the button and select the album you want to add from the popup. Then, insert it.
That’s it!
You’ve successfully added a portfolio to your WordPress site. You can now go to the page and view your portfolio.
Alternative Plugins for Adding Portfolio to WordPress
In this tutorial, we used Envira Gallery because it offers a simple, beginner-friendly interface for creating a portfolio. In addition, it enables you to create any type of portfolio or image gallery with its powerful addons.
However, if you want to check out alternative WordPress portfolio / gallery plugins and compare the plugins, you can try the following plugins:
- NextGEN Gallery: This WordPress gallery plugin is a powerful tool for creating simple photo galleries to advanced portfolios suitable for photographers and visual artists.
- Foo Gallery: Foo comes with a drag-and-drop builder reordering capability that lets you arrange your images the way you want. You’ll also find several useful built-in templates so you don’t always have to create a portfolio from the ground up.
- Portfolio by BestWebSoft: It lets you create unlimited portfolio projects for your WordPress site.
We hope this article helped you learn how to add a portfolio to your WordPress site. Up next, you may also want to read:
- How to Create a Welcome Gate in WordPress
- How to Create a Stunning Photography Website
- How to Create a Custom WordPress Layout
These tutorials will help you create a stunning portfolio with custom layouts and welcome messages to wow your clients and potential employers.

Comments Leave a Reply