
Looking for an easier way to manage ads on your site?
The AdSanity WordPress plugin allows you to create and display banner ads of all sizes on your site using widgets and shortcodes, and get stats on views and clicks.
Read all about how it’s done in our AdSanity review.
Why You Need an Ad Management Plugin
Advertising is one of the easiest and most popular ways to make money from your WordPress website.
But, if you’ve ever tried to display ads manually on your WordPress site, you know what a hassle it can be.
Using an ad management plugin can help you to stay organized and have more control over how your ads are displayed — as well as give you crucial statistics on how your ads are performing.
AdSanity works by allowing you to create ads as custom post types, and displays them on your site using a widget or shortcode.
Ads can be displayed by themselves (either by specific ad or randomly chosen), or in groups. The ads default to your theme’s styles, so, if your theme is responsive, your ads will be too.
What Is AdSanity and How Does It Work?
AdSanity is a powerful ad management plugin for publishing self-hosted banner ads as well as network ads in WordPress. It’s one of the most popular WordPress plugins for managing ads and powers millions of ads online.
The plugin is so simple and easy to use that anyone, including complete beginners, can create professional ads using it. It provides a clean and beginner-friendly interface for creating and managing the ads. The core plugin is lightweight and fast with a minimal set of features; however, it offers a number of addons to allow you to extend the plugin’s functionalities.
The AdSanity plugin was created and maintained by Pixel Jar, a website development company. The company focuses on making the WordPress platform easy for users.
AdSanity Review: Features and Addons
AdSanity is a feature-rich plugin with tons of great features and addons. While the plugin’s standard features are great for creating and managing professional ads in WordPress, you can use the addons to add some extra capabilities.
There are two varieties of AdSanity addons: Basic and Pro. The basic addons are included in all plans, while the pro addons are included only with the Developer license. However, you can purchase the addons individually and use them on your site, should you need them.
Some of the most intriguing AdSanity addons are:
- Conditional Ad Appearance: It adds a new metabox on the Create Ad screen page to allow you control the appearance of your ads.
- User Role Ad Visibility: It allows you (site owner) to hide ads based on the role of the visitors on your site.
- Google Analytics Tracking: It helps you to track ads from both self-hosted sources as well as from ad networks. If you’re using MonsterInsights on your site, you don’t need to purchase this addon because MonsterInsights allows you to track your ads with ease.
- Ad Block Detection: This addon checks for Ad Block software in your users’ browsers and shows them a message encouraging them to disable it.
- Video Ads: It allows you to add video ads to your WordPress site easily.
Moreover, the plugin features multiple publishing options so you can create infinite or date-based ads with a beginning date and ending date. To display your ads on your site, you can add them in widgetized areas, pages, posts with shortcodes, or template tags.
The most interesting feature for developers is that it includes actions and filters that developers can utilize to customize and add power to the AdSanity plugin. And, their support is also incredible.
How to Set Up Your First Ad
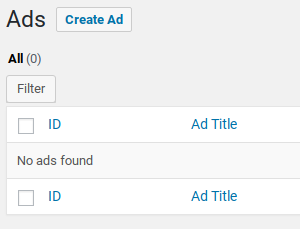
To get started, you need to download the AdSanity plugin from its website and then upload it to your site to install it. After installing and activating the plugin, you can navigate to AdSanity » Manage Ads to get started.
Click the Create Ad button at the top of the screen.
Here you’ll enter the details of your ad and upload the banner image.
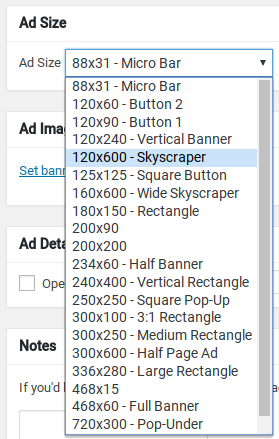
After entering a name for your ad, select the size.
Then upload your banner image.
Under Ad Details, be sure to paste the URL you want to direct your visitors to when they click the ad. If you prefer, you can check off the box to open the link in a new window.
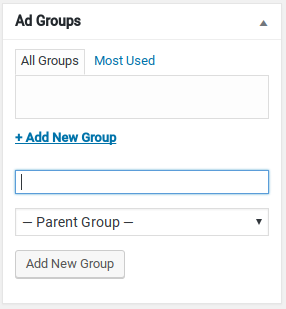
On the page’s right side, you can add your new ad to an ad group. Groups are useful when choosing which ads you’d like to display together (more on that below).
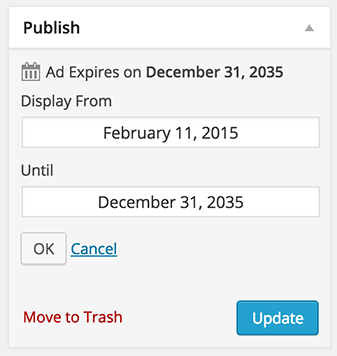
In the Publish box on the right, you can click the Edit link next to Publish Forever to change the duration of the ad display.
When you’re finished selecting your options, click the Publish button.
To display your new ad, navigate to Appearance » Widgets.
You’ll see that there are a few new widgets available to use.

The widgets are:
- AdSanity – Single Ad: Display one specific ad of your choice.
- AdSanity – Ad Group: Select an ad group to show all the ads at once.
- AdSanity – Random Ad: Displays a random ad every time the page is loaded.
To display the ad you just created, use the AdSanity – Single Ad widget and select the ad name you entered. Then click Save.
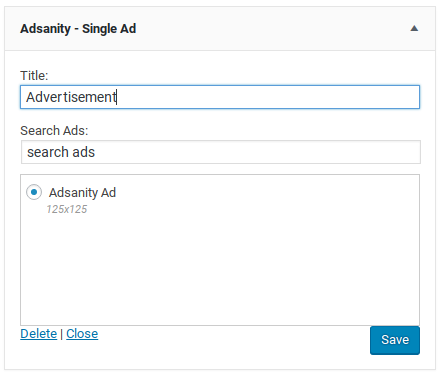
Your ad will now be displayed in your widget area!
Be sure to test it to make sure it’s working correctly.
(Note: If clicking your ads brings you to a 404 page, go to Settings » Permalinks and click the Save button without making any changes. This will reset the permalink structure on your site to include the AdSanity custom post type, without affecting the rest of your site.)
You can also display ads on your site using shortcodes, which can be found in the official documentation.
Use this shortcode to display a single specific ad:
[adsanity id="put-the-ad-id-here" align="alignnone"]
And this shortcode will display an ad group:
[adsanity_group num_ads=2 num_columns=3 group_ids=1,2 /]
You can adjust the attributes to change the display:
- num_ads: The number of ads that will be displayed together
- num_columns: The number of columns
- Group_ids: The ID of the ad group(s) you want to display.
To find your ad group IDs, navigate to AdSanity » Ad Groups, and the ID number will be listed next to the group name.
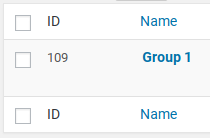
Once your ads are displayed, you can navigate to AdSanity » Stats to see data on your ad views, clicks, and CTR.
Should You Purchase AdSanity for Ad Management in WordPress?
Now that we’ve reviewed AdSanity’s features and functionalities in detail, it’s time to decide if it’s worth purchasing. If you have plans to turn your site into an advertising machine with professional ads, this plugin is perfect.
Here are just a few reasons why you should purchase AdSanity for WordPress ad management:
1) Beginner-Friendly Plugin That Doesn’t Compromise on Features
Since the AdSanity ad management tool works just like the Post Editor in WordPress, any user, regardless of their skill set, who’s accustomed to WordPress’ interface will find it easy to work with. Plus, it comes with all the essential features you need to succeed.
You can easily create self-hosted ads of any dimension and display them on different parts of your site. If you want to add network ads, you can simply add the ad snippet to your ad creation page. You can also create HTML5 ads.
2) Lightweight and Extensible
AdSanity comes with a simple and clean interface that isn’t bloated with unwanted features — the core plugin is shipped with only the most important features.
If you need more than the standard features provided, you can expand AdSanity’s features by installing the basic and pro addons. There are 4 basic and 6 pro addons for the AdSanity plugin. The basic addons are available for free with all of their pricing plans, whereas pro addons are included in only the Developer plan. But you can buy the pro addons individually and use them on your site, with any plan, if needed.
3) Best Suited for Any Budget
The best thing about the AdSanity plugin is that it’s best suited for websites of all sizes and budgets. The pricing is fairly reasonable.
Whether you’re a blogger, publisher, developer, or a large-scale agency, you can find a plan for you.
Let’s check out its pricing plans in the next section.
Pricing and Support for the AdSanity Plugin
AdSanity is a premium plugin with 3 types of pricing plans: Basics, Pro, and Extended. You can choose 1 of the available plans and start creating and managing banner and network ads immediately.
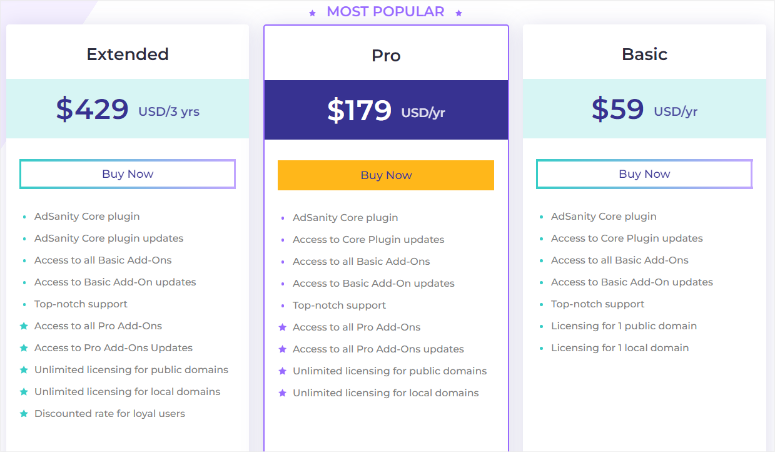
The most basic plan is Basics and it costs $59 per year. The plan comes with the AdSanity core plugin and basic addons and can be used in 1 public domain and 1 local domain.
The Pro plan is the middle-range plan and also the most popular plan. The license costs $179 per year and can be used for unlimited public and local domains.
The Extended plan is the highest-priced plan for AdSanity. It costs $429 for 3 years and comes bundled with all the features and addons the plugin has to offer. And, it provides unlimited licensing and unlimited updates.
Documentation for the AdSanity plugin is sparse, with just a few short articles available online for basic troubleshooting and features. If you’re having trouble getting the plugin set up, you can submit a support ticket through the support site.
Our Verdict on AdSanity as the Best WordPress Ad Management Plugin
AdSanity makes it easy to manage your ads and see basic statistics all from within your WordPress dashboard.
If you’re looking for more advanced features, like the ability to sell ad space directly or get more detailed analytics, then this plugin will be too basic for you.
While the documentation is lacking, the plugin is easy to use, and the developers are responsive to support requests.
We give AdSanity 4 out of 5 stars. Here is the breakdown of our review scores:


 4.0 / 5.0


 3.0 / 5.0


 5.0 / 5.0


 5.0 / 5.0


 4.0 / 5.0


 5.0 / 5.0


Comments Leave a Reply