
Do you want an easy way to install Google Tag Manager on your WordPress site?
Google Tag Manager (GTM) lets you add and update different tracking codes on your site. The best part about this tool is that you don’t need to fiddle with your website’s coding to start tracking advanced data.
However, if you’re new to this, GTM can be hard to use as there’s a steep learning curve to it.
We use a much easier way to track advanced statistics in WordPress and we’ll share that with you today.
To get started, let’s understand what Google Tag Manager does.
What is Google Tag Manager?
Google Tag Manager (GTM) is a dream tool for marketers, bloggers, SEO specialists, and website owners that want to track different aspects of their websites. It lets you go beyond the data that’s available in Google Analytics.
A tag is a snippet of code or tracking pixels that are created by third-party tools. When this is added to your site, it tells Google Tag Manager what to do.
So for instance, you can use tags from Google Adwords, Facebook, and heatmap tools. The tag tells GTM what to track such as:
- Pageviews
- Link clicks
- Scroll depth
- Form submissions
- Custom events
With GTM, you can track events like PDF downloads, button clicks, and outbound link clicks. There are a number of things you can do with this tool and it’s pretty amazing.
Why Use an Alternative to Google Tag Manager
Google Tag Manager has a huge learning curve to it. Any misstep can result in inaccurate tracking.
You need to also be careful about how many tags you add so that you don’t overload your site with extra snippets of code that could affect your page load time.
To get started with Google Tag Manager, make sure you’re signed up for a Google Analytics account.
You can use our guide: How to Set Up Google Analytics 4 in WordPress. In case you want to set up Universal Analytics, we don’t recommend doing that now.
Here’s why: Google Analytics 4 vs Universal Analytics.
Next, you’ll need to sign up for a Google Tag Manager account. Then you need to enter your information and select your preferences.

After you’re signed up, you’ll get 2 tracking code snippets that you need to manually insert into the coding of your WordPress site. You would have to access the header.php file to insert this code.
If you don’t know how to do that, we recommend using a plugin like Insert Headers & Footers or WPCode to easily access the code of your site where you need to paste these tracking codes.
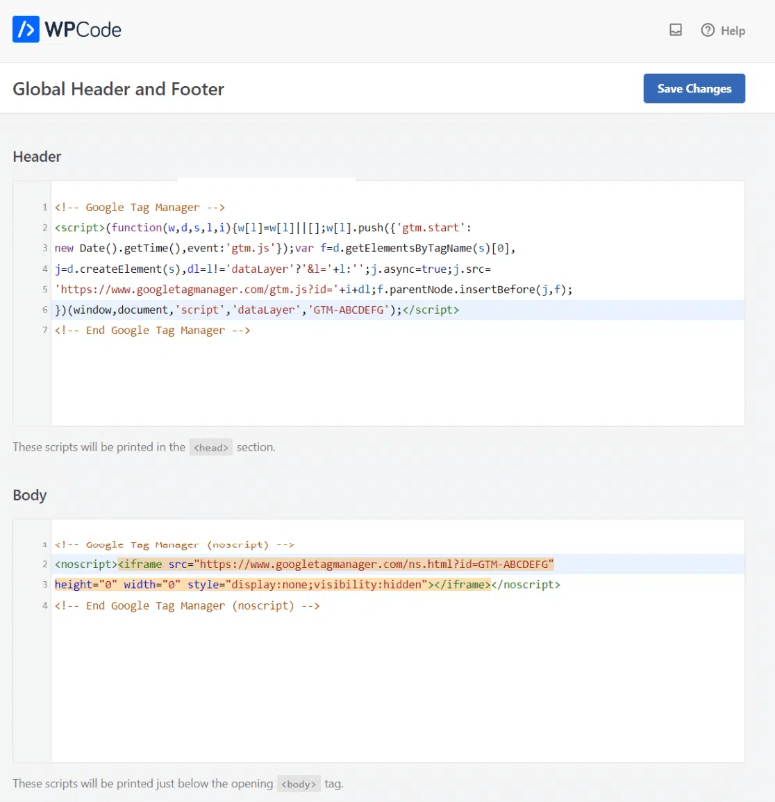
The first code needs to be added to the Header box and the second to the Body box.
Once you save your changes, you can start using Google Tag Manager. You need to head over to your GTM dashboard to install new tags to start tracking new data.
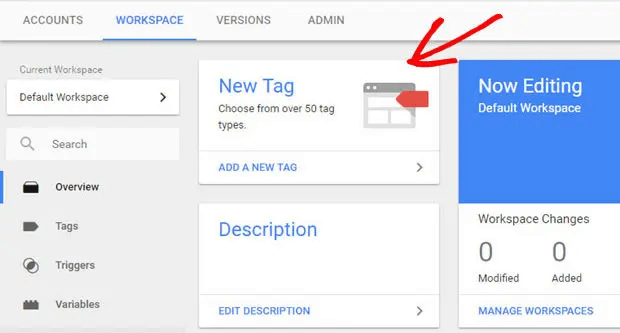
There’s a Tag Manager to organize and optimize tag. It also supports version control, third-party and community-developed tag templates, and security features.
You can also use Tag Manager to add and update Google Ads, Google Analytics, Floodlight, and third-party tags.
The best way to go about learning GTM is to make use of tutorials online. This will help you familiarize yourself with your GTM account so that you can make full use of its functionality. You’ll learn all about datalayer variables, tag types, marketing tags, triggers, tracking IDs, Facebook pixels, GTM container code, and more.
You’ll also want to learn how to use the Google Tag Assistant Manager. It’s an extension to troubleshoot any issues you have with Google Analytics tags, GTM tags, Google Ads, and more.
If you’re a beginner or just aren’t code-savvy, this can be really complicated and nerve-racking. At any time when you’re making changes to your site’s coding, make sure you take a backup of your site.
A small mistake could lead to a broken website.
You also want to ensure that when collecting customer and personal data, your site is GDPR compliant.
See more: 11 Best WordPress GDPR Plugins to Create a GDPR Compliant Site.
While Google Tag Manager enables you to track new data, there’s actually a much easier way to do the same thing.
You can avoid copy-pasting code and figuring out how to use GTM altogether. Below, we’re going to share the process we use that’s so much simpler and just awesome.
The BEST WordPress Google Tag Manager Plugin
If you’re looking for a quick way to start tracking advanced statistics right away, then MonsterInsights is the tool for you.

MonsterInsights is the best Google Analytics plugin for WordPress. It makes it incredibly easy to connect your WordPress site to Google Analytics. Then it automatically fetches data from Google Analytics and transforms it into reports that are easy to read and understand.
With MonsterInsights, you can set up advanced tracking to get data like:
- eCommerce statistics
- Link clicks
- Button clicks
- Form conversions
- and more!
You can enable these features with just a few clicks and won’t ever need to use an additional Google Tag Manager. All of this data can be accessed right inside your WordPress dashboard.
Here’s why we recommend using MonsterInsights:
- You can set up advanced tracking without touching a line of code
- You don’t have to spend several hours learning how to use Google Tag Manager
- There’s no need to go through the lengthy process of setting up individual tags on your WordPress website
- Removes any risk of making a mistake and messing up tracking
- You never need custom HTML, PHP, Javascript, none of that
That said, we’re going to show you how to set up MonsterInsights on your site.
How to Set Up MonsterInsights
Step 1: Install MonsterInsights on Your Site
To get started, head over to the MonsterInsights website and sign up for an account. There’s a free version of MonsterInsights in the WordPress plugin repository.
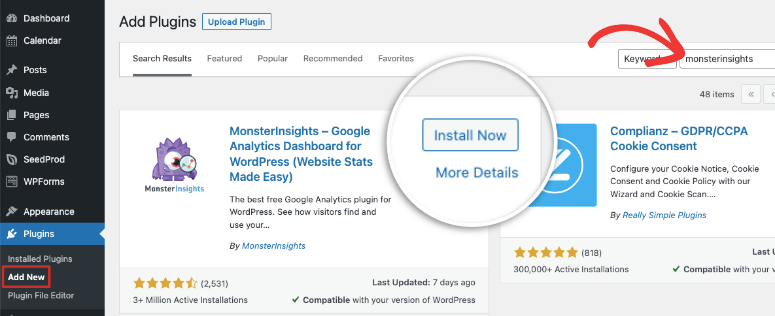
It’s pretty awesome to connect your site to Google Analytics for free but if you want advanced tracking, you need the pro version.
Inside your MonsterInsights account, you’ll get a plugin download file and a license key.
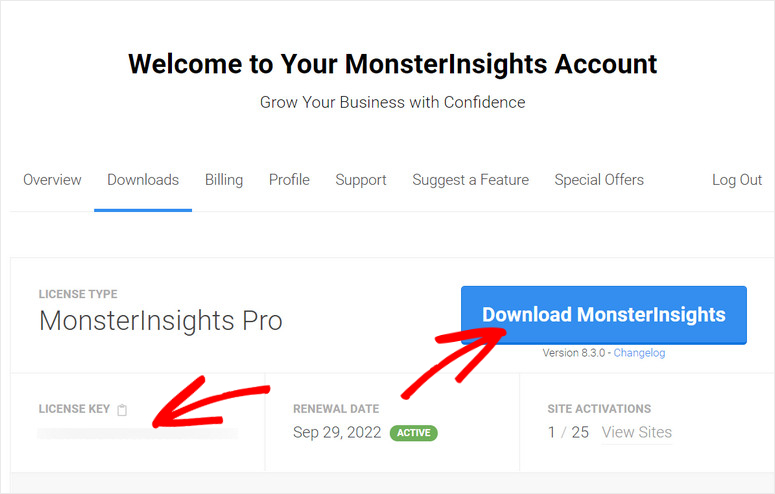
You need to upload this plugin to your WordPress site. Never done this before? Follow our guide: How to Install a WordPress Plugin – 3 Methods (Step by Step)
Step 2: Connect to Google Analytics
You’ll first need to have a Google Analytics account. If you don’t, you can sign up for a free Google Analytics account. It only takes a minute.
Now back on your WordPress site, once you activate the MonsterInsights plugin, the setup wizard will launch. It’s really simple to follow and we recommend using the wizard so that you cover all bases.

You’ll also get a chance to enter the license key to connect to your Pro account.
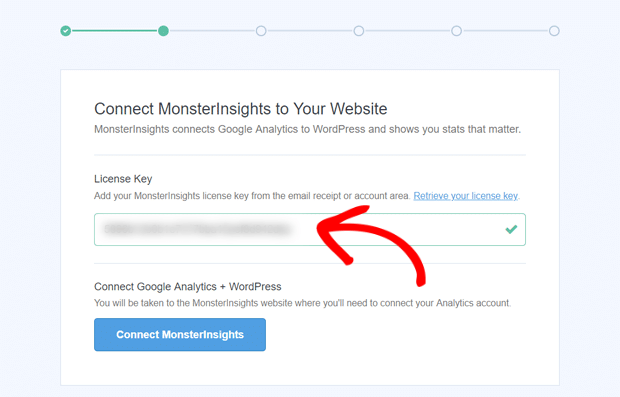
Once the account setup is done, you simply need to click on the Connect MonsterInsights button here in the wizard. Make sure you select the same Google account name you used to create your Google Analytics account.
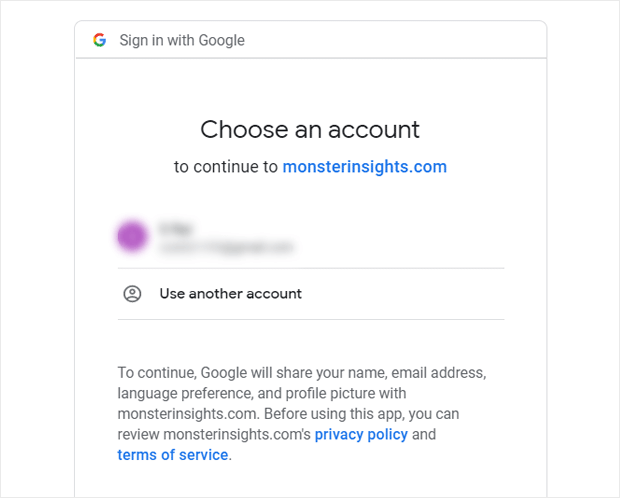
Then, grant it the necessary permissions and the rest will be taken care of for you.
Step 3: Set Up Advanced Tracking
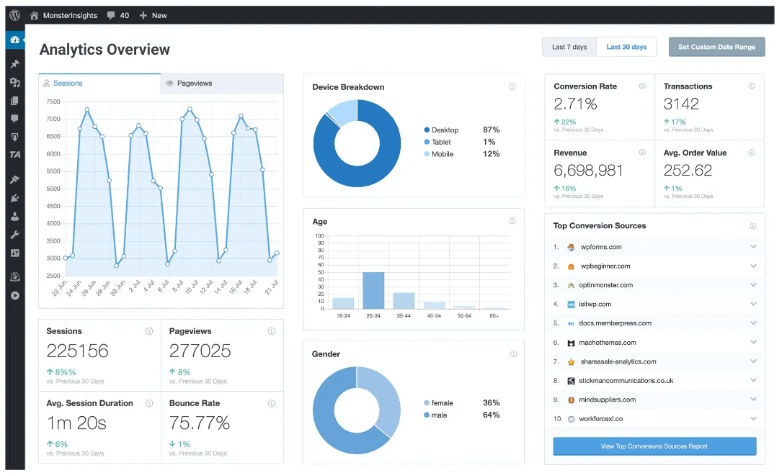
Now comes the best part! Once you’ve connected your website to MonsterInsights, you never have to leave your site to see your website’s performance.
In your WordPress dashboard, you’ll see all your data and metrics right there. You can open the Insights tab in the left menu to see more.
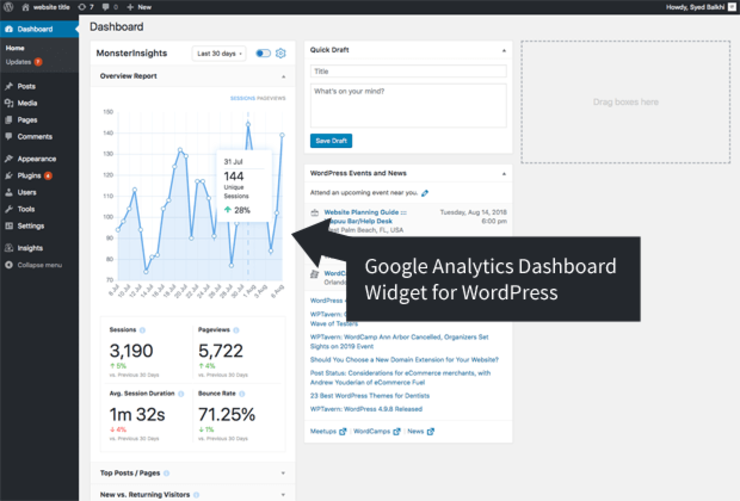
You can view statistics that include:
- Sessions
- Pageviews
- Bounce Rate
- Conversion Rate
- Conversion sources
- Location
- Age
- Gender
- Device
…and so much more.
This will help you figure out which pages are getting more attention, whether your homepage is designed properly or needs improvements, which forms are working the best, and so on.
With MonsterInsights, you have the power to set up advanced tracking with the click of a few buttons. There’s no need to install Google Tag Manager, no need for complex setups, and there’s also no need for learning anything new!
MonsterInsights is beginner-friendly so your data is presented in simple words and in neat reports. It’s perfect for small-time bloggers to big-time businesses.
Let’s show you how easy it is to set up advanced trackers here.
1. Track Link and Button Clicks
By default, Google Analytics doesn’t track clicks on links and buttons. With Google Tag Manager, you need to manually set up a tracking code for every link and button you want to track.
Not only is this tiresome, but it can also bloat your website with unnecessary code.
With MonsterInsights, there’s no need to set up extra tracking and coding.
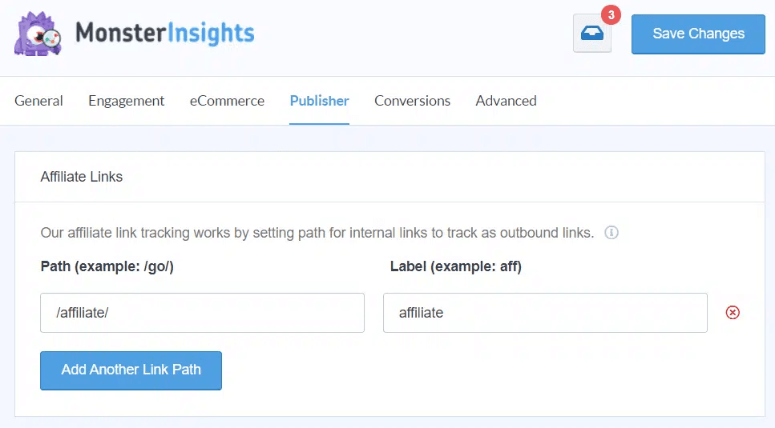
You’ll find tons of addons to track anything you need in Google Analytics.
You can even track custom links. To learn more, check out this guide from MonsterInsights: How to Track Link Clicks in Google Analytics 4 and WordPress.
2. Track eCommerce
To track enhanced eCommerce data, you usually need to take a couple of days to set up the complex tracking requirements inside Google Analytics.
Not with MonsterInsights. It comes with an eCommerce addon that you simply need to activate and the rest is taken care of.
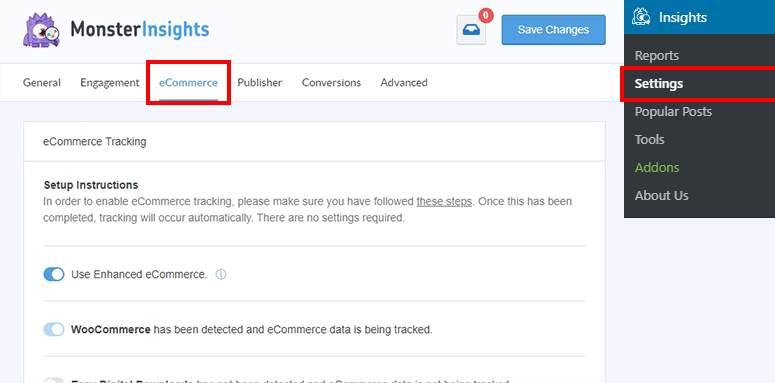
You can access this data under the eCommerce tab. You’ll start seeing data on revenue, conversion rates, popular products, conversion sources, and much more.
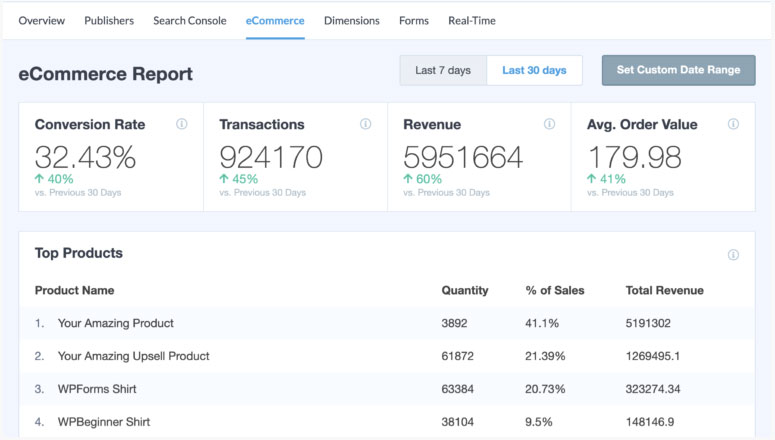
This will help you understand how your users behave and interact with your websites. You’ll be able to see which products are popular, which products are added and removed from cart, and how much time they spend before they complete a transaction.
- Set up affiliate link tracking to grow your revenue
- Track file downloads on your website
- See which outbound links get the most clicks
- See which products people buy a lot by tracking add-to-cart buttons
- Add call-to-action (CTA) button tracking to boost conversions
- Find out whether people click on a mail or telephone link
Follow our guide: How to Set Up Google Analytics eCommerce Tracking for WooCommerce
3. Track Forms
Tracking all your website forms is super simple with MonsterInsights. Simply activate the form addon and the plugin will automatically track any form you publish on your site. You won’t have to set up tracking for each form you create.
In your MonsterInsights dashboard, open the Forms tab and you’ll see all your forms listed along with impressions, conversions, and conversion rates.
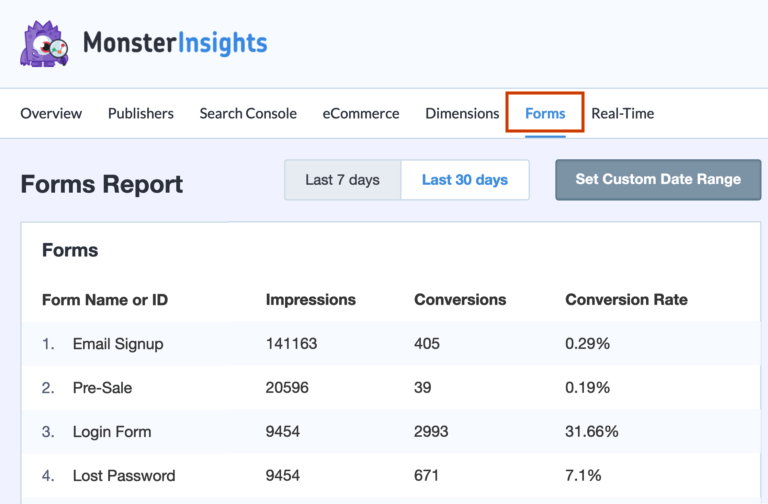
You can track contact forms, popup forms, login forms, and so much more. Follow our guide: How to Set Up WordPress Form Tracking in Google Analytics
4. Scroll Tracking
Do you want to know how far your users scroll down your pages before they stop reading? Knowing these details helps you boost conversions. You can place CTAs in the right place to make sure your users see them.
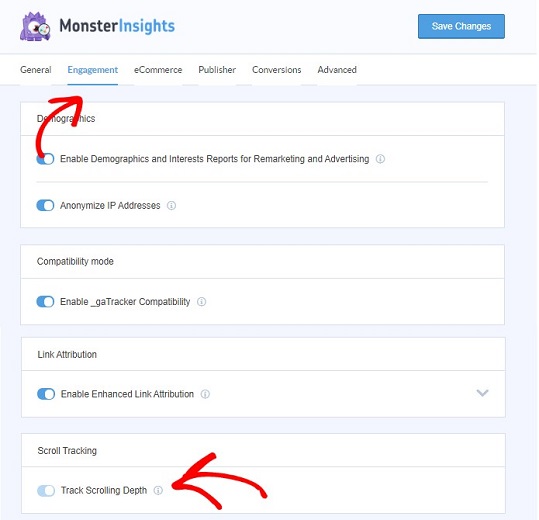
This tracking is automatically enabled for you. You can choose to disable it inside your MonsterInsights dashboard.
See our guide: How to Enable Scroll Tracking in WordPress With Google Analytics
With that, we’re confident that you know how to install and use MonsterInsights to track advanced data just like Google Tag Manager.
You can continue to explore more reports and addons on your own. It’s really so simple, you won’t need a tutorial. But if you do, you’ll find plenty of MonsterInsights tutorials on the MonsterInsights YouTube channel.
Knowing what MonsterInsights has to offer, it’s no wonder the plugin has 3+ million active installations on WordPress.
Check out the latest MonsterInsights review here.
If you are looking for similar tools, check out this article on 7 Powerful Google Analytics Alternatives for WordPress.
BONUS: Alternative to Google Tag Manager Plugin
If you’re looking for more options, we recommend ExactMetrics.
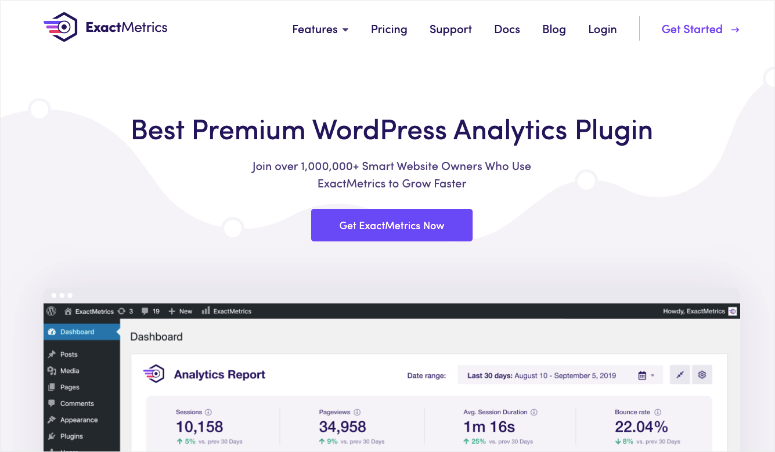
ExactMetrics is a premium Google Analytics plugin for WordPress and is a really close match to MonsterInsights.
It comes packed with powerful features and a user-friendly dashboard. You can track all sorts of advanced data including:
- eCommerce
- Affiliate links
- Ads
- Forms
- SEO and keywords
- File downloads
- Custom events
You’ll get automated email summaries as well sent straight to your inbox so that you can stay updated on your site’s progress.
Learn more about this plugin here: ExactMetrics Review.
You might also want to see our comparison: ExactMetrics vs MonsterInsights: Which Is Better?
There are also GTM plugins like Duracelltomi but we recommend MonsterInsights because it just simplifies everything for you and gives you exactly what you need to track, optimize, and grow your site.
That’s all we have for you today. We hope you found this guide helpful.
Up next, we have more helpful guides for you:
- How to Set Up Google Analytics 4 in WordPress
- How to Track User Journey Before a User Submits a Form
- How to Create UTM Codes to Track Your URLs in WordPress
This will help you have more options to track your site’s performance and activity.

Comments Leave a Reply