
Are you looking to create a custom user registration form in WordPress? Great idea! By default, WordPress’ user registration form is pretty boring. Why not spice it up with your personal branding?
In this article, we’ll show you how to create a custom user registration form in WordPress, step by step.
Why Bother Adding a Custom User Registration Form?
It’s all about branding, Baby! The default WordPress user registration form shows their branding, not yours. It doesn’t mesh with the rest of your website’s overall “look.”
You can also add a custom user registration form to any page on your WordPress website. Plus, you can set it up so it redirects users once they’ve registered; meaning, you can send users to any landing page you desire. This is a great way to collect leads if, say, you redirect users to your email optin page.
So, now that you know the “why,” let’s move onto the “how.” From here on out, we’ll teach you exactly what you need to create a custom user registration form in WordPress.
How to Create a Custom User Registration Form in WordPress
Start by downloading the WPForms plugin. Then, install and activate it. Not sure how? No problem. You can hop over to our guide on how to install a WordPress plugin to get that all sorted out.
Keep in mind that you’ll need the Pro plan (or better) of WPForms in order to build a custom user registration form in WordPress. Fear not though. By using our coupon code, SAVE10, you can take 10% off of the cost right off the bat.
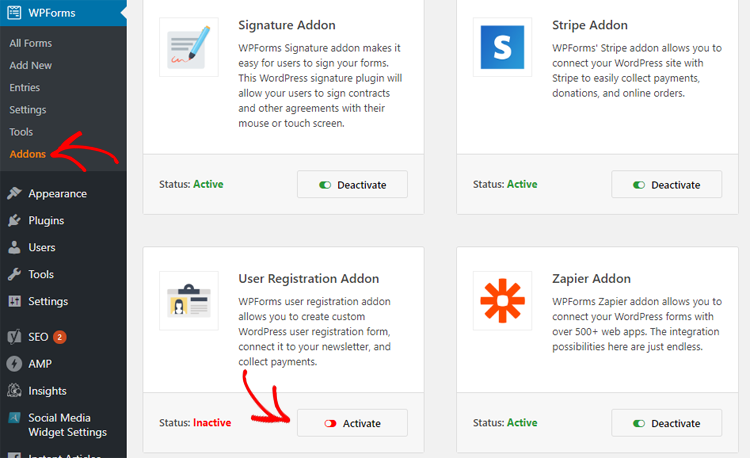
After activating the plugin, head over to WPForms » Addons to install the User Registration Addon. Simply click on “Install Addon” and then hit “Activate” once it’s installed.
All set? Awesome. It’s time to start creating your custom user registration form in WordPress.
Launch the WPForms builder by heading over to WPForms » Add New.
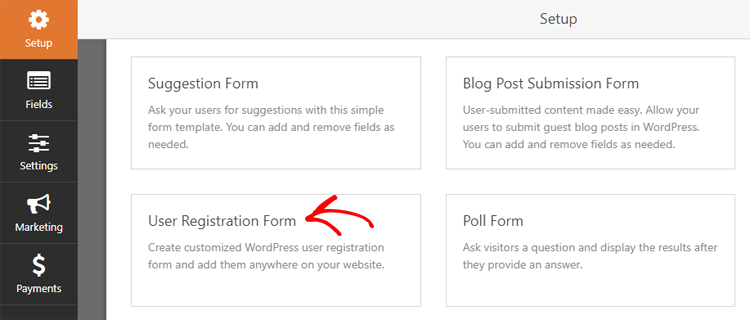
Name your form, and then select the “User Registration Form” template.
This sample / template will have the following user registration fields pre-added:
- Name
- Username
- Password
- Short bio
If you like what you see, you can be on your merry way to the next step.
If you’d like to rearrange the fields, you can do so with the drag and drop feature. Or, you can add additional fields by dragging them over from the left-hand column. Or, you can remove any fields you’re not satisfied with. WPForms is known for its customization features. Have fun with it.
Once you’re ready, hit Save, and head to the next step.
How to Add Custom Fields to Your User Registration Form
WPForms has a nifty feature that lets you connect custom user profiles to your user registration form. However, to do this, you’ll need to make adjustments to your WordPress site: namely, you’ll need to add additional user profile fields.
To accomplish this, you’ll need an additional WordPress plugin.
Any plugin that uses standard WordPress custom fields to add and store meta data will work with WPForms. However, for this tutorial, we’re going to use User Meta Manager.
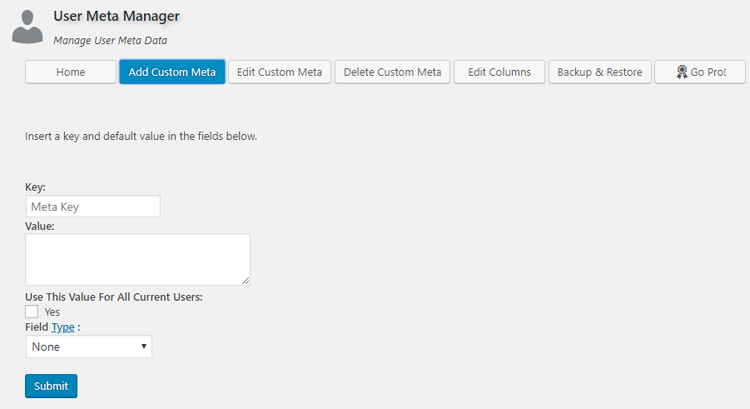
Download, install, and activate the User Meta Manager plugin. After its been activated, head to the Users » User Meta Manager page and click on “Add Custom Meta.”
You’ll need to enter a key for the custom user profile field to be recognized internally. Then, you’ll need to choose a field type. For this tutorial, we’re using a URL field in order to add a Facebook profile address.
Under “Label,” you’ll need to enter a label to describe what the field is. This will be visible to users on your website when they’re filling out your form.
To add the custom meta field, click “Submit.” Then head over to Users » Your Profile to see the magic in action.
Now that you’ve made a custom user profile field, it’s time to add it to the custom user registration form in WordPress via WPForms. To do this, you’ll need to go to WPForms » All Forms and edit the form you saved earlier (or create a new one).
Once you’ve got your form on screen, click on a field from the left-hand column and drag it onto your form. For this tutorial, we’ll be adding a Website / URL field to the form.
Next, since you added a Facebook profile URL option for your users, you’ll want the new field to reflect that. Click on the field to edit it. Then, change the label from “Website / URL” to “Facebook Profile URL” from the Field Options section on the left-hand side. You can also add a description, if needed.
Save your form once you’re done.
Next, you’ll need to click on the Settings button to access the Advanced form settings and field mapping. On this page, click on the User Registration tab.
WPForms will now show your form fields with a drop down menu below them to select the WordPress registration field to map it with.
WPForms will automatically map your default fields like Name, Email, Password, etc. You can also select a page where you want users to be redirected to once they submit the form.
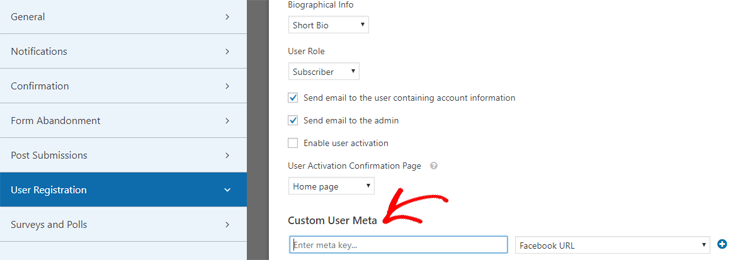
From here, scroll down to the “Custom User Meta” section. Type in the custom meta key you created earlier and then select the form field you want to map it with.
Once that’s done, click Save, and head to the last step.
How to Add Your Custom User Registration Form in WordPress
This is the easy part. It’s smooth sailing from this point onward.
With WPForms, you can add forms easily and quickly to your WordPress website’s posts, pages, or sidebar widgets.
For this example, we’ll create a new Page.
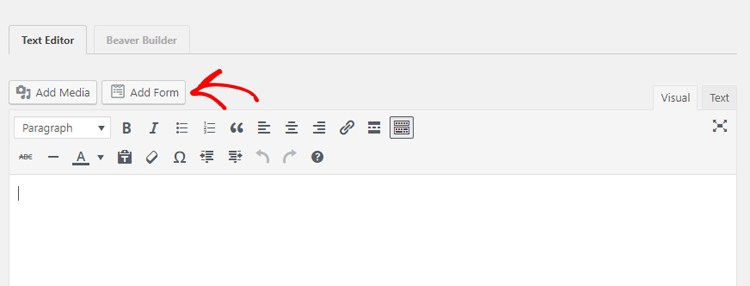
On the Page edit screen, you’ll find a WPForms button right above your toolbar. Give that sucker a good hard click.
Now, there should be a popup on your screen. Select the form you made from the drop down menu and then click on the Insert Form button.
Blam! Now a shortcode for your form is on your page. Hit “Publish” (or “Update” if you’re editing an old Page), and your form will be live on your site.
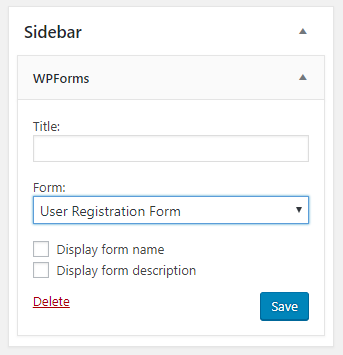
Prefer a sidebar widget? No problem. Just go to Appearance » Widgets and drag the WPForms widget to your sidebar area.
Select the form you made from the drop down menu in the widget’s settings. Then, click Save. That’s it! Now your user registration form is in your sidebar.
Also, check out how to create an AMP form in WordPress.
We hope this article helped you learn how to create a custom user registration form in WordPress.
If you’re looking for more awesome things you can do with WPForms, check out our posts on how to create a survey in WordPress and how to create a registration form with PayPal payments.

Comments Leave a Reply