Did you know that a DDoS attack can bring your website to a grinding halt just minutes after it’s launched?
Plus, these kinds of attacks have become more frequent. In fact, there have been over 17 million DDoS attacks launched so far.
By familiarizing yourself with DDoS (distributed denial-of-service) and taking measures to prevent them, you’ll be saving yourself tons of trouble down the road.
In this post, we’ll explain what happens in a DDoS attack. Then, we’ll show you 5 easy steps you can take right now to stop an ongoing attack and secure your site against it.
Decoding a DDoS Attack
DDoS attacks aren’t like regular hacks. In most cases, a hacker gains access to your site and then uses it for nefarious purposes.
But in a DDoS attack, hackers attack your site from the outside, meaning they don’t actually need access to your site. They don’t steal anything or inject any malicious script into your site.
So what are they specifically doing to harm your site from the outside?
Let’s take a look at what exactly happens in a DDoS attack.
What Is a DDoS Attack?
In a DDoS (distributed denial-of-service) attack, hackers send huge amounts of traffic to your website to exhaust your server. This causes your site to become unresponsive and inaccessible to visitors.
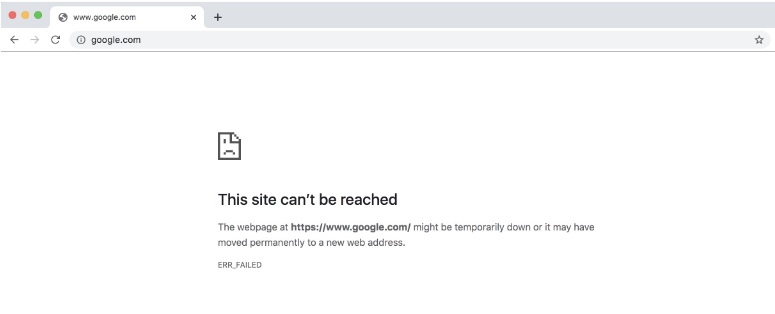
Visitors will either find your website extremely slow or they may see error messages like ‘This site can’t be reached’ or ‘Your connection has timed out’.
And you may be wondering, “How exactly does this work?”
Every time a visitor opens your site, their browser (such as Chrome or Firefox) makes a request to your website’s server to fetch the data it needs to display the website.
All web servers have a limited number of resources to process these requests. So if it receives too many requests at one time, the server can get exhausted and unresponsive.
And, in turn, your site goes offline or visitors won’t be able to load your website properly.
Hackers use this to their advantage, and it’s how they run DDoS attacks.
Now let’s look at how hackers set up DDoS attacks.
How DDoS Attacks Work
Here we’ll walk you through the general stages of a DDoS attack (though the specific steps may vary depending on your site and the individual hacker).
1. Set up a botnet: First, they hack into all sorts of devices like computers and mobile phones and install their malware. And they can let them sit for a long time without the owner detecting a thing.
This is called a botnet which is their hacked network of machines.
Nowadays, hackers don’t even need to go through the trouble of setting this up. Botnets can be hired on the dark web.
2. Launch Attack: Next, when they’re ready to launch their attack, they get their botnet to send requests to your website. This can be thousands to hundreds of thousands of requests flooding your server.

When your server can’t handle the load, it slows down or becomes unresponsive, and your site becomes inaccessible to visitors.
You may have security measures on your site such as a security plugin, but it can still come under a DDoS attack. This is because hackers externally target your server’s resources and don’t need to break into your site to cause damage.
Some attacks may be unsuccessful, but some can cause irreparable damage.
Before we teach you how to detect and protect your site against DDoS attacks, let’s clear on why hackers go through all this trouble in the first place.
What’s the Motive Behind DDoS Attacks?
There are different reasons and motives behind these attacks.
Hackers may be out for financial gain and demand a ransom be paid in Bitcoin. Or they may be competitors or users seeking revenge against an unfavorable policy.
They could also be politically motivated or want to spread a message. And then there are some hackers who do it out of boredom and because they can.
Luckily, there are ways you can prevent these attacks, and if you’re under attack, it can be stopped.
How to Detect a DDoS Attack on Your WordPress Site?
There are classic signs that help you spot a DDoS attack. You’ll likely see that your website doesn’t load and instead displays a message that the connection has timed out.
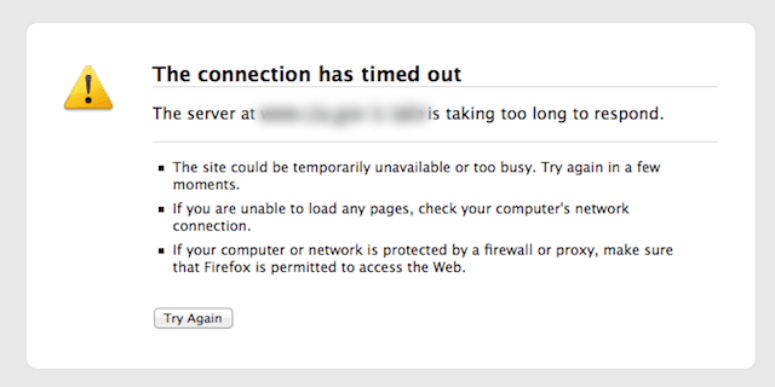
Other signs include:
- Your website is responding slowly
- Your website is unresponsive
- Visitors complain of problems accessing the website
- You’re unable to upload or publish any content
- You’re unable to access your WordPress admin dashboard
When you notice these signs, we recommend that you take the following steps immediately:
1. Check Your Website’s Data Usage
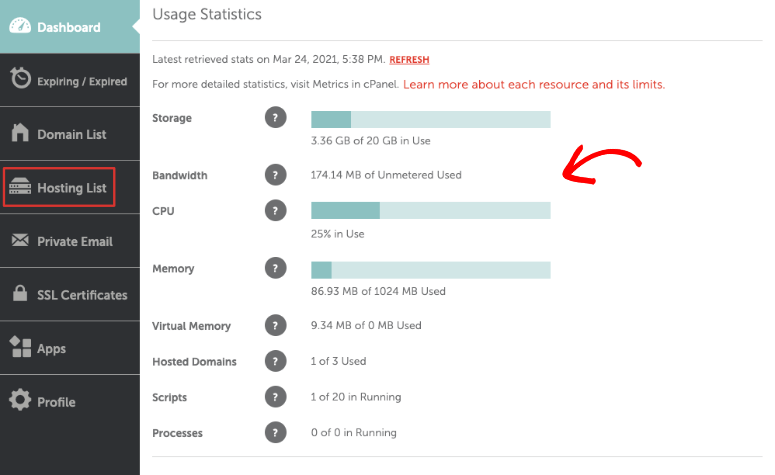
If your website is under attack, it will use up your website’s resources. And you can easily check how much has been used in your web hosting account.
Simply log into your web hosting account and under the ‘Manage Hosting’ tab, you should see the usage statistics:
In case you’re unable to find it, contact your web host’s customer support for guidance.
Usually, it takes a lot of traffic to reach these limits. So, if you see that your CPU usage and bandwidth have reached their limit, it’s most likely a DDoS attack.
2. Check Your Website’s Traffic
As we explained, in a DDoS attack, hackers send thousands of requests to your website. This is nothing but traffic to your site.
You can log in to your Google Analytics account to check if you’ve received a sudden spike in traffic. You can see your active users in real-time under the Reports » Realtime tab.
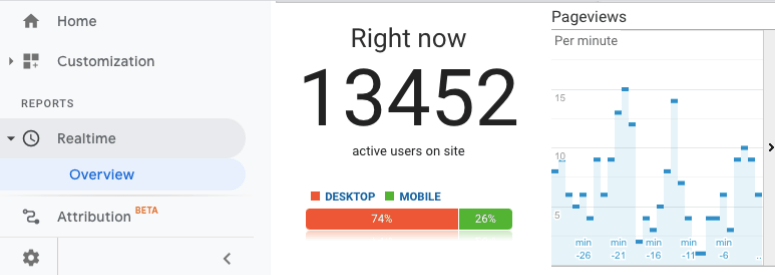
Keep in mind, that it may take some time for it to reflect your traffic statistics. You can also check how many users you get regularly under the Audience » Active Users tab.
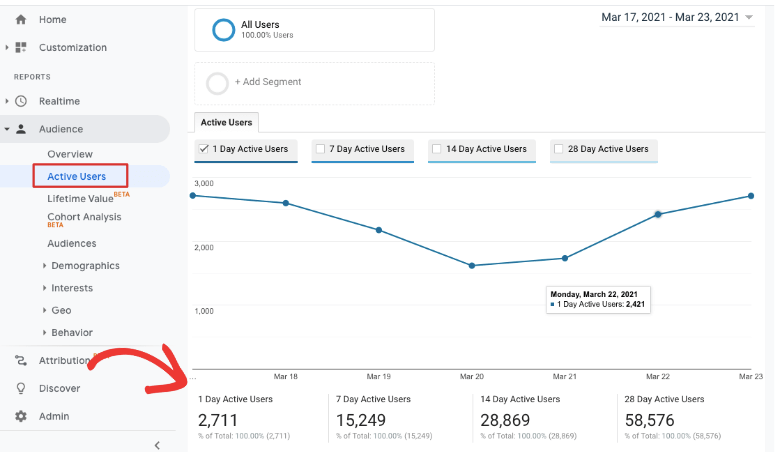
So if you see an unusually high amount of traffic, it’s most likely a DDoS attack. You’ll want to take action fast to prevent huge losses to your business.
How to Stop and Prevent a DDoS Attack?
DDoS attacks aren’t like normal hacks so the usual web security measures simply don’t work. The best way to stop these attacks is by:
1. Using a hosting service that is prepared for DDoS
2. Installing a server-level firewall on your site
1. Using a Reliable Hosting Service
DDoS attacks happen at a server level that is controlled by your web host. If they aren’t prepared to handle a DDoS attack, it will be much harder to stop it.
However, if you choose reliable web hosts like Bluehost, you’ll be in good hands.

Bluehost actually has customized internal tools that mitigate these attacks automatically. So in most cases, you won’t even notice the DDoS attack or the steps taken to stop it.
But large-scale attacks can slow down servers and you’ll notice that your site is under attack. In these cases, Bluehost automatically runs manual steps to stop the attack and restore their servers as soon as possible.
If you feel your site is under any attack, you should let your web host know immediately and check if they are already taking steps to stop it.
But on top of your web host’s protective measures, you can also take steps to guard your site on your own. The best way to stop and prevent DDoS attacks is with a server-level firewall.
2. Installing a server-level firewall on your site
Sucuri has one of the best and most powerful server-side scanners and firewalls.
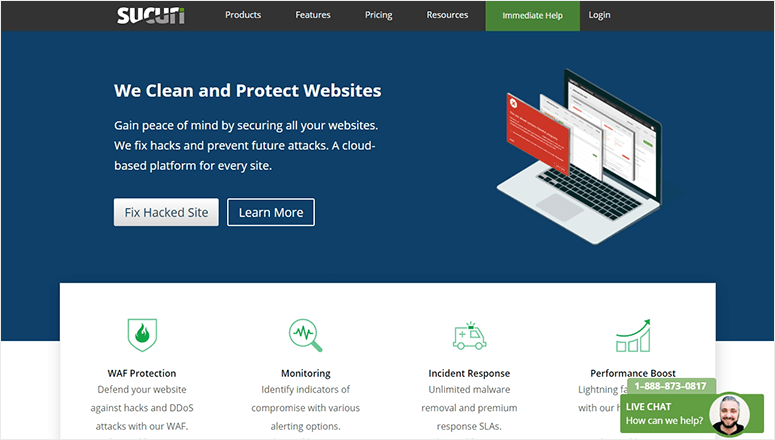
Sucuri can detect and block fake browser requests and bad bots attacking your server. Here’s what it has to offer:
- Easy to set up and install
- Gives you access to a server-side scanner and firewall to stop fake traffic without interfering with your real visitors
- Identifies malicious bots and hackers and blocks them
- Gives you emergency DDoS protection and keeps your site online during an ongoing attack
- Has built-in machine-learning technology to anticipate malicious activity and block it
Plus, they have a friendly and professional support team to help you every step of the way.
Check out our full review of Sucuri to learn more.
Now we’ll teach you exactly how to install and set up Sucuri on your website.
Step 1: Add Your Site To Sucuri
To get started, you’ll need to sign up with Sucuri. Once you do that, you’ll have access to the Sucuri dashboard.
Then you’ll need to add your website using the ‘Add Site’ button.

You’ll see a popup to enter your website’s URL and FTP details. In case you don’t know your FTP credentials, simply ask your web host, and they’ll give it to you.
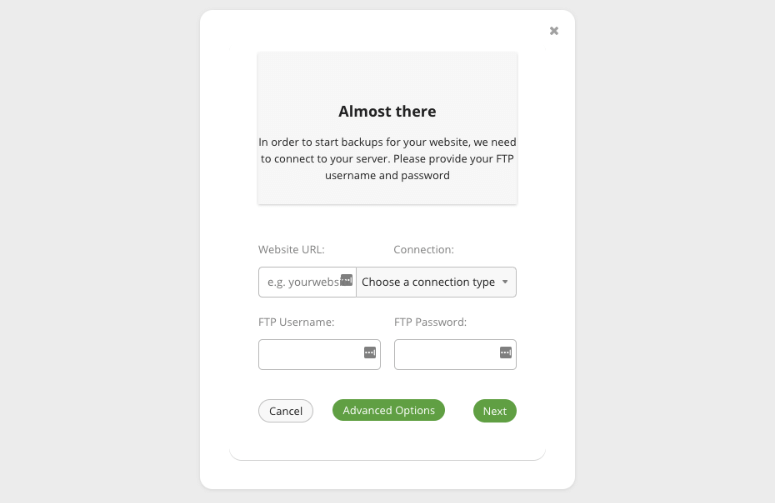
Once you submit your details, Sucuri will automatically scan your website and display the status of your site. You’ll see if it has detected anything suspicious.
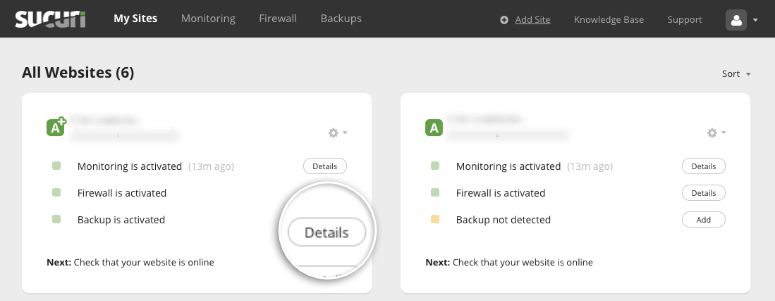
And if you want to view the details of what it found, you can use the ‘Details’ button next to the warning message.
This will take you to the Monitoring page where you can see if your website is clean or if it has detected malware.
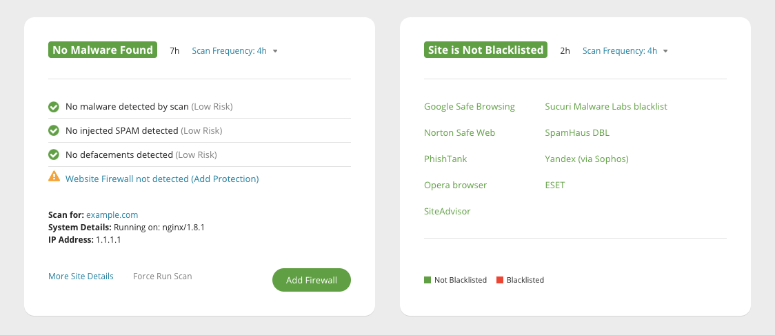
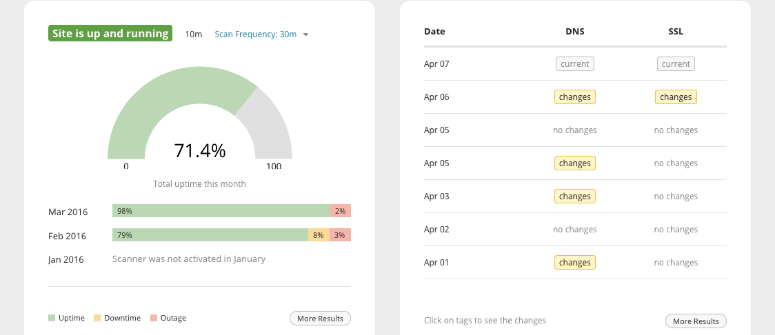
On the same page, you’ll also see if your website is currently up and running or if it’s down. In a DDoS attack, you may see that your website is down.
Step 2: Enable Sucuri Security Firewall
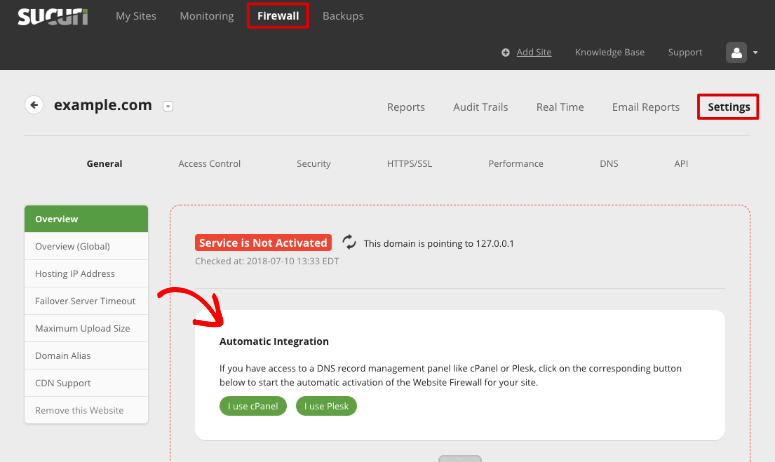
The first line of defense you need to set up is the firewall. To enable the Sucuri firewall, navigate to the Firewall tab on your Sucuri dashboard.
Select your site, and it will show you the setup instructions. Sucuri gives you 2 options to set up the firewall:
1. Automatic Integration: If you have access to cPanel or Plesk, you can select either one and enter your web host account credentials. This will grant Sucuri access to automatically set up the firewall for you.
2. Manual Integration: You’ll need to follow the instructions to set it up on your own. First, you need to click on the internal domain link provided to you to make sure that it loads.
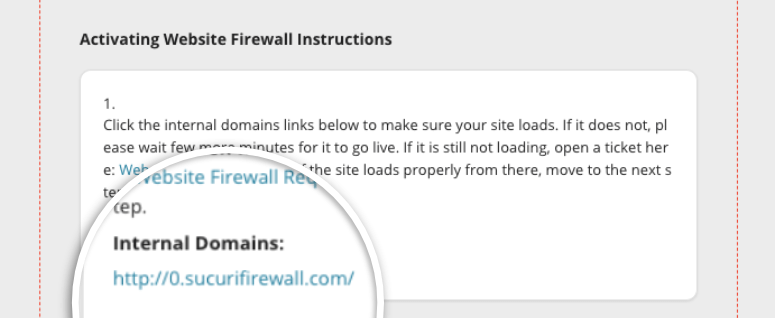
Then you’ll want to configure your DNS to point your web traffic at the Sucuri firewall. You’ll need to access the DNS records in your web hosting account and change the ‘A’ record of your site. Then enter the IP addresses Sucuri gives you.
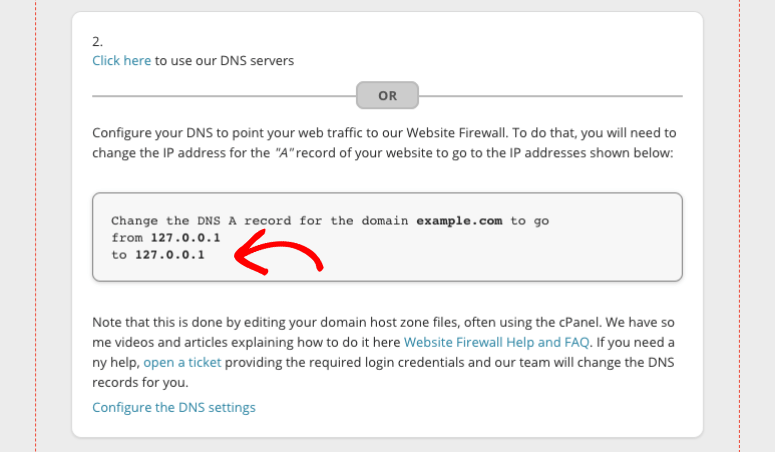
If all this is overwhelming, don’t worry.
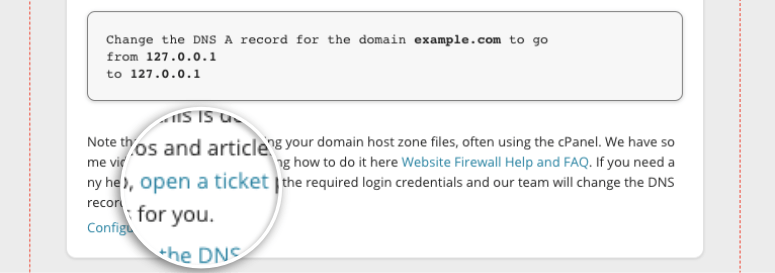
You can contact your web host or domain registrar and they will guide you through it. Or even better, you can raise a support ticket with Sucuri, and their team will help you change the DNS records.
You’ll find the link to open a ticket inside the instructions given on the same page.
Once you’re done, the changes can take up to 48 hours to reflect but usually happen in a few hours.
Step 3: Enable Emergency DDoS Protection
If your site is under a DDoS attack, Sucuri has a built-in feature to enable emergency DDoS protection.
Select your website from the dashboard and open the Firewall » Settings » Security tab.
Here you’ll see a list of measures you can enable using the checkboxes next to them. You’ll want to check the box next to ‘Enable Emergency DDoS protection’. And don’t forget to hit the ‘Save Advanced Security Options’ button to store your changes.
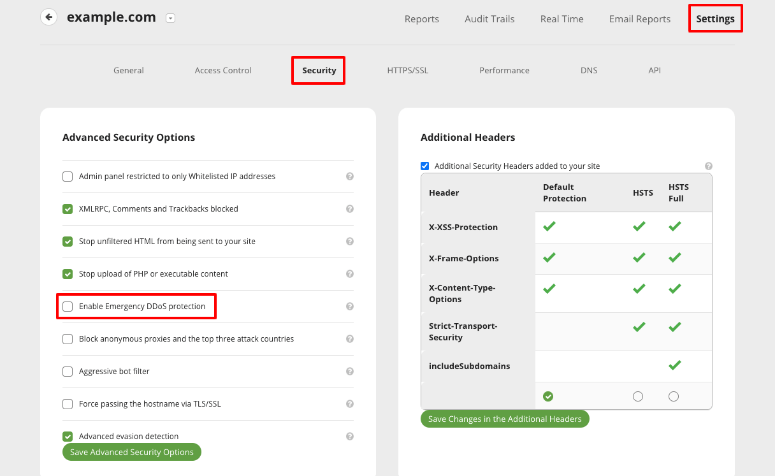
This gives your site HTTP flood protection. It basically prevents any browser that doesn’t have Javascript enabled from accessing your site, except any major search engines. This is a very helpful feature to mitigate DDoS attacks.
Once you’re sure the attack has stopped, you can disable this feature.
Step 4: Enable Geo Blocking
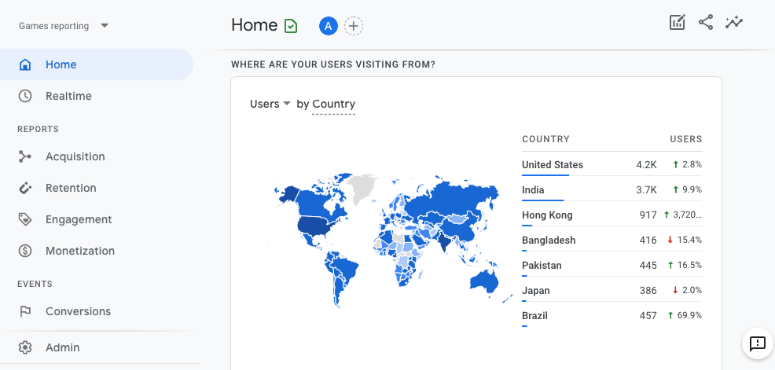
If you see spikes in traffic originating from specific countries, Sucuri lets you block these countries to stop the attack. You can view where your site’s traffic is originating from in the Home tab of your Google Analytics account.
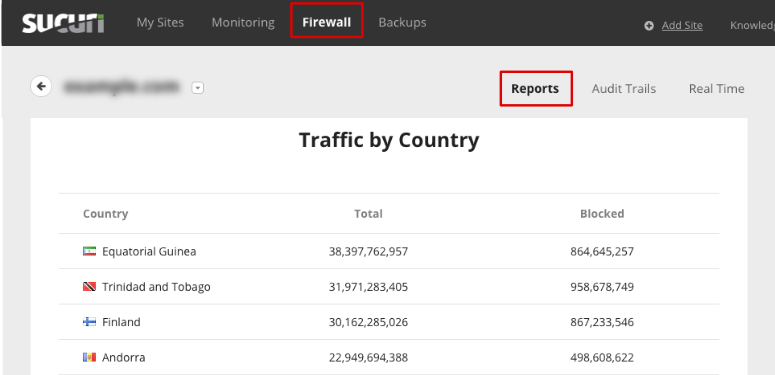
You can also see your traffic by country in Sucuri’s dashboard under the Firewall » Reports page. You’ll need to scroll down to find the Traffic by Country section:
If you don’t advertise to these countries, you can simply block them. This means any IP address in that country won’t be able to access your site.
To block specific countries, on the Sucuri dashboard, open the Firewall » Settings » Access Control page and here you can open the ‘Geo Blocking’ tab.
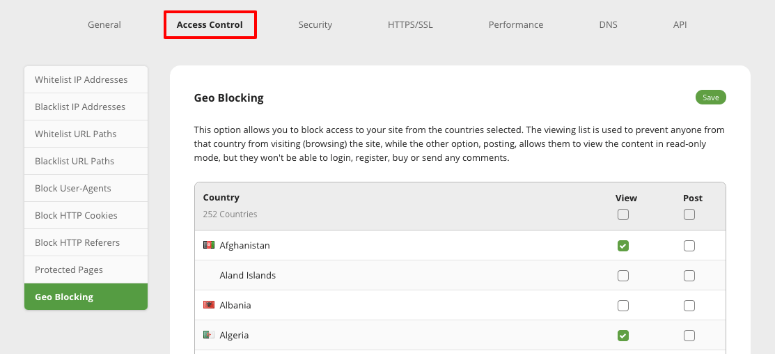
You’ll see a list of all the countries in the world and you simply need to check the box next to the ones you want to block. When you’re done, hit the green ‘Save’ button to store your changes.
Once things come back to normal, you can unblock these countries if you want so that real users originating from them can access your site again.
Step 5: Monitor Your Site
Sucuri’s firewall will protect your site and block any attacks by hackers and malicious bots. Its server-side scanner will periodically scan your website for malware and suspicious activity.
You can view your site’s details under the Firewall » Reports page. You’ll see how many attacks Sucuri has blocked, average traffic per hour, and traffic by country, along with other helpful charts and statistics.
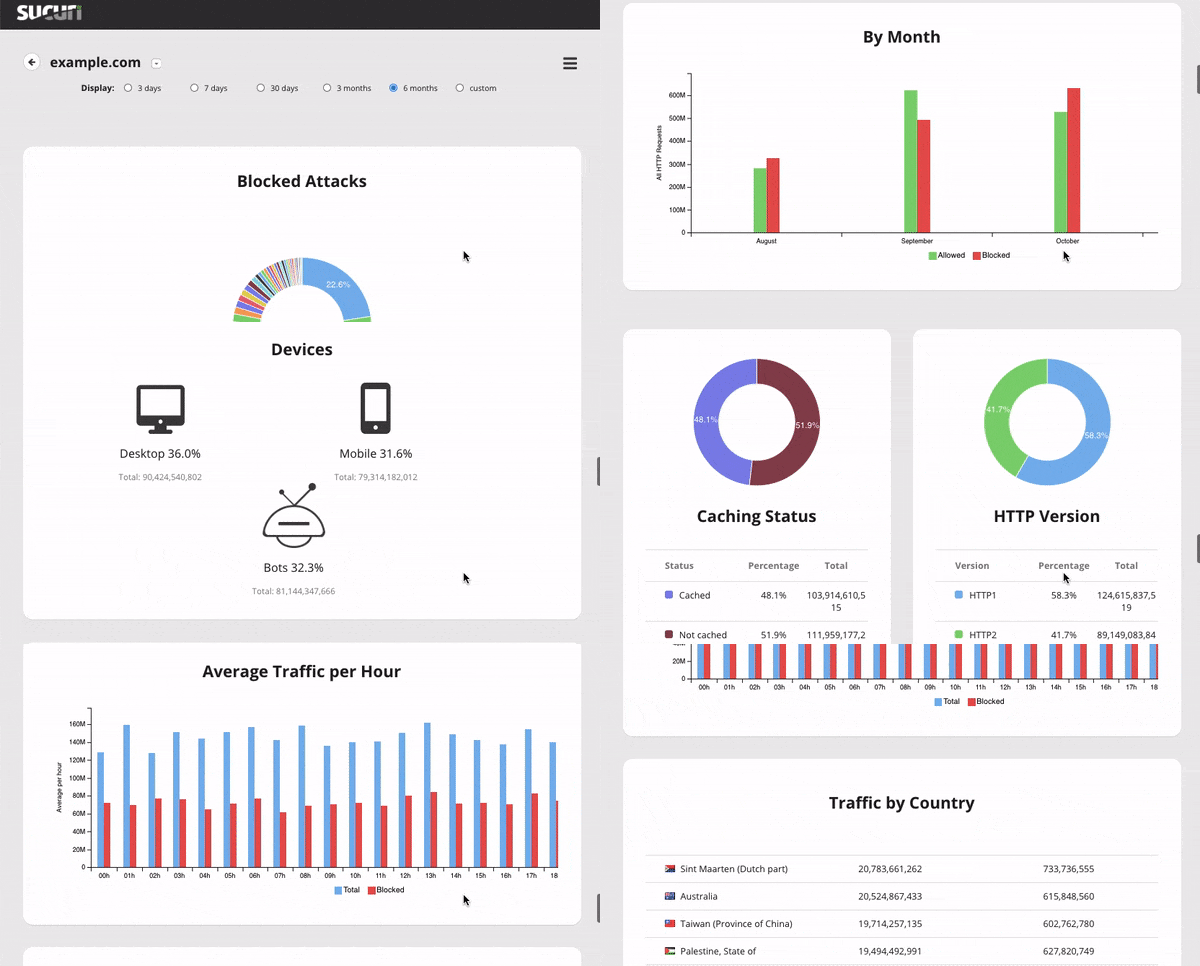
That way, you can monitor your site on a regular basis and prevent these attacks.
And with that, your site will be protected not just from DDoS attacks but all other hacks as well like redirect hacks and SEO spam.
And if you face any hiccups with your security, you can always reach out to the Sucuri support team and they’ll help you out.
How to Get Added Protection for Your Site
Security plugins like Sucuri give you a robust security system for your site. However, hackers are always looking for new ways to attack your site. Plus, there are other things that can go wrong which can lead to a broken site.
To be prepared in all circumstances, here’s what we recommend:
1. Backup your site – It’s important to have regular backups of your site so all your information is stored safely. When things go wrong, you can restore your backup quickly and get back to business.
For that, we highly recommend using Duplicator or UpdraftPlus:
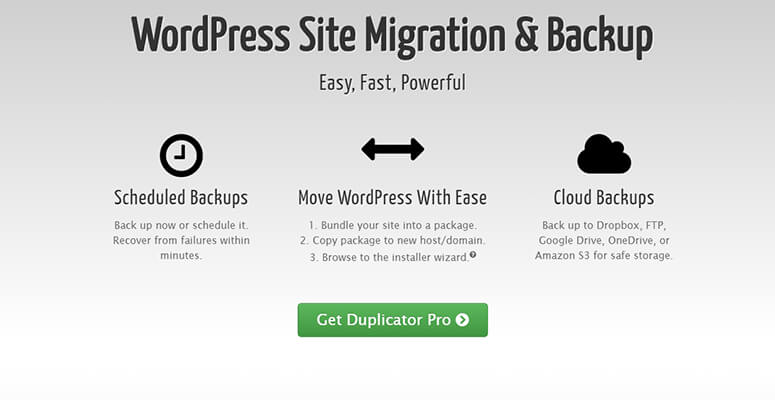
Duplicator is the best backup plugin for WordPress. It lets you make backups of your site for free. With the pro plan, you can also manage, schedule, and automate backups for your WordPress site. And if you run into any problems, you can restore an older version of your site with the click of a button.
2. Install an SSL certificate – An SSL certificate encrypts any data sent to and from your site. So even if hackers get their hands on it, they can’t read it. You can get an SSL certificate with your web host (such as Bluehost) or with Really Simple SSL.
With these measures in place, your site will be better protected. Plus, you’ll be in a better position to face any issues that come along.
We hope you found this post helpful. And if you want to secure your website further, here are 2 posts that will help you do that:
- The Complete WordPress Security Guide (Beginner Friendly)
- How to Perform a WordPress Security Audit (Step by Step)
These posts will help you power up your website’s security and make it super hard for hackers to attack your site from the inside, as well as from the outside.

Comments Leave a Reply