Do you want to make sure your WordPress site is safe by creating a backup?
A backup can save you from losing your data and you can restore your website from it if you should ever need to.
Now taking a backup is easy. Everything can be done at the click of a button and can even be scheduled to run automatically, provided you have the right tools.
In this tutorial, we’ll show you how to easily back up your WordPress site using the best WordPress backup plugin.
Why Do You Need to Back Up Your WordPress Site Regularly?
As a WordPress user, it’s critical for you to back up your WordPress files and databases regularly to a secure location. In case data loss happens due to an accident, malicious attack, or another catastrophe, making regular backups can be a lifesaver.
That way you can easily restore your files and databases, even if your entire website gets hacked, corrupted, or erased.
We recommend you save these backups to multiple locations. If any of your backups are corrupted, then you have another one to recover your site easily.
If you have a content-heavy website and you add new content regularly, then you may need to set up automated backups. You’ll also want to look for plugins that use the incremental backup process where it copies and adds only the new changes made to your site instead of running a full backup each time. This optimizes the backup process speed so that there isn’t any heavy load on your server.
However, if you don’t update your WordPress site very often, then you can create manual backups using a WordPress backup plugin. Of course, you’ll need to choose the right plugin that fulfills your requirements for creating and restoring your WordPress backups.
Before we start, you’ll need to know which WordPress files you should back up:
- Core WordPress files
- Files in the wp-content folder (themes, plugins, and uploads)
- WordPress configuration files
- WordPress database
Now taking manual backups is easy. Most web hosts and plugins let you do that with a click of a button. But the real thing you need to look out for is the restore options.
When your site goes down, you should be able to restore it in minutes. It shouldn’t take a long and complex process to get your site back.
This is one of the reasons why we recommend using a premium backup solution that will make it easy not just to create backups, but also to restore them instantly.
Not convinced? You’ll want to read our guide: importance of creating regular backups in WordPress.
With that said, let’s take a look at how you can easily back up and restore your WordPress site completely without losing any files.
How to Create a Backup of Your WordPress Site
Step 1: Get the Right Backup Plugin
There are a lot of different plugins that allow you to create a backup of your site.
Our #1 pick is Duplicator.
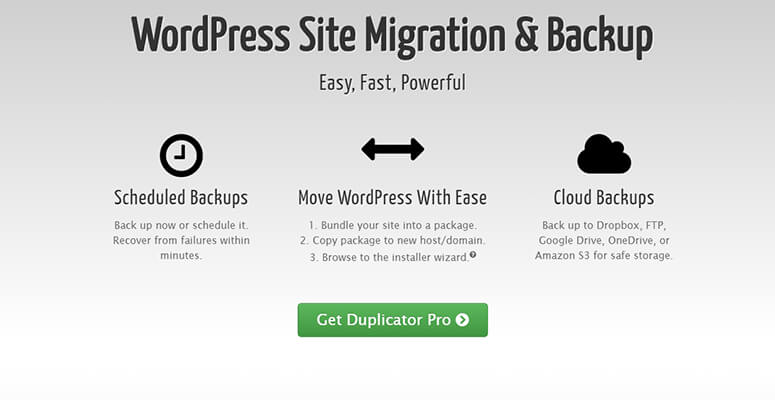
Duplicator is simple to install, easy to take a backup, and when the time comes to restore your site, you can quickly do that with a few clicks.
Whether you have a small or large site, you can use Duplicator to take manual backups on demand or set up an automated schedule.
Then, you can choose to store your backups in multiple locations that include Dropbox, FTP, Google Drive, OneDrive, or Amazon S3.
You can also use your backup copy to create a staging area to test changes before rolling them out on your live site.
Added to all this, Duplicator makes it easy to migrate your entire site to other servers or hosts.
Here are some more reasons why we pick Duplicator to create WordPress backups:
- Unlimited backups and migrations
- Easy recovery points
- Secure file encryption
- Large site support
- Server to server imports
- Multisite support available
There’s a free version of the plugin in the WordPress.org repository. With Duplicator Pro, you’ll get access to advanced features plus email notifications and professional support.
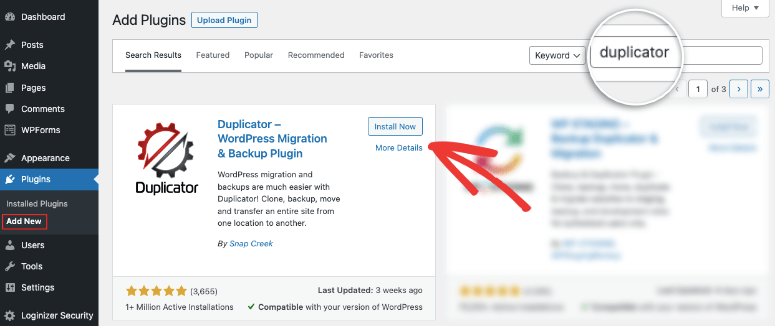
Now installing this plugin is so easy. If you want the free version, inside your WordPress admin panel, head over to Plugins » Add New page. Search for Duplicator and install the plugin. That’s it.
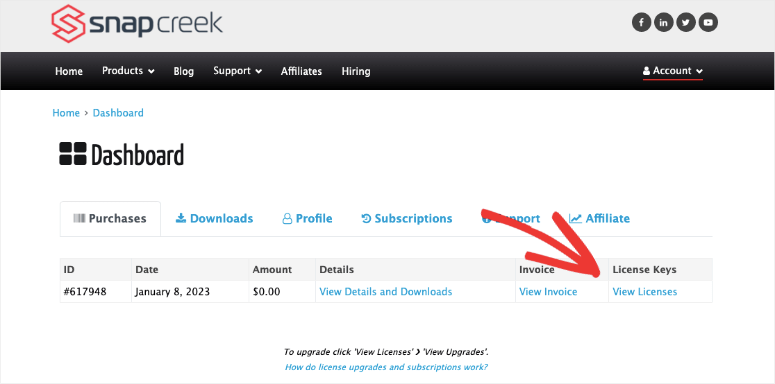
For the pro version, go to the Duplicator website. Sign up for the plan that’s best for you and you’ll get a plugin zip file.
Duplicator will email you the file and the license key. You can also access this inside your Duplicator account.
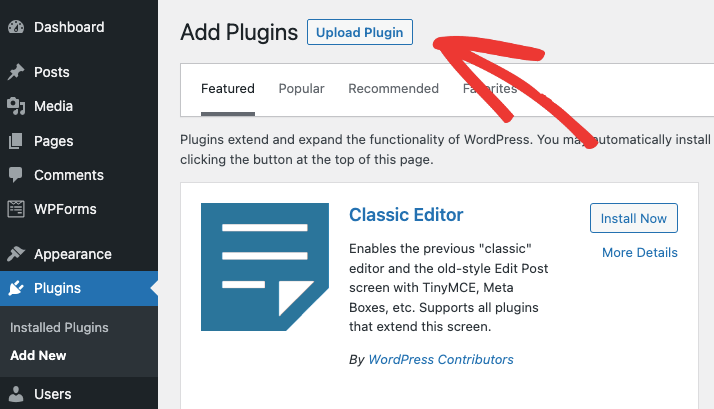
Now inside your WordPress admin panel, you need to upload this plugin file under Plugins » Add New » Upload Plugin option.
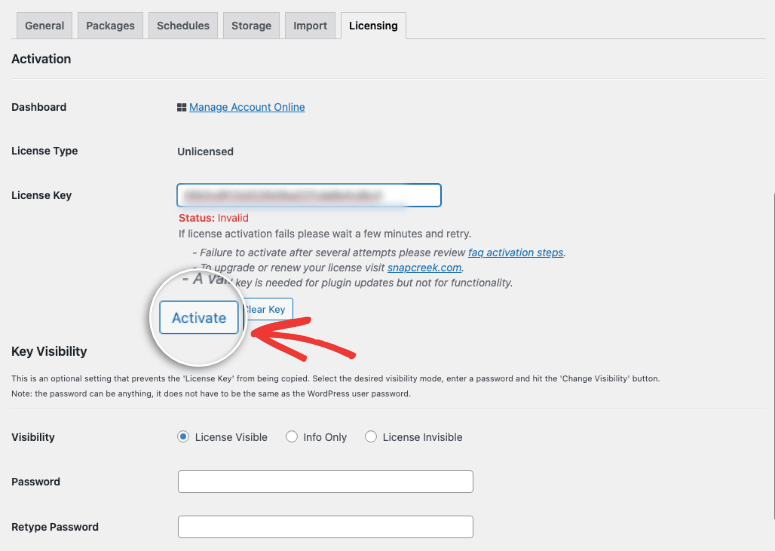
You’ll get an option to activate the plugin using the license key sent to you by Duplicator.
Now you’re all set to create backups of your site.
Step 2: Create a Backup
With this awesome backup plugin, you can set an automated schedule to create backups regularly.
All you have to do is head over to Duplicator » Schedules page.
This will open a page where you can customize your schedule.
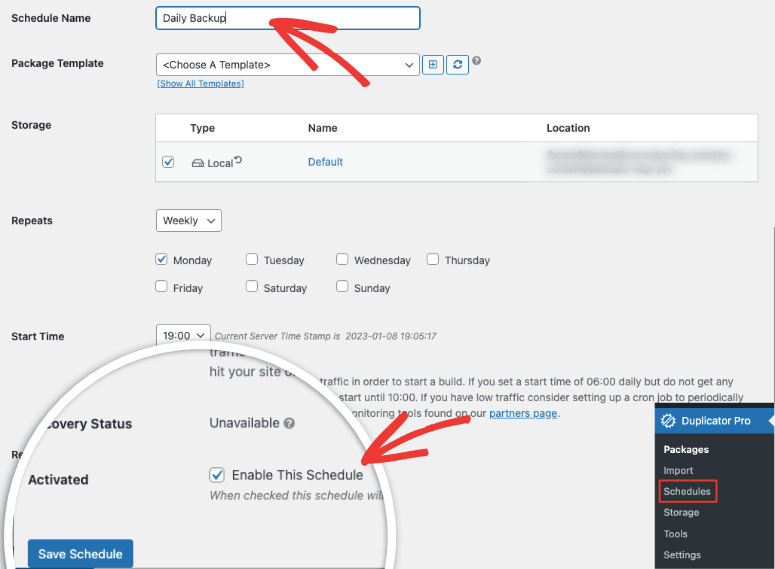
You can give your schedule a name, choose a backup location, and choose when the backup happens by day and time.
Make sure you enable and save the schedule. Then Duplicator will automatically back up your site as per your set time and day.
You can also take manual backups whenever you need. Also, if you’re using the free plugin, you’ll need to create the backup copy as automatic backups is a pro feature. For this, navigate to Duplicator » Packages tab.
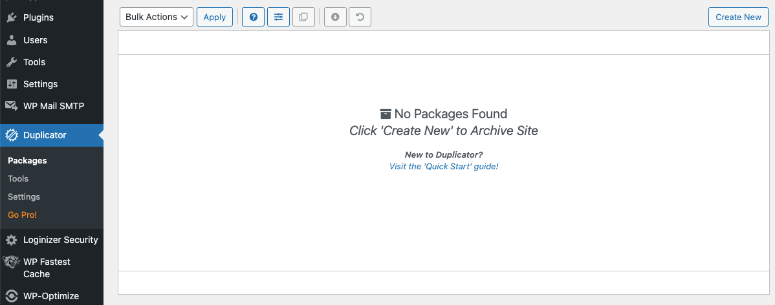
Here, you can create a new package which is essentially a backup. You’ll be taken to a setup page where you can choose the name and storage options.
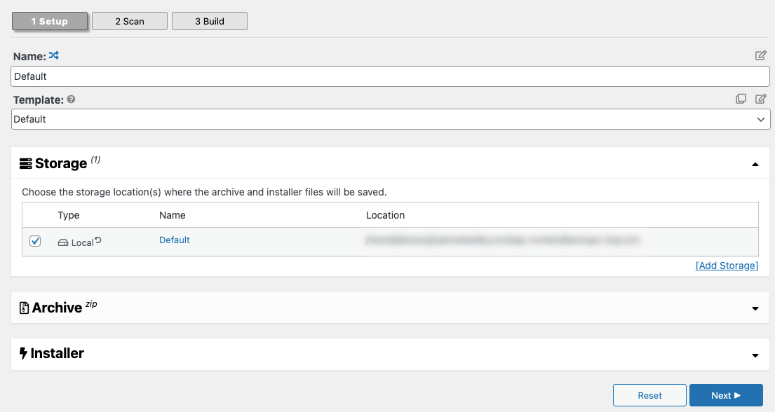
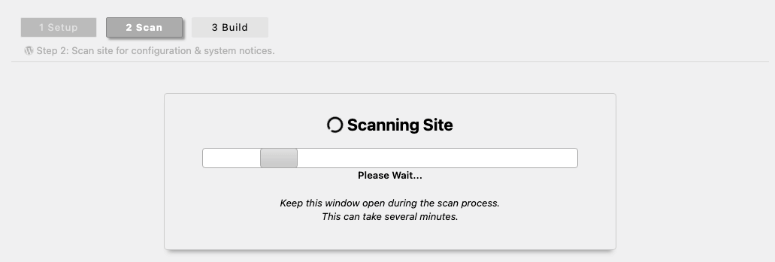
When you click on the Next button, Duplicator will scan your site completely.
Once the scan is complete, you’ll see a page with the scan details about your system, WordPress, database, and files.
If there are any notices here, you can check them to see if anything needs fixing.
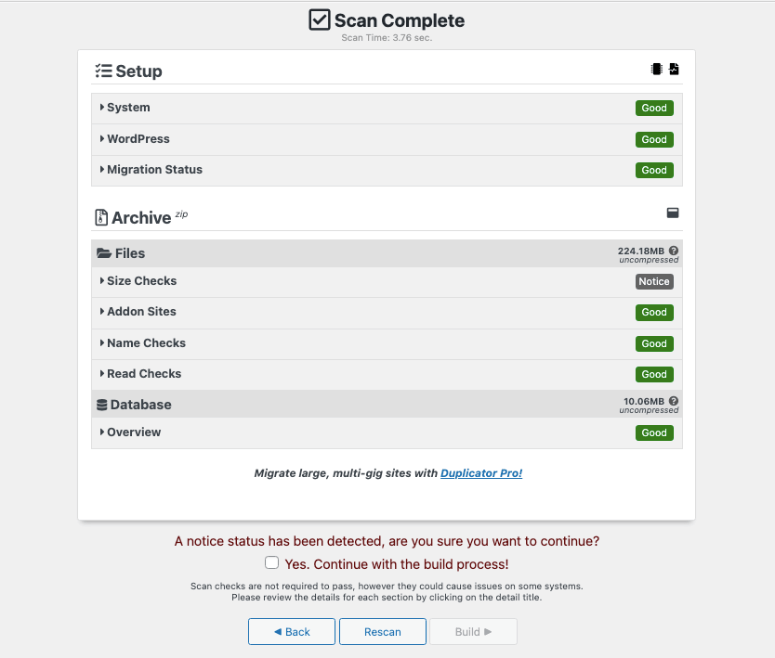
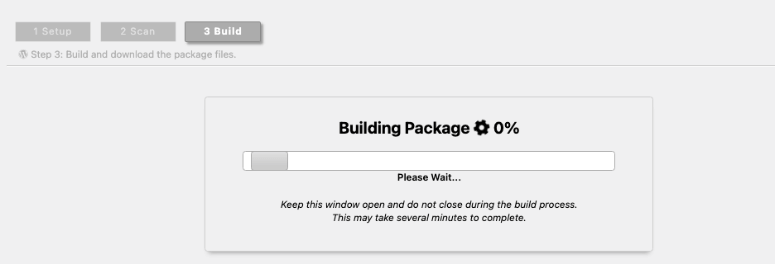
Then check the box ‘Yes. Continue with the build process!’ then hit the ‘Build’ button. You’ll see a page with the building in progress.
Once complete, you’ll see the WordPress installer backup and the archive backup. You can choose to download these files if you want to store them locally on your computer or use them to migrate your site elsewhere.
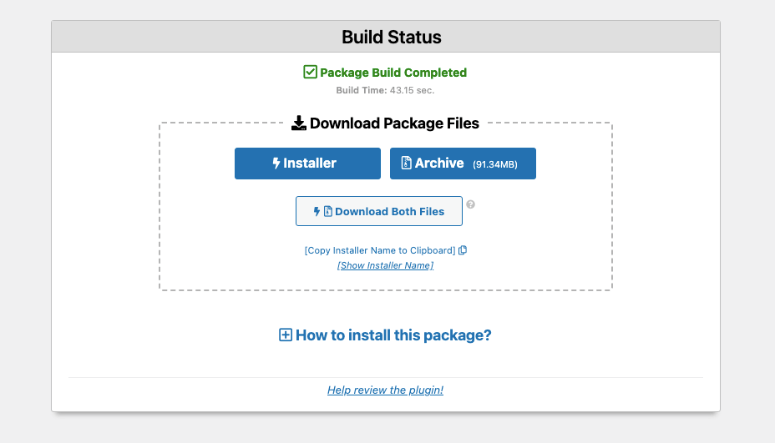
Otherwise, you don’t need to download anything here. Your backup will appear under the Packages tab.

Now you have a backup copy ready. If anything goes wrong, you can quickly restore it.
How to Restore Your WordPress Website
It’s not enough that you have a backup, you need to know how to restore your backup instantly when you need it.
It’s best to practice on a staging site. Learn how to create a staging site here: How to Set Up a WordPress Staging Site (Beginner’s Guide). You could also bookmark this guide and keep it handy for when you need to restore your site.
Duplicator makes it easy to restore your WordPress site but it’s not a one-click process as other plugins claim. Most of the time when plugins say ‘one-click restore’, they mean it takes a few button clicks.
What you need to know is that restoring your site is a really delicate process that needs caution. It involves wiping out existing files and databases and replacing them with your backup. So we feel it’s important that the plugin checks with you if you are absolutely sure you want to restore your site.
Inside the Duplicator plugin page in WordPress, go to the Packages tab. You’ll want to choose the most recent backup copy you have so that it has the latest data.
Now select the Recovery Point icon from the top menu.

This will take you to a new page where you can choose your recovery point. Duplicator recommends that you copy the recovery URL provided here and store it in a safe place.
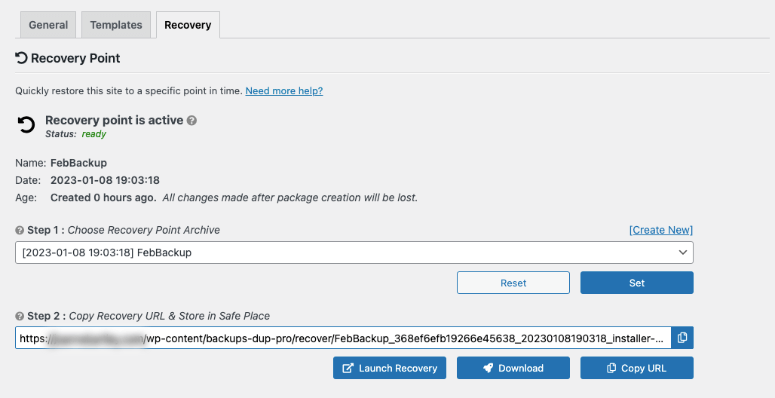
Now you need to hit the Launch Recovery button. A new page will open with the details of your recovery point along with a warning that this restore process cannot be undone.
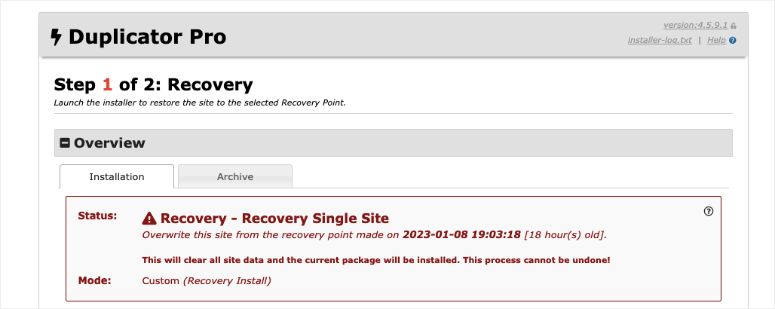
You can view the details of your site which has been scanned by Duplicator and check if any issues have been flagged.
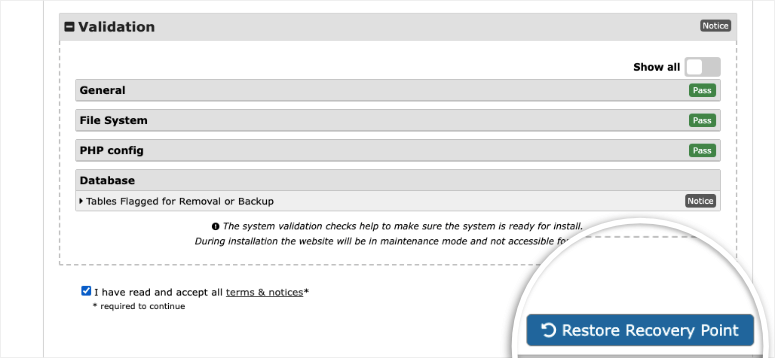
Then simply agree to the terms of service and click on the Restore Recovery Point button.
Duplicator asks you to confirm once more if you’re sure and you can click on the ‘OK’ button.
The recovery process will run and once it’s done, you’ll see a success page.
By default, the plugin will auto-delete the installer files. We recommend leaving this setting as it makes sure your site doesn’t face any security issues.
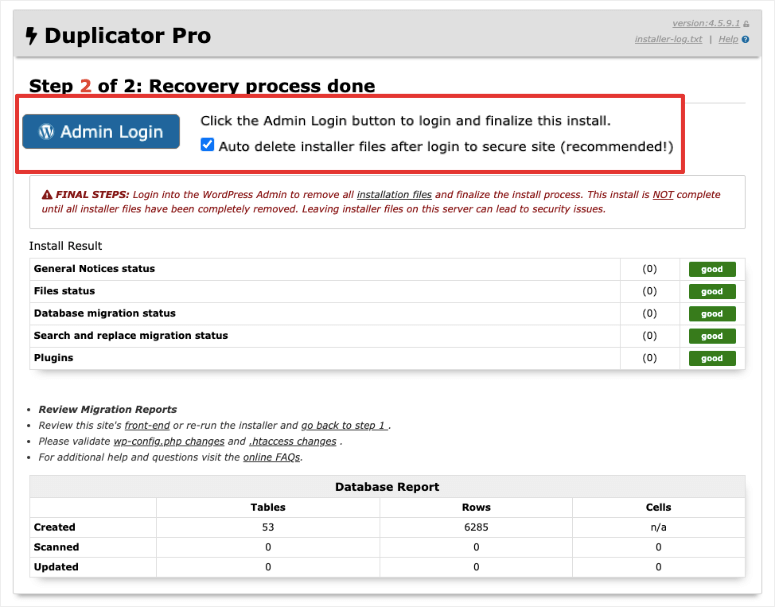
You can log in to your WordPress admin page here and check that your live site is back to normal.
That’s it! You’ve learned how to back up and restore your WordPress site.
Backups come in handy in case data loss happens due to an accident, security breach, etc. Even if you set up backups, you can still be a victim of hacking and security threats.
We recommend you use Sucuri to save your site from hackers, malware attacks, and other threats. You should also read our complete Sucuri review for more information or you could follow our Complete WordPress Security Guide.
FAQs on How To Backup Your WordPress Site?
How do I backup my WordPress site for free?
You can back up your WordPress site for free using the Duplicator plugin. Simply install the plugin on your site and take a backup. It’s that simple.
How do I backup my WordPress site manually?
To back up your site manually, you need to access cPanel (control panel) inside your WordPress hosting account. We do not recommend taking a manual backup of your website unless you’re familiar with cPanel. Small mistakes can lead to a broken website. You should use this method only if you don’t have access to your WordPress dashboard to install a backup plugin like Duplicator.
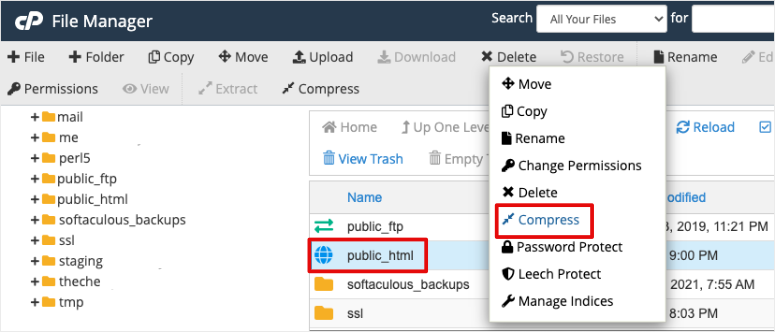
To take a copy of your WordPress files, open File Manager » public_html folder. Here, you should see more folders called wp-content, wp-admin, and wp-includes – this contains all your WordPress core files like the wp-config, functions.php, and so on. You can the public_html folder, compress and download a zip file to your computer.
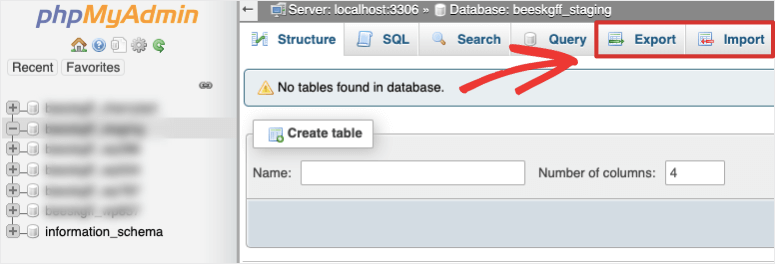
Next, you need to download your WordPress database. Head over to phpMyAdmin in cPanel. Here, you can export your WordPress database. The database backup will be a mySQL file.
If you don’t have access to cPanel, then you need to use an FTP or SFTP client like Filezilla to backup your WordPress files.
Does WordPress have a backup?
WordPress does not back up your website. You need to take backups on your own using a backup plugin. You can also subscribe to a backup plan offered by your web hosting provider. We prefer using a plugin as you get more control over your backups and storage functionality. It’s also wise to have a separate backup from the web hosting companies so that you can restore it when you need without the hassle of waiting for the host to restore it.
How do I backup my WordPress site to local computer?
The best way to backup your site to local computer is to install the Duplicator backup plugin on your site. Then create a backup copy with just a few clicks. Once the backup copy is ready, there is an option to download the backup to your local computer or hard drive.
What is the best backup for WordPress?
There are many backup options for WordPress. In our opinion, Duplicator is the #1 backup plugin for WordPress. However, it is built for both WordPress users and developers so there are some bits that are technical. You can also use other backup solutions like UpdraftPlus plugin, JetPack, and BackupBuddy.
Make sure the plugin lets you automate backups to run on schedule and also gives you the option to backup now (on-deman backups). See our full list here: Best Backup Plugins for WordPress.
How do I backup WordPress to Dropbox?
To store WordPress backups in Dropbox, inside the Duplicator plugin, open the Storage tab and Create New storage. Here you’ll get an option to choose the Type of storage location. You can select Dropbox and connect to your Dropbox account here.
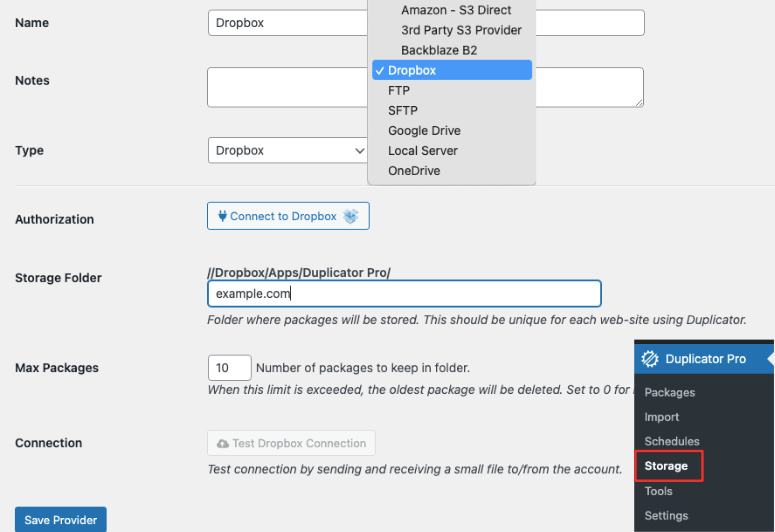
Then you can either transfer backup files to Dropbox or set it up to automatically be added to dropbox.
Duplicator offers all sorts of cloud storage options including Amazon, Google Drive, and OneDrive.
Should I backup my site daily?
If you make changes to your website on a daily basis, then we recommend taking daily backups. If you want to create scheduled backups, it’s best to run them when you’re most likely to make changes to your site. For instance, if you post a new blog every week on Thursday, then you should schedule your backup to run on Thursday evening so that the latest content is added to the backup.
What is the best type of backup for eCommerce?
If you run an eCommerce or WooCommerce site, then you need real-time incremental backups. This will capture every order placed so that you never lose vital customer data.
We hope this article helped you easily back up your WordPress website. You might also want to check out our post on the Best Free Websites and Resources to Learn WordPress (Beginners & Developers). It links to tons of free WordPress tutorials, guides, and reviews that you’ll find helpful.

One of the most important things in running a website successfully is always having a fresh backup. Thank you for sharing a clear explanation of how to back up the WordPress site in an easy and understandable manner.
Hey Jennifer, you bet. Do follow us on Facebook and Twitter for more helpful guides. 🙂