
Want an easy way to connect Slack with your WordPress site?
Slack is a team messaging app that lets you easily communicate and collaborate with your team, freelancers, and clients. You can send text messages and even share files with each other or even in a group.
It also lets you connect with external services and web apps to automate different processes. With the help of a plugin, you can easily embed slack in WordPress as well. This helps you streamline your workflows and improve the productivity of your team.
In this tutorial, we’ll show you how to integrate slack on your WordPress site in a few easy steps.
Before we start, let’s learn how you can use Slack with WordPress to organize your workflow.
Why Connect Slack to your WordPress Site
With Slack, you can stay connected with your team in real-time. It lets you create private and public channels for different projects. You also get to archive all messages and run a quick search whenever you need them.
After you embed Slack in WordPress, you’ll get quick Slack notifications about new events and updates on your website. This will allow you to automate all the manual tasks and keep track of everything happening on your site.
Here is an example screenshot of what an automated Slack notification looks like:
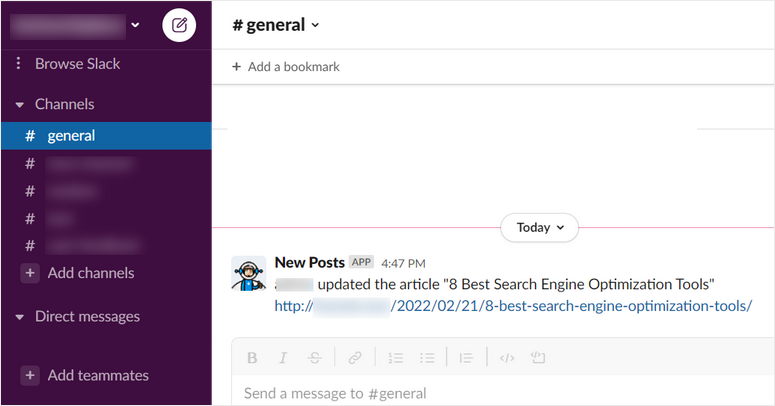
Like this, you can get Slack notifications from your WordPress site about important events like when:
- Writers publish/update blog posts
- A user registers for an event or webinar on your site
- Someone purchases a product from your online store
- A user submits a form such as contact or feedback form
- A new comment is posted on your blog
- A student signs up for a new course on your membership site
You can update an entire Slack channel or direct message a specific person.
Slack can be really helpful once integrated with WordPress. With that said, let’s take a look at how to connect Slack with your WordPress site to get notifications and alerts.
How to Embed Slack in WordPress
The easiest way to integrate slack on WordPress is by using Uncanny Automator.

Uncanny Automator is the best automation plugin for WordPress that lets you create powerful workflows without any coding. In a matter of minutes, you can connect your WordPress site with your favorite apps like Slack, Google, Zoom, and more.
You can automate tasks between different WordPress plugins and allow them to transfer data with each other. This allows you to create automated workflows or recipes with a combination of tasks.
With Uncanny Automator, you get over 100 automation triggers and actions. To create a recipe, you simply need to choose your trigger app or plugin and set up an action.
For this tutorial, we’ll be using Slack as the trigger app. Uncanny Automator comes with 3 actions for creating slack workflows or recipes:
- Create a Slack channel
- Send a direct message to a team member in Slack
- Send a message to a Slack channel
For the Slack recipe action, we’ll be sending a message to a Slack channel when a blog post is updated.
So, let’s get started with our quick and easy guide on how to embed Slack in WordPress.
Step 1: Install Uncanny Automator Plugin
First, you need to sign up for an Uncanny Automator account. You’ll also find the free version available on WordPress.org but you’ll need to upgrade to the premium version to get access to advanced features and more integration options.
After you sign up, you’ll find your download file and your license key inside your Uncanny Automator dashboard.

You need to install this plugin file on your WordPress site. For more help on this, see our guide on how to install a WordPress plugin.
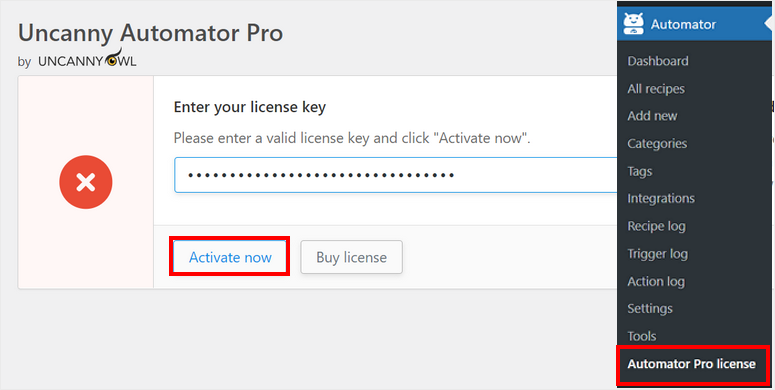
Once you install and activate Uncanny Automator on your admin dashboard, open the Automator » License Activation page.
Here, you’ll need to enter your license key and click on the Activate Now button.
After your account is verified, you can set up your Slack integration in WordPress.
Step 2: Connect with Slack
To embed Slack in WordPress, head over to the Automator » Settings page and click on the Slack tab.
Here, you can enter a name and upload a profile photo for your Slack bot. This bot will post automated notifications on your Slack channel.
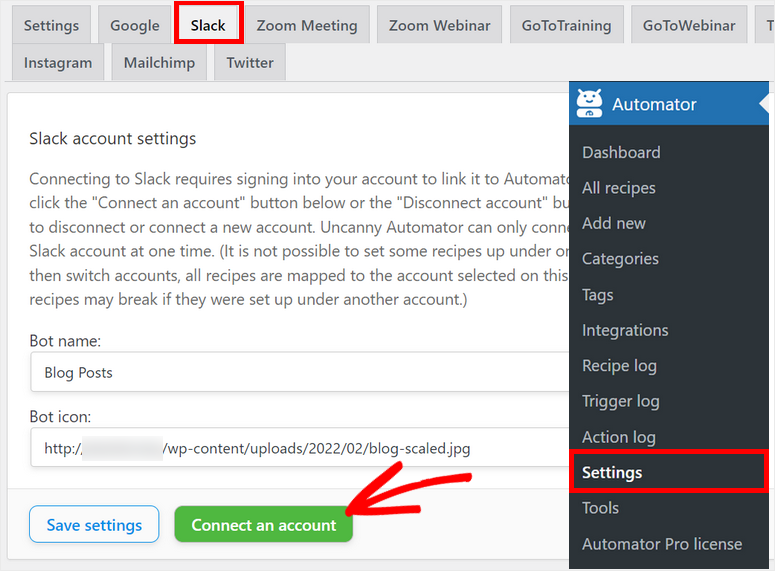
Then, click on the Connect an account button to continue. This will redirect you to your Slack workspace and ask you for permissions to connect your WordPress site.
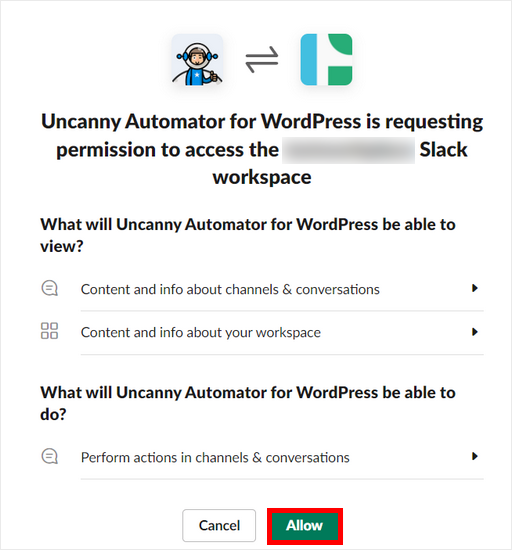
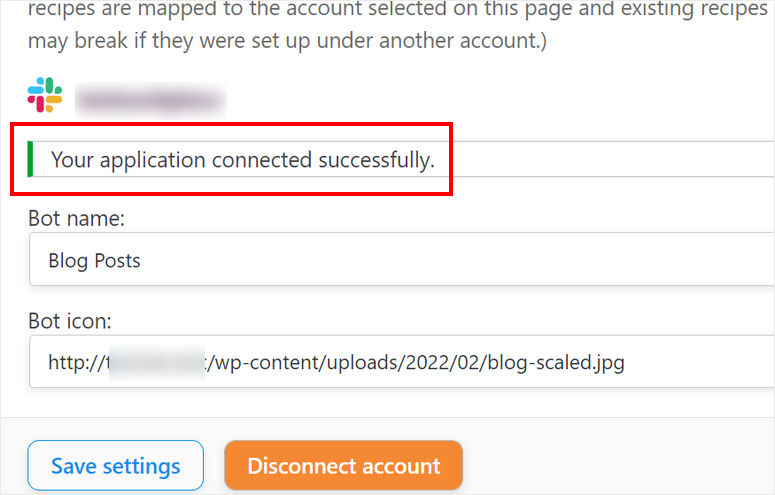
Once you allow permissions, you’ll be taken back to your WordPress site with a connection successful message.
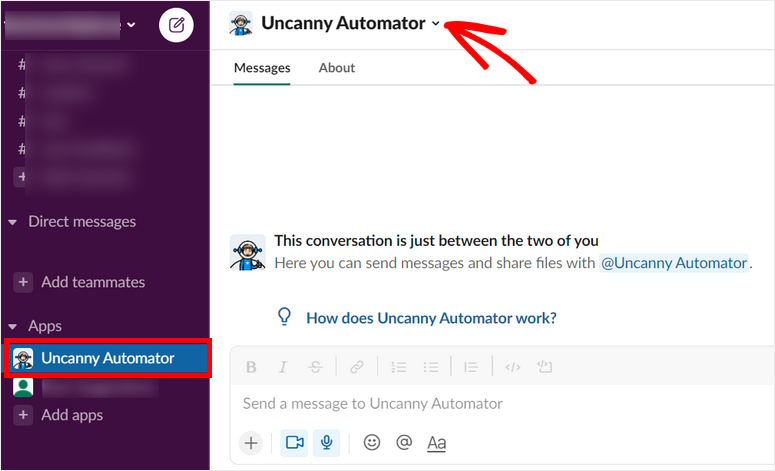
If you head back to your Slack workspace now, you’ll see the Uncanny Automator app in the left sidebar. You can open the app and click on the dropdown menu next to the app name.
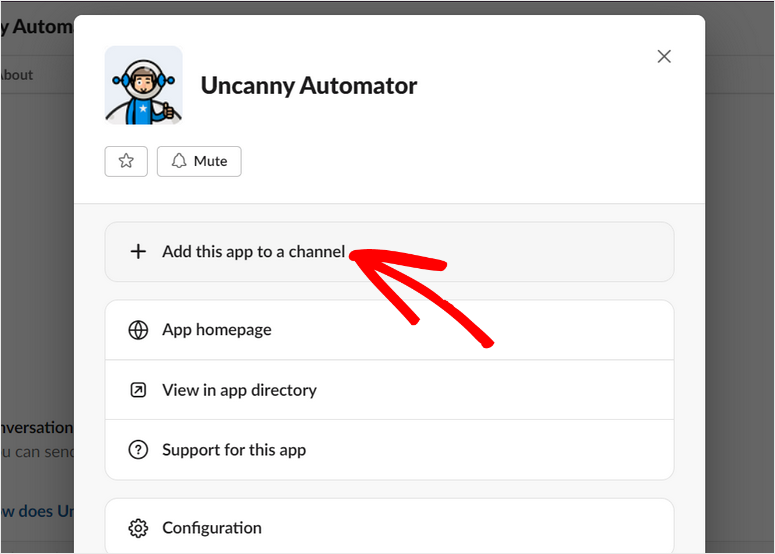
Next, click on the Add this app to a channel option. This allows you to send messages and alerts to a particular channel via Uncanny Automator.
After you click on it, you’ll get the option to choose a channel from your Slack workspace. Click on the Add button once you choose a channel.
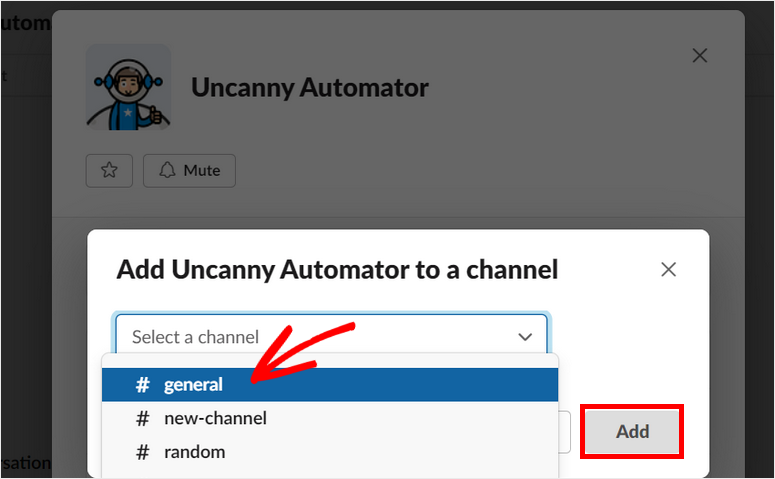
It’s as simple as that! You’ll now receive automated notifications from your WordPress site on this channel.
Now, let’s learn how to create a recipe for your Slack integration.
Step 3: Create a Recipe to Embed Slack in WordPress
To create a new recipe or workflow, head over to the Automator » Add New page. Here, you’ll have to choose the recipe type.
The Logged-in users option allows you to create recipes triggered by logged-in users only. Whereas, the Everyone option lets you create recipes triggered by any type of user on your site.
You can choose the type depending on the requirements of your workflow. Then, click on the Confirm button.
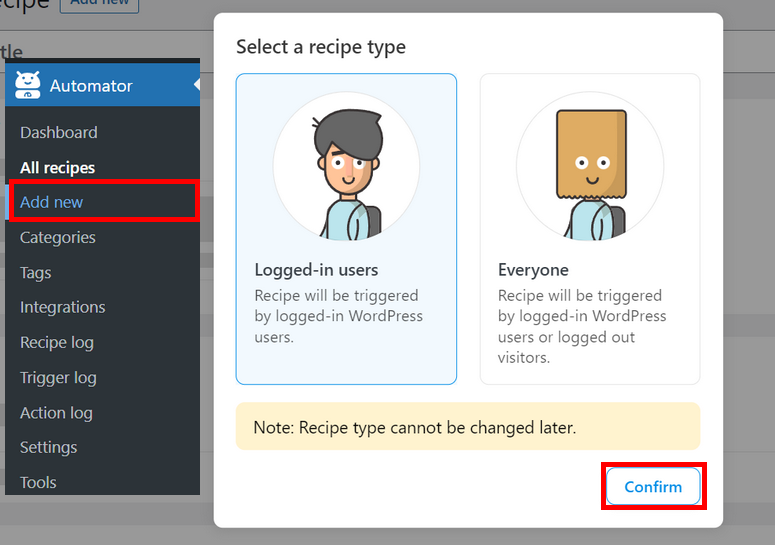
For our example, we’ll choose the Logged-in Users recipe type. So, when a writer updates a post on your WordPress site, you’ll get a Slack notification.
In the next window, you need to enter a name for your Slack recipe first. Then, you’ll need to set up the trigger event and action.
Step 4: Setting up a Trigger
Uncanny Automator detects all your existing WordPress integrations installed on your site. You can see that it automatically adds the integrations for the WordPress core and WPForms that are already installed.
Select the WordPress option for your Slack recipe trigger.
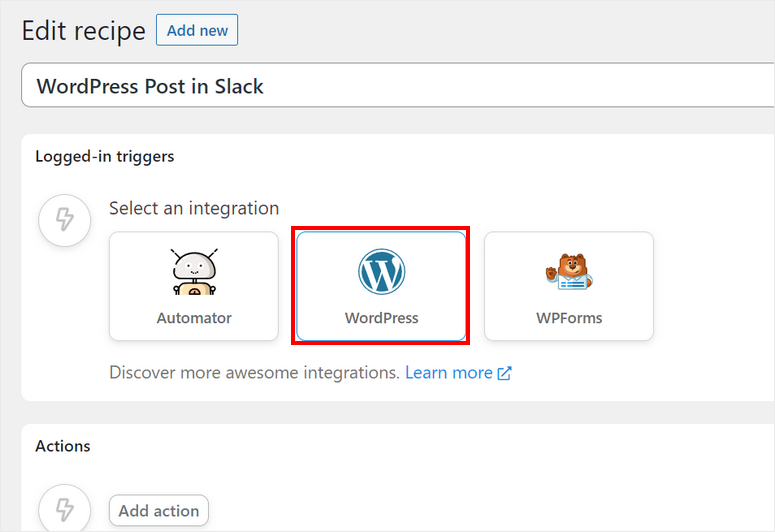
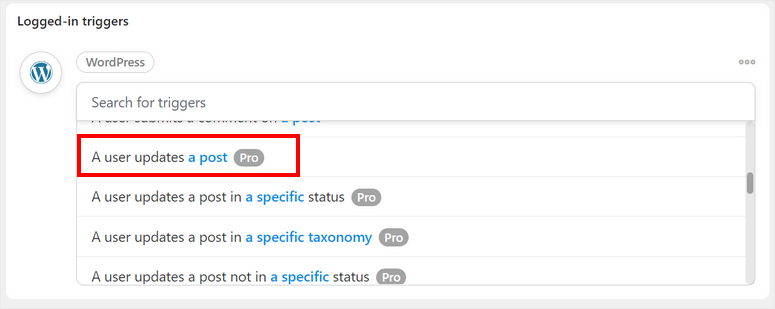
After you choose WordPress, you’ll see the options for the trigger event on your site.
We’ll be using the option “A user updates a post” for this recipe. You can choose any other event like when a user publishes a post.
Next, you’ll need to choose the post type to receive updates.
If you want to get notifications about any post on your site, select Any post type. For blog posts, you can select the Post option.
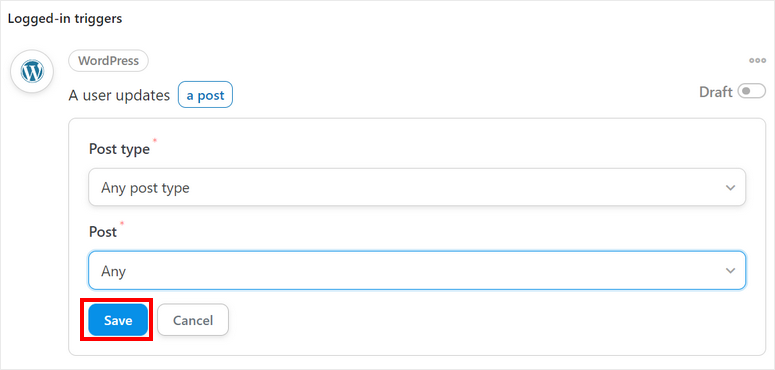
Once you’re done setting up your trigger event, hit the Save button.
Step 5: Setting up an Action
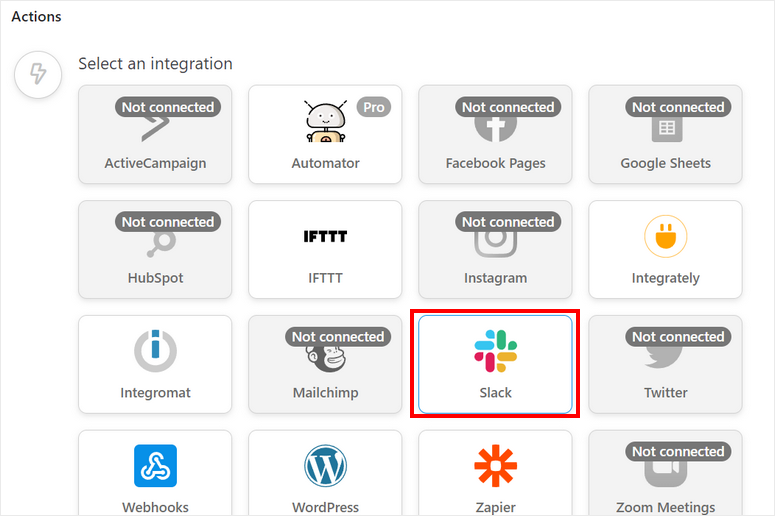
Now, you need to configure your action for your Slack recipe. For this, click on the Add action button below and you’ll see the integration options.
Here, select Slack as your integration.
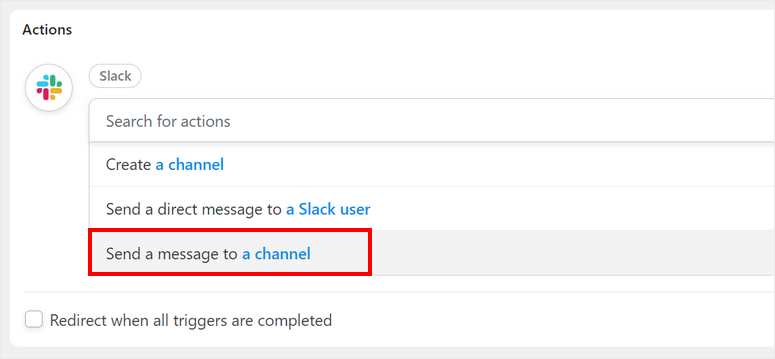
Then, you’ll see the action options. This action is what you’ll see on your Slack channel. For this example, we’ll choose the Send a message to a channel option.
After that, you’ll see the options to choose the slack channel where you want to send notifications. There is also the option to customize the message.
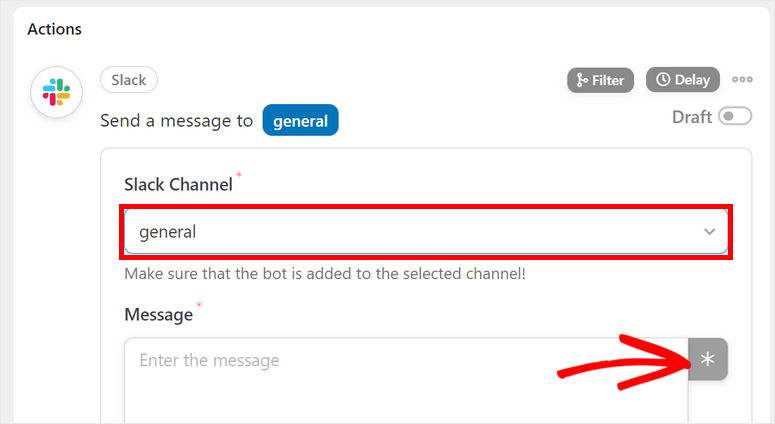
If you click on the Star button on the right-hand side, you’ll get options to add dynamic values from your WordPress site on your message.
For instance, you can add the user name of the person who updated the post, the post title, and the post URL.
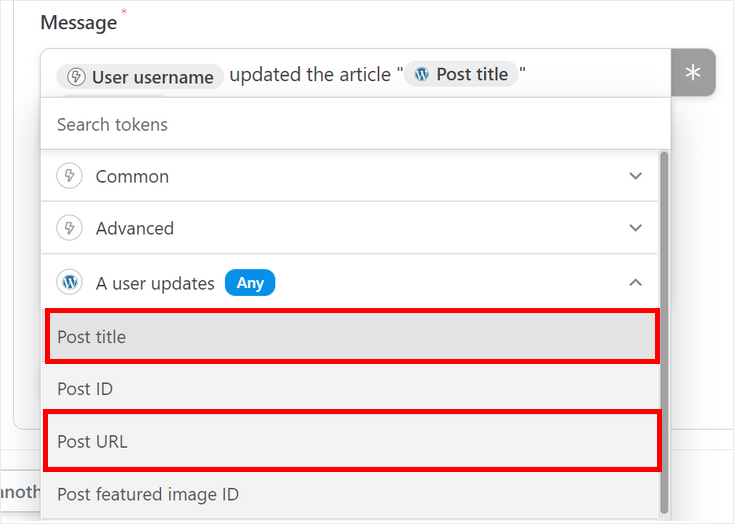
After you finish editing your notification message, make sure your save your changes.
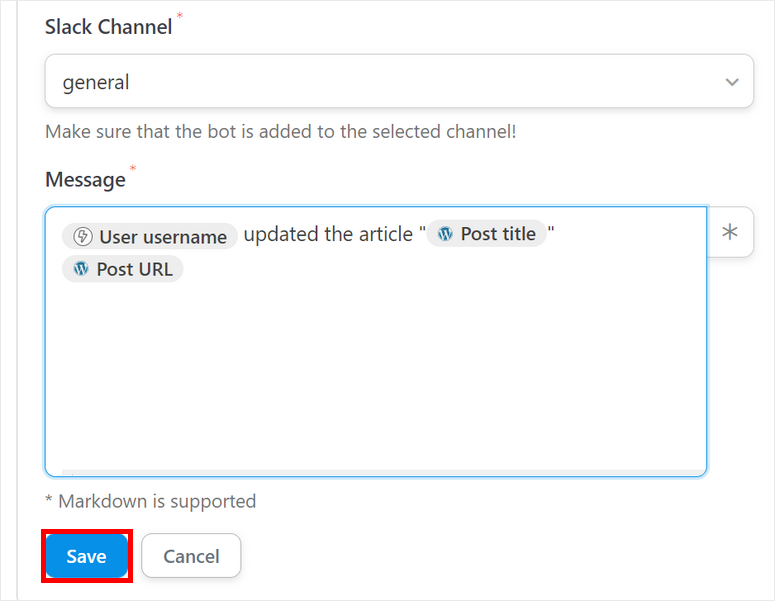
Now, all you need to do is publish your recipe to embed Slack in WordPress.
Step 6: Publish the Slack Recipe
If you look at the left menu panel on your recipe editor, you’ll see that it is on Draft mode.
To complete your Slack integration in WordPress, you need to toggle that to the Live mode.
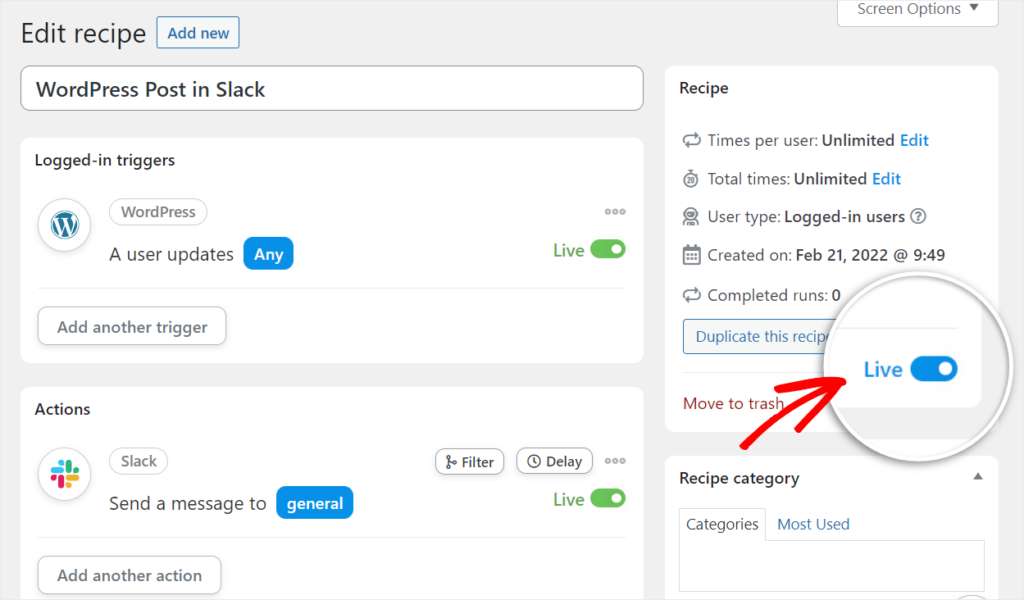
Congratulations! You have successfully connected your WordPress site with Slack for automated notifications and alerts.
Now, whenever a user updates a post, you’ll receive a message on your Slack channel like this.

Bonus: Connect your WooCommerce site with Slack
With Uncanny Automator, you can do so much more. If you run an online store, you can connect with Slack to get notified about new product purchases and orders.
To do this, you can follow the same instructions above to create a recipe. But, when setting up the trigger, you need to choose WooCommerce as the integration.
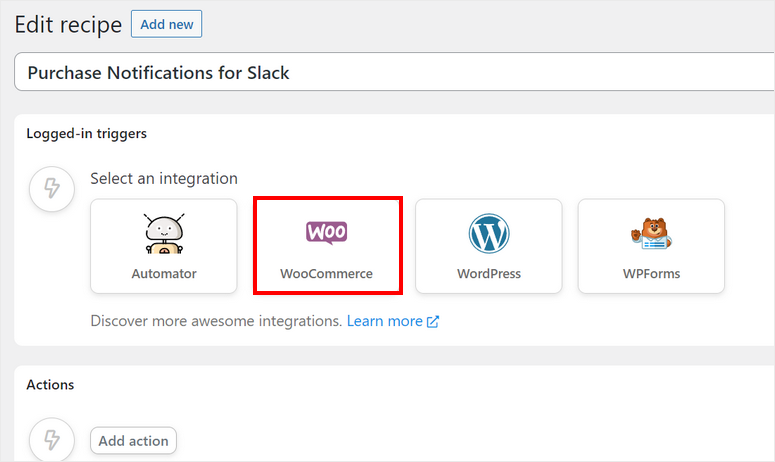
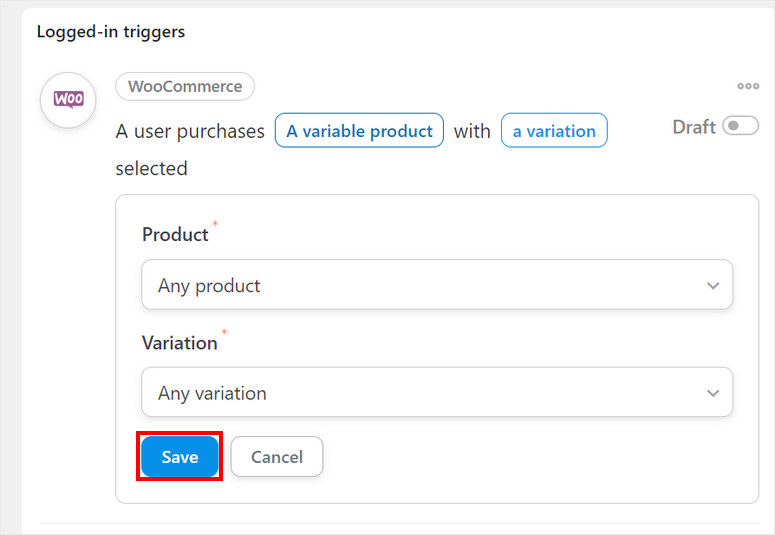
For the trigger event, select the A user purchases a product option. You can add more conditions if you want. Then, you can save your trigger event.
Next, you can set up the action event with Slack as the integration. Choose the Send a message to a channel option here.
After that, you can select the Slack channel where you want to send the notification and edit the message. You can use the dynamic tags to insert WooCommerce data by clicking on the Star button.
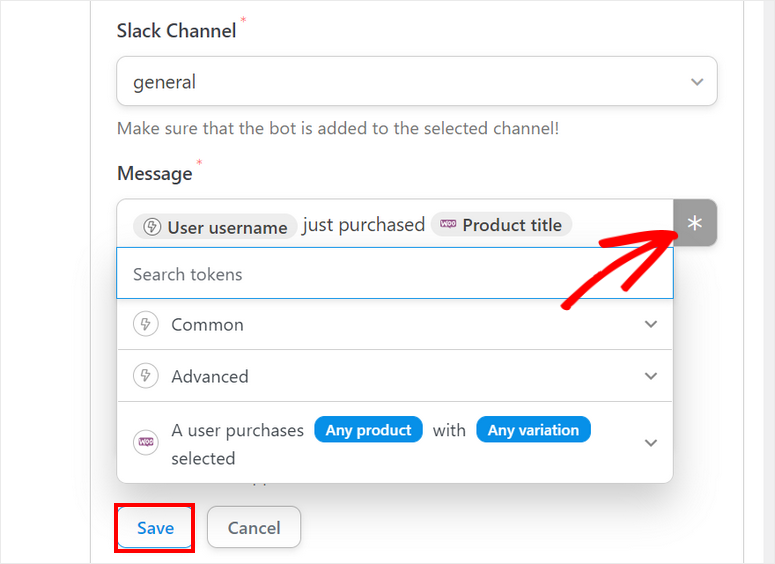
After you save the action event, you can set this WooCommerce recipe on the Live mode.
Then, you’ll be able to see the notification of someone purchasing a product on your Slack channel.
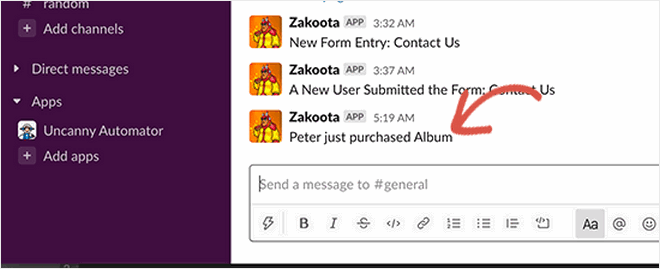
Like this, you can use Uncanny Automator to connect other WordPress plugins with Slack and receive instant notifications. This Slack plugin helps you stay updated with any important updates and changes on your website.
That’s all for today! We hope this article helped you learn how to easily embed Slack in WordPress.
FAQs on Embedding Slack in WordPress
How can I embed Slack in my WordPress site in just 2 minutes?
Embedding Slack in WordPress is quick and easy with Uncanny Automator. You simply need to connect your Slack account to your WordPress site using this tool.
What are the benefits of embedding Slack in WordPress?
- Real-time communication with your audience or team.
- Easy access to important discussions and announcements.
- Enhancing community engagement.
- Providing a centralized hub for communication on your website.
Is it possible to embed multiple Slack channels in WordPress?
Yes, you can embed multiple Slack channels or conversations on different pages or sections of your WordPress site. This allows you to organize and display relevant content based on your website’s structure.
Do I need a Slack account to embed it in WordPress?
Yes, you’ll need a Slack account to create or access the channels or conversations you want to embed in your WordPress site.
Are there any security considerations when embedding Slack in WordPress?
While embedding Slack in WordPress is generally secure, it’s essential to manage permissions and ensure that your Slack channels are appropriately configured to protect sensitive information. Be mindful of who can access the embedded content.
For your next steps, you can check these resources out:
- Best Marketing Automation Tools for WordPress
- Powerful WordPress Lead Generation Plugins Compared
- How to Automatically Share WordPress Posts to Facebook and Twitter
These posts will help you automate your marketing campaigns and generate more leads for your business. The last one will help you automatically share your new website posts on social media apps like Facebook and Twitter.

Comments Leave a Reply