
Do you want people to be able to view your YouTube live stream directly on your website?
Adding a live stream to your site is a great way to boost engagement on both your website and your YouTube channel.
However, embedding a live stream on your site can be difficult, especially if you’re not tech-savvy.
In this post, we’ll show you an easy way to embed a YouTube live stream on a website in under 5 minutes with zero coding required.
Let’s dive in!
The Easiest Way To Add YouTube Live Stream To Your Website
Anyone can manually embed YouTube videos using a snippet of code. But when you do this, you’ll likely face a lot of restrictions such as:
- No customization options to control how it looks
- Need coding knowledge to make even minor adjustments
- Small coding errors can break your site
- No support team to help you fix mistakes
Luckily, you don’t have to rely on the manual embed method anymore. Instead, you can use Feeds for YouTube by Smash Balloon.
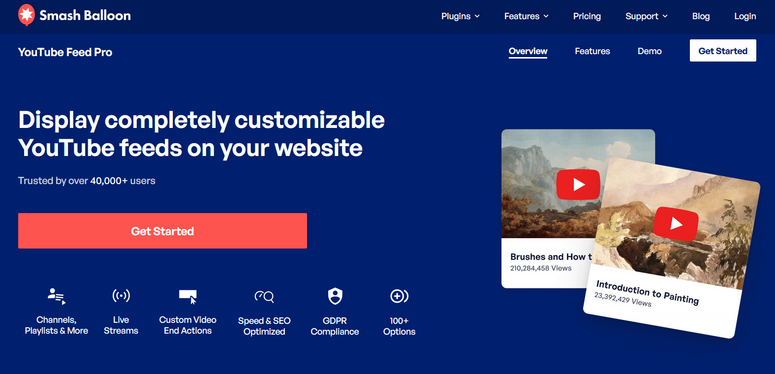
Feeds for YouTube lets you set up automated video feeds on your site. You can pull videos from your YouTube channel, embed a single video, and even play live streams directly from your website.
Smash Balloon has made it as easy as pointing and clicking or checking and unchecking boxes to showcase your YouTube live stream in a customized video player. It’s beginner-friendly so anyone can use this tool.
And here’s what really stands out about Feeds for YouTube:
- Designed with speed in mind so it doesn’t slow down your site
- Filter videos by playlist, favorites, search, and more
- Completely customizable YouTube player
- Add ‘subscribe’ and ‘load more’ buttons
- Dedicated customer support team
To learn more about this plugin, check out our detailed Smash Balloon review.
Ready to link your YouTube live stream to your website? Let’s get started!
Linking YouTube Live Stream To Your Site
To set up the live stream on your site and follow along with this tutorial, you’ll need to sign up for Feeds for YouTube by Smash Balloon.
Once you’ve created an account, you can get started.
Step 1: Installing the Feeds for YouTube Plugin
When you sign up, Smash Balloon will let you download the Feeds for YouTube plugin which you’ll need to install on your WordPress site. For more help on this, follow our guide on how to install a WordPress plugin.
Once it’s installed, you can activate the plugin and then access the Feeds for YouTube dashboard from your WordPress admin menu.
First, navigate to Feeds For YouTube » License page to enter your license key.
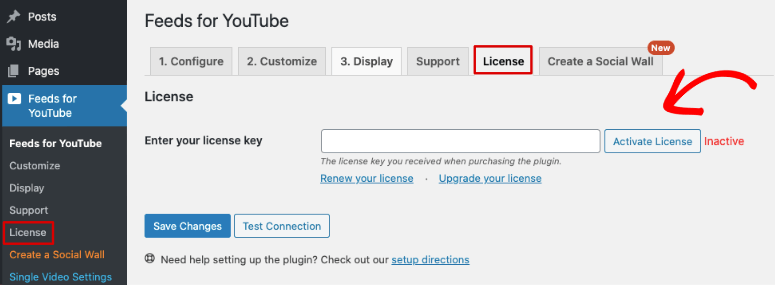
You can find this key on the Smash Balloon website under the Account » Downloads section.
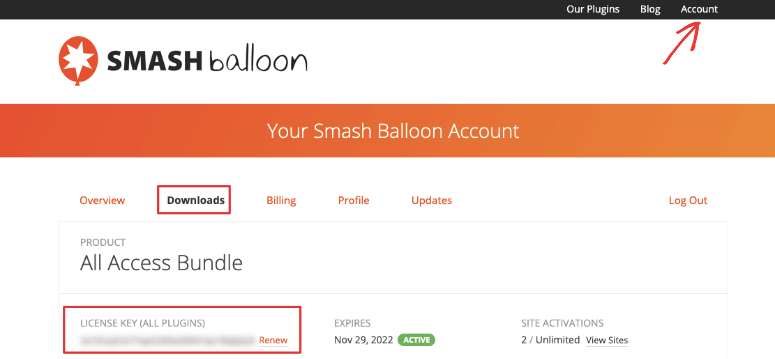
Once your license is active, you can set up your YouTube live stream.
Step 2: Connecting YouTube Channel
To showcase a live stream on your website, you’ll first need to connect to your YouTube channel.
For this, switch over to the Configure tab.
Here, you can add an API key. It isn’t mandatory to use an API key, but it only takes a few minutes to create one. And this will unlock some awesome features of Smash Balloon that require an API key to work.
For step-by-step instructions, follow this guide on creating and using an API key.

Now you can connect your YouTube channel by clicking on the big blue button that says ‘Connect to YouTube to Create a Feed’.
Then, simply follow the onscreen instructions to sign in to your YouTube account and connect it.
Step 3: Configuring the YouTube Live Stream
After you’ve connected your YouTube account, on the same Configure page, scroll down to see the ‘Feed Type’ options. Here, you can select ‘Live Streams’ and enter your Channel ID.
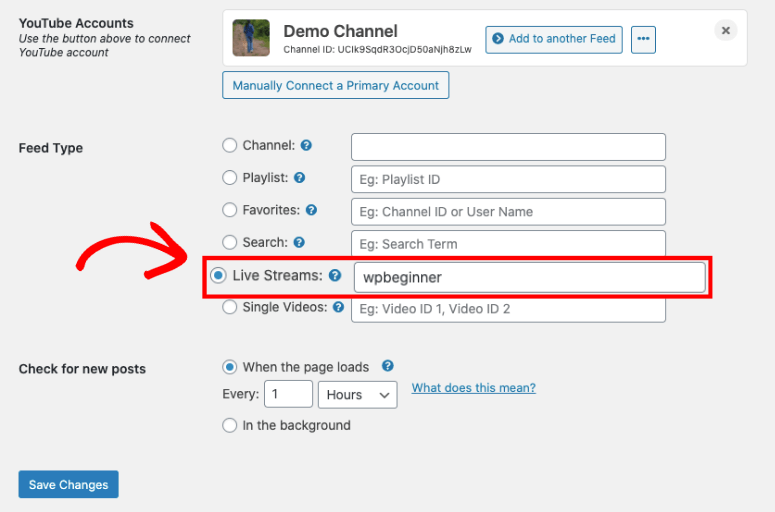
You can find your channel ID in your YouTube channel’s URL. It’s the string of numbers or the username after ‘/channel/’, like this:

Simply copy and paste it into the live stream field on the Configure page. And store your changes by clicking the ‘Save Changes’ button.
Now, you’ve successfully connected your YouTube channel to your site and configured it to display your live stream.
Step 4: Customizing Your YouTube Live Stream Feed
Smash Balloon creates a YouTube feed that looks great by default. But it also lets you customize everything about your YouTube feed.
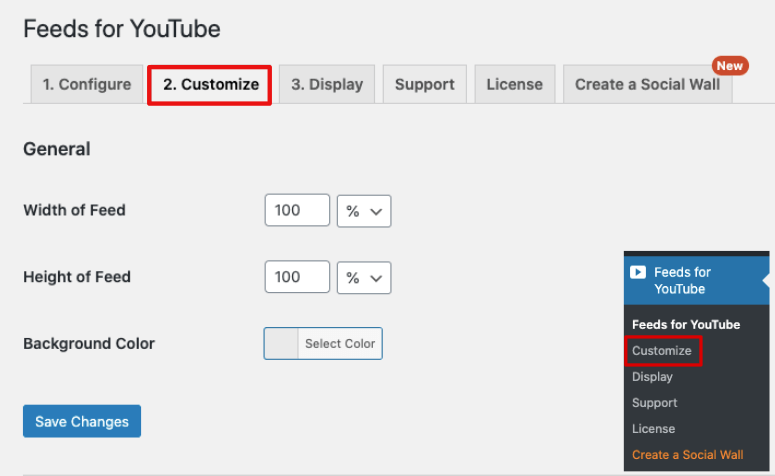
To make your changes, switch over to the ‘Customize’ tab. Here, you can adjust the height, width, and background color of the feed.
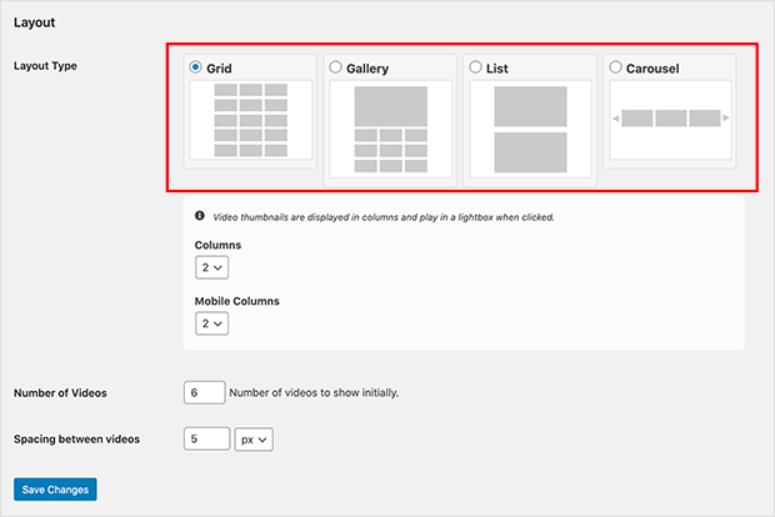
Then you’ll see options to choose a layout such as grid, gallery, list, and carousel. You can use these options if you want to display more than one YouTube video in your feed.
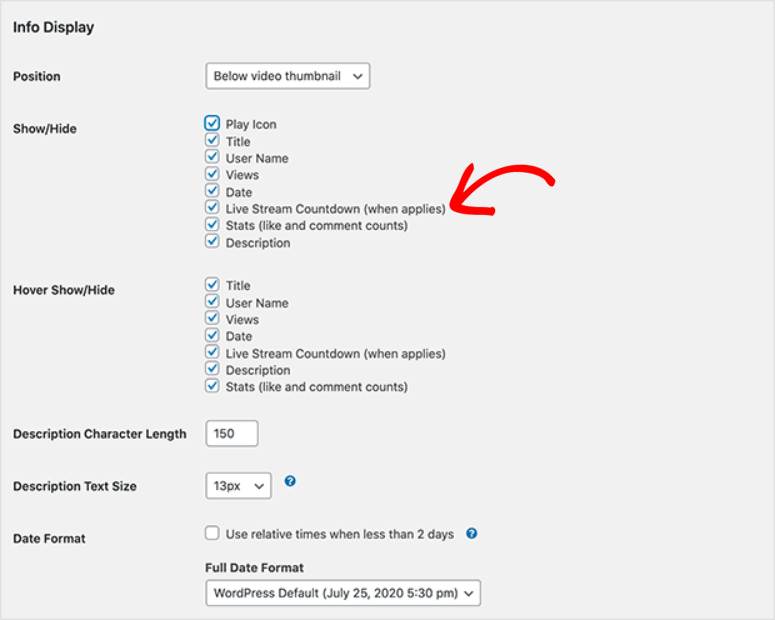
After this, you can scroll down to get more options to show or hide certain details of your video. So you control what your website visitors see such as the live stream title and description.
And Feeds for YouTube has a neat feature here that lets you display a countdown timer for your live stream so visitors will know when you’re going live. This creates excitement and can boost engagement on your site.
When you’re done customizing the feed, don’t forget to save your changes.
Step 5: Adding YouTube Live Stream on WordPress
Feeds for YouTube has flexible options to showcase your live stream on your site. You can embed the player in a post, page, or sidebar.
1. Add YouTube Live Stream to WordPress Page or Post
We’ll show you how to add the live stream to a new page on WordPress, but the steps will remain the same for a post as well.
To do this, navigate to the Pages » Add New tab. This will open up a new page in the block editor.
You can click on the Plus (+) icon to choose a new WordPress block. Search for ‘YouTube’ and you’ll see the Feeds for YouTube block appear.
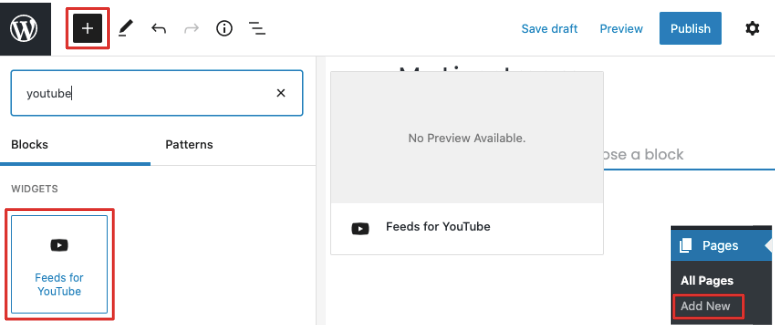
When you click on it, the feed will automatically be added to your page. All that’s left to do is Preview and Publish the page to make it live.
2. Add YouTube Live Stream to WordPress Sidebar
Feeds for YouTube comes with a readymade widget that you can add to your sidebar. Navigate to Appearance » Widgets and search for the YouTube Feed widget.

You can then drag and drop it into your sidebar area. Make sure you click the Save button to store your changes. And that’s it. You’ve successfully added a YouTube live stream to your site.
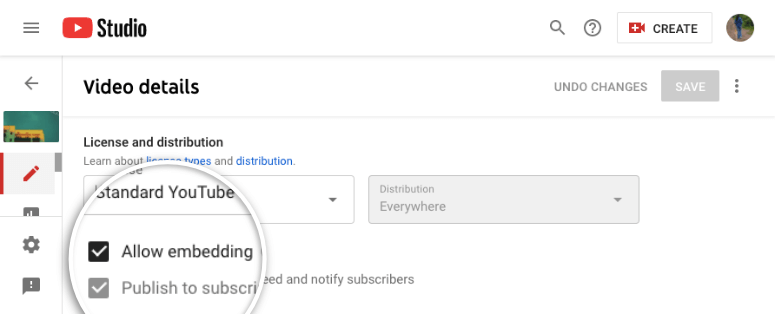
For your live stream to work on your website, YouTube requires you to turn on the ‘allow embedding’ option for every live stream video. If it isn’t enabled, you may see that your feed is blank or has an error message.
So for the final step in this tutorial, we’ll show you how to enable the ‘allow embedding’ permission setting in your YouTube account.
Step 6: Allow YouTube Live Stream Embedding
To enable the ‘allow embedding’ option for your live stream video, first visit this link: https://studio.youtube.com/channel/.
You should be signed in to your YouTube channel’s studio account now.
Here, select your live stream and this will open up the video details. Scroll down on this page and click on the ‘Show More’ option.
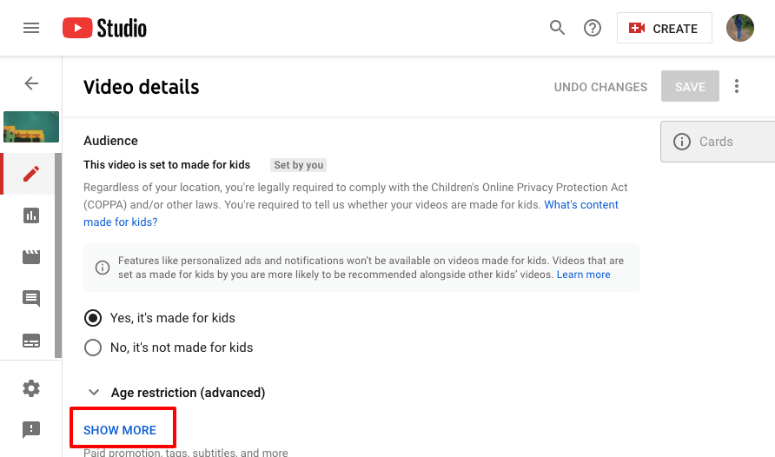
Scroll further now and make sure the ‘Allow embedding’ box is checked. If you’ve made any changes, make sure you Save your settings.
Now when you go live on YouTube, your video will stream on your website. You can keep your visitors engaged and draw more traffic. And at the same time, you can boost engagement on YouTube and grow your channel.
We hope you found this tutorial on how to embed YouTube live on a website helpful. If you liked this post, you may also want to see:
- How to Show Recent Videos From a YouTube Channel in WordPress
- How to Show a Facebook Feed in WordPress
- How To Create A Custom Twitter Feed With WordPress
These posts will help you leverage social media on your website to gain more subscribers and boost engagement across all platforms.

Comments Leave a Reply