Want to reach out to potential customers with a Facebook landing page?
By creating a dedicated landing page, you can redirect your Facebook users to a beautiful page where they can see what you’re offering and buy or subscribe instantly! This will let you capture all your leads coming from your Facebook advertising campaigns and boost your sales.
In this tutorial, you’ll learn how to easily create and optimize your Facebook landing page. But first, let’s learn what a Facebook landing page is.
What is a Facebook Landing Page?
A Facebook landing page is a dedicated web page where visitors are sent to after they click on a Facebook ad. These pages are designed to capture your social media audience and convert them into paying customers.
You can get users to buy a product, sign up for newsletters or webinars, or simply engage with your brand.
Here is a good example of a Facebook ad from Playlister Club.
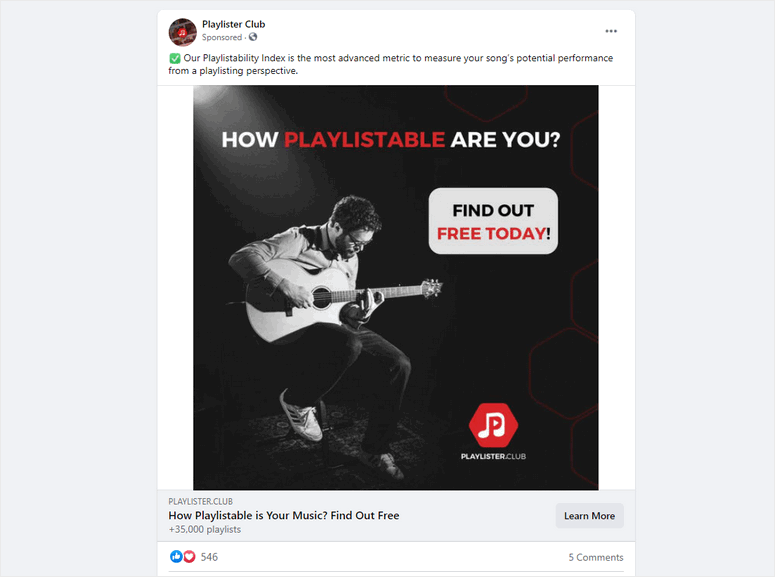
When you click this Facebook ad, you’ll be redirected to a web page when you can see what they have to offer.
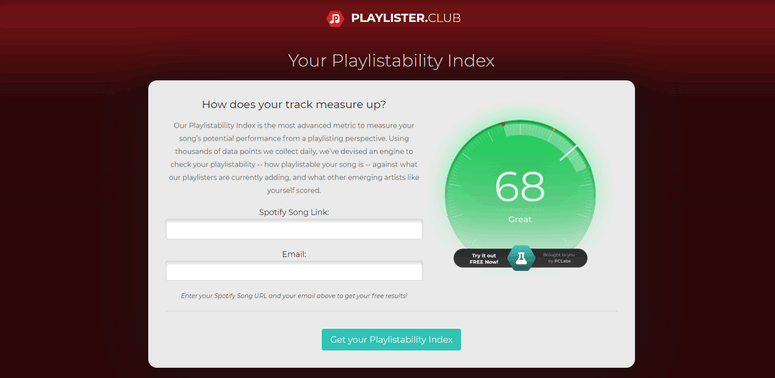
A Facebook landing page is quite different from other web pages. So for instance, if you redirect users to a homepage or a product web page, they might get confused because your ad may not be related to what your homepage is about.
When users don’t find the exact information of the product and offer in the ad, they’ll lose interest and click away.
By creating a custom Facebook landing page that focuses on your product and its benefits, you can keep users interested and encourage them to take action right away.
Now you’re ready to create your own Facebook landing page. Let’s get started by learning what page elements you need to add to your Facebook landing page to increase your sales.
What to Include in your Facebook Landing Page?
A good Facebook landing page should provide clear and detailed information about your products or service without wasting the user’s time.
Here’s our recommendations on the basic elements that’ll make your Facebook landing page successful:
- Bold Headline: An attention-grabbing title that engages the visitors to read on
- Crisp Content: A clear message explaining your product or offer in detail
- Images: A visual representation of your product or service
- Call to action: Buttons and links that trigger the user to sign up or make a purchase
- Social proof: Customer reviews or testimonial that show the authenticity of your site to gain the visitors’ trust
These are the must-have elements for a high-converting page. Keep in mind the other elements you choose would vary based on your target audience.
Having said that, let’s dive into the tutorial on how to create a landing page.
How to Create a Facebook Landing Page in WordPress
Creating a dedicated Facebook landing page may seem like a difficult job. However, there are tools to help you create one with ease.
Since most websites are built on the WordPress platform, we’ll show you how to create your page using the most popular landing page builder for WordPress – SeedProd.
In case you don’t have an existing WordPress site, see our guide on how to make a website. This will help you set up your very own WordPress site in no time!
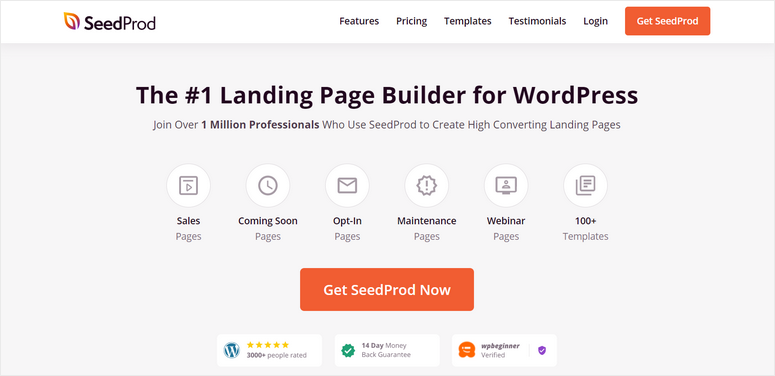
SeedProd is hands down the easiest way to create beautiful landing pages in a few clicks. You’ll never have to touch a single line of code.
It comes with a built-in template library with over 150 pre-designed eye-catching premium and free landing page templates. Added to that, there’s drag-and-drop page builder that lets you easily create and customize your landing page to your liking.
With SeedProd, you’ll get access to essential content elements along with other powerful content blocks like countdowns, testimonials, and CTA buttons. These features are crucial for making your landing page perform well.
Moreover, the plugin allows you to integrate your Facebook landing page with email marketing services such as Constant Contact, AWeber, Active Campaign, and more. This makes it easy to sync your social media, landing page, and email marketing campaigns to smoothen your workflow.
Along with this, these are some of the other features that make SeedProd the best landing page builder plugin:
- Beginner-friendly interface
- 40 content blocks that help you create professional landing pages
- Fully responsive so your landing page will look great on all screen sizes
- Built-in Coming soon page, 404 pages, login page, and maintenance mode
- Google reCAPTCHA feature protects your page from spam and malicious attacks
Furthermore, if you want this page to be visible only to Facebook users, you can turn off visibility on search engines with a single click.
Now, we’ll show you how to create a high-converting Facebook landing page using the SeedProd plugin.
Step 1: Install and Activate SeedProd Plugin
First, you need to sign up for a SeedProd account.
After you sign up, you can log in to your SeedProd dashboard. Open the Downloads tab and you can see the plugin download option along with your license key.
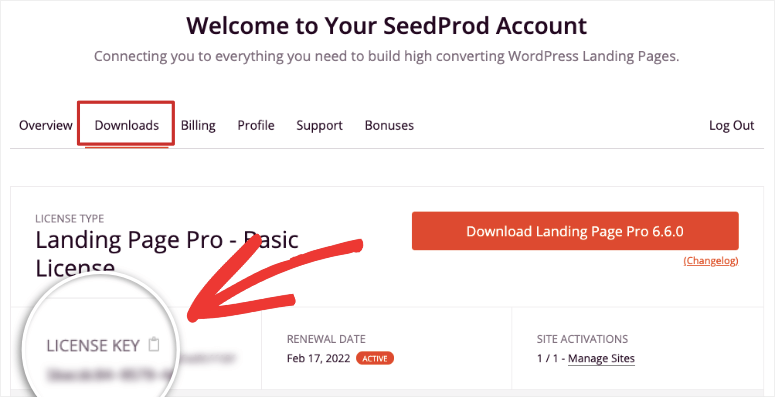
You’ll need to install the SeedProd plugin from your WordPress dashboard. If you want more details on this, see our guide on how to install a WordPress plugin.
Once you install and activate the plugin, go to SeedProd » Settings to enter the license key.
Copy and paste the license key from your SeedProd account and click on the Verify Key button.

After you see a verification success message, you can start creating your Facebook landing page.
Step 2: Create a New Landing Page
To get started, you’ll need to create a new landing page. For this, go to the SeedProd tab from your WordPress dashboard.
Here, you can see 4 options to set up Coming Soon Mode, Maintenance Mode, Login Page, and 404 Page for your site. With these options, you’ll learn how to create an under construction page with ease.
To create a new landing page, scroll down the page and click on the Add New Landing Page button.
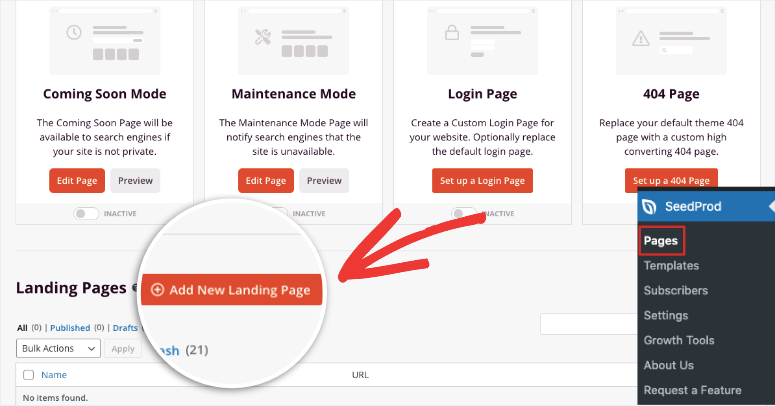
This will open up the template library where you can choose a design you like. For easy browsing, SeedProd offers filters that make selecting a template easy. The filters you get are:
- Coming Soon
- Maintenance Mode
- 404 Page
- Sales
- Webinar
- Lead Squeeze
- Thank You
- Login
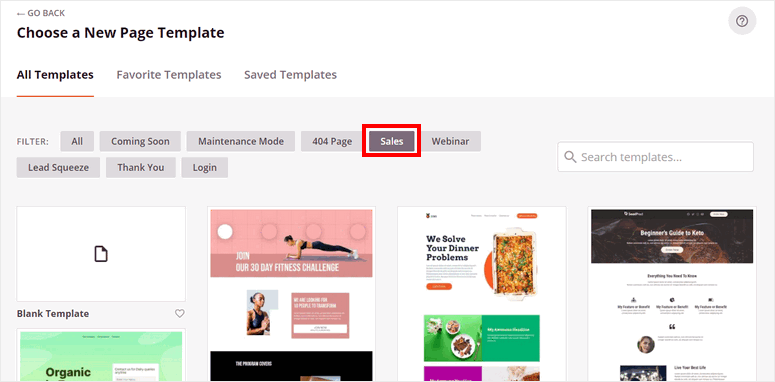
We recommend using the Sales filter to find a template that’s better suited to create a Facebook landing page.
To preview a template, hover over it and click on the zoom icon. We’ll be using the Coupon Sales template but feel free to choose the one you like.
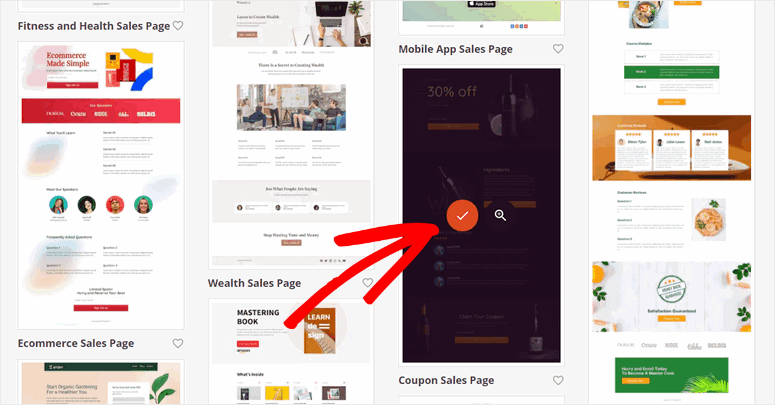
Once you select a template, you’ll see a popup where you can enter your page name and URL.
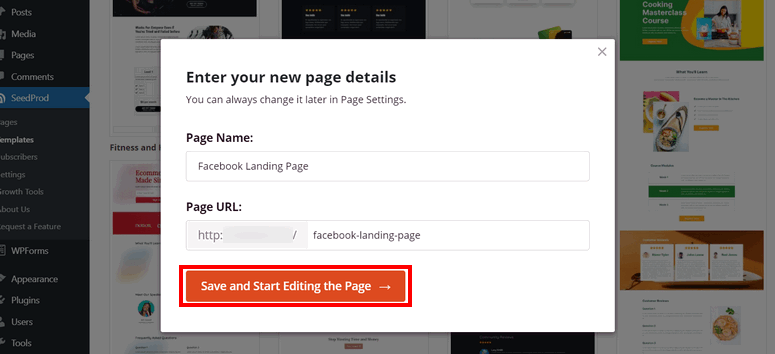
Once you hit the Save and Start Editing the Page button, the SeedProd drag-and-drop page builder will open.
Now, you can customize the template to make your Facebook landing page look just the way you want.
Step 3: Customize your Facebook Landing Page
Inside SeedProd’s visual page builder, you’ll see a live preview of your template along with customization options on the left.
SeedProd templates are ready to use out of the box so you won’t need to spend much time changing the design. Instead, you can focus on updating the content to match your brand and marketing goals.
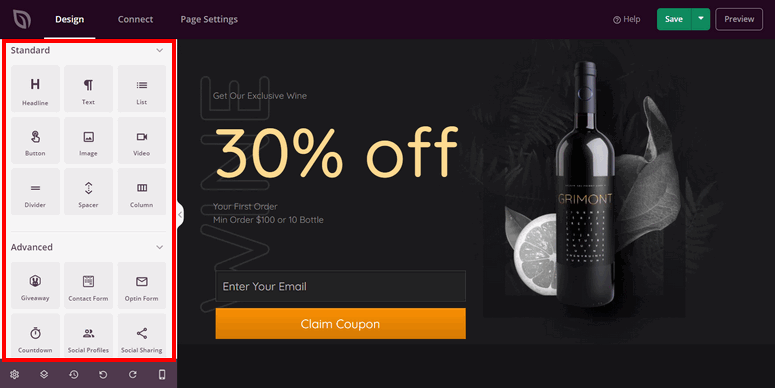
If you want to add new content blocks, then you can easily drag and drop the block from the left menu to the page preview on the right.
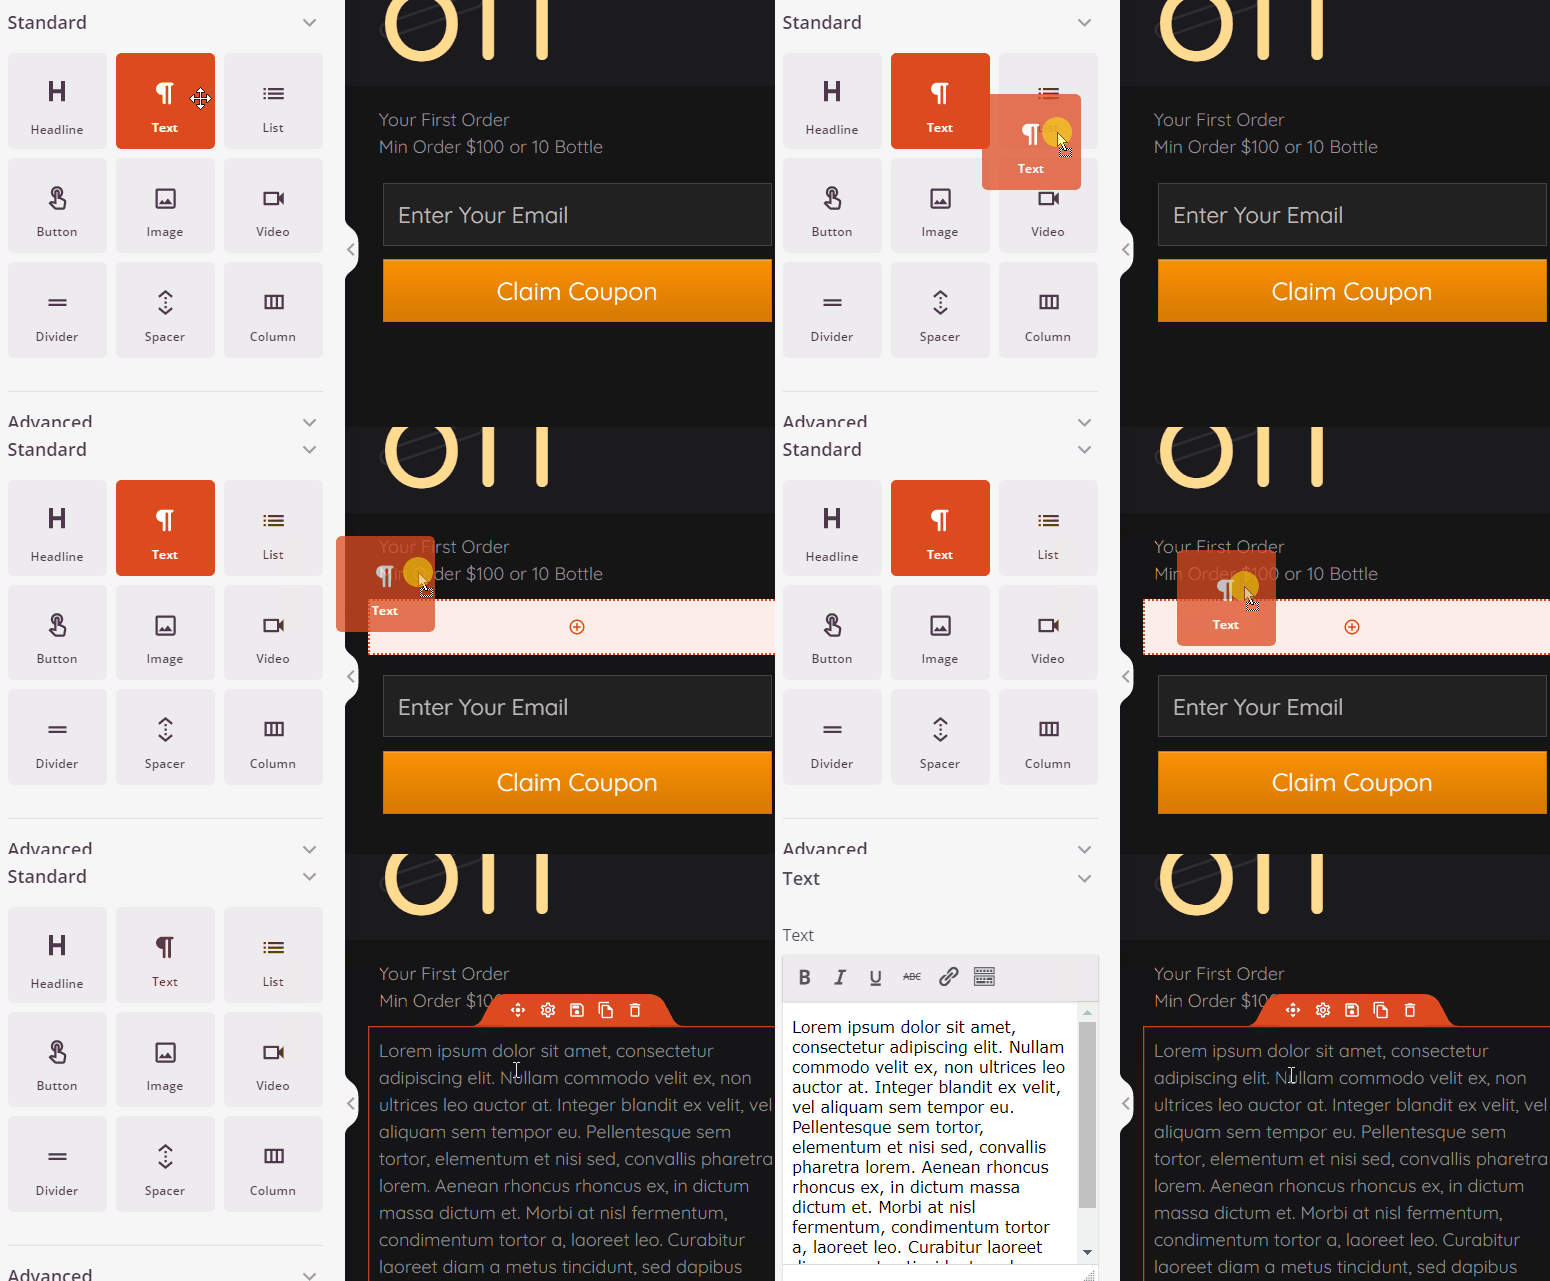
You’ll find basic and advanced blocks of content that include:
- Images and videos
- Animated headline
- Testimonials
- Social sharing
- Star rating
- Optin form
- Giveaways
- Countdown timers
These blocks are designed to help you convert visitors into customers.
SeedProd also integrates with WooCommerce, the best eCommerce platform for WordPress. This lets you sell your products directly from your Facebook landing page.
You can use this integration to add product grids, popular products, and calls to action like Add To Cart and Checkout buttons.
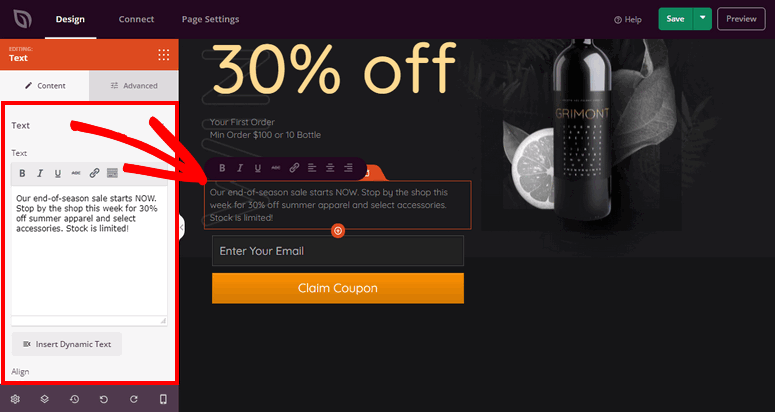
Next, to start editing the content, click on any block and the settings for it will open up in the menu on the left. You can change the text, formatting, size, and more.
Now you may want to apply standardized settings for the entire page. this will help you keep your brand colors, font family and size, and other elements consistent throughout.
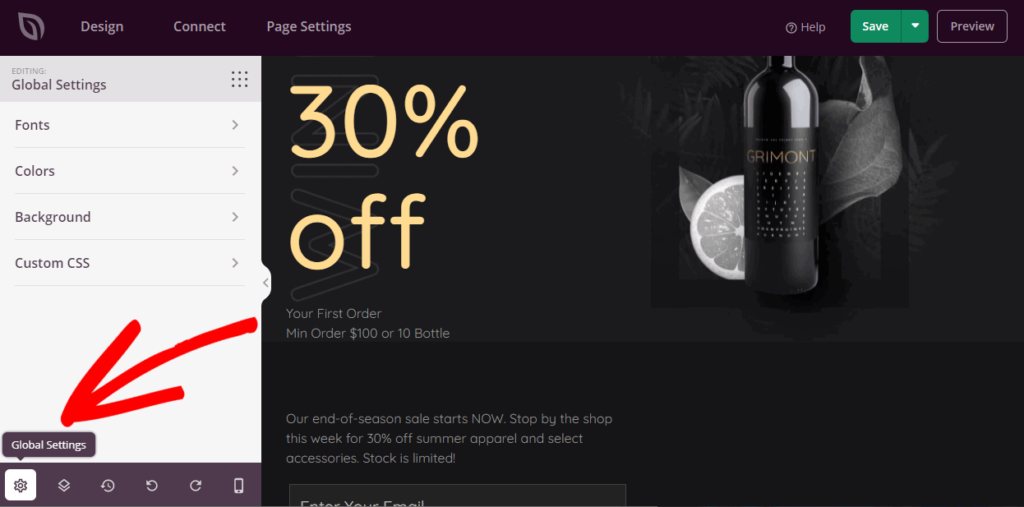
You can apply these changes under the Global Settings icon at the bottom-left corner of the page builder.
In this menu, you’ll find options to change the fonts, colors, background, and add custom CSS.
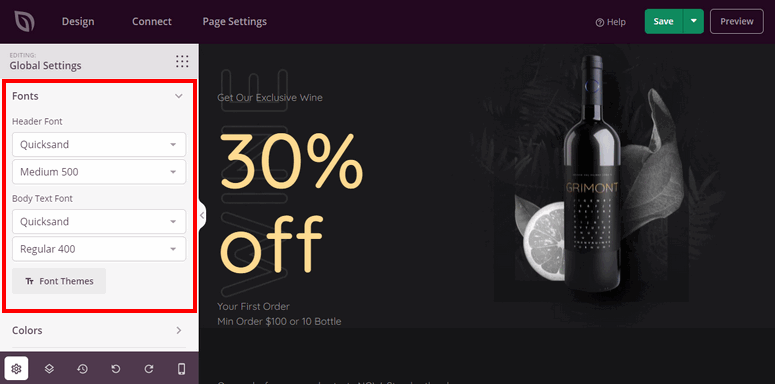
To change the font options for your entire landing page, open the Fonts tab. Here, you can choose the font and other styling options as per your requirements.
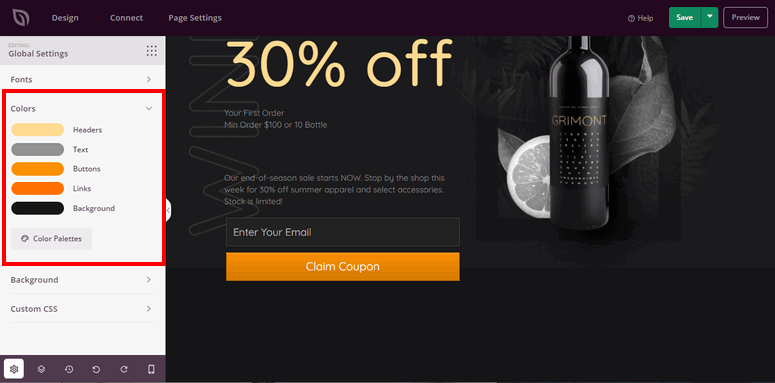
In the Colors settings, you can add you brand or campaign colors that will auto-apply to headers, text, buttons, links, and background. If you don’t have a set color scheme, you can choose premade color palettes to easily change the color theme of your whole page.
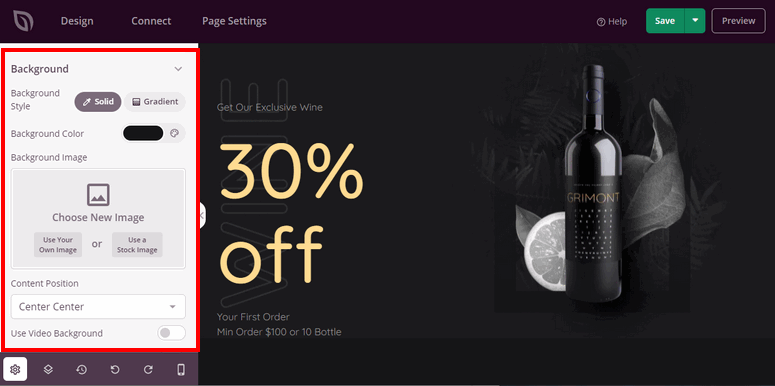
Next, you can change the background of your Facebook landing page from the Background settings. You can add a solid color, image, or video.
That’s it! You have successfully created a Facebook landing page for your site. Hit the Save button to store your customized page.
Now, before we show you how to publish the page, we’ll show you how to quickly connect your landing page to your email marketing list.
Step 4: Connect with Email Marketing Service
When you connect your Facebook landing page to your email account, all your leads will automatically be added to your email list. This will help you save time since you won’t need to manually import all your lead information.
Plus, this integration is helpful if you want to deliver digital products, trigger welcome emails, and engagement campaigns.
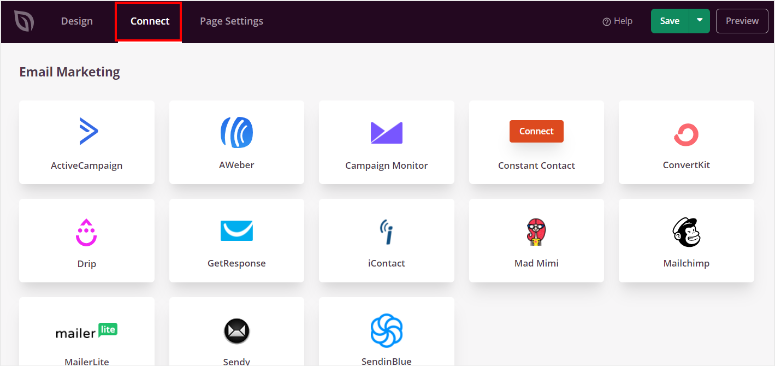
SeedProd lets you integrate with popular email marketing services like Contact Contact, Aweber, ConvertKit, and more.
To connect to your email account, navigate to the Connect tab and select your email marketing service.
Then, click on the Connect New Account button and follow the instructions to connect your account.
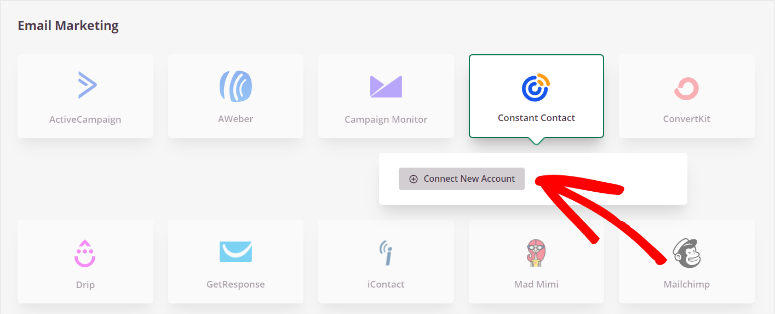
Most email service providers require you to connect your account using an API key. To get your API Key, you can head over to your email account and find it there.
The process is really that simple! Now, you can send your lead information automatically to your email list. SeedProd even lets you segment your audience so that you can stay organized and create lists according to what the user signs up for.
Now there’s just one last step before you publish your page and that’s to make sure the page settings are set to your preferences.
Step 5: Configure Page Settings
To change page settings, open the Page Settings tab on the form builder.
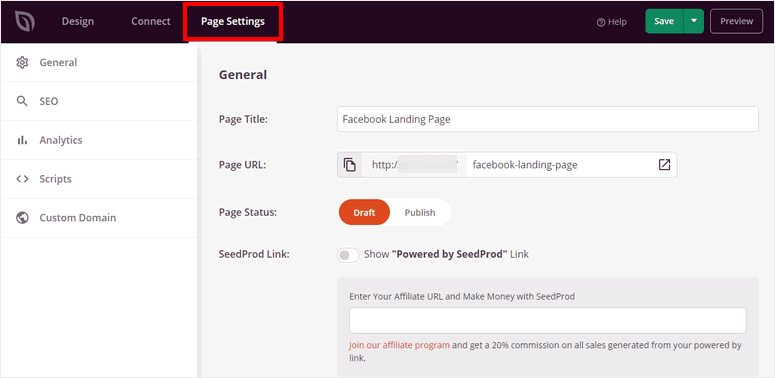
Here, you’ll get options to easily configure your page preferences:
- General Settings: Change your page title, page URL, and page status.
- SEO: Optimize your landing page for SEO (Search Engine Optimization) with powerful SEO plugins like All in One SEO.
- Analytics: Track the performance of your Facebook landing page by integrating an analytics plugin like MonsterInsights.
- Scripts: Use custom code to change the page style and settings even more.
- Custom Domain: Change the domain name for your landing page that is different from your site.
Since this is a dedicated page for Facebook users, you’ll want to ensure that this page is not visible on search engines. It could confuse organic users.
To make sure this page doesn’t appear on search engine results pages (SERPs), under the SEO tab, you can enable the ‘no index’ option.
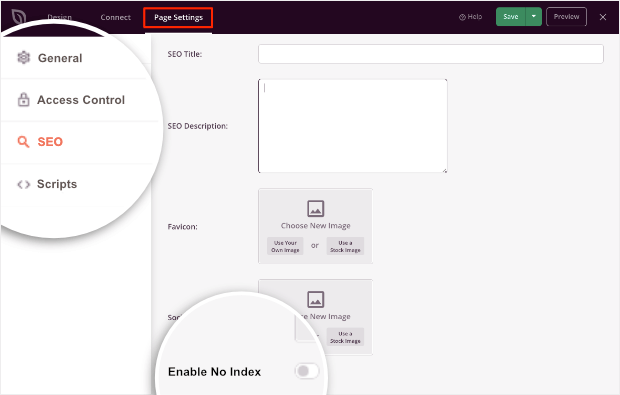
Once you make changes to the settings, hit the Save button at the end.
All you need to do now is publish your landing page to your site.
Step 6: Publish your Facebook Landing Page
To publish your page, click on the dropdown arrow next to the Save button in the form builder. Select the Publish option and your landing page will go live.
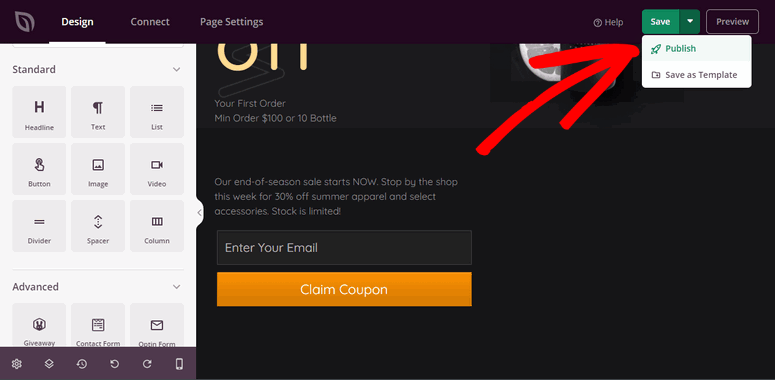
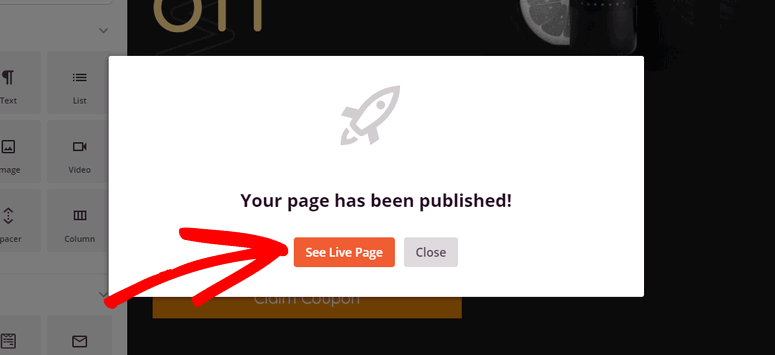
After you hit publish button, you’ll see a popup window that confirms your page is published on your site. You can click on the See Live Page button to see how your page looks.
And that’s all for today! You’re all set to convert Facebook leads into paying customers with a beautiful landing page.
We hope this tutorial helped you learn how to easily create and optimize your Facebook landing page in WordPress.
SeedProd‘s easy-to-use page builder lets you create any type of landing page for your site, so why not try your hand at creating other landing pages for your site?
You could create a lead squeeze page or a stunning splash page for your site. Or, you could create a Twitter landing page to drive traffic from Twitter and boost conversions.
If that’s not enough and you’re looking for more ways to target your Facebook audience, we recommend checking out Optinmonster. It’s the #1 lead generation and conversion optimization tool in the market. You’ll get access to beautiful templates and powerful targeting options like referral detection. So you can use it to create targeted popups that display only to your Facebook audience.
And for your next steps, you’ll definitely want to see these resources:
- Best Facebook Plugins for WordPress
- How to Automatically Share WordPress Posts to Facebook and Twitter
- How to Create Profitable Facebook Ads With Your Email List
We’ve picked these posts for you to help you improve your Facebook strategy to maximize conversions, sales, and revenue.

Comments Leave a Reply