
Do you want to broadcast your Facebook live stream on your WordPress site?
By syncing the live stream to WordPress, your website visitors can watch the session and interact with you without being redirected to your Facebook profile. In turn, you increase site traffic and session time and gain more viewers and engagement on your live streaming events. It’s a win-win for both platforms.
In this tutorial, we’ll show you how to easily link your Facebook live stream to your WordPress site using a plugin.
But first, let’s be sure that it’s worth it to
Is It Worth Streaming Facebook Live Videos on Your WordPress Site?
In recent years, live streaming on the social networking site Facebook has become a great medium for hosting live events and promoting brands.
Whether you are an influencer or an online store trying to sell your products, live streaming videos on Facebook will help you reach out to more people.
To gather more viewers and engagements, you can add your live videos to your website. This makes your website more interactive and helps you build your social presence.
If you are confident with coding, you can embed your Facebook live streams manually. But, why waste your time doing that when you can automatically stream your live videos on WordPress.
By using a Facebook live stream plugin for WordPress, you can easily add your live video anywhere on your website in a few clicks.
With that said, let’s move on to our step-by-step guide on how to add Facebook live streams in WordPress with the help of a plugin.
Adding your Facebook Live Stream in WordPress
You’ll find many live streaming WordPress plugins out there. However, you need to choose the plugin that offers advanced sharing features and ensures the best streaming performance for your video.
We recommend using Smash Balloon, the best social media feed WordPress plugin.
Smash Balloon allows you to add your social media feed, images, videos, albums anywhere on your site without any coding knowledge.
It offers many customization features that give you the freedom to customize how your social feed is displayed on your site. You can change the fonts, color and choose the styles that match your website’s theme.
Smash Balloon is a bundle of 5 different plugins that let you display content from Facebook, Instagram, Twitter, and Youtube on your WordPress site.
The plugins that are included are:
- Custom Facebook Feeds lets you showcase your Facebook photos, events, videos, live streams, Group content, and more
- Instagram Feeds allows you to add Instagram feeds, stories, IGTV videos, and more
- Custom Twitter Feeds show Twitter feeds on your site, including feeds that mention your account
- Feeds for YouTube help you display YouTube feeds, playlists, live streaming videos, and more
- Social Wall lets you combine feeds from Instagram, Twitter, Facebook, and YouTube
For this tutorial, you’ll need Custom Facebook Feeds by Smash Balloon.
The plugin is simple and easy to use so anyone can use it to broadcast Facebook live videos on their site. Also, it is fully responsive and mobile-friendly, meaning your live streams will work well on any device.
Now, we’ll show you how to add your Facebook live streams in WordPress using Smash Balloon.
Step 1: Install Custom Facebook Feed Plugin by Smash Balloon
Before you start, you need to sign up for a Smash Balloon account.
Once you sign up, you can find your license key and download file for your plugin on the Downloads tab.
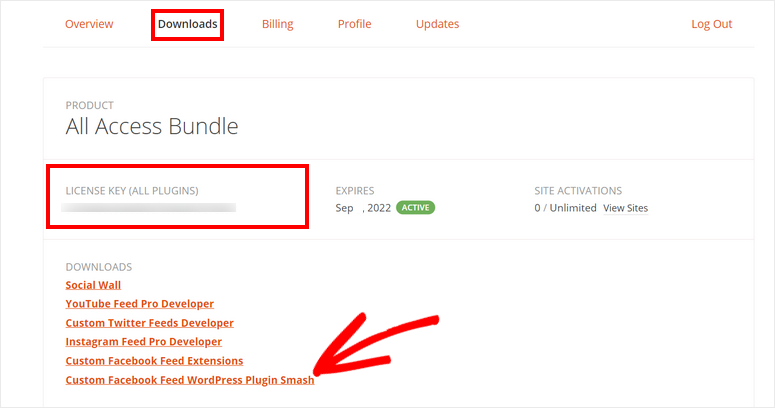
Then, you need to install and activate the Custom Facebook Feed plugin on your site. If you want more details, you can check out our guide on how to install a WordPress plugin.
Once you install and activate the plugin, you need to navigate to the Facebook Feed » Settings » General tab on your WordPress dashboard.
Here, enter your license key here and click on the Verify button.
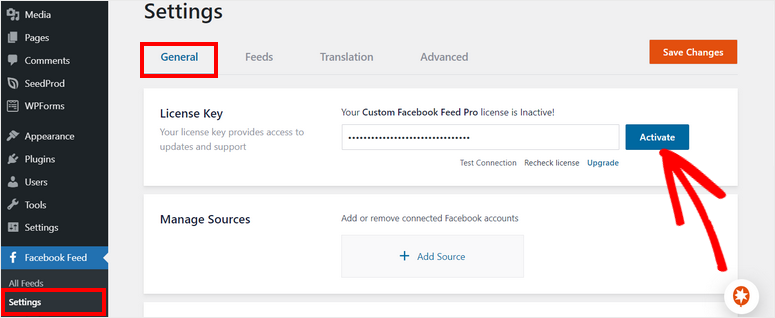
Now, you need to connect your Facebook page or group with your WordPress site.
Step 2: Connect your Facebook Page or Group
To connect to your Facebook page or group, click on the + Add Source button on the Manage Sources option.
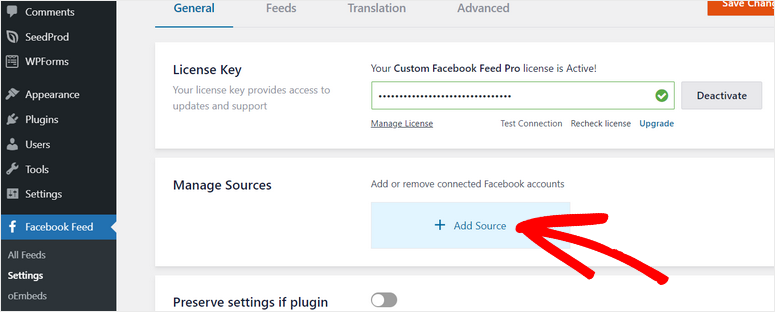
Then, you’ll see a popup window where you have to choose whether your source type is page or group. After you choose, click the Connect button to integrate your Facebook account.
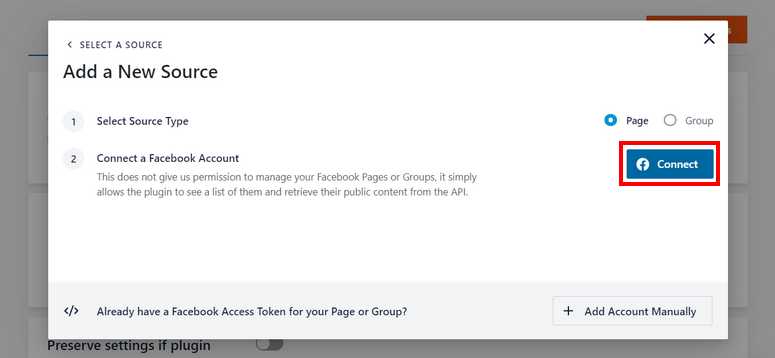
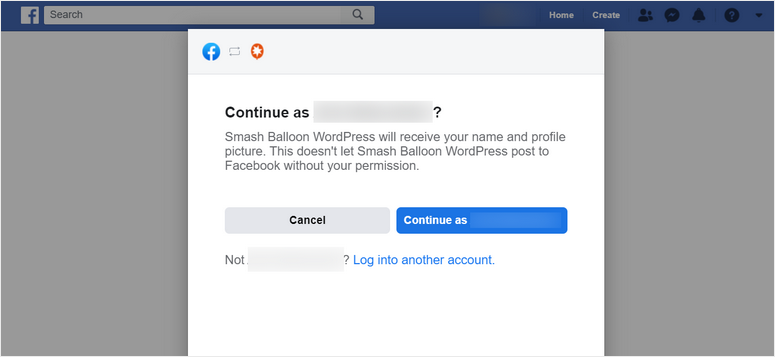
You’ll be redirected to Facebook to log in to your account. If you are already logged in to your Facebook account, you’ll have to confirm your account.
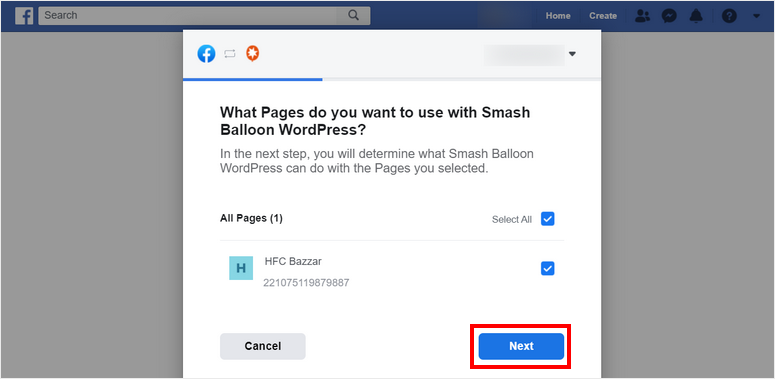
As we selected the page option earlier, we are going to select a Facebook page to stream live videos. Click on the Next button to continue.
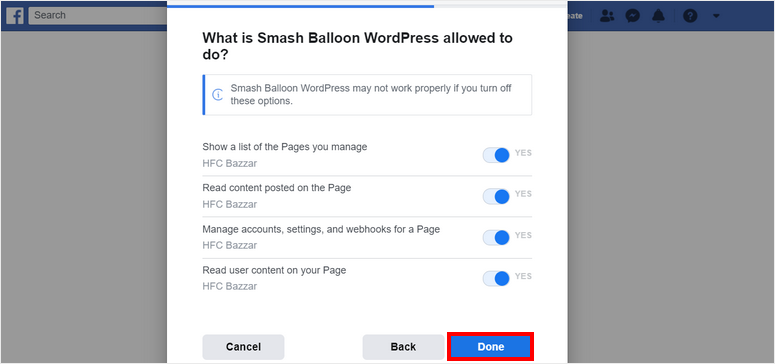
Now, you’ll see options to give permissions to Smash Balloon to access your Facebook page. You can choose what permissions you want to grant, although we recommend leaving the default settings to ensure the plugin works correctly. Then click on Done.
Once you connect with your account, you can select your Facebook page and add it as a source for your live streams.
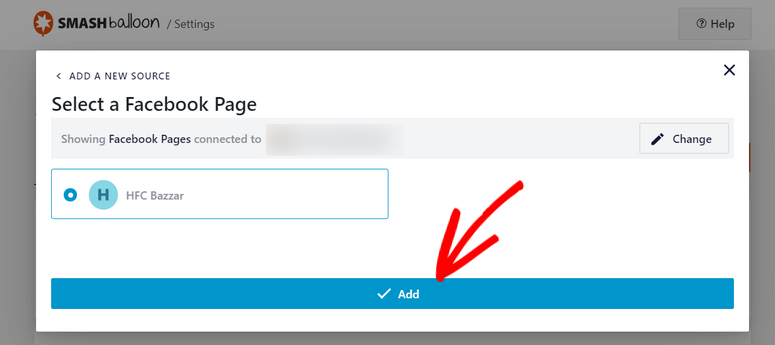
Next, you’ll need to create a feed to display your Facebook live streams on WordPress.
Step 3: Create a New Facebook Feed
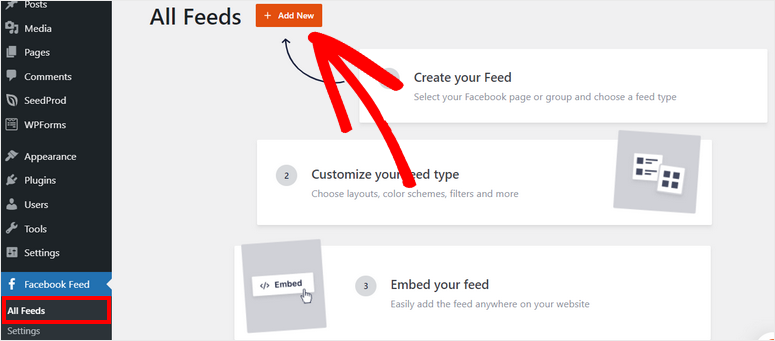
To create a new Facebook feed, open the All Feeds tab and then click on the + Add New button.
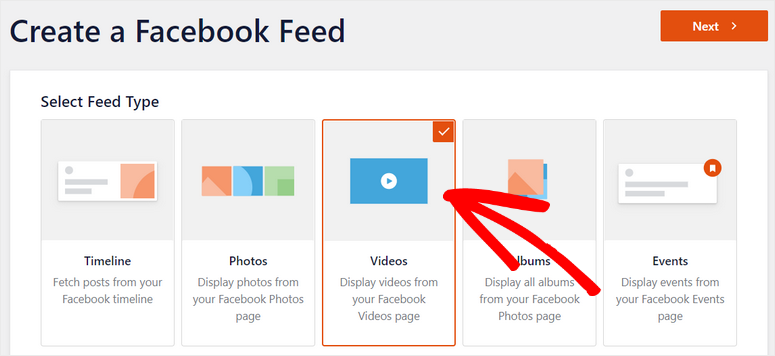
First, you need to select the feed type as ‘Videos’ and click on the Next button.
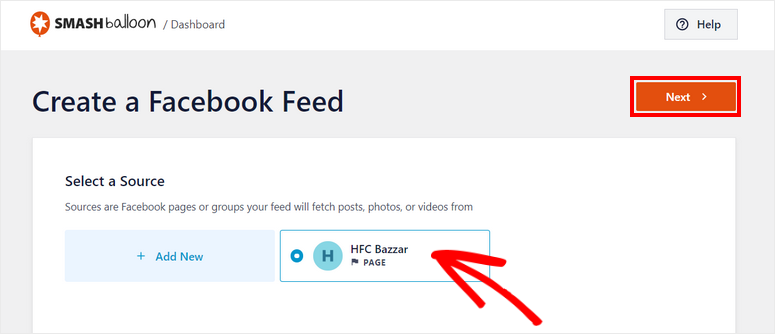
Then, you’ll see a window that lets you choose the Facebook page for your live stream videos. You can choose the required page and move to the next step.
This will launch a feed editor page that lets you customize how your Facebook live stream looks on your site.
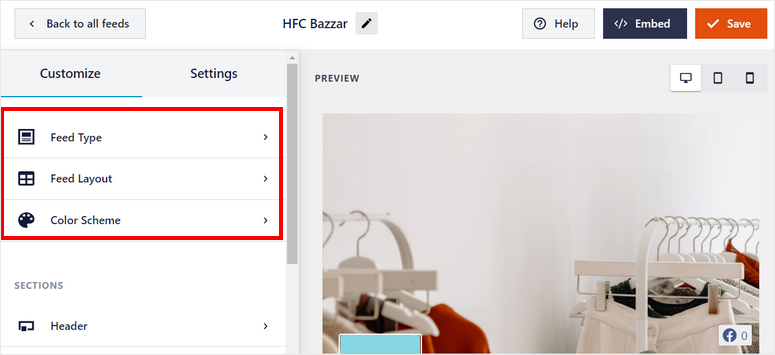
On the left side, you can see the customization options. And on the right side, you can see the preview of your Facebook feed.
To change the settings of your feed, you have 3 options:
- Feed Type: Change the type of Facebook feed like images, albums, videos, and more.
- Feed Layout: Choose from layouts like list, grid, masonry, and carousel. Other settings like feed height, number of posts, and columns
- Color Scheme: Set the theme for your Facebook feed. 4 options include inherit from theme, light, dark, and custom.
After that, you can also change the settings for each section of your Facebook feeds. There are 5 options including Header, Post, Like Box, Load More Button, and Lightbox.
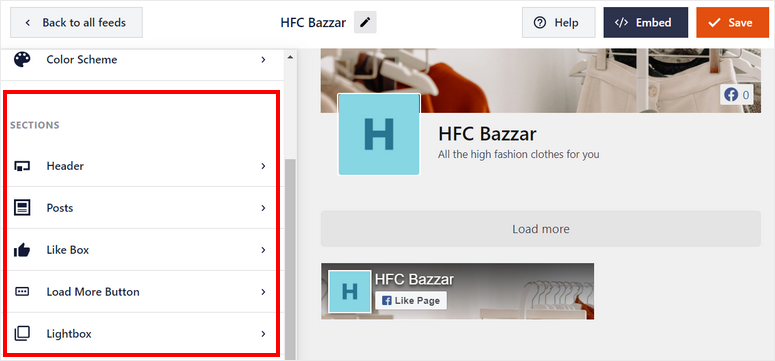
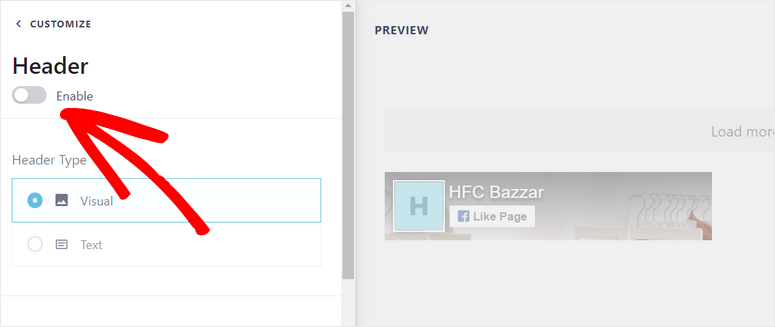
Smash Balloon’s editor is user-friendly and incredibly easy to use. So you can go ahead and customize the Facebook live stream feed to look just the way you want. For instance, you can enable the header of your Facebook page to hide your cover image.
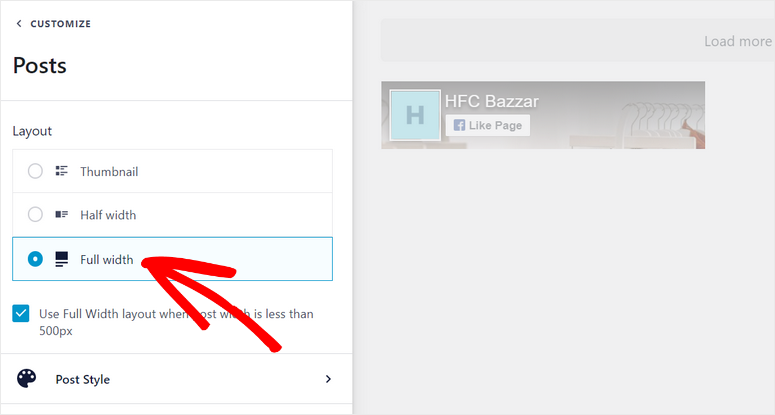
Or, you can change the layout of your posts. The layout options are thumbnail, half-width, and full-width. So you can choose that layout that matches the look you had in mind.
Don’t forget to click on Save after you are done with customizing your Facebook live stream feed.
Now, you can add it to your WordPress site.
Step 5: Embed Facebook Live Stream on Your Site
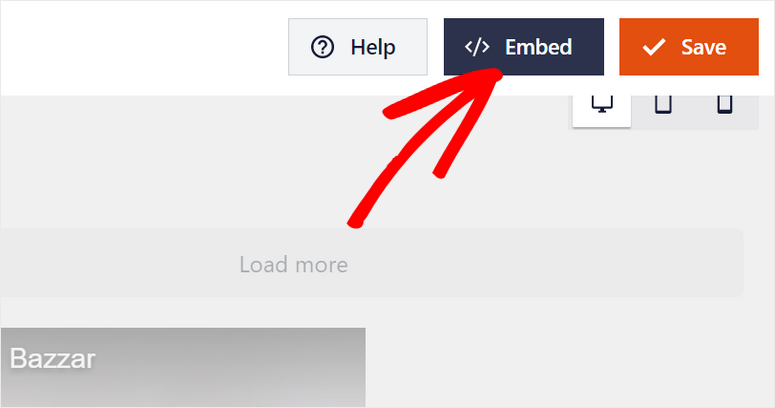
To link your Facebook live stream, you need to click on the </> Embed button on the top-right corner of the page.
Now, there are 2 ways of adding your Facebook live video on your WordPress site.
2. Using WordPress block or widget
Smash Balloon works well with the WordPress block editor and you’ll find a ready-made block that lets you add your Facebook live stream videos in 2 clicks.
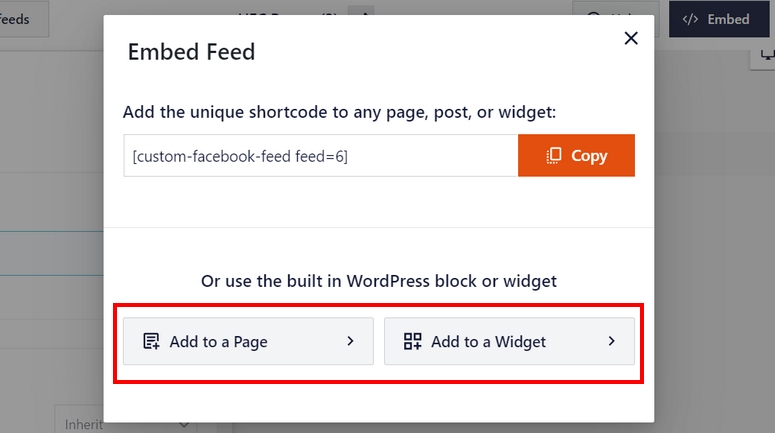
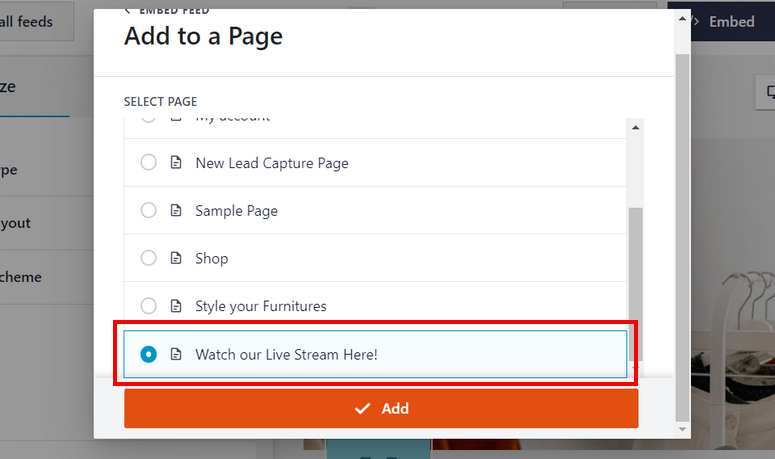
If you choose the Add to a Page option, you need to choose the page in which you want to add the live video.
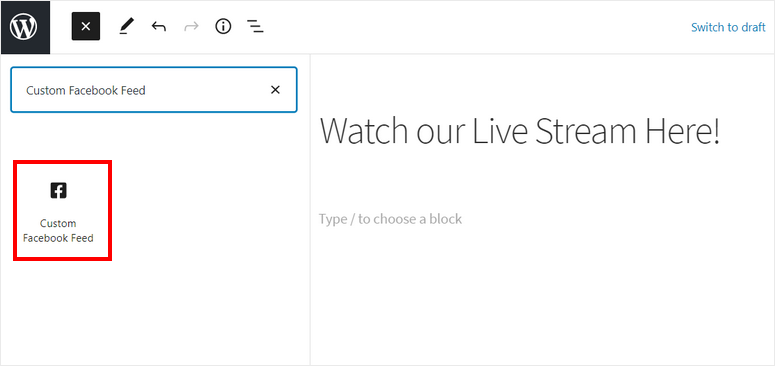
Then, you are automatically taken to the page editor. In the block editor, search for the Custom Facebook Feed block and add it to your page. All that’s left to do is publish or update the page.
Similarly, you can choose the Add to a Widget option and add the Custom Facebook Feed block to the widget areas such as a sidebar
2. Using shortcode
With Smash Balloon, you’ll never need to use any coding, however, if there is an instance where you feel it’s easier to embed a shortcode, then there’s an option for that.
To add the Facebook live stream using shortcode, copy the shortcode first.
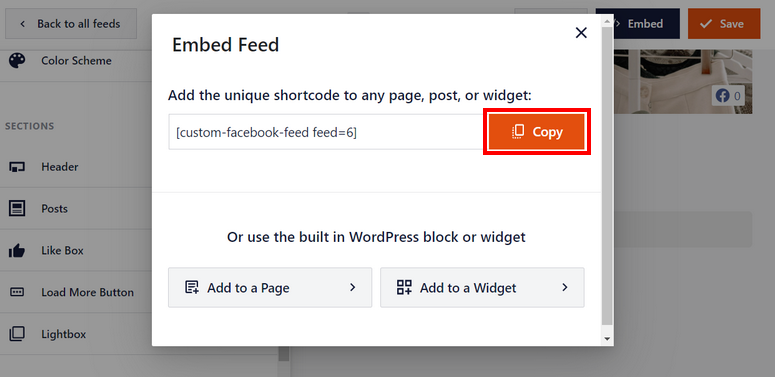
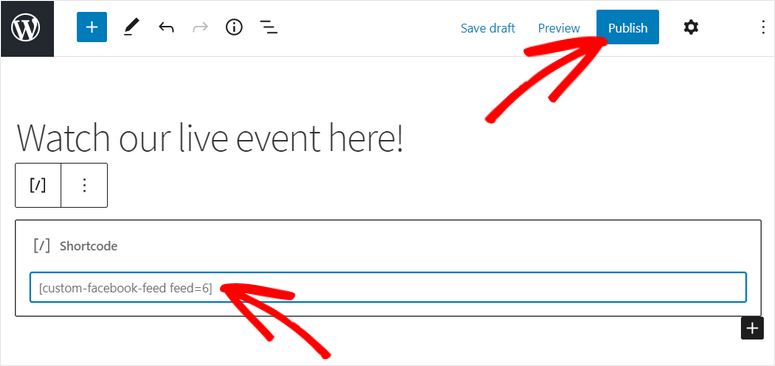
Then, head over to the page you want to show your live video. Paste the shortcode on the block editor and Publish your page.
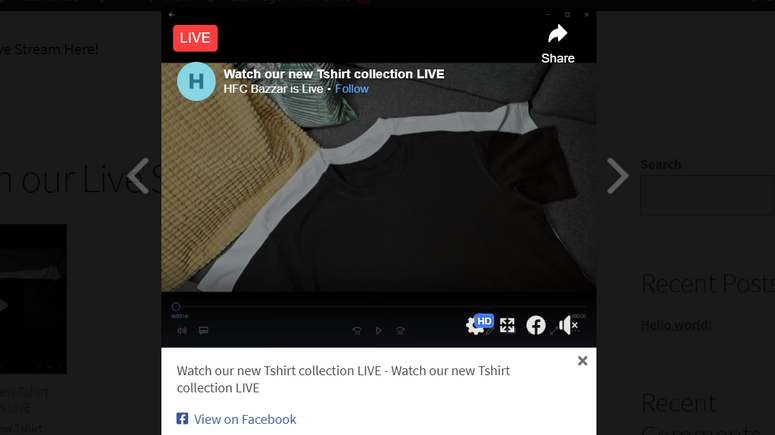
Now, you can test out your live streams. The stream will begin once you go live on Facebook.
Visitors can click on the feed to watch the live stream from your Facebook page.
That’s all for today! You are all set to stream your Facebook live videos on your WordPress site.
Smash Balloon is the best Facebook live stream plugin for WordPress that lets you add Facebook live videos in a few clicks. It offers many customization features that allow you to change the look and feel of your Facebook post.
What’s more, you can also link your YouTube live stream to your website with the help of the Feeds for YouTube plugin.
Other than live videos, you can add social media feeds like posts, photos, albums, events, and more to your WordPress site.
If you want to grow your Facebook interactions, you can check out these resources:
- How to Show a Facebook Feed in WordPress
- How to Effectively Track Facebook Traffic With Google Analytics
- 10 Best Facebook Plugins for WordPress
These posts will help you add more Facebook feeds to your website and track your traffic on Facebook. The last one will help you choose the best plugins that help you integrate your Facebook account with your site.

Comments Leave a Reply