
Are you looking for a website builder? Wondering if GoDaddy Website Builder is worth it?
GoDaddy is a renowned brand when it comes to domain registration and web hosting. In our GoDaddy review, we’ll take a thorough look at its usability by creating a demo site, so you can figure out if it’s worth the hype.
Step 1: Setting Up a Free Account With GoDaddy Websites + Marketing
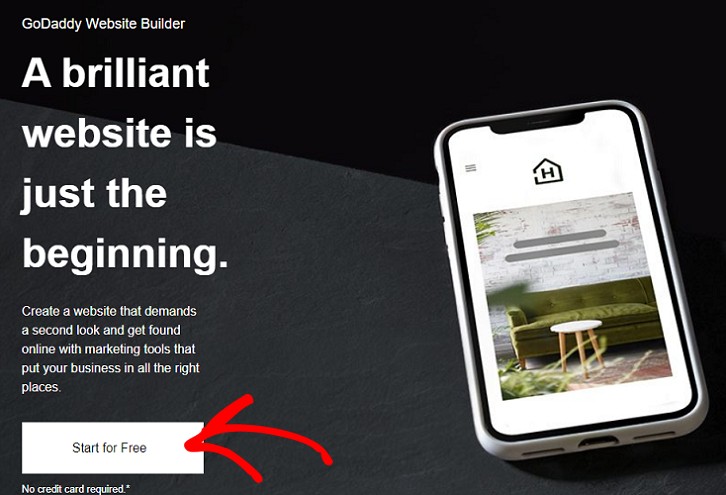
To create a free account, you have to go to the official website of GoDaddy Websites + Marketing and click on the Start for Free button.
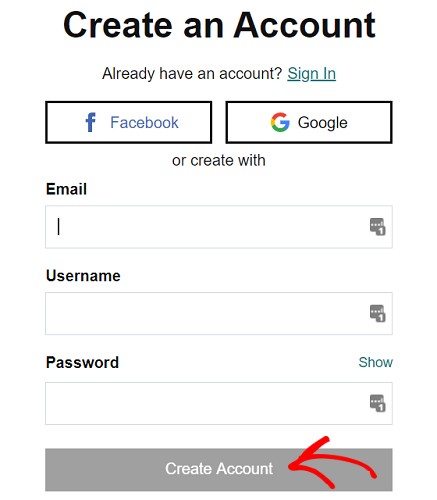
You will then be directed to a new page where you will be asked to create a new account with GoDaddy. Enter the details here and click on the Create Account option to get started.
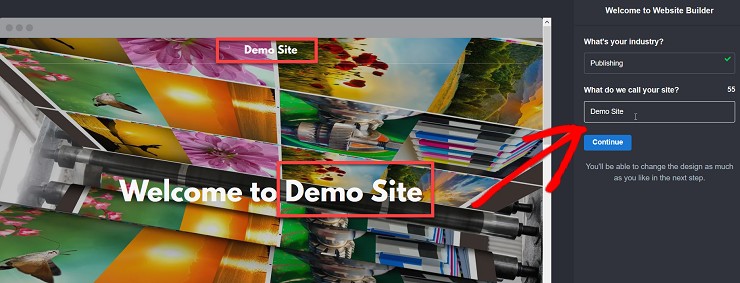
Once you’ve created the account, you’ll be on the website builder setup page, which actually works as a visual builder. You can enter your website industry and name on the fields on your right-hand side. You’ll see it being reflected in the space on your left.
Click on the continue button to proceed to the next step where you can edit your page further.
Step 2: Editing with GoDaddy’s Website Builder
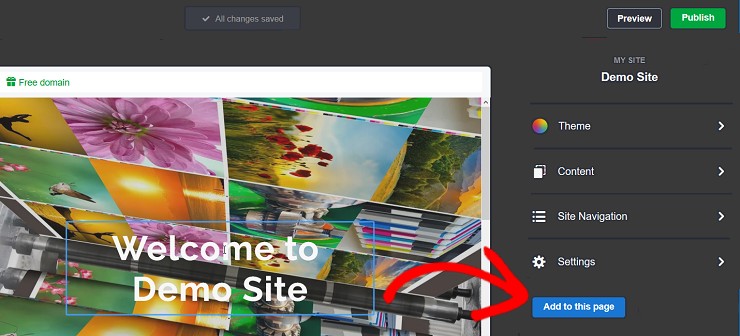
You should now be on the visual page builder with the editing option on the right and the real-time view of the changes on your left. Here you will see 4 different options for customizing your theme.
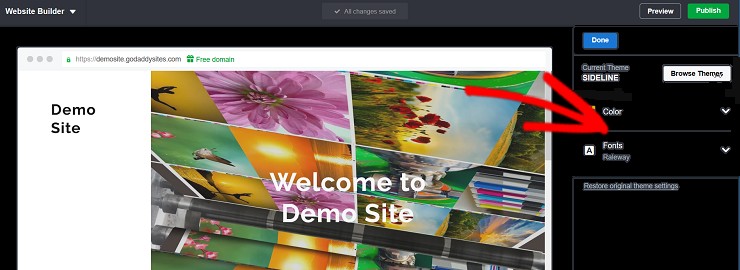
Let’s start with the first option. Click on the Theme option. You’ll see that all the available themes appear on your left.
GoDaddy Websites + Marketing offers more than 20 different themes each with a unique look. Now select the one you like the most. It will automatically expand to fit in the screen and you’ll have the editing options on the right.
Here you can work on changing your theme color, font style and sizes. This will then be used for your headlines, links, and buttons. However, you won’t be able to add any custom fonts because they don’t have the option for that.
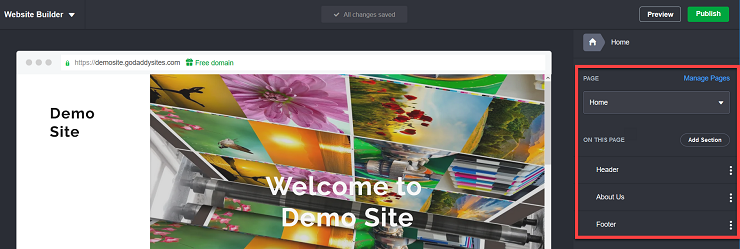
Once you are done, click on the Home icon just below the Preview and Publish button. This will take you back to the main page with 4 customization options.
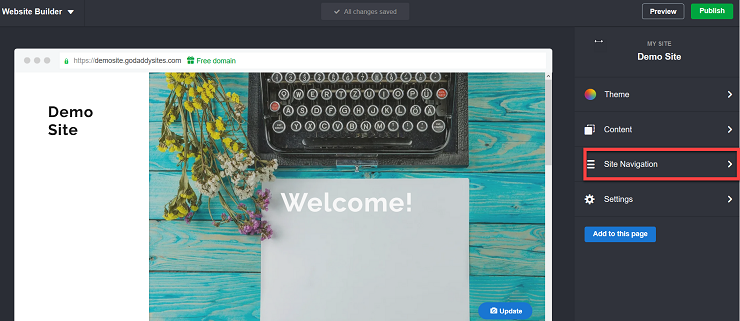
You can now click on the Content option to add your own content. Again this tab will have 4 choices for you.
You can select the option depending upon which section you want to add your content. If it’s the Home page just click on the Home page option. You can then start adding your own content on the left side of your screen that displays your homepage.
The homepage tab will let you work on all the elements that you can add to your homepage. You can change your cover picture, add a new color, work on the alignment, change your logo, add CTA buttons and more under this option.
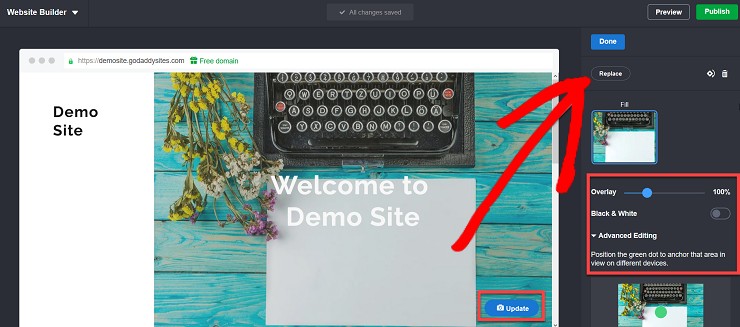
To change the cover picture, you can use the Update button on your real-time editor. Then use the Replace button to upload a new image. It also lets you browse through its library of stock images if you want.
You can also use the advanced editing options if you need more advanced changes. Once you are done working on the homepage, you can again click on the home tab. You can now work on your Header, About Us page and the Footer.
However, in each of these options, you can add a limited number of elements only. So if you want to have full flexibility about the design, you might not be happy with this website builder.
For example, in the header, you can add your logo, a promotional banner, CTA (call-to-action) button, and your contact number. There’s no way you can move the content container around, and it has no option for customizing the font size, color or style.
Similarly, in the Footer, you can only add your Copyright, footer note and add the social links. If you want to add an affiliate link or anything of that sort, you might find it annoying to use.
Step 3: Setting Up the Site Navigation in GoDaddy Website Builder
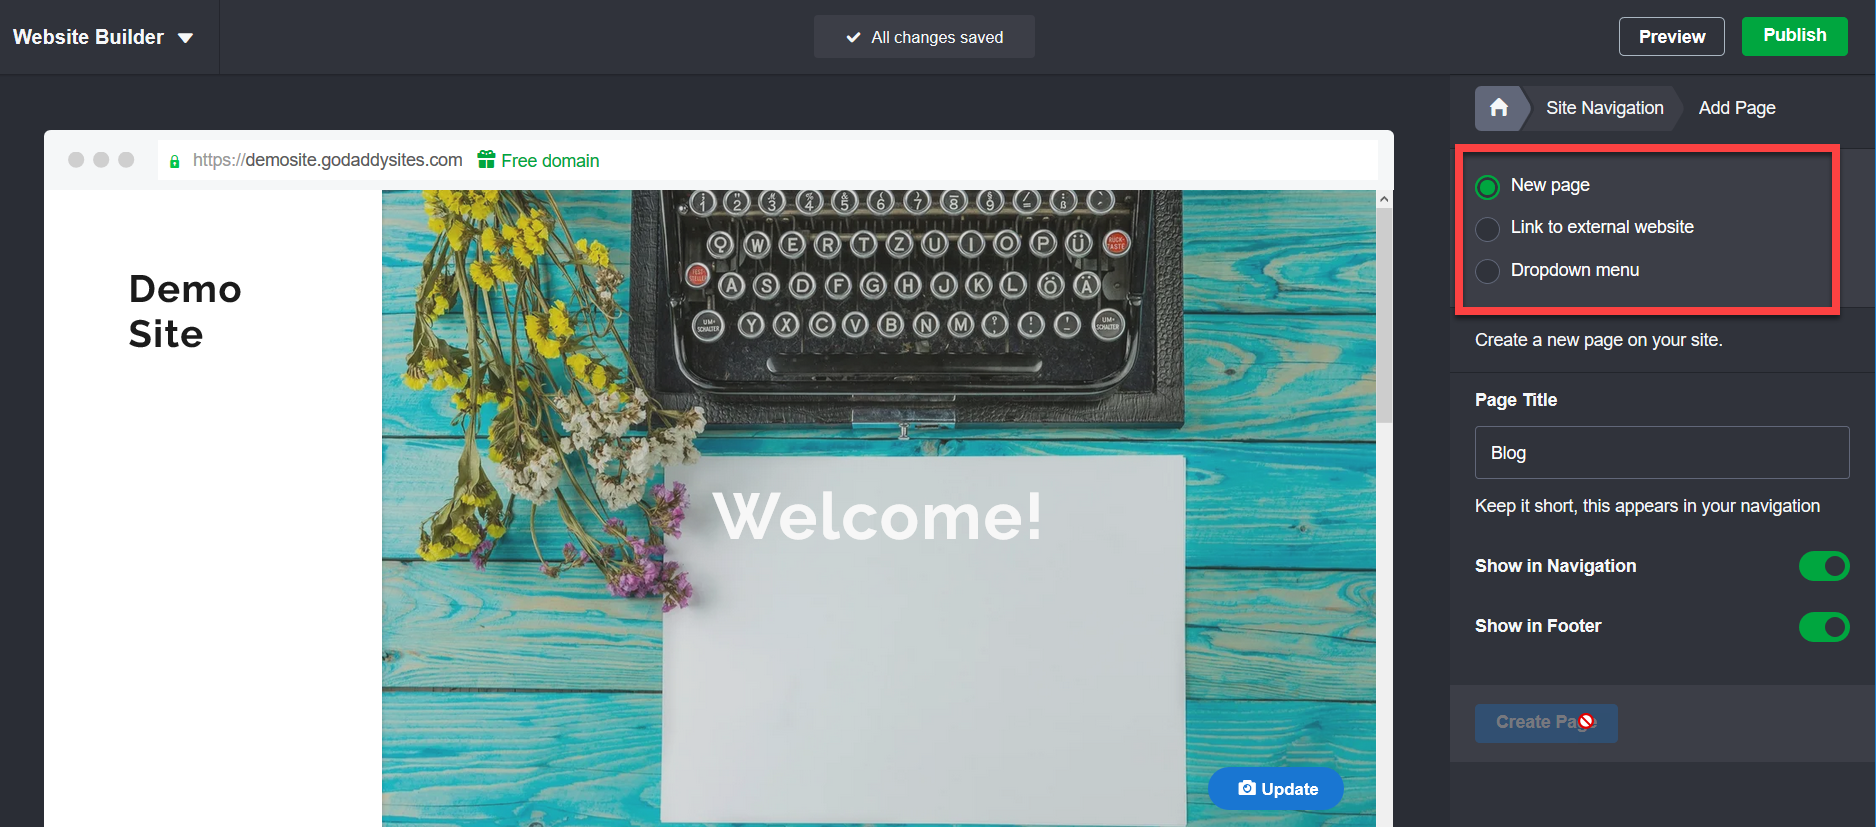
The next option is Site Navigation. Here you can add new pages to your website and add a link to an external website. Both these elements can be displayed on your footer and header.
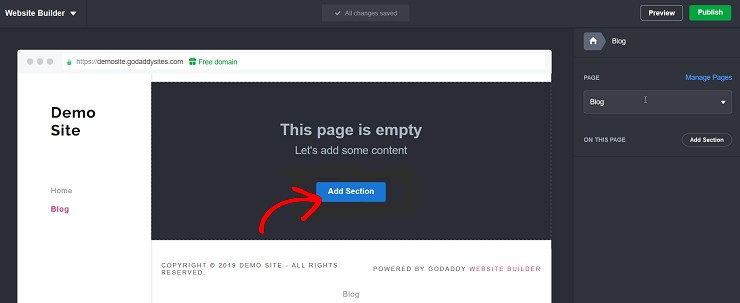
You can also add a dropdown menu if you want. Let’s add a new page. Just select the New Page option and name your page as shown in the above screenshot. You will now be redirected to a new screen. Now click on the Add Section button.
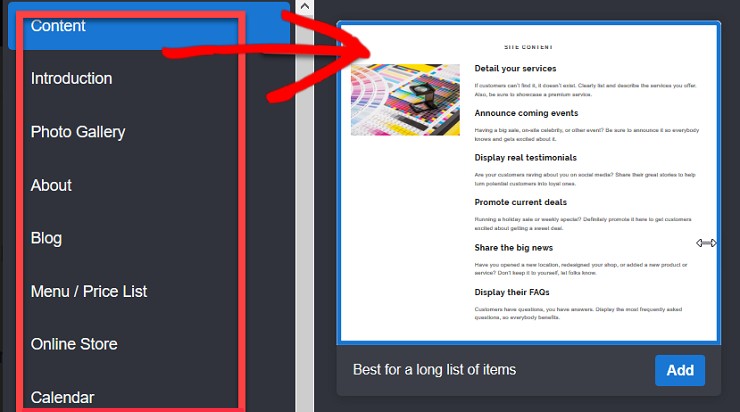
This will offer you several options to work on your page design. Compared to the home page you will find the options here a little more flexible. You can work on the layout of your page, alignment of your content, add images and galleries, CTAs, calendars, social links, testimonials, and a lot more. You can also add an online store to your page.
It also supports audios and videos. Whatever you want to add, make sure you’re using the right layout that supports your file.
Step 4: Setting Up an Online Store With GoDaddy Websites + Marketing
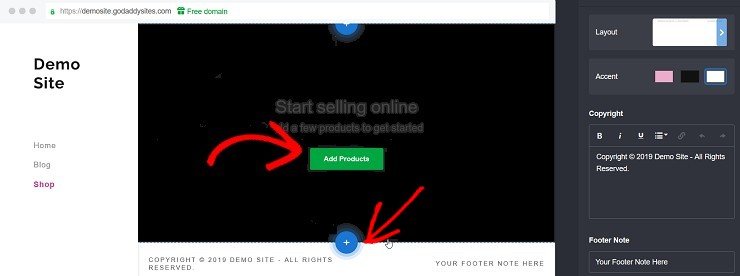
To set up an online store, just click on the Online store option and the page will take a few seconds to load one for you. You will then have the following page on your screen.
You can click on the Add Products button for adding what you want to sell. The ‘+’ lets you add new sections to your store.
It also doesn’t allow personal logins, adding ratings or recommended items in your store.
Overall, the options for setting up an online store is very basic.
Step 5: Checking Out the Settings Options
The fourth option is the Settings option. You can click on the Settings button to see all the options available. You can add basic site details, SEO, Analytics, social links, a favicon, etc.
GoDaddy Websites + Marketing Pricing
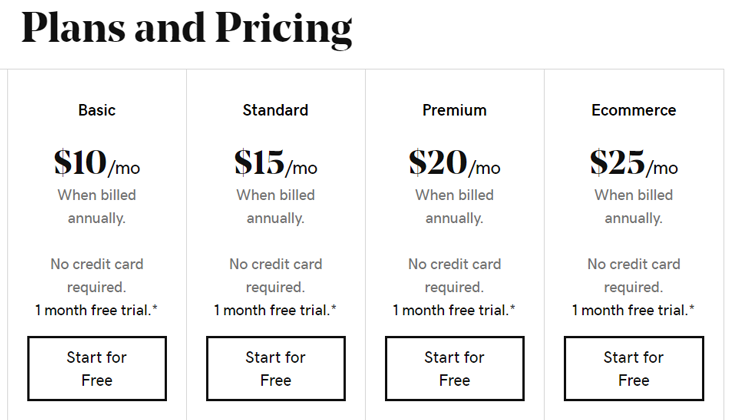
GoDaddy offers 3 plans for their Websites + Marketing platform.
- Basic: $10 per month
- Standard: $15 per month
- Premium: $20 per month
- Ecommerce: $25 per month
All plans come with a 1-month free trial. The best part is that a credit card isn’t required to sign up for their platform. With the basic plan you get all the essential features, like 24/7 support, connect a custom domain name, PayPal button integration, access to GoDaddy Insights, and 100 email marketing sends per month.
If you want to integrate an eCommerce storefront as well, then choose their Ecommerce plan.
Is GoDaddy Websites + Marketing Worth Purchasing? – Our Verdict
Typically, GoDaddy Website Builder users are the ones who prefer GoDaddy brand to their contenders. GoDaddy makes it easy and cheap to register a domain name, so beginners find it easy to build a website with that domain name.
If you like to register a domain name with GoDaddy and manage everything with your GoDaddy account, then you might find GoDaddy Website Builder, also known as Websites + Marketing, totally worth it.
The best thing is that Websites + Marketing comes with everything you need to get your site up and running. It’s true that it has a lot of limitations, like every other site builder.
If you want to build a professional blog at a cheaper price with endless possibilities to build and grow your site, then you might want to consider choosing WordPress.org.
- What is WordPress? Why is it free? Is there a catch?
- Why use WordPress? 9 Reasons Why It’s the Perfect Site Builder
- Complete WordPress review: Must read before launching a site


Comments Leave a Reply