
Do you want to learn how to create and style buttons for your WordPress site?
Buttons are powerful and can be used to call users to action to sign up for your email list, follow you on social media, and buy your product.
To create custom buttons, you can use a code snippet or simply download a plugin that does everything for you.
In this tutorial, we’ll show you how to add and style a button on your web page and even add animation effects. Let’s get started.
Here’s a table of contents that you can use to skip to the method that interests you the most:
- Add a button in the Block Editor
- Add a button using SeedProd
- Add a button using Thrive Themes
- Add a button using Coding
Before you get started, you may want to see this detailed cheat sheet on how to create a perfect button for your website.
Adding buttons to your posts and pages encourages your users to do what you want them to do. Without a button or CTA, your website lacks an optimized strategy and leaves your conversion rates up to chance.
As marketing expert Neil Patel says, a button or CTA is the “bridge between marketing and sales.” You can use buttons in WordPress to give your final CTA to your users like Buy Now, Contact Us, Download, or others.
However, it’s important that you know how to use these buttons to maximize your conversions. There are several factors that make some buttons better than others.
These include:
- Knowing your conversion goal
- Keeping your button text short and catchy
- Using action words
- Providing an incentive
Now, let’s look at how to create powerful WordPress buttons for your website without any coding.
Add a Button in WordPress with the Block Editor
By default, the WordPress block editor lets you add a simple button to your site. This is free and anyone can use it.
First, create or edit any page or post in WordPress. Then you can use the ‘+’ button to add a new block. Search for ‘button’ and add the widget to your page.
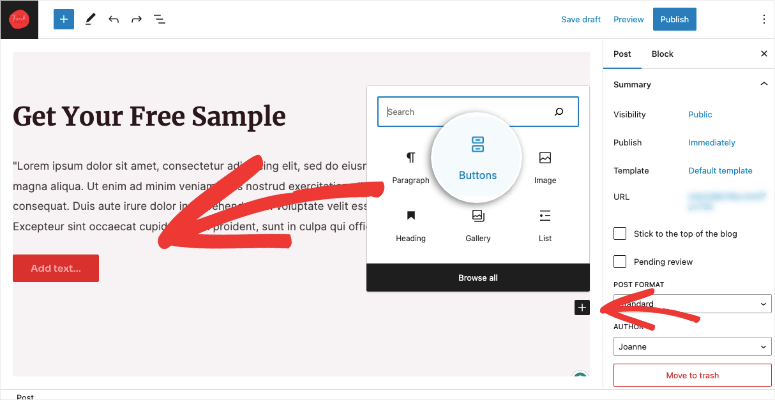
Now you should see a button added to your post. Let’s customize it. Click on the button to open up the settings for the buttons.
You’ll see a menu appear just above the button. You can explore these settings to change the alignment, add a link, edit the text and font, and more.
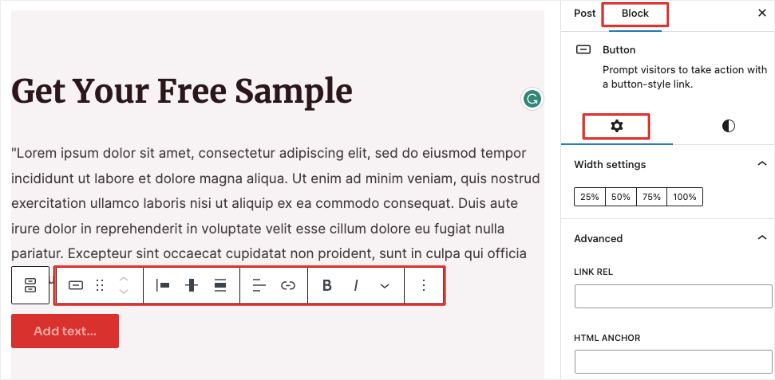
In the right panel, you can change the width, add a link and HTML anchor as well. If you switch to the Styles tab, you’ll get more options to customize the button.
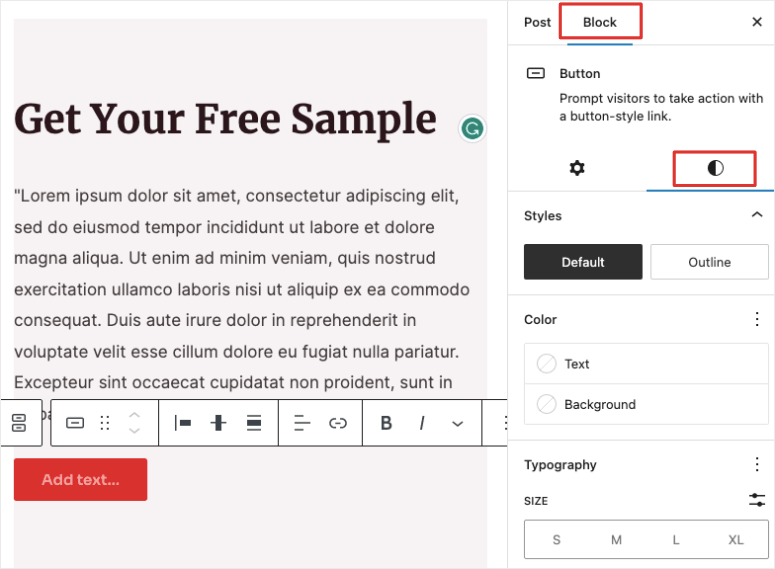
You can change the button from a solid background to an outline. There are options to change the size, padding, and border.
Now this method is easy but limited in customization options. If you want to style the button and add animation effects, then you’ll need to use a WordPress page builder. Next, we’ll show you how to use 2 very popular builders – SeedProd and Thrive.
Add a Button in WordPress using SeedProd
There are many page builder plugins out there that let you customize your page and add buttons with ease. Our #1 pick is SeedProd.

SeedProd is a website and landing page builder for WordPress. It comes with premade themes that already have buttons strategically placed for you. You simply need to choose a theme and edit it to match your needs.
With SeedProd, you can add all sorts of powerful elements like:
- Social profiles
- Social sharing buttons (Like, Tweet, Follow)
- Pricing table & payment button
- Countdown timer
- Navigational menu
- Reviews & testimonials
- Image gallery
- Google Maps
…and so much more.
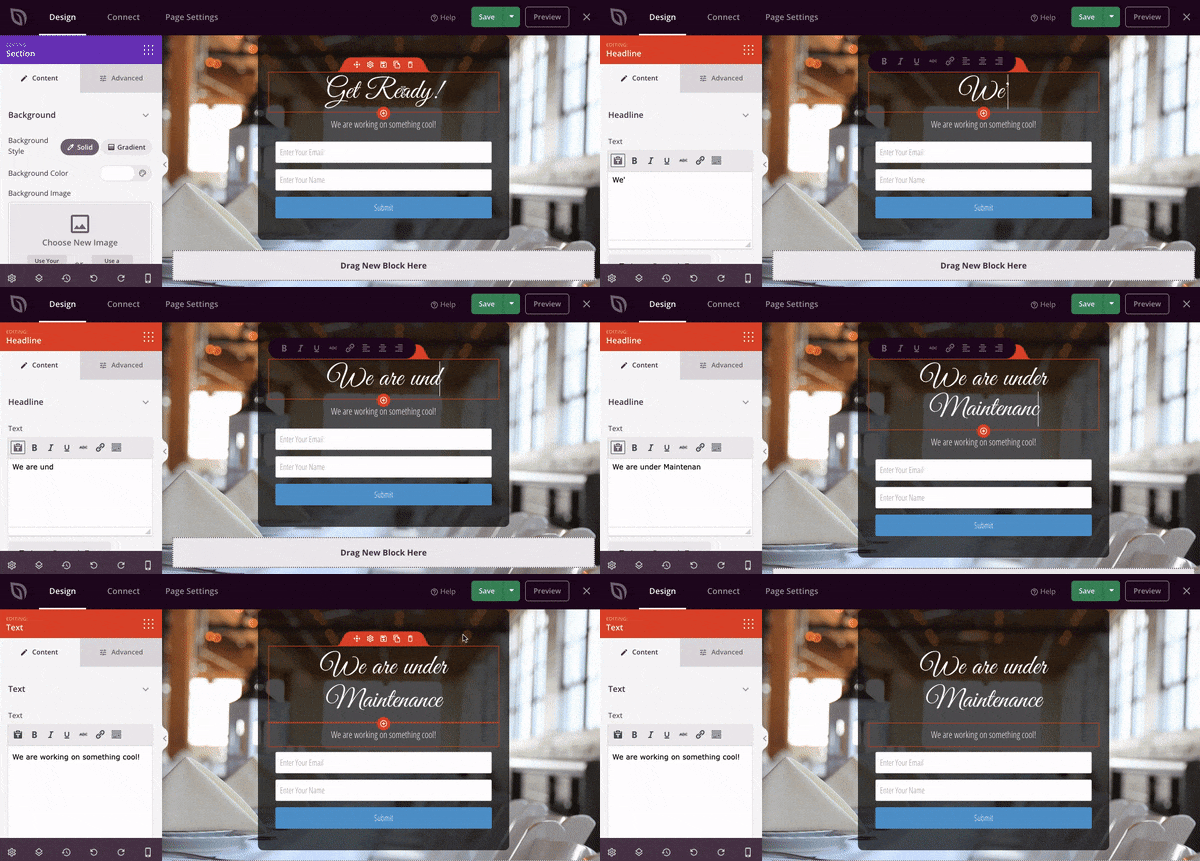
There’s a drag and drop builder with a visual interface. This means you’ll edit the front end of your website. Simply click and edit anything you need, and drag and drop new elements to where you want them.
There’s never any need for coding. Check out how we changed the text in our sample design here:
Coming to advanced customization options for button, SeedProd includes:
- Premade button styles
- Customizable size, shape, and color
- Custom fonts and typography
- Icons to button
- Animation effects
- Duplicate feature to carry button style to other blocks
- Save the layout as a custom template
- Show/hide on devices
- Preview on mobile and tablet
- SEO-friendly elements like no-follow & open in new tab tags
With SeedProd, you’ll have everything you need to design a stunning button to get users to click and take action on your site.
The first thing you’ll need to do is download and install SeedProd on your site.
Once you’ve activated the plugin, head over to the WordPress admin dashboard and open SeedProd. If you’re building a new website, you can select a readymade theme kit and customize it. This will create all the pages and posts your site may need.
For this tutorial, we’ll show you how to add a button to a landing page. Navigate to the SeedProd » Landing Pages tab. Here, you can add a new landing page.
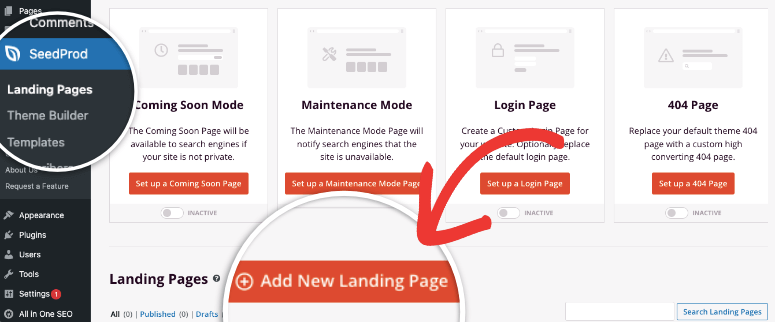
Choose a template and add a name for your page, then the builder will open. You’ll see a live preview of your design with an editing panel on the left.
From the standard blocks available, simply drag and drop the button block into your design. When you do this, more options to edit the button will open on the left. You can simply click on the button text and add your own call to action. See how we added and edited a button on our page easily:

When you select the button, in the left panel under the Content tab, you can edit the text, size, alignment, add a link, and more. These are the default options available in the WordPress block editor as well.
When you add a link, you’ll get options to add SEO elements such as ‘no follow’ and ‘open in a new window’.
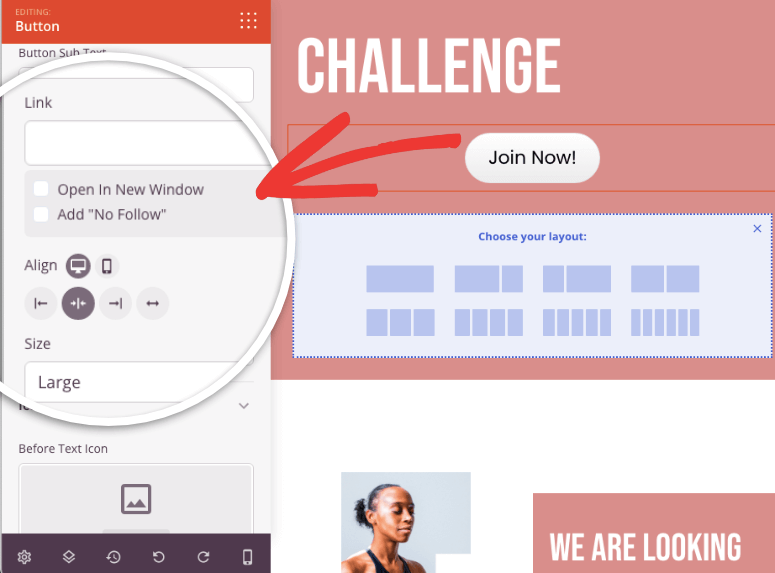
Now there’s more. You don’t have to style the button on your own. If you switch to the Templates tab, you’ll see readymade button designs to choose from. You can choose a flat or pill button design.
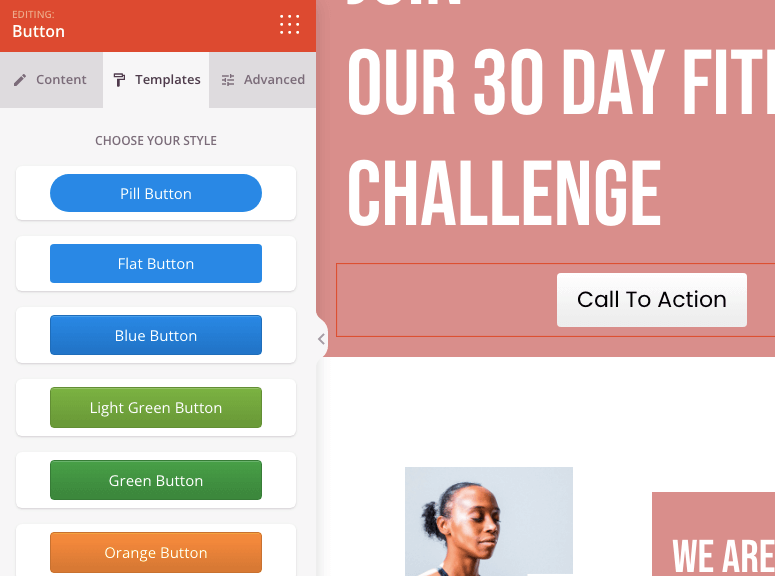
There are also tons of colors to choose from. If you want more control over your button style, head over to the Advanced tab. Here, you can fix the padding, radius, width, color, and more.
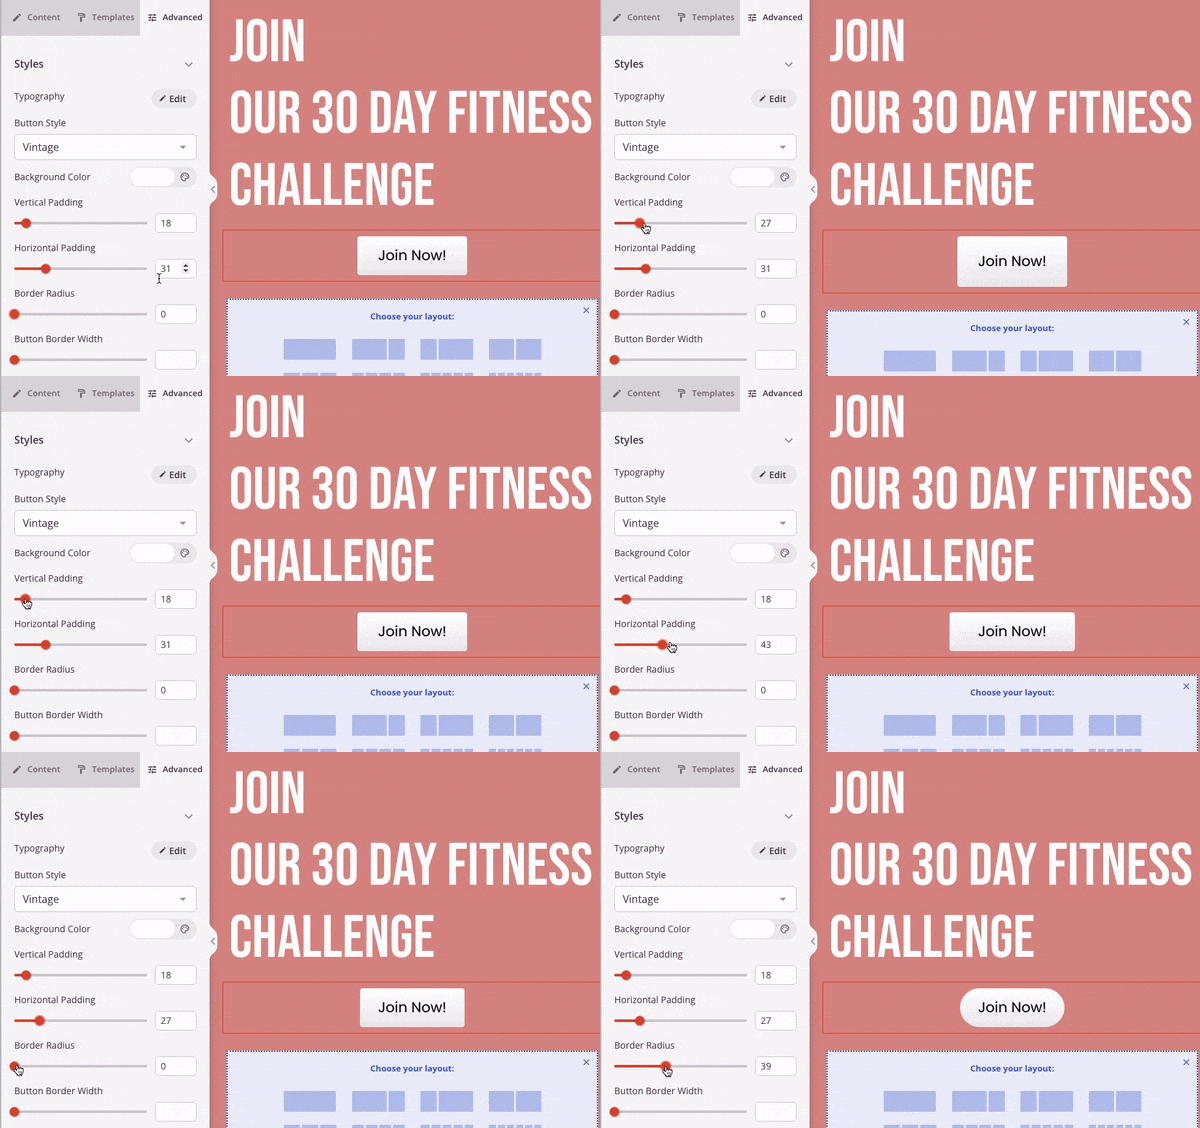
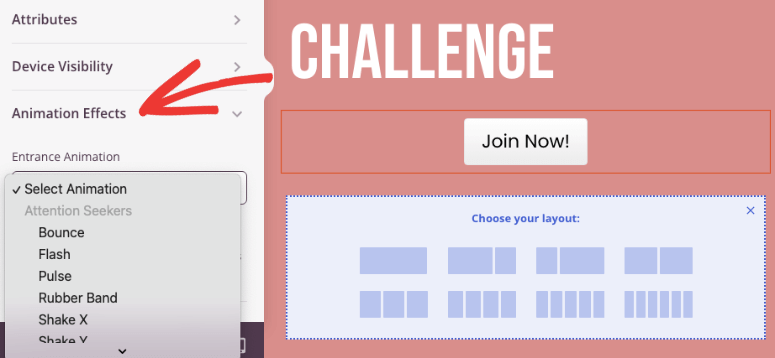
In the Advanced tab, scroll down and you’ll see Animation Effects. You can make your button bounce, pulse, shake and so much more. This will help you grab your reader’s attention.
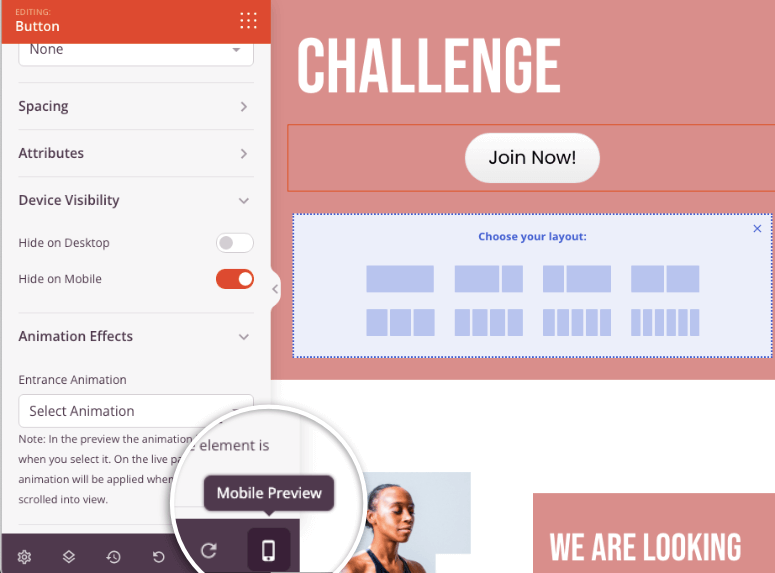
At the bottom of the page builder, there’s an option to preview on mobile and tablet to make sure your button design looks good on all devices.
Like this, you can customize your entire landing page with SeedProd. When you’re ready, you can save and publish your page.
Add a Button in WordPress using Thrive
Thrive Themes has a powerful theme builder and landing page builder that you can use to customize your WordPress site.
For this tutorial, we’ll show you how to use Thrive Architect – the landing page builder. The steps for the theme builder follow similar steps.

Thrive Architect is beginner-friendly and easy for anyone to use. This plugin is a premium tool so you’ll need to sign up for a Thrive account first.
Then you can install this plugin on your site. Learn how to do that in our Thrive Architect Review.
Once installed on your site, get started by creating or editing any page using the Thrive Architect builder.
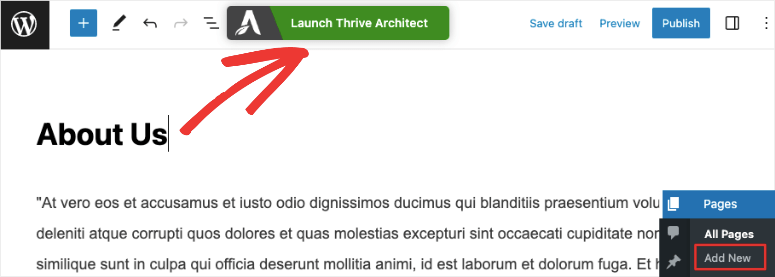
When the Thrive landing page builder opens, you’ll see a preview of your page along with editing options on the right and left of the builder.
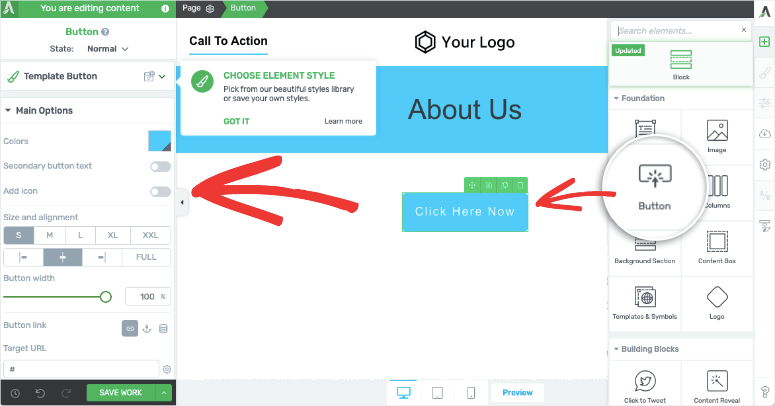
In the left panel, click on the ‘+’ icon and a block menu will open. Here you can select the ‘Button’ block and drag and drop it in your design.
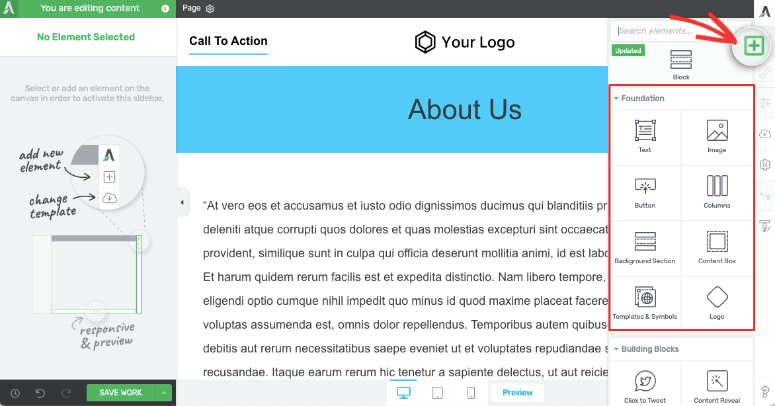
When you do that, you’ll see the button appear in the preview along with editing options on the right. You can change the color, size, alignment, and more. You can also add a link and add ‘no follow’ or ‘open in a new tab’ tags.
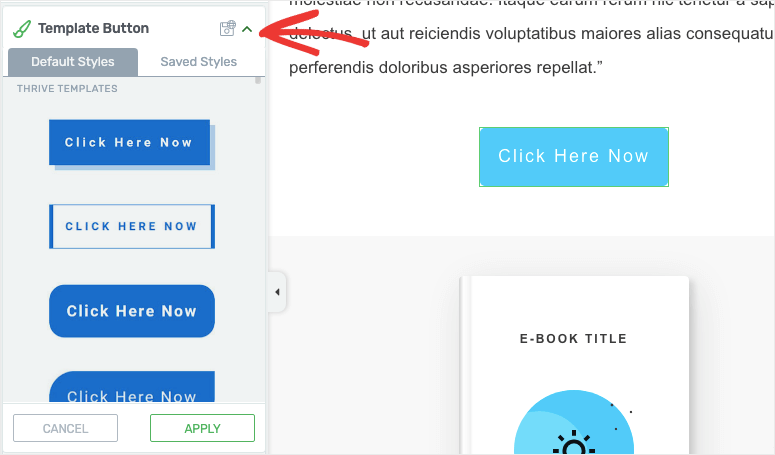
In the left menu, there’s a ‘Template Button’ tab. When you open it, you’ll see different button styles to choose from. There are so many options here, you’ll never have to style a button on your own.
Back to the Main Options tab, scroll down to find more options.
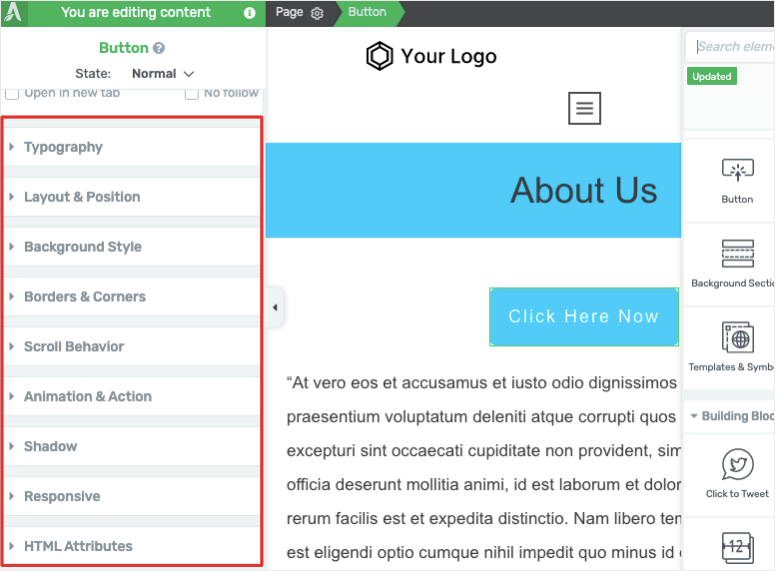
These options include:
- Typography
- Background Style
- Layout and Position
- Animation and Action
- Responsive
- HTML attributes
…and more.
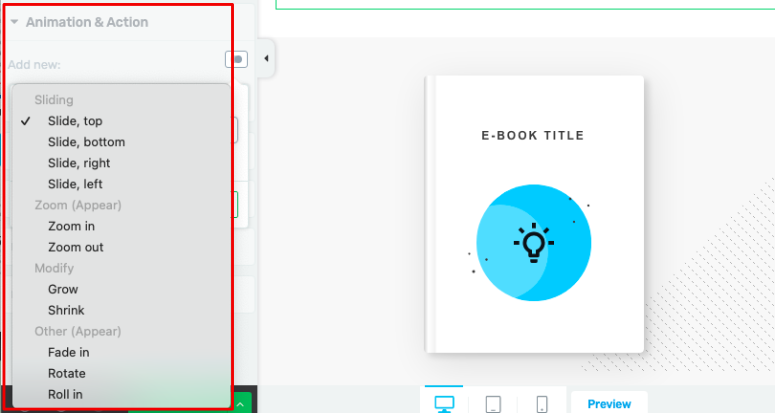
To make your button come alive, open up the Animation & Action tab. You’ll see animation effects to make your button slide, zoom, grow, shrink, fade, and more.
When you’ve customized your whole page and you’re ready to publish, open the settings icon at the top of the builder. Here, you can publish your page to make it go live on your site.
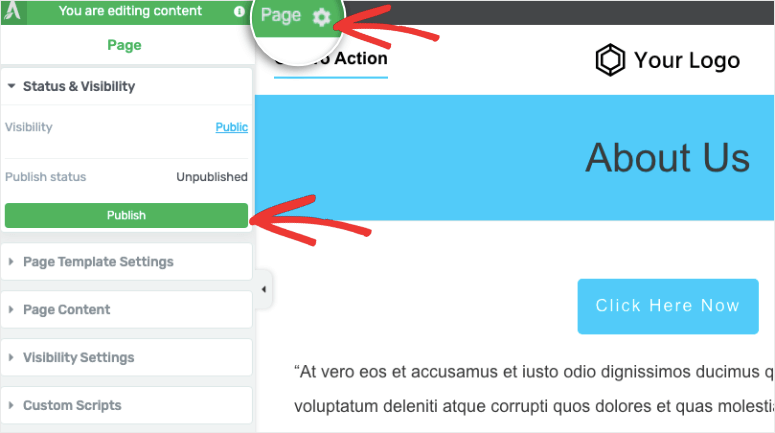
That’s it! You’ve learned how to create a button using the block editor and third-party page builders. Next, we’ll also show you how to use custom coding to add a button.
Add a Button using Coding
If you’re code-savvy and want to add/style a button on your own, then you’ll want to check out WPCode.
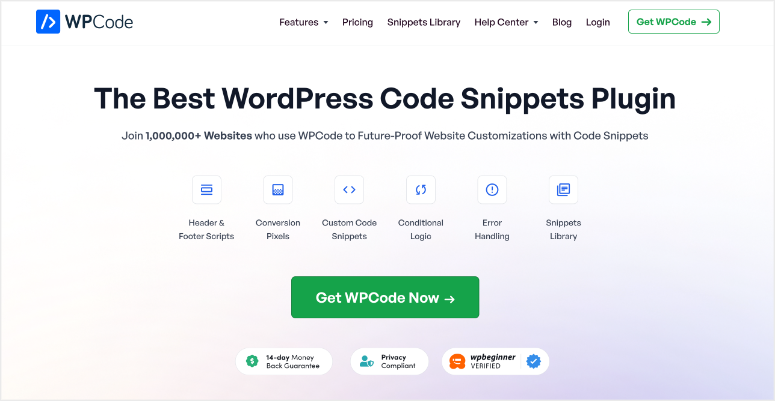
WPCode gives you premade code snippets that you can use on your website. There’s a free and pro snippets library you can access on their site.
You can preview the snippet and download it to use it on your site.
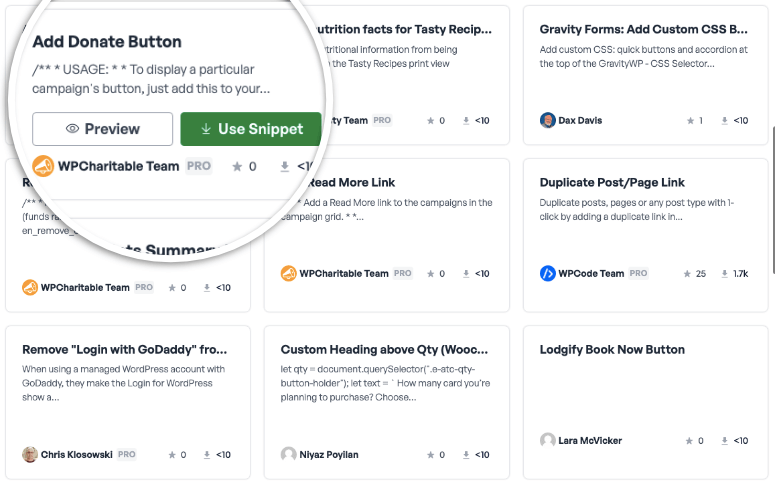
You can also install the plugin on your site and you’ll get premade snippets along with an option to auto-insert them into your page. There’s also a shortcode option that you can use to easily add the button anywhere you want on your site.

With WPCode, you’ll never have to spend hours trying to figure out how to create/add new elements. You can quickly find code snippets that you need and add them to your site.
That’s all we have for you. We hope this tutorial has helped you add a button to your site. If you’re looking to add a custom button to a popup on your site, then OptinMonster is the tool for you. See our OptinMonster Review for more.
Next, you may also want to see our other helpful guides:
- How to Create a Custom WordPress Layout
- How to Customize a WordPress Website
- How to Track Link and Button Clicks in WordPress
These tutorials will help you customize your WordPress site. The last one will help track the performance of your buttons.

Can you do this with Elementor