Want to add a multimedia slider to your WordPress website?
Adding a catchy multimedia slider to your site is a great way to grab your visitor’s attention. To your slider, you can add videos, images, buttons, or anything you want to engage your audience.
However, sliders are known for affecting a website’s page loading time.
In this tutorial, we’ll show you how to use a multimedia slider on your website, without hampering your performance.
Adding Multimedia Slider to WordPress Without Affecting Speed
Adding a multimedia slider to your website is easy. All you have to do is to install a slider plugin, activate it on your site, and start creating one.
While there are several WordPress slider plugins available in the WordPress market, we recommend you to use the Soliloquy plugin for the best results.

Here’s why we recommend Soliloquy over its competitors:
- Soliloquy is designed with site’s performance in mind so, you can rest assured that your slides won’t negatively impact your website’s loading time.
- It lets you create fully responsive sliders that look equally great on desktop, mobile, and tablets.
- It’s also a beginner-friendly plugin, meaning even if you’ve never created a slider before, you could create one with Soliloquy quickly and easily.
Check out our complete Soliloquy review.
Let’s take a look at how to use Soliloquy to add multimedia sliders to your website.
Step 1: Installing Soliloquy in WordPress
The first step is to install and activate the Soliloquy plugin. You can find it in the WordPress plugin repository by going to the Plugins » Add New tab.
Here’s a step-by-step guide on how to install and activate a plugin on your WordPress site.
Step 2: Adding Media Files to Your Slider
Once activated, it’s time to create your sliders. Let’s start with adding media files to your sliders.
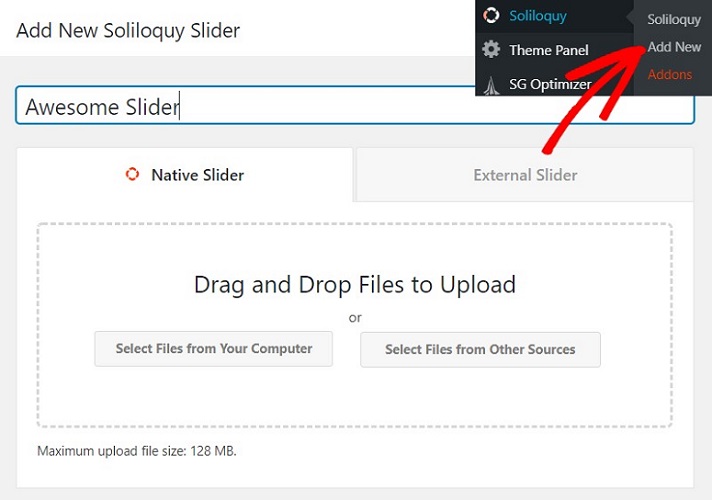
To add media files to your slider, go to Soliloquy » Add New on your WordPress dashboard.
Now you need to give your slider a title. Then, click on Select Files From Your Computer button to upload images for your slider.
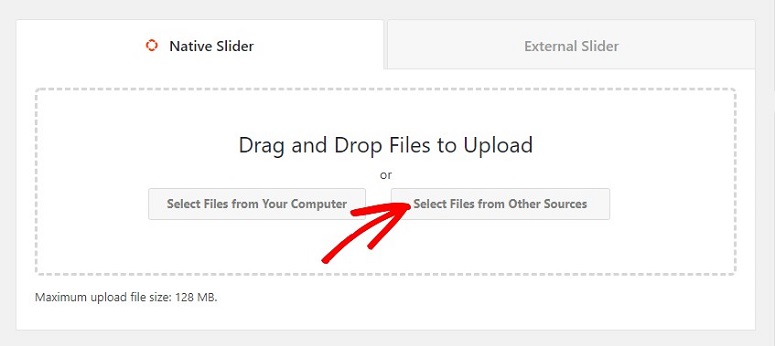
If you want to choose the images from your media library, or insert an HTML slide then you need to click on the button that reads Select Files From Other Sources.
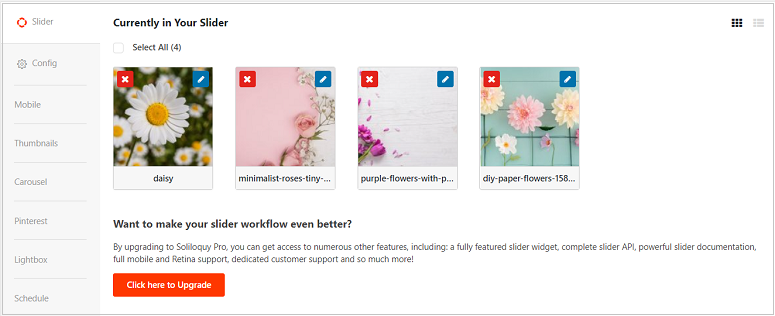
In this tutorial, let’s select a few images from your computer. You can see all your uploaded files by scrolling down your screen a little.
Just like adding image files, you can add other media files too, like videos. To add video files, you need to click on Select Files from Other Sources
Now click on Insert Video slides on your left.
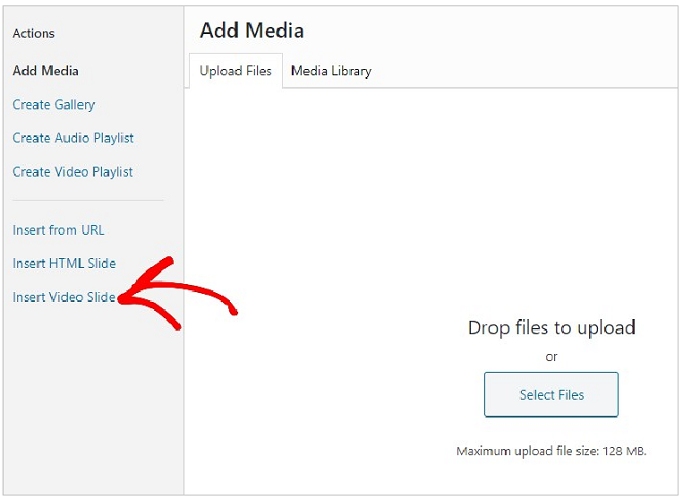
You can now add a title for your video and then use the Upload Media button to upload your videos.
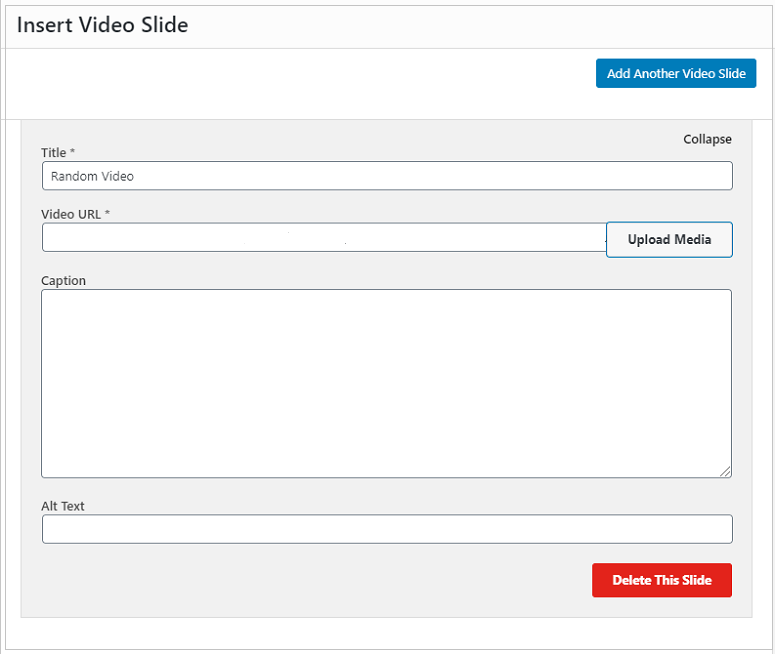
To add more video sliders, just click on the Add Another Video Slide button.
Step 3: Editing Your Multimedia Files With Soliloquy
Once you’ve added your files, it’s time for you to edit them. Let’s look at the images first.
If you want to delete an image file, you can do so by clicking on the cross mark above your file.

Click on the pencil icon if you want to add a tilte, alt tags, captions etc.
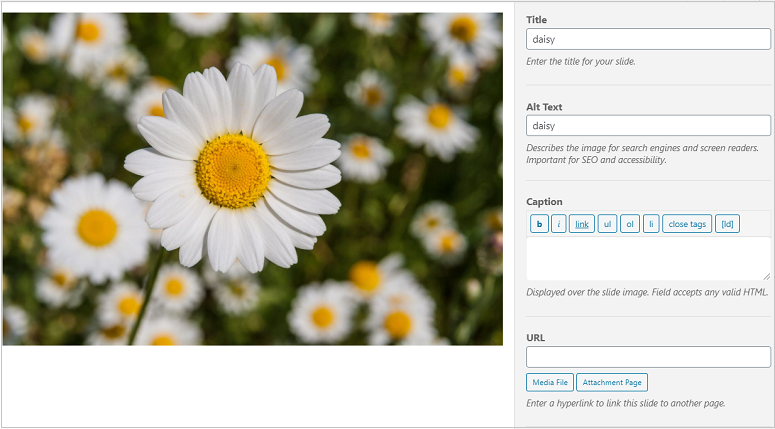
You’ll also find an option to add a URL to your slide and enable opening the image in a new window. Don’t forget to click on the Save button once you’re done.
Once you’ve added the image details, you can go ahead and adjust the basic configuration options.
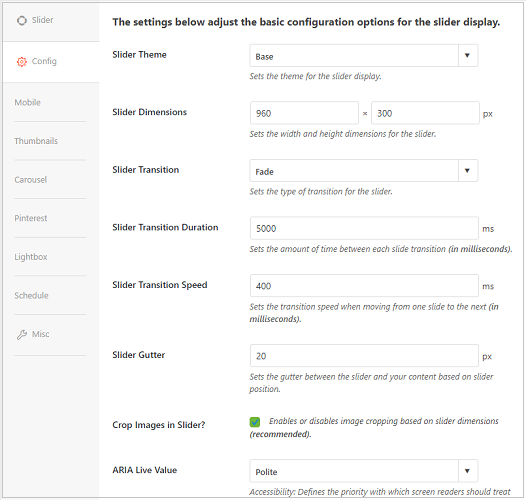
You’ll see several tabs in there like:
- Configure
- Mobile
- Misc
If you use the free version, you can use only the Configure tab.
In this tab, you can set a slider theme, edit the dimension of your sliders, add slider transition, work on the transition speed and duration as well.

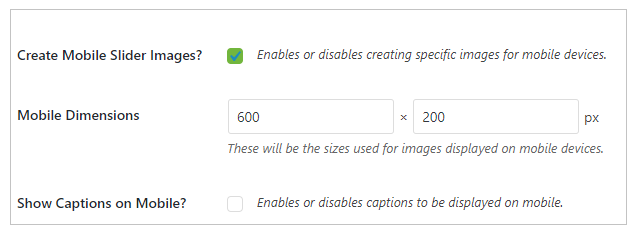
In the Mobile tab, you can work on making your sliders look appealing on mobile devices by adding custom dimensions.
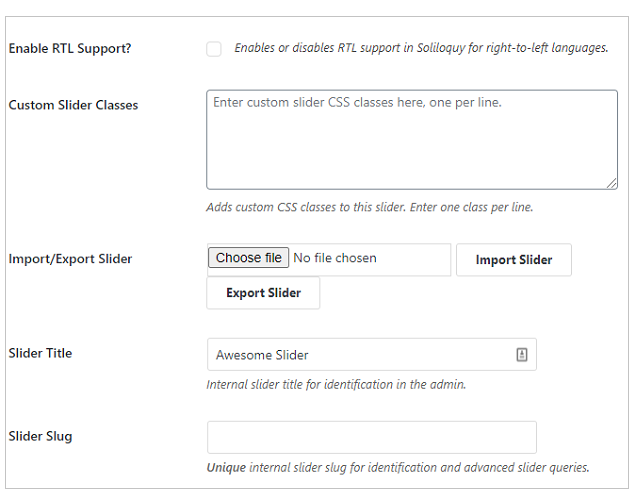
In the Misc tab, you have options to enable RTL (right-to-left language like Arabic) support, add CSS, export/import your sliders, etc.
So depending on your requirements, you can work on the settings. For videos, however, you can add your alt tags, and captions right below the file.

Step 5: Publishing Your Sliders With Soliloquy
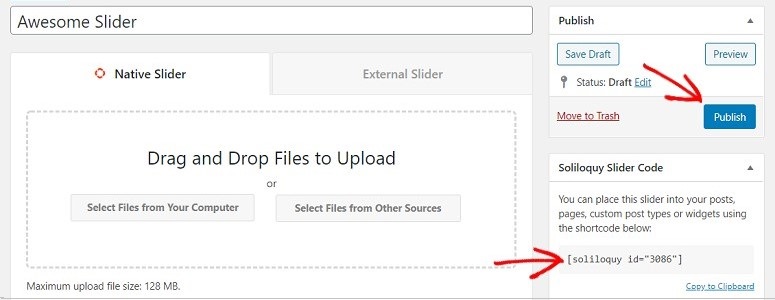
Once all the files are properly edited, you can click on the Publish button on the right. You can find the slider shortcode just beside the publish button. Copy it and place it into your posts, pages, custom post types, or wherever you want to embed it to be.
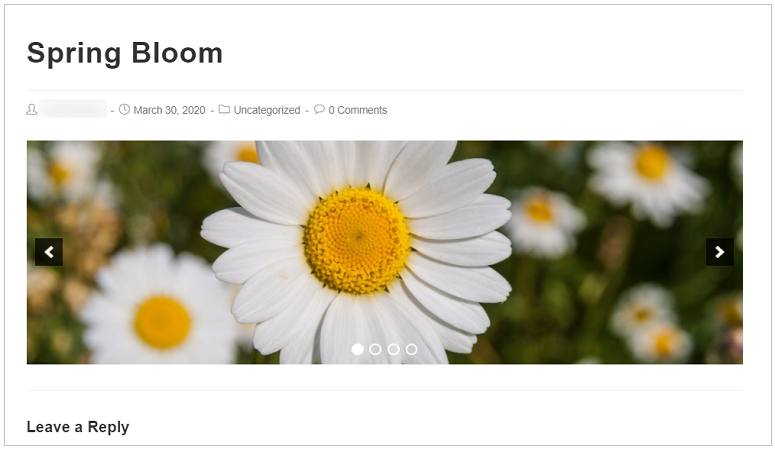
And that’s it. Your slider will now be shown on your posts.
Isn’t that easy? We hope this article helps you learn how to add multimedia sliders to your website without affecting your page speed. But if you want to check out other slider plugins, check out our review on Smart Slider 3 and Envira Gallery.
Also, you can check our guide on the best gallery plugins to add beautiful image galleries to your WordPress site.
If you want to add an Instagram gallery to your site, then check out our tutorial on How to Embed Instagram Feed in WordPress.

Comments Leave a Reply