Want to build a sales funnel for your website but don’t know where to start?
Usually, to create a sales funnel, you’d have to hire a sales & marketing expert to set it up for you. But we’re here to tell you that’s not the case anymore.
There are tools that let you set up a sales funnel with automated processes to drive sales and profits. So you don’t need any experience in marketing, conversion optimization, and website automation.
Follow this step-by-step guide to create a high-converting sales funnel that actually drives results.
To start, let’s be clear on what a sales funnel is and what you need to make it work.
What is a Sales Funnel?
In simplest terms, a sales funnel is a customer journey from landing on your website to checkout.
Any funnel creates a clear path for users to follow so that they can move step by step toward taking action on your site. So for instance, if you have a lead funnel, it would move the user step by step from reading your blog to signing up for your newsletter.
No doubt, a sales funnel helps increase conversions and sales but it also comes with many other benefits:
- Breaks up the user’s journey into steps that are easy to track and improve
- Gives users a clear path to follow (also called a buyer’s journey)
- Turns visitors into loyal returning customers
- Automates processes slashing admin time
- Integrates tools and platforms for better management
With a sales funnel, you won’t be guessing what works and what doesn’t. You’ll have a strategic plan to improve sales and grow your business.
4 Stages Every Sales Funnel Needs
Your online store most likely already has a sales funnel in place that you’re not aware of. You may need to just improve your existing funnel.
For instance, you may be using content marketing where users land on a blog post » click on a product linking » view the product page » check out.
That’s a sales funnel right there. But is it working for your business? Is it actually driving sales? What can you do to improve it? What more can you add to the funnel without disrupting user experience?
That’s where you need to know about the 4 basic stages of the sales funnel (known as the AIDA framework):
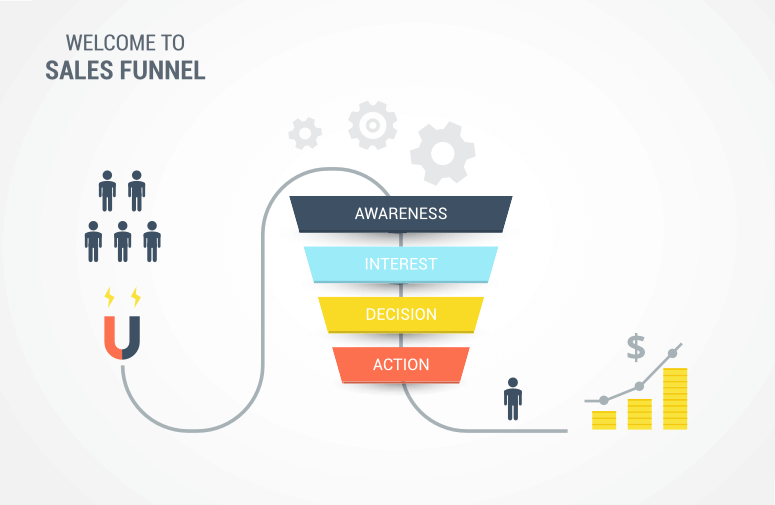
- Awareness Stage: In the first stage, the visitor becomes aware of your brand. This could include a product, service, offer, or your business as a whole. Here, you want to grab your consumer’s attention using blog posts, SEO results, ads, tweets, Facebook ads, and so on. At this stage, your users are at the top of the funnel and you want to draw potential customers to your website.
- Interest Stage: The visitor becomes a prospective customer as they are now interested in the benefit you offer. Your product may solve a problem they’re facing or your service is what they’re looking for. You want to add good content and provide new leads with clear and crisp information. This will help them understand what your brand actually does and how it can help them.
- Decision Stage: The prospect makes up their mind on whether they should buy from you. They may start researching your brand offerings, checking online reviews, and contacting your sales team. This is the best time to explain how you’re better than competitors and offer discounts or freebies. You could even make the offer time-sensitive like if they check out in the next 15 minutes, they’ll get 25% off.
- Action Stage: Now we’re at the bottom of the funnel. The visitor takes action to buy your product, sign up for your service, or become a member. They transition from visitor to customer.
Once the customer takes action, it doesn’t mean your funnel needs to end. The funnel can continue in different stages to keep the customer engaged in your brand.
You can get them to opt-in for marketing emails and your newsletter. Then you can send emails to share new blog posts, alert them about sales and promotions, and send your catalog. This way, you can get them to return to your website to make more purchases.
The idea is to create a seamless path that directs website traffic from awareness to action.
That said, let’s look at the top sales funnels that work for most websites.
Examples of Good Sales Funnels
There are lots of tutorials out there that show you how to set up a sales funnel but the truth is there’s no “one size fits all” sales funnel.
What sales process and marketing strategy works for your store may not work for another. You need to find what helps convert visitors to customers on your website the best.
If your customers are more active on social media, then you’ll want to start there and direct them to your website.
Here are 5 sales funnel examples you could use:
1. Landing page » Checkout page » Upsells and Cross-sells » Thank You page
2. Blog post » Optin form » Email series » Product page » Checkout » Confirmation page
3. Landing page » Chatbot » Sales representative » Offer page » Checkout » Newsletter signup page
4. News article » Membership signup popup » Checkout » Account dashboard
5. Instagram post » Link in bio » Offer page » Registration form » Payment Gateway » Thank you page » Confirmation email
Like this, you can create a sales funnel that works best for your business. Next, we’ll show you the easiest way to set up your sales funnel in WordPress.
How to Set Up a Sales Funnel in WordPress
We’ve created this guide in 6 easy steps to set up your first sales funnel that actually drives results.
Step 1: Get the Right Tools
If you want to create a sales funnel that actually works, you’re going to need the right tools. So to get started, we’re going to list out the best free and paid tools that you can use.
SeedProd: The best landing page builder with eCommerce features, payment gateways, lead generation blocks, and sales funnel options.
OptinMonster: The best conversion optimization tool to target users at the right time and place to get them to take action on your site.
WPForms: The best form builder for WordPress that lets you create any form you need including optin, registration, login, appointment booking, reservation forms and more. You can even create product catalogs and accept online payments without an eCommerce setup.
WooFunnels: Upsell and cross-sell products to increase average order value and boost sales.
MonsterInsights: The best analytics plugin to track and monitor your sales funnel.
We’ll focus on these 5 tools here that are perfect for beginners, small businesses, and entrepreneurs. For more options, you’ll want to see our guide: 35 Best WooCommerce Plugins to Grow Sales Rapidly.
Below, we’ll set up a sales funnel with safety nets to catch leads that are dropping off along the way without checking out. This is the path we’ll follow:
- New and returning visitors – Set up a landing page to welcome them and pitch your product, service, or offer
- User did not checkout? – Optimize conversions with an Exit Popup to recover abandoning users
- Customer is checking out? – Show upsell & cross-sell campaigns to increase order value
- Visitor is not ready to buy? – Display social icons and optin form to subscribe to a newsletter
- Subscriber is interested in the newsletter? – Trigger an automated email campaign to nurture a relationship
- Is the funnel working? – Monitor and track sales funnel to find areas of improvement
Step 2: Create a Sales Landing Page
There are different routes you can take to get visitors to come to your website. So for instance, you can place an ad on Instagram and Facebook. You could also use SEO to drive traffic to your blog post and then lead them to buy your product from there.
Whichever one you choose, the most important thing you need is a dedicated landing page to sell your product or service.
This gives you a central location to drive traffic from multiple channels. You can then use this page to explain your product, its benefits, what pain points it solves, any deals you have to offer.
This page is a must-have for any business online. You may even need multiple sales pages if you have different things to offer.
You can create a sales landing page in under 5 minutes using SeedProd.
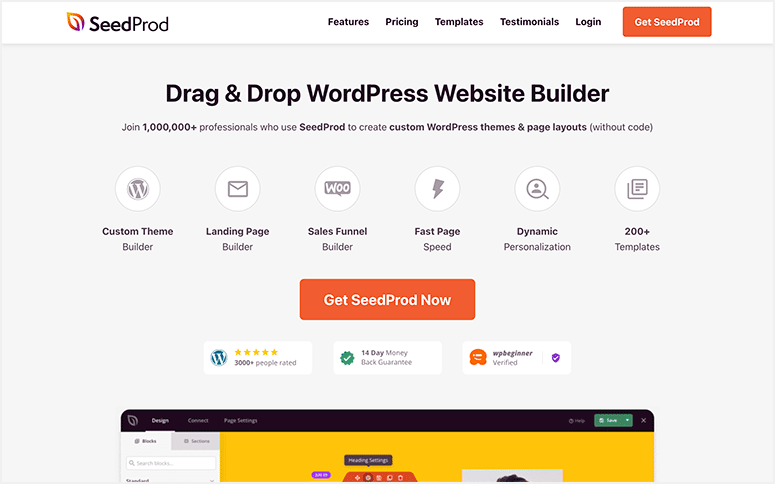
SeedProd is an easy and powerful WordPress page builder plugin. It comes with tons of page templates you can use to create the perfect sales page without writing any code or hiring a developer. These templates are already optimized for higher conversions.
Added to that, there’s a drag and drop builder to easily customize the page.
First, you can install and activate SeedProd Lite on your site. This is a free plugin that’s available in the WordPress repository. However, if you want advanced features and the WooCommerce integration, then you’ll want to sign up for the SeedProd premium version.
Then inside your WordPress admin panel, you can navigate to SeedProd dashboard.
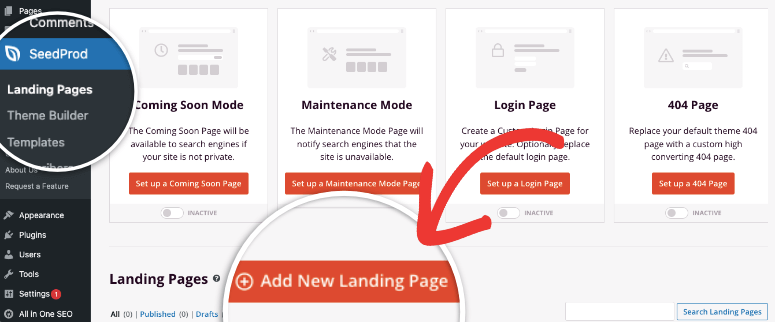
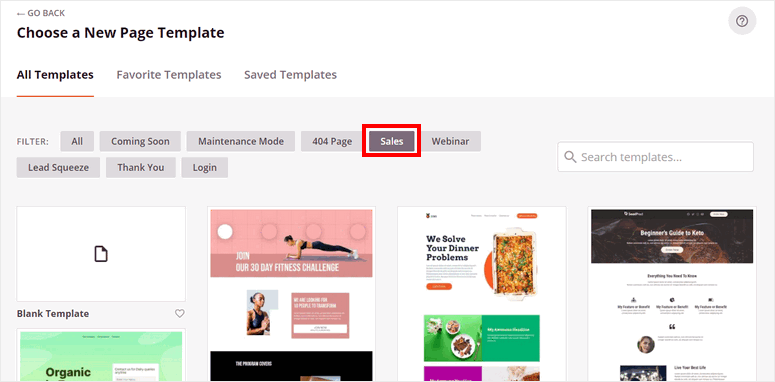
Here you can set up your sales page by clicking on the Add New Landing Page button. This will open a library of templates. You can use the filters to see the Sales templates.
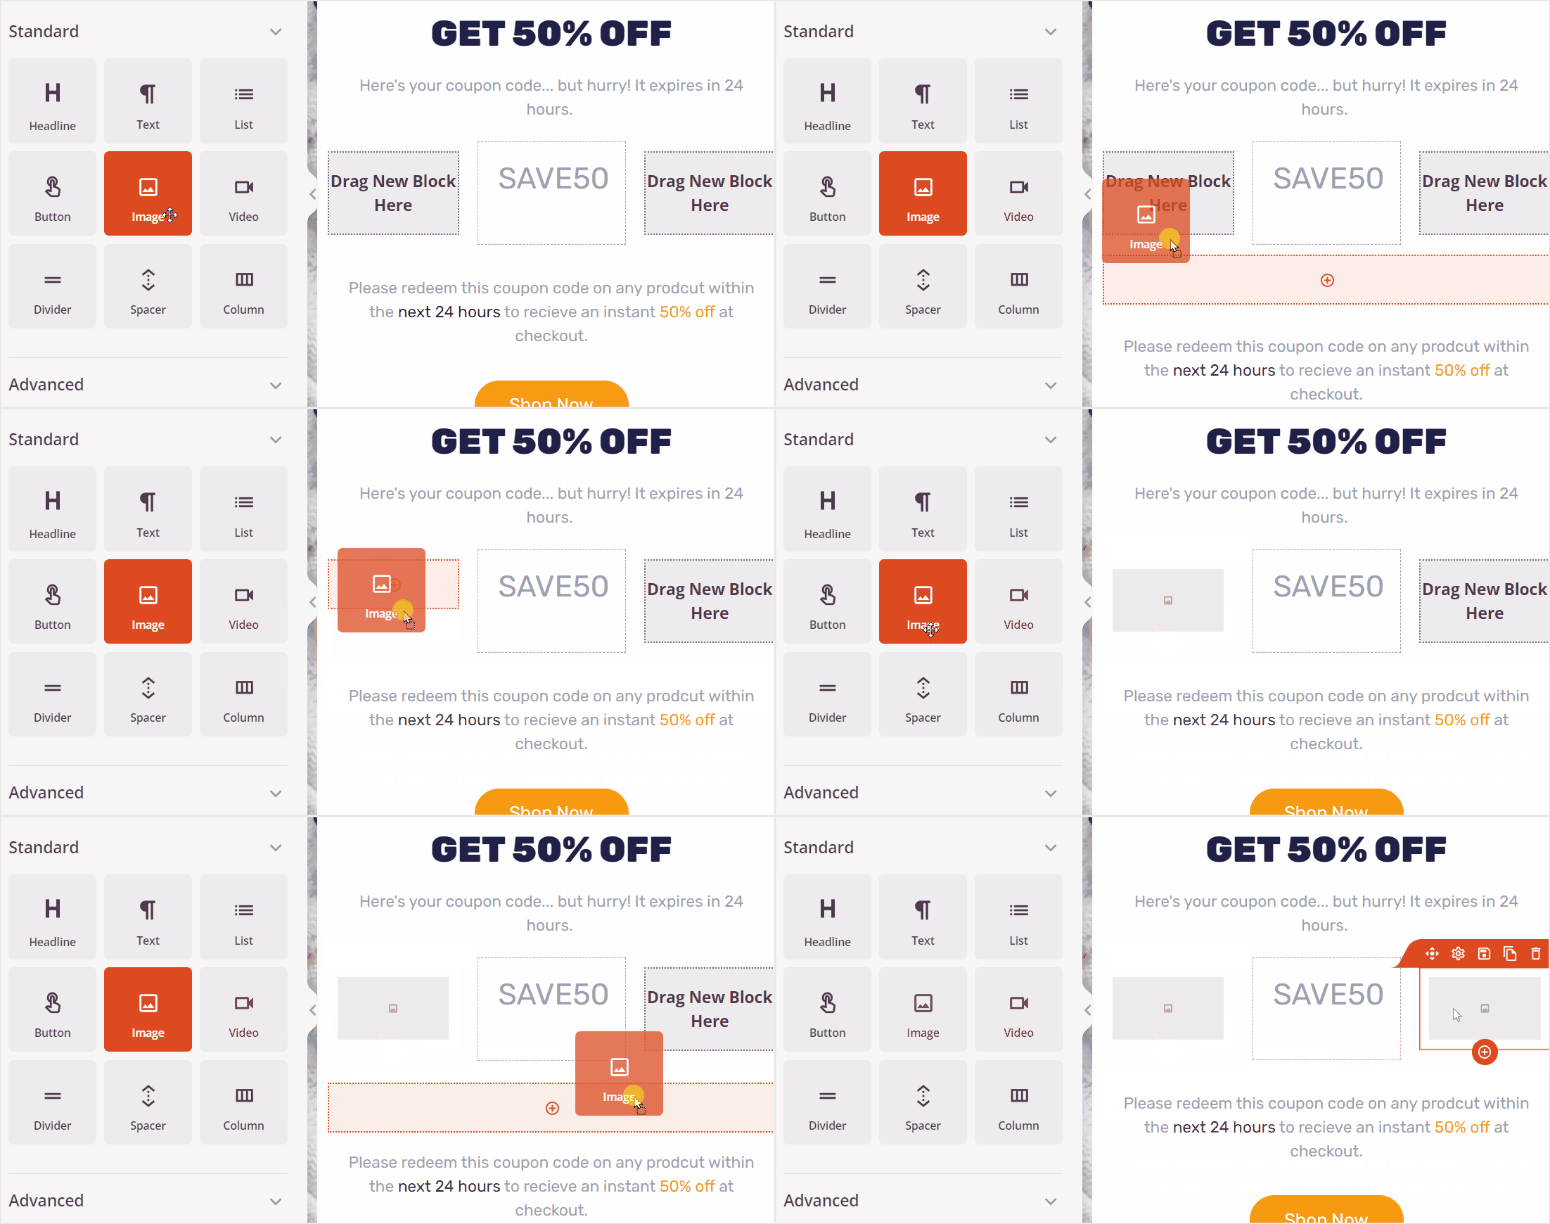
When you select a template, you need to add a name for your page and head over to the drag and drop editor. Here, you can easily customize the page with new blocks, text, images, background, calls to action (CTA) and more.
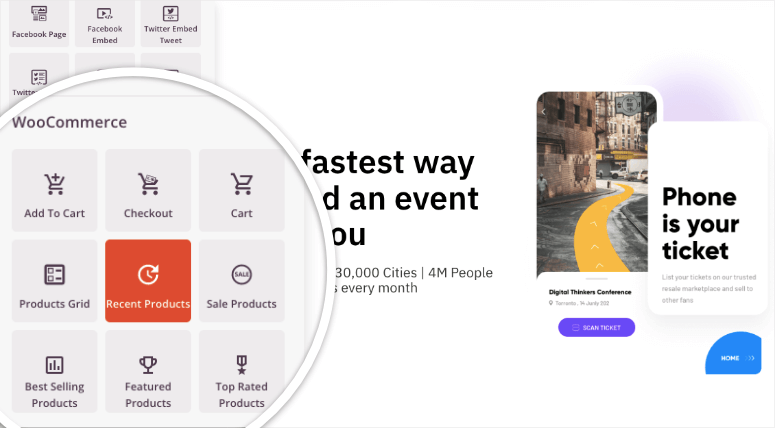
You’ll also see a section for WooCommerce blocks. You can add buttons and grids that include add to cart, checkout, products grid, recent products, sale products, and more.
For more detailed steps, see: How to Build a Sales Page in WordPress (Step by Step).
Once this page is set up, you can add this page URL to ad campaigns, inside blog posts, and even your Instagram link in bio. That way you can streamline traffic from different channels to land on a single page on your website.
Using SeedProd, you can also set up a Thank You page or Order Confirmation page.
Step 3: Optimize Conversions
Next, you’ll want to add elements that help you capture leads and optimize conversions. The best tool for this is OptinMonster.
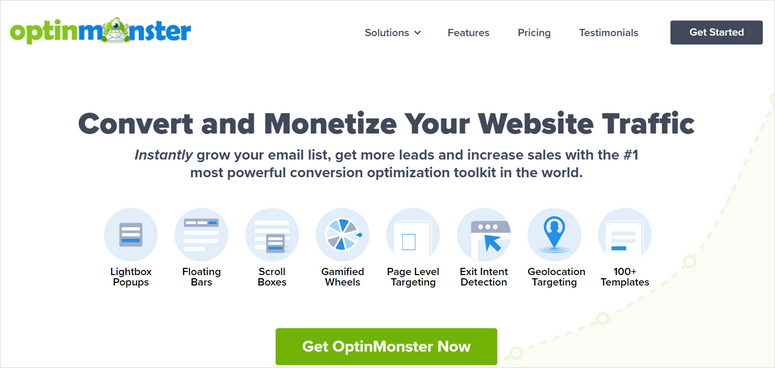
OptinMonster is the most powerful lead generation and conversion optimization tool for WordPress sites. You can create all sorts of campaigns like popups, scroll boxes, floating bars, slide-ins, and even coupon wheels.
The reason we chose OptinMonster is because of its incredibly powerful targeting rules. You can make your campaigns appear based on different factors:
- Device (desktop, mobile, tablet)
- Geographic location
- Date and time
- New user or returning user
- Which page they’re viewing (product page, home page, blog)
- Which referral source they’ve come from (Facebook, Instagram ad, Google Search)
- Whether the user has added items to their cart
- Whether the user is about to exit the site
- Whether the user has scrolled a certain % of the page
These are just to mention a few. You can even display a follow-up campaign if the user has already engaged with the first popup.
You can add these rules with just a click of a button. And you can combine as many rules as you want to zero in on your target audience.
With OptinMonster, you’ll be able to target users at the right moment when they’re most likely to convert. So for instance, you could create a discount coupon to appear if the user has added items to the cart and is about to leave your site without checking out.
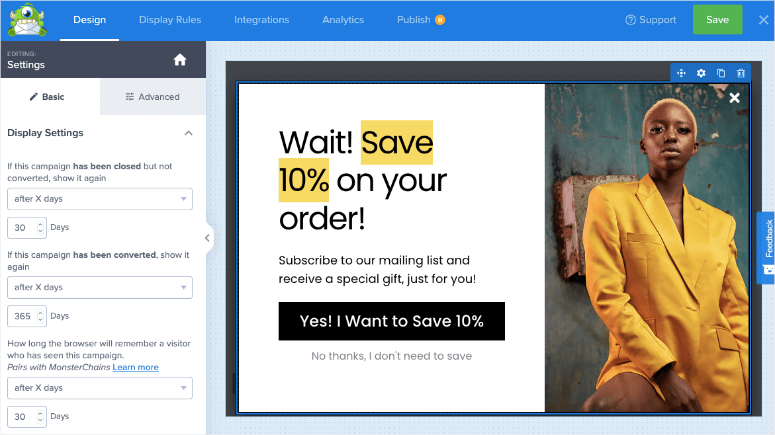
The discount coupon would serve as an incentive for them to check out now. You’ll increase your chances of recovering this abandoning user and converting them into a new customer.
OptinMonster is designed to be easy to use for anyone, even if you’ve never created these kinds of campaigns before. If you want more details, follow this tutorial to set this up: How to Combat Shopping Cart Abandonment With Exit Intent.
Step 4: Add Upsells and Cross-sells
If you want to boost average order value or get customers to buy a premium version, you can use cross-selling and upselling techniques.
With cross-selling, you can show recommended products that the user may also want to buy based on what they have in their cart or which product page they’re viewing. For instance, if they’re looking at a washing machine, you could display other related products like a machine stand, cover, detergent, and other things they’ll need.
Upselling lets you show a premium version of the product that the user may be interested in. If the user is looking at a basic top-loading washing machine, you can show them other high-end options like a feature-rich front-loading machine or a washer-dryer combo.
There are plugins that let you add this feature to your site with just a few clicks. So for instance, you could use the YITH Frequently Bought Together plugin.
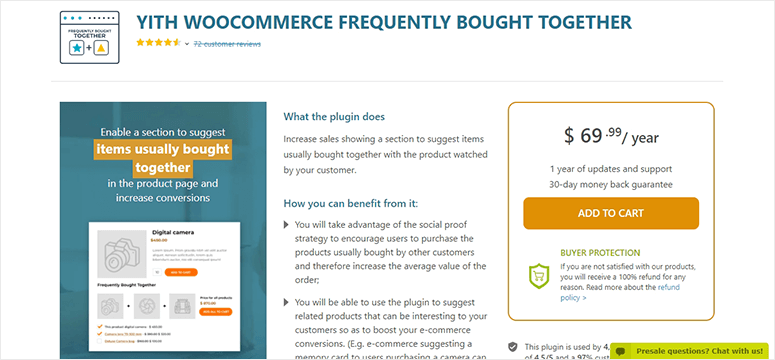
We also recommend WooFunnels. The plugin comes with powerful features to automate upsells and cross-sells. You can create dynamic order bumps to show different offers based on the user.
You can make recommended products or offers appear based on their cart items, cart total, shipping options, and so on.
For more options, you’ll want to see our guide: 7 Best WooCommerce Upsell & Cross-Sell Plugins.
Step 5: Add Social Elements
If a website visitor isn’t ready to buy from you, you can still keep them as a potential lead. They may just need a little more time to trust your brand and buy your product.
In times like these, it’s best to get them to follow your social media pages. When they see others interacting and commenting on your posts, it builds trust and confidence with them as they know others trust your brand.
Most website builders, including SeedProd, let you add social media icons and links to your posts and pages.
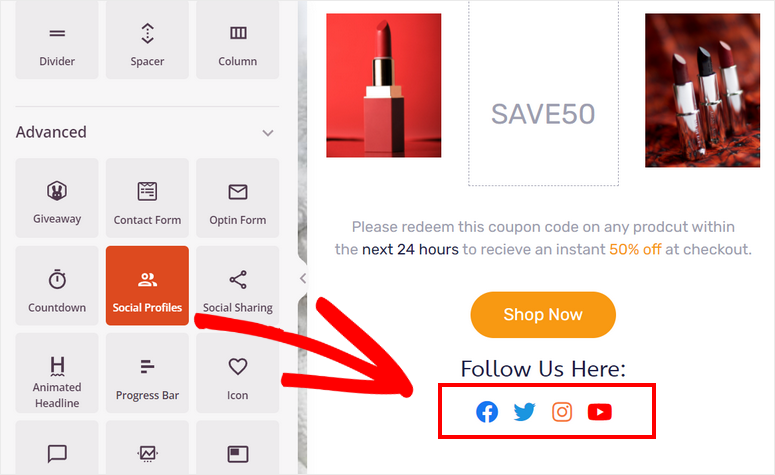
You can link to Twitter, Facebook, Instagram, YouTube, LinkedIn, and more. This makes it easy for users to connect with you on other platforms and learn more about your brand before they become paying customers.
You may also be interested in learning more about using social proof on your site to influence your visitors’ purchasing decisions. You can add testimonials, reviews, and recent sales notification popups to build confidence in users. See: How to Add Social Proof to Your WordPress Website.
Step 7: Set Up Automated Emails
Again, if a user isn’t ready to buy, you can capture the lead as an email subscriber. Then you can nurture a relationship by sending them helpful tips and new blog posts, product catalogs, and alerts about sales or price drops.
You can also get customers to opt into marketing emails when they’re on the checkout page. This will help you bring them back at a later date.
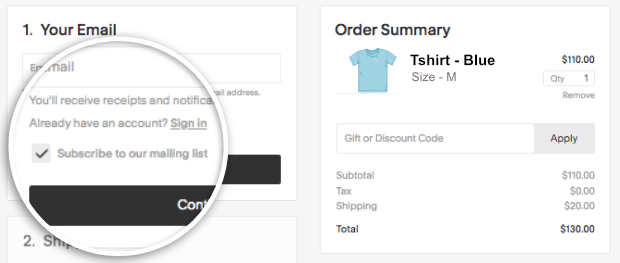
You can use OptinMonster to get people to sign up for our newsletter. There are premade templates you can use to set this up in minutes. You can even add lead magnets like a free eBook or discount to make it worth the user’s while.
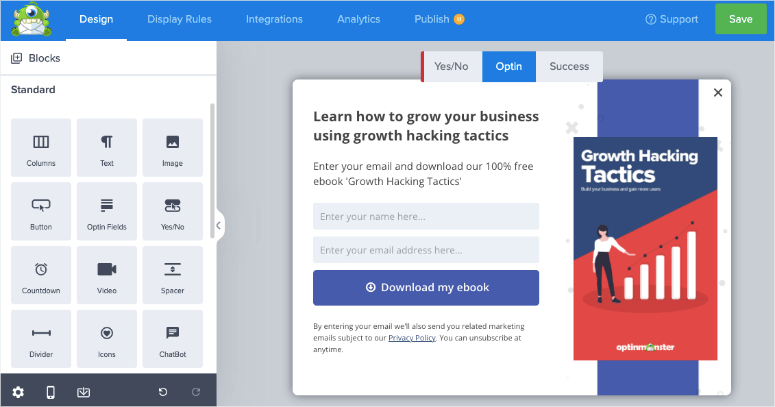
This will help you retain visitors that would’ve otherwise left your website and never come back.
The best part is that you can use the targeting rules to get qualified leads rather just random users who will never buy from you.
Also, OptinMonster lets you integrate your email account. So anyone who signs up will automatically be added to your contact list and to any welcome or drip campaigns you have set up with your email service provider.
You can use segmentation to create separate email lists based on what they’re interested in.
See: How to Create Stunning WordPress Optin Forms (Step by Step).
Once you capture these leads, you can set up automated email campaigns in your email account. Our #1 email service is Constant Contact.
After you sign up, you can create cool email designs and write a series of emails to welcome users to your brand and move them along the path to convince them to buy from you.
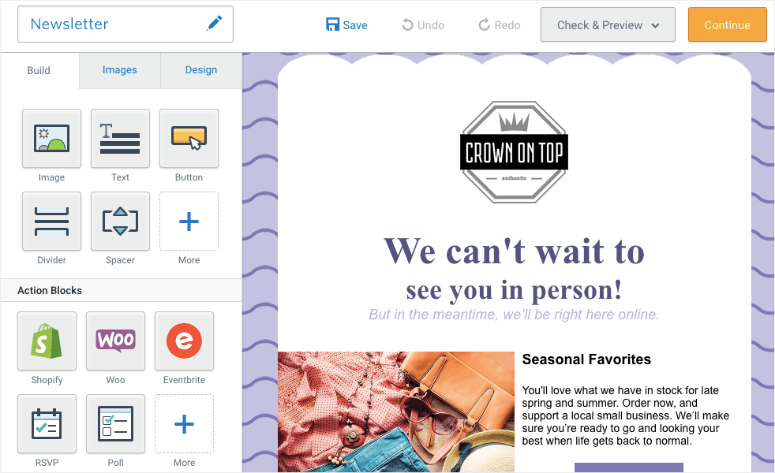
With Constant Contact, you can also add automation rules.
So for instance, you can trigger Campaign 1 to start when a user signs up for an email newsletter without buying anything from your site. And you can send Campaign 2 to customers who have already bought from you and opted in to receive marketing emails.
You can even branch out of your sales funnel and create separate email marketing funnels here. So for email subscribers, you can send them a newsletter, and helpful content explaining your product which will help you bring them back into your sales funnel later.
Next, you can keep current customers in a separate customer retention funnel that keeps them engaged in your brand. You can alert them about sales, price drops, and new launches to keep them coming back to your site for more.
Here are 7+ Best Email Automation Tools to Improve Your Email Marketing and a tutorial to help you get started: How to Create an Email Newsletter in 5 Minutes (Step by Step).
Step 8: Track and Optimize Sales Funnel
Once your funnel is set up and running for a while, you’ll be able to find what’s working and what you need to change.
To do that, you need to track every step of the process. Don’t worry, you won’t have to analyze anything manually. We recommend using MonsterInsights which will collect the data and transform it into reports that are easy to understand.
MonsterInsights is the best Google Analytics plugin for WordPress sites. It lets you see where your users are coming from and what they do when they’re on your website.
It’s super easy to set up and you’ll be able to see all these insights in your WordPress admin dashboard.
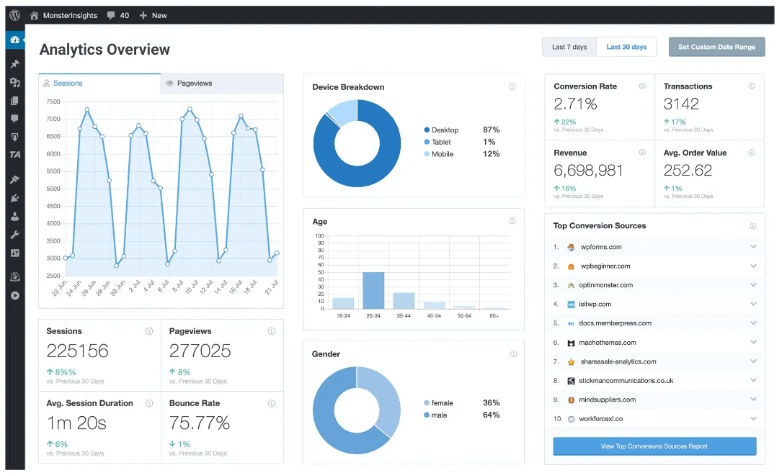
And we love MonsterInsights because it comes with enhanced eCommerce tracking. This shows you insights like:
- Conversion rates
- Transactions
- Revenue
- Average order value
- % of sales per product
…and more. It also comes with an A/B testing feature to run split tests using Google Optimize. This means you can try 2 versions of your funnel or campaigns to see which one works better.
See our guide: How to Set Up Google Analytics 4 in WordPress.
With that, you know how to set up a sales funnel from start to finish. We hope this guide has helped you streamline your sales pipeline and marketing efforts to create an effective sales cycle.
If you have your own salespeople handling new and existing customers, you’ll want to see: 15 Best Live Chat Software Plugins Compared. These tools make it easy for sales and customer reps to provide the best service.
You may also want to check out Thrive Suite. It has the best conversion-optimization tools to create online courses, interactive quizzes, optin forms, and more.
There’s so much you can do to grow your sales and expand your business. We think you’ll find these guides helpful:
- How to Create Automated Recent Sales Notification Popups (An Easy Guide)
- How to Set Up WordPress Conversion Tracking (Step by Step)
- 15 Conversion Rate Optimization Tools to Skyrocket Growth
These guides will help you optimize your sales, conversions, and digital marketing campaigns.

Comments Leave a Reply