
Do you want an easy way to create an Instagram landing page?
Instagram has become a great platform for business owners to promote their products and get connected with potential customers.
With an Instagram landing page, you can grab the users’ attention and convince them to take action immediately. This will help you generate more leads and convert visitors into paying customers.
In this post, we’ll show you how to easily create a custom Instagram landing page to boost your conversions.
But first, let’s learn why you need to create a landing page for Instagram.
Why Create an Instagram Landing Page?
An Instagram landing page is a dedicated webpage built specifically to convert visitors from Instagram ads and bio links into customers and subscribers.
Right now, Instagram only lets you add one clickable link to your profile bio. So you can add a landing page URL to your bio to drive traffic towards your website, product page, or any other content.
If you want to promote your brand with sponsored ads posts, then you can even create a custom landing page for Instagram.
Here is an example of an Instagram ad from Cooler Master.

When users click on the post, they are redirected to the detailed product page for the product advertised on the image.
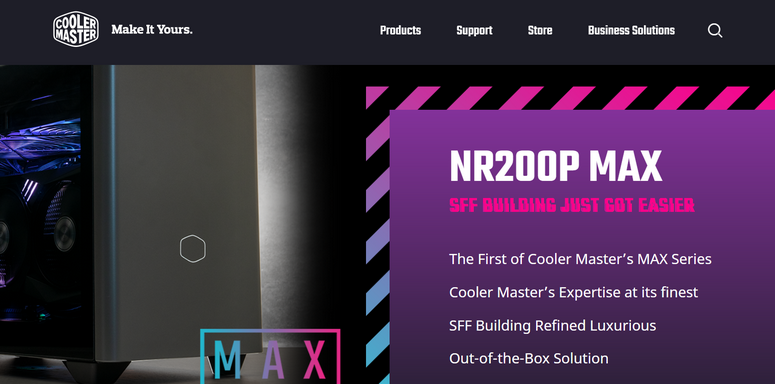
Just like this, you can create a landing page for Instagram to prioritize product sales and increase brand awareness.
Plus, you can add multiple links to your blogs, guides, YouTube videos, and other social media profiles to grow your audience. Or add an optin form to get users to subscribe to a newsletter or join your email list.
With that said, let’s learn how to build an Instagram landing page with ease.
Creating an Instagram Landing Page in WordPress
You may think that creating a landing page is impossible without any professional help. But, that’s not the case at all.
There are many page builder WordPress plugins in the market. However, you need to choose a plugin that’ll let you easily create an Instagram landing page without touching a single line of code.
Our favorite page builder plugin is SeedProd.
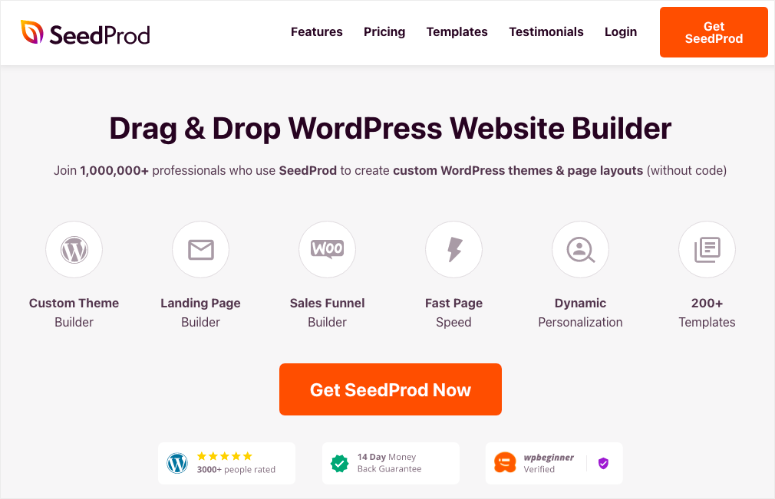
SeedProd is the #1 landing page and website builder plugin for WordPress that comes with a built-in library of 200+ landing page templates. So you can easily choose one and create a stunning Instagram landing page in no time.
With its drag and drop page builder, you can add and remove content blocks and customize your landing page. There are over 40 content blocks that include unique page elements such as CTA (call to action) buttons, testimonials, countdowns, optin form, and more. These blocks are optimized to help you convert as many visitors as possible.
Here’s why SeedProd is the best choice for creating your Instagram landing page:
- Responsive: All landing pages you create with SeedProd are fully responsive so they look great on any screen size.
- Smart Sections: Pre-designed sections like hero headers, calls to action, footers, and more for creating professional landing pages.
- SEO-friendly: You can integrate with SEO plugins like AIOSEO and Google Analytics to optimize your site for better search result rankings.
- Email Integration: Connect with email service providers such as Constant Contact, AWeber, Active Campaign, and more to grow your email list.
- Compatible with WooCommerce: Add WooCommerce blocks to sell your product and have a distraction-free checkout.
- Spam Protection: Protect your Instagram landing page from spam and hackers with the Google reCAPTCHA option.
Along with this, you get tons of customization options such as color schemes, Google Fonts integration, and custom CSS.
Plus, SeedPlus offers a built-in maintenance mode, coming soon page, 404 page, and login page mode. With this, you can notify your visitors when your site is under construction, maintenance, and redirect your visitors. You can create custom pages and enable/disable these modes with a single click.
Now that we know which plugin to use to build your Instagram landing page, let’s get started with the tutorial.
Step 1: Install and Activate SeedProd Plugin
First, you need to sign up for an account in SeedProd.
There is a free version available in the WordPress repository. It gives you access to the basic features to create landing pages, and enable coming soon or maintenance mode.
For advanced features, integrations, and payment options, you’ll want to sign up for the premium plan. These pro plans start from $39.50 per year.
Once you sign up, you can download the plugin file and copy your license key from the Downloads tab.
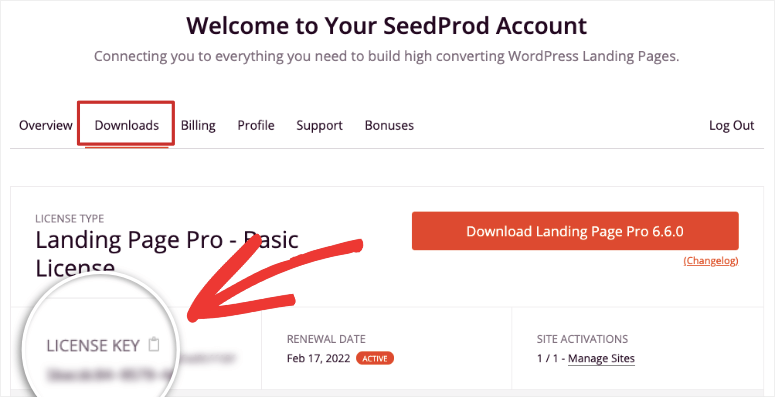
Then, head over to your WordPress dashboard to install the plugin. If you need more help on this, you can go through our guide on how to install a WordPress plugin.
After you install and activate the plugin, go to SeedProd » Settings tab and enter the license key.

Then, click on the Verify Key button and you’ll see the success message.
Now, let’s create your custom landing page for Instagram with SeedProd.
Step 2: Create a New Landing Page
To create a landing page, open the SeedProd » Pages tab. Here, you’ll see the options for Maintenance Mode, Coming Soon Mode, Login Page, and 404 Page.
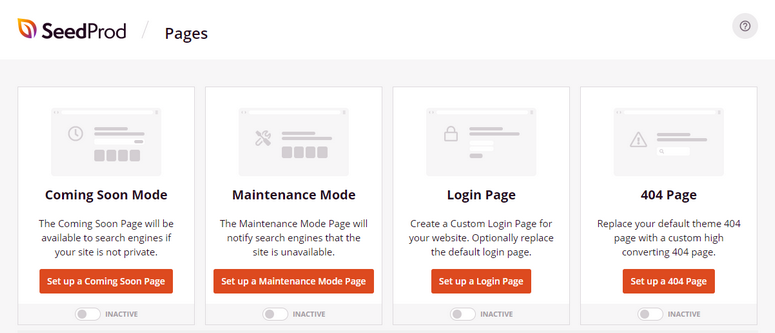
For landing pages, you can scroll down the page and click on the Add New Landing Page button.
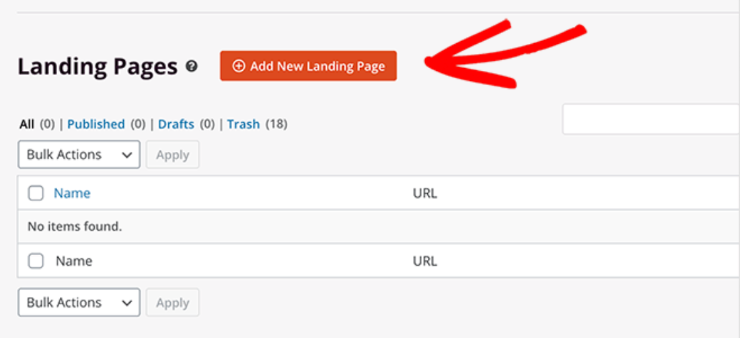
After that, you’ll see the template library where you can choose from over 100 stunning landing page templates. There are many filters that help you browse templates with ease that include:
- Coming Soon
- Maintenance Mode
- 404 Error
- Sales
- Webinar
- Lead Squeeze
- Thank You
- Login
If you want to build an Instagram landing page from scratch, you can select the Blank template.

For this tutorial, we are going to choose the Travel Lead Squeeze template. It comes prefilled with all the fields we need to create a stunning Instagram Landing Page.
Feel free to choose any template that suits your purpose and brand. The steps will remain the same.
To preview a template, you can hover over and click on the magnifying glass icon.
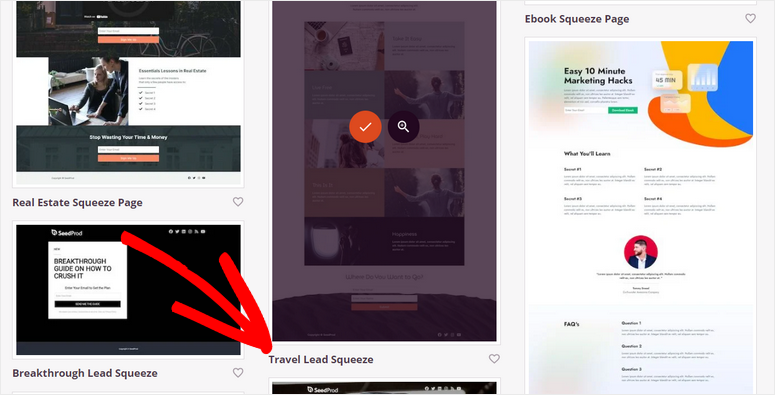
Once you select a template, enter your name and page URL, then hit the Save and Start Editing the Page button.
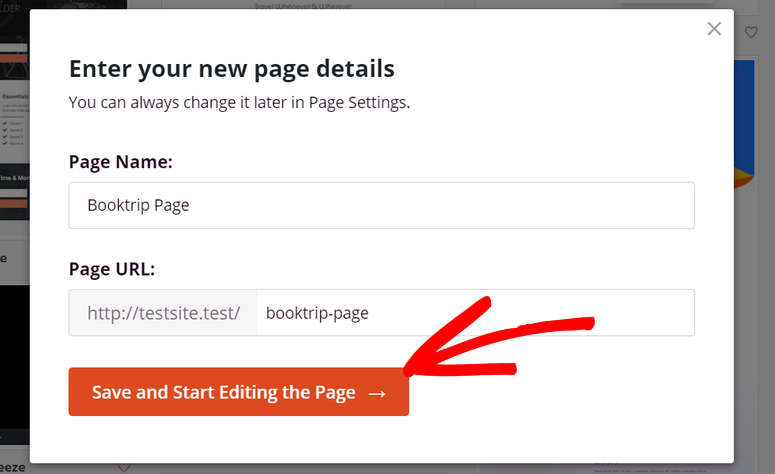
This launches the page builder where you can customize your landing page template right away.
Step 3: Customize Your Instagram Landing Page
SeedProd offers a beginner-friendly page builder that lets you insert content blocks by just dragging them to the page preview area.
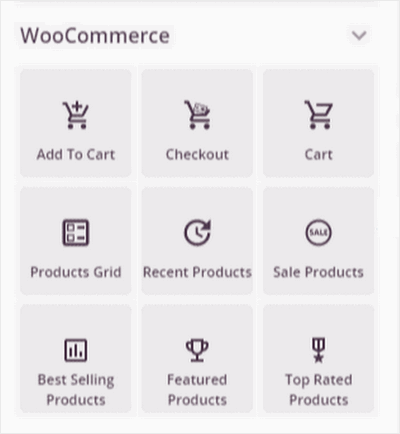
You can see all the page content blocks on the left side and the live preview of your Instagram landing page on the right side. The content blocks are divided into 3 sections: Standard, Advanced, and WooCommerce.
In the Standard section, you’ll find content blocks such as headlines, text, image, CTA button, and more.
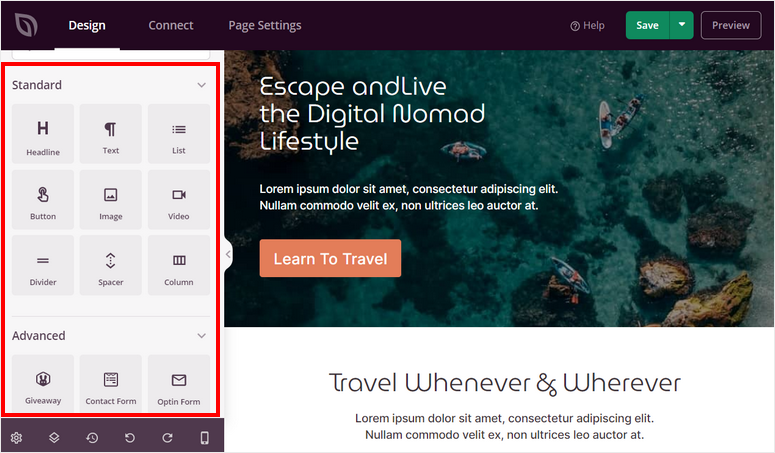
Whereas, in the Advanced section, there are high-converting content blocks like:
- Animated headline
- Giveaways
- Countdown
- Optin form
- Social sharing
- Testimonials
- Star rating
- And more
Also, you get the WooCommerce section which consists of blocks like product grid, add to cart, checkout, cart, and more.
This lets you display and sell your products right from your landing page. So Instagram users that land on this page will get options to add to cart and checkout instantly.
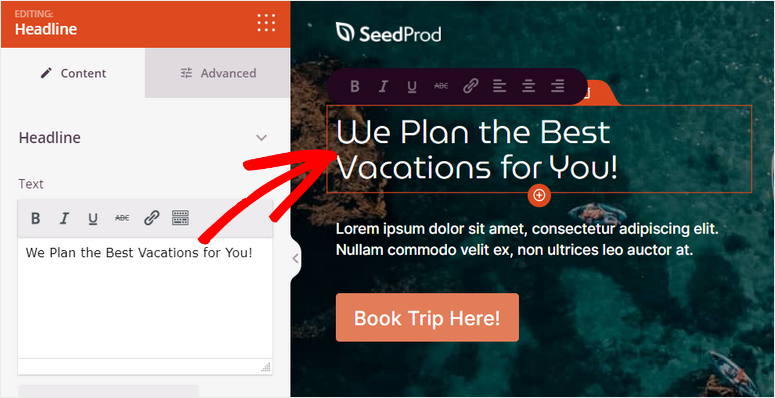
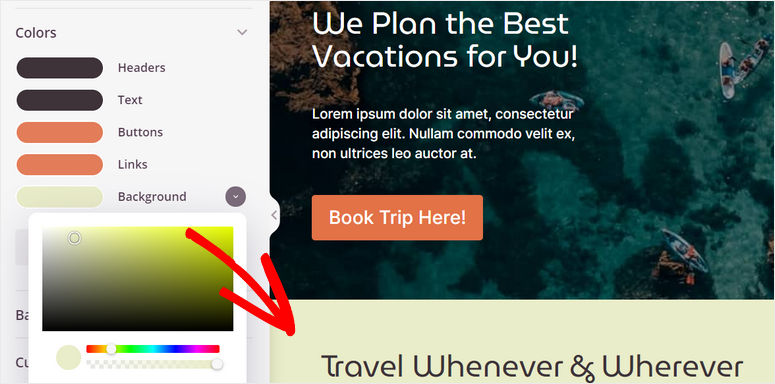
To edit any existing content block, just click on it and you’ll see the block settings. You can add your own text, font, and more settings.
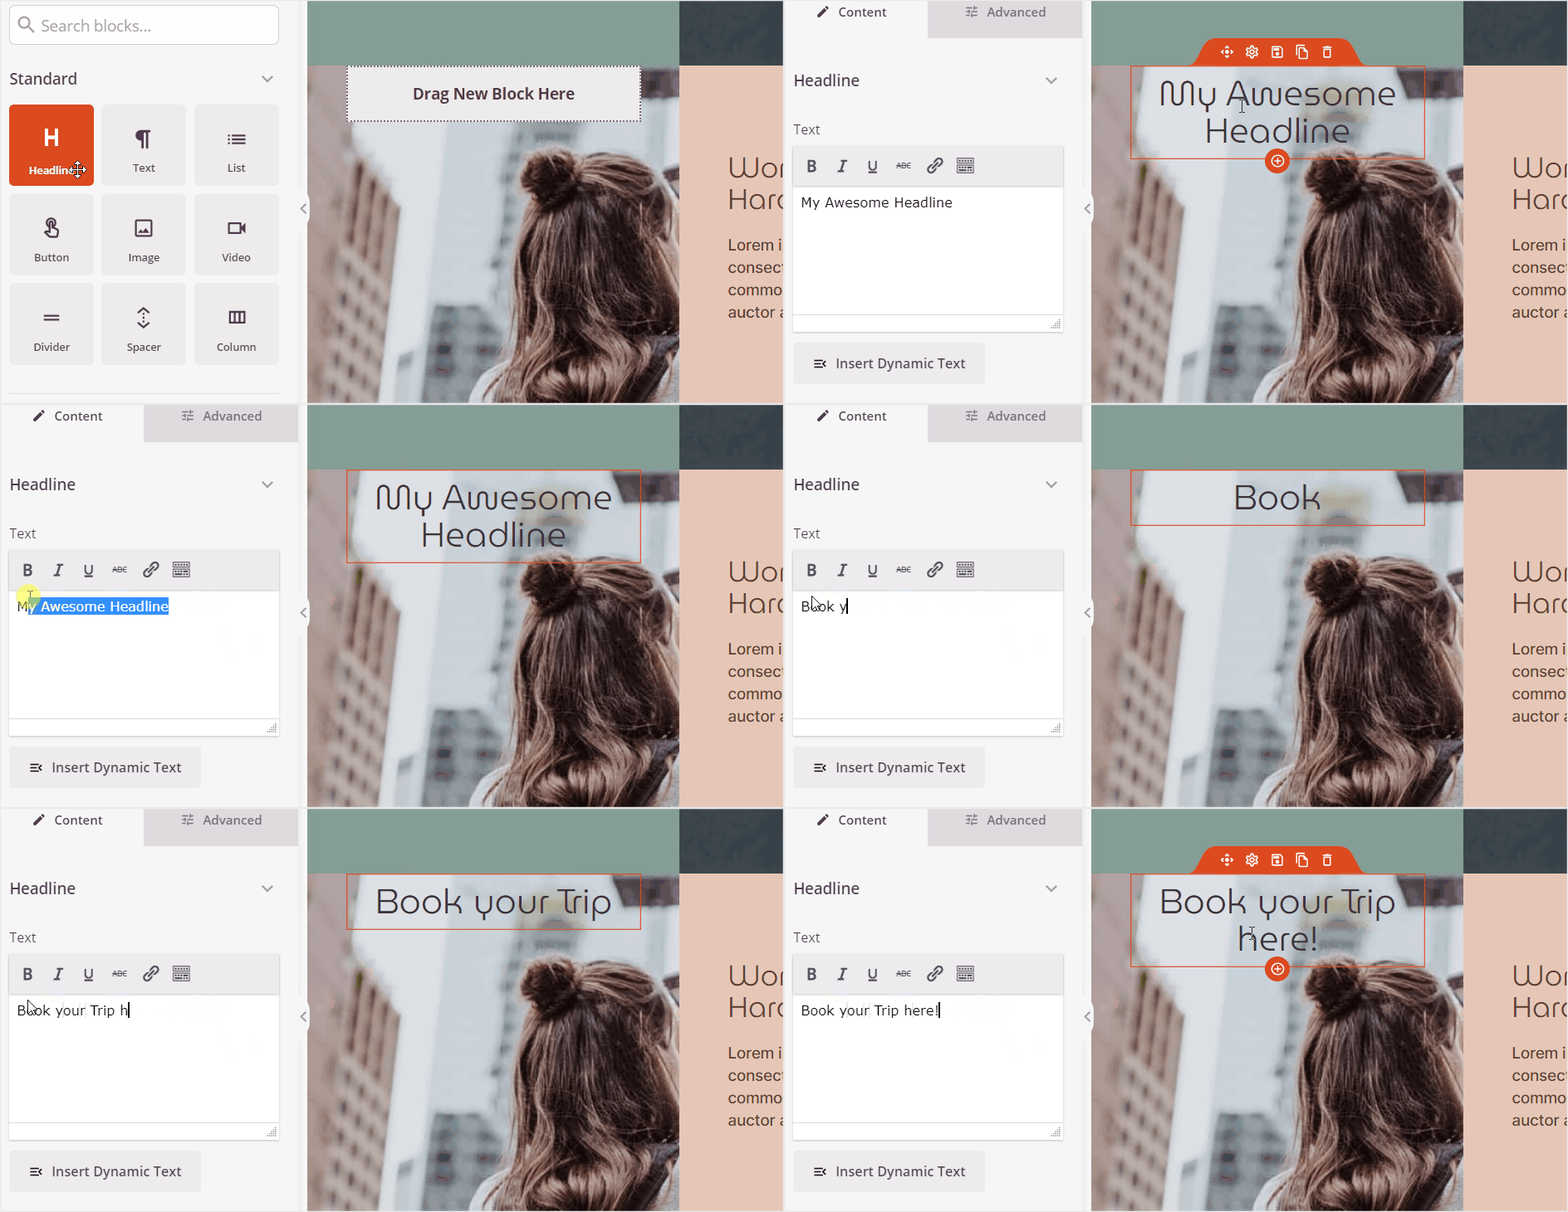
If you want to add a new content block, simply drag the block from the left menu to the page preview. We are inserting a headline page block here.
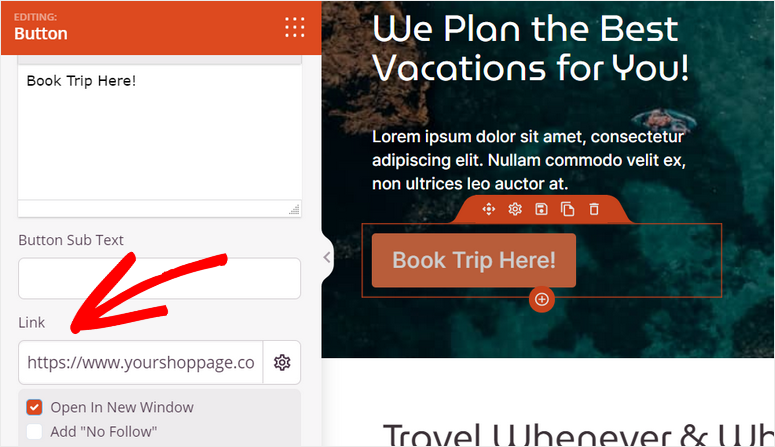
You can also edit the CTA buttons and add custom text for your product or services. On the button settings, you’ll see options for adding a custom link and redirecting the visitors to any page, blog, or content.
Also, SeedProd lets you choose a template to change the style of your buttons.
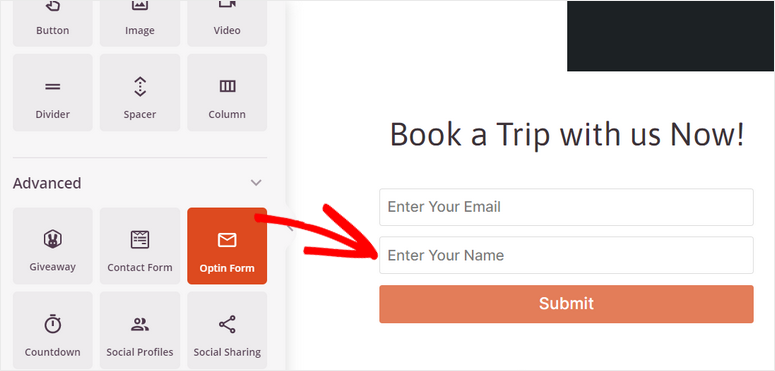
To collect your visitor contact information, you can add the Optin Form block on your Instagram landing page.
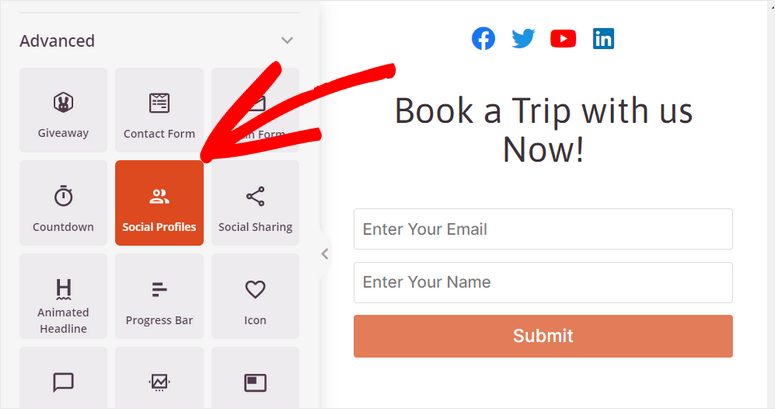
Next, if you want your audience to easily find you on other social media platforms, you can insert the Social Icons block and link your social media profiles.
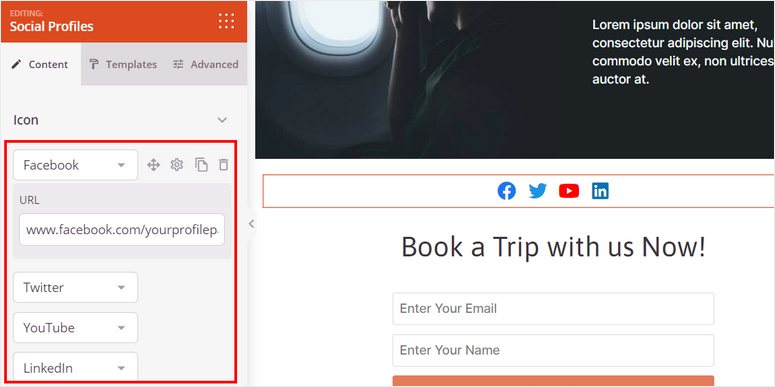
In the block settings, you can choose to add more social media icons and edit the links for each icon.
After you are done adding and customizing your content blocks, click on the Save button so you don’t lose progress.
Now you’ve learned how to customize your landing page but there’s more.
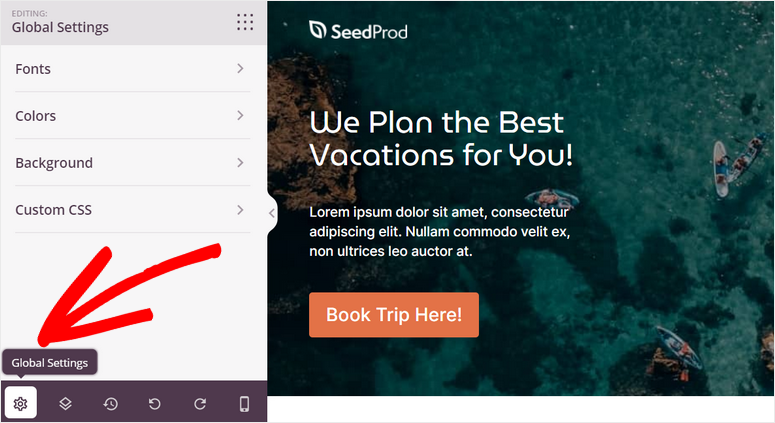
SeedProd lets you apply settings across your landing page. So for instance, you can choose the font and font size you want for headings. Then SeedProd will universally apply this to all headings to keep it consistent.
For this, click on the Global Settings on the bottom-left corner of the page builder.
Here, you’ll see 4 options:
- Fonts
- Colors
- Background
- Custom CSS.
When you change these settings, it will apply to the entire landing page.
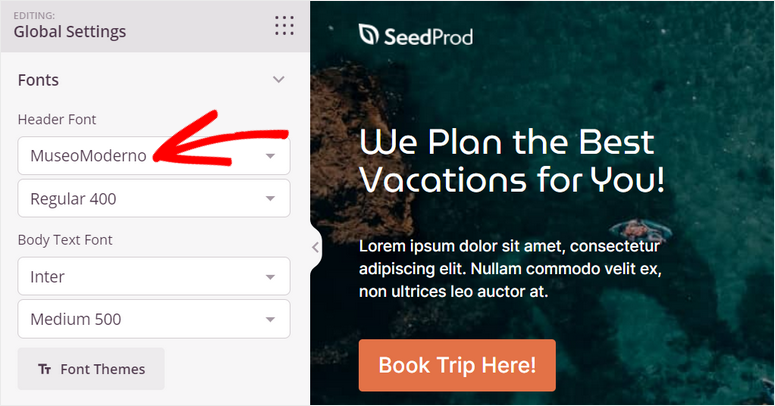
You can change the typography and use Google Fonts for all the texts for your Instagram landing page.
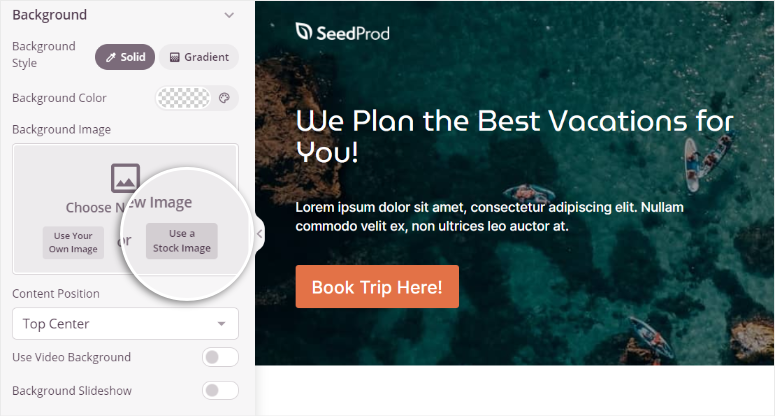
Moreover, SeedProd allows you to browse copyright-free stock photos directly from the page editor and add it to your page.
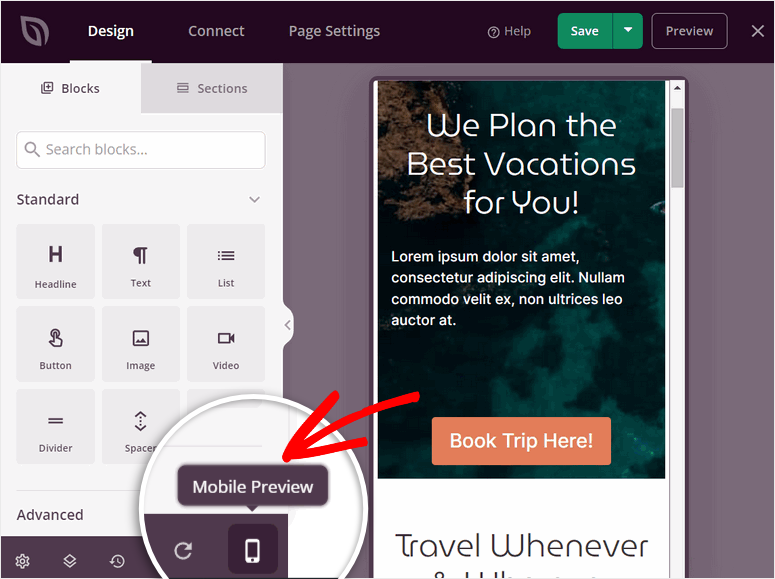
Most of the visitors who land on your Instagram landing page are mobile users. So, you need to make sure your page works well on mobile devices.
SeedProd offers a live Mobile Preview option that lets you check if your page design and layout are displaying perfectly on the mobile view or not. With this, you can make the mobile-only changes and optimize your page.
Once you finish customizing your landing page, you can connect it with an email service provider.
Step 4: Integrate with Your Email Service Provider
With SeedProd, you can connect your landing page with all the major email marketing services such as Constant Contact, Aweber, ConvertKit, and more.
This allows you to import your subscribers to your email list directly from your Instagram landing page. You can also segment the contacts and import this information to different lists depending on the user input.
To connect with your email service provider, navigate to the Connect tab in SeedProd.
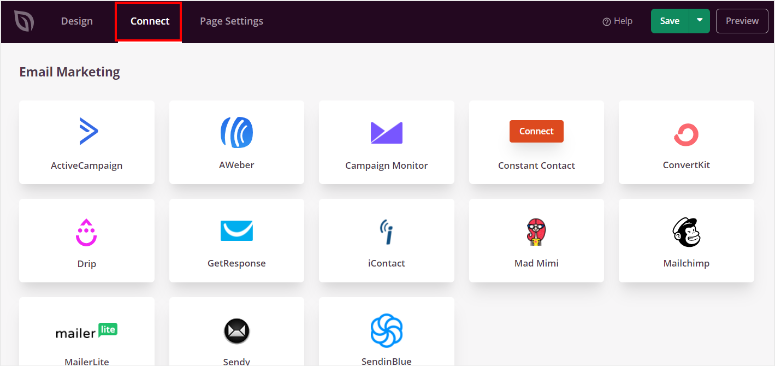
You can select the email service provider of your choice and click on the Connect New Account button.
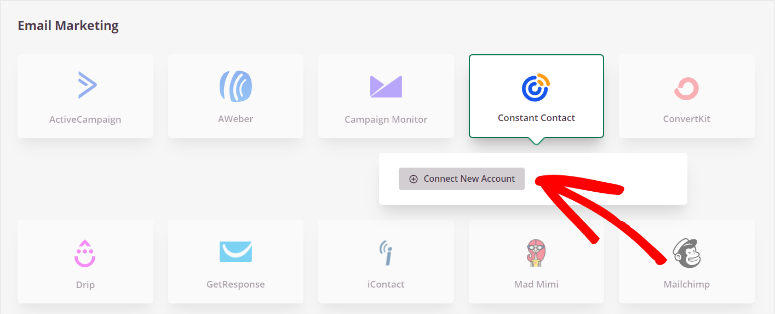
Most email service providers will require you to enter your API key for connecting your account. You can get your API key from your email service account.
After you connect with your email service provider, don’t forget to hit the Save button.
Next, you need to configure the page settings for your Instagram landing page.
Step 5: Configure Page Settings
SeedProd lets you integrate with SEO and Analytics tools to get insights into your audience and help you rank on Google.
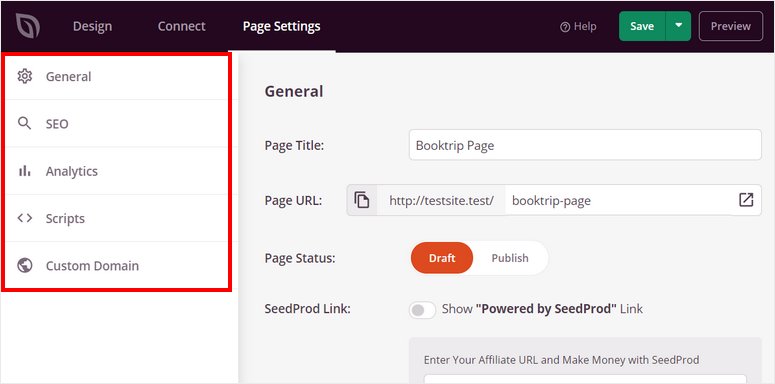
In the Page Settings tab, you’ll see options for optimizing the SEO and performance of your landing page. These include:
- General Settings: You can change the title, URL, and status of your landing page. You can also show or hide the “Powered by SeedProd” link on your page.
- SEO: Optimize your landing page for better search result ranking by integrating with the All in One SEO plugin.
- Analytics: Track the view and engagement on your landing page with the analytics plugin MonsterInsights.
- Scripts: You can add custom codes in this section to customize your site. If you don’t know how to code, you can skip this section.
Make sure you save your settings after you’re done.
Now the last step is to publish your Instagram landing page to your WordPress site.
Step 6: Publish Your Instagram Landing Page
To publish your page, open the dropdown option next to the Save button. Then, click on the Publish option.
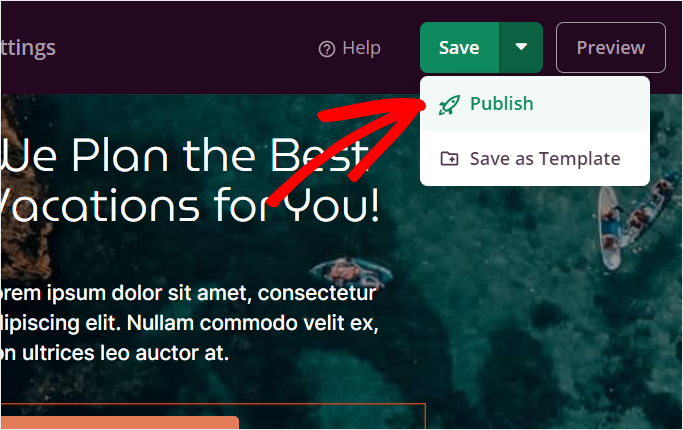
After your page is published, click on the See Live Page button to see how your landing page looks.
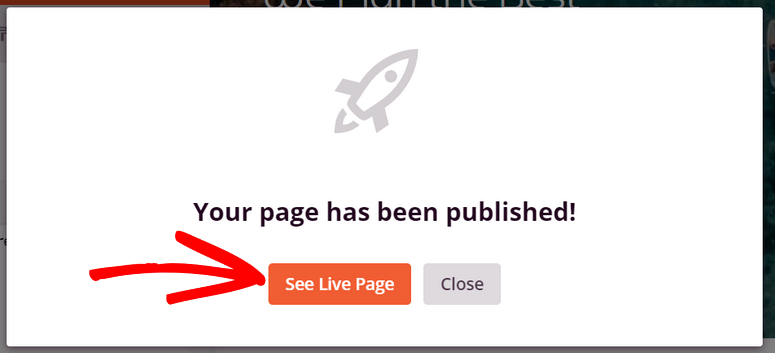
Congrats! You’ve successfully created an Instagram landing page using SeedProd. You can add it to your bio link or use it as a landing page for your Instagram ads and drive more traffic.
SeedProd offers tons of pre-designed landing page templates and customization options which helps you create any type of landing page for your website. You can create dedicated pages for audiences from Facebook, Twitter, YouTube, and more.
If you’d like to use the same landing page to target different audiences, then OptinMonster is the best tool for that. Check out our OptinMonster Review for more info on that.
We hope this article helped you learn how to create a landing page for your Instagram campaigns. You may also want to connect your website to Instagram. Then you can showcase a beautiful Instagram feed on your website. And the best part is that you can automate all of this. Check it out: How to Embed Instagram Feed in WordPress.
Next, you’ll definitely want to see our list of the Best Instagram Plugins for WordPress. These tools will help you expand your reach, automate tasks, and generate more sales and leads.
You’ll also want to check out these resources:
- Best Link in Bio Tools for Instagram
- 12 Ways to Use Social Media to Increase Email Subscribers
- Best WordPress Social Media Plugins for Engagement
These posts will help take your social media marketing to the next level.

Comments Leave a Reply