Want to learn how to cloak affiliate links on your WordPress website?
Affiliate marketing can be a great way to monetize your blog or website. The strategy relies on using affiliate links which are trackable URLs that show your affiliate partners when customers have made a purchase through your website.
There’s just one problem: affiliate links are usually long and ugly to look at.
But by cloaking your affiliate links, you can replace the original links with more professional and user-friendly URLs.
In this article, we’ll teach you step-by-step how to cloak your affiliate links. But before we get there, let’s have a look at the benefits of cloaking affiliate links.
Why Cloak Affiliate Links on Your Website?
Before we begin, let’s get clear on what we mean by “cloaking a link” since this phrase can have 2 meanings for affiliate marketing:
- Shortening a long, unattractive URL to make a shorter, prettier link (the most popular use of “cloaking”)
- Hiding the URL from the visitor altogether, even after they click on the link
For today’s post, we’ll be exclusively using the term “cloaking” to refer to the first definition.
Apart from just creating cleaner and more user-friendly URLs, cloaking your links has several benefits. We’ve listed a few of them for you.
1. Create More Professional Links
Generally, raw affiliate links are long and consist of special characters, letters, and numbers like this:
http://example.com/products/?product_id=123&affiliate_id
This makes the links look unattractive and, frankly, a bit sloppy. By cloaking your links you can change that. Compare the URL above with the following:
http://www.yoursite.com/refer/productname
This is a much cleaner link and looks more professional.
2. Secure Your Links from Theft
Using raw affiliate links directly on your website exposes the unique affiliate ID in the URL. That means anyone can easily overwrite your link, replace it with their own affiliate link, and hijack your commissions.
By cloaking your affiliate link, however, you add a layer of security and protect them.
3. Easy Link Management
Cloaking your affiliate links makes link management easy. This is especially important if you’ve used a specific link in several pieces of your content only to find that the company is switching its affiliate program.
So now you have to update ALL the links that you’ve used so far.
If your links are cloaked, you can easily update your link to the new affiliate structure and all the links on your website will be automatically updated.
4. Create SEO-Friendly Links to Boost Your Income
Some link cloaking plugins offer an automatic keyword replacement feature, which is a great way of boosting your affiliate income.
This feature lets the plugin scan your site’s content and replace all specified keywords with an affiliate link. That gets more exposure to your affiliate links and, as a result, can drastically increase your affiliate revenue.
5. Add Affiliate Links in Email Campaigns Without Getting Blacklisted
Sometimes you may want to add an affiliate link to your email marketing campaigns. However, adding affiliate links directly to your email campaigns may trigger the spam filters. That could result in getting your email account blacklisted.
By cloaking your affiliate links, you can easily prevent this from happening.
Now that we’ve seen a few advantages as to why you’d want to cloak your affiliate links, let’s dive into how you can do so in WordPress.
How to Cloak Affiliate Links in WordPress
Cloaking your WordPress affiliate links is quite easy. Especially if you use a good affiliate link management plugin.
There are several affiliate plugins on the market. But we highly recommend you to use the Pretty Links plugin to cloak and manage your links.
Pretty Links is an all-in-one link management plugin that makes cloaking, redirecting, and managing your links super simple. In this tutorial, we’ll use Pretty Links to show you how to cloak your affiliate links. If you want to learn more, feel free to read our review of Pretty Links.
Let’s get started.
Step 1: Installing Pretty Links in WordPress
The first step to getting started is to install and activate the Pretty Links plugin on your website.
Step 2: Setting up PrettyLinks
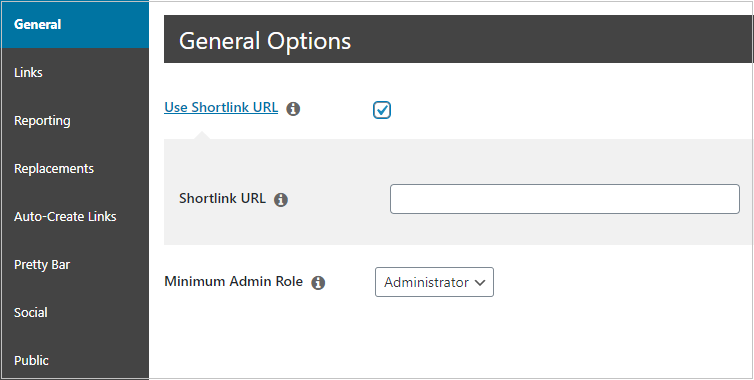
Once the plugin is activated, its time for you to configure your settings. For that, go to Pretty Links » Options. Here you’ll see several tabs on the left. The first one is the General tab. In this tab you’ll see an option called Use short link URL.
By enabling this link, you can add a shorter URL to replace your original affiliate link.
The next tab is the Links tab.
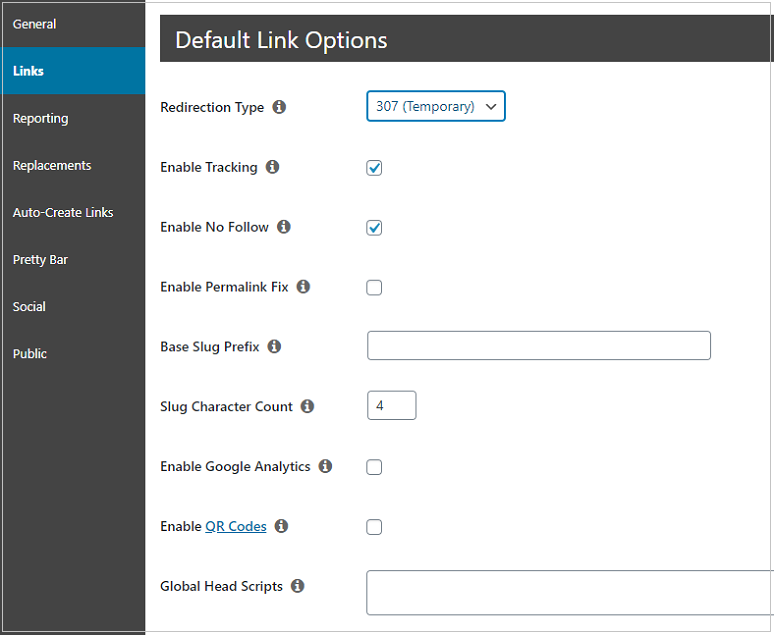
In this tab, you can add a redirection type, enable tracking, and a ‘no-follow’ tag. By adding a ‘no-follow’ tag, you’re essentially asking search engines not to associate those links with your own site (which could sometimes harm your SEO).
You also have the option to enable permalinks for your affiliate links which simply means that your links will remain permanently unchanged.
A few other options include adding a base slug prefix, adding the number of characters you want in your slug (a specific identifying part of web address at the end of the URL), or enabling Google Analytics and QR codes.
The next tab is the Reporting tab. Using this tab, you’re able to track your affiliate link clicks.
There are 3 different options here:
- Normal Tracking
- Extended Tracking
- Simple Tracking
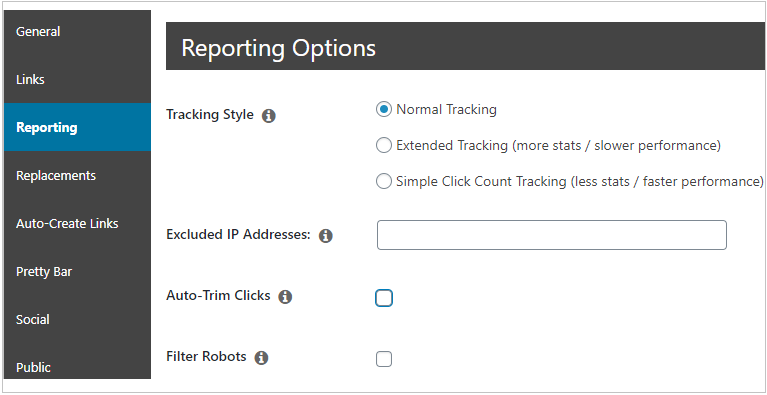
You can select whichever option you want. The extended tracking will show you detailed results. But it can slow down your site a bit. The other two options may display less data but will not impact your website performance.
You can also exclude IP addresses if you want to block certain visitors. Excluding IP addreses will also help you limit the display of your ad on particular networks that you think isn’t likely to be used by potential customers. Just add them in the Excluded IP Address tab and you’re done.
If you enable the Auto-Trim Clicks option, the plugin will delete all the clicks that are older than 90 days. This can help you improve your website performance.
Finally, you have the Filter Robots option. This option helps you weed out bots from your link reports ensuring a more accurate analytics report. It will automatically exclude the clicks that aren’t from human visitors from your website statistics. This setting works well if you enable the Extended Tracking option. Since enabling this feature may slow down your site, we recommend not to use this feature.
The next tab is the Replacement tab. If you check the box next to Enable Replacements, you’ll see several features appear on your screen such as adding thresholds, opening in a new window, adding no follow, and more.
If you’re ever unsure about what these features do, simply click on the tiny icon next to each field.
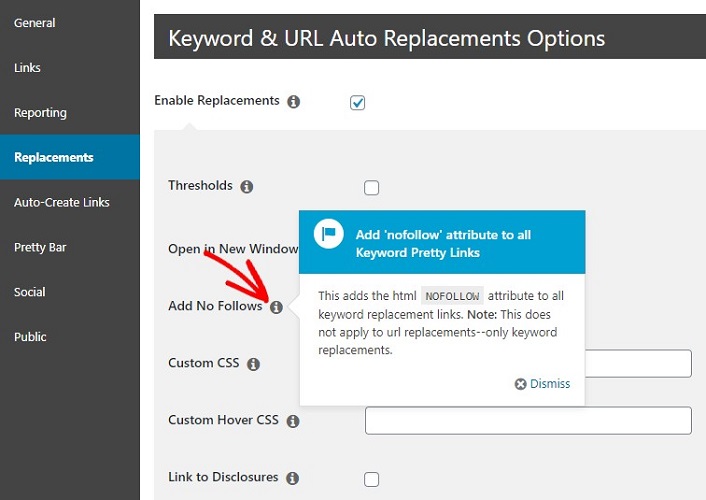
Everything is explained there in more detail.
The next tab is the Auto Create Links tab. Just like the above tab, here too you’ll see various options. Under this option, you can basically create short links.
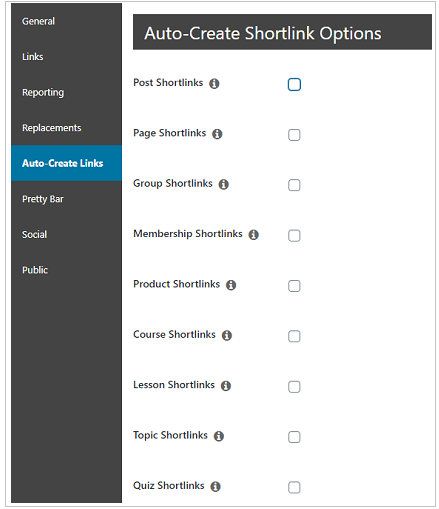
Again, if you’re not sure what these options mean, you can click on the information icon to learn more (as we did in the image above).
Next is the Pretty Bar tab. Here you can work on the appearance of your links. That means you can customize the text color, link color, link hover color, and more.
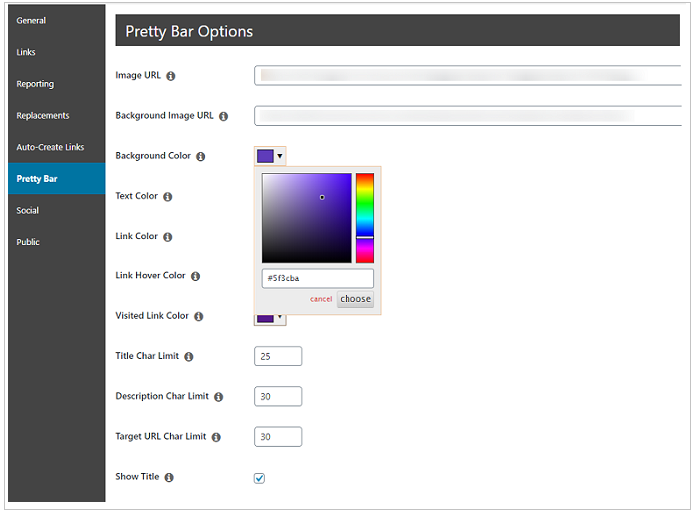
Then there’s the Social Bar tab. Here you can work on the placement of your buttons. By using this feature you can add a social share button to your posts and pages to encourage your users to share your content. This is a great way to boost engagement and increase your site traffic. You can select the option that fits your needs.
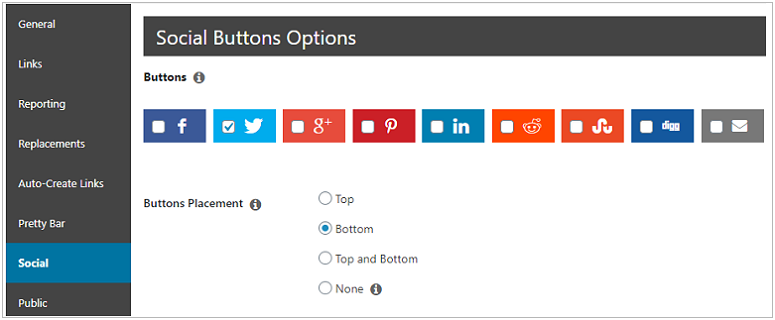
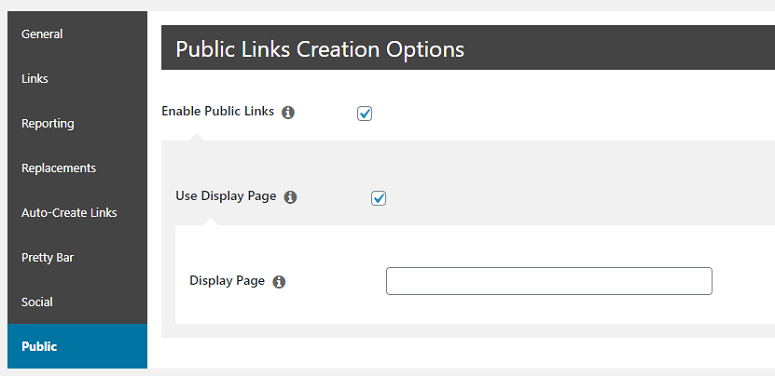
The last option is the Public tab. This tab is helpful for those who want to turn their website into a link shortening/cloaking service provider. That means your site visitors can drop by and create a short link using your site. If you want to offer link cloaking services to your users you can use this tab. Otherwise, feel free to skip it.
Step 3: Cloaking Your Affiliate Links with Pretty Links
To cloak your affiliate links with Pretty Links go to Pretty Link » Add New Link. Here you’ll see various options. The first one is Redirection.
If you click on the drop-down arrow next to it, you’ll see various options like 301, 302,307, and more. As a thumb rule, you should always stick to 307 if you think the link might change in the future.

But if you’re sure the link will stay on your site for a long time, you can choose a 301 redirect. Then just add the target URL which is your affiliate URL.
In the next tab, you can add a short link that you want to use instead of the original affiliate link.

Next, add a title and notes to your link if you want. This helps you to manage your links better.
Step 4: Adding Advanced Settings to Your Cloaked Links
Once you’ve created the basic settings, scroll down to the Advanced Option tab.
Under this option, you can add your link to a specific group for easy management. For example, if your link falls in a specific category, you can group it with other links in the same category.
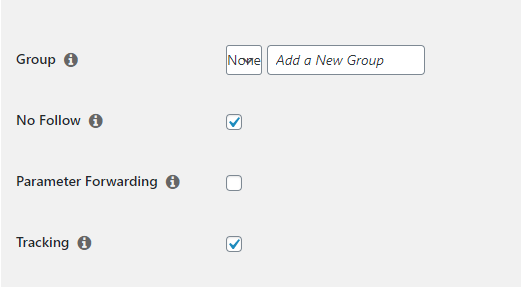
You also have the option to add a No Follow tag. By enabling this option you tell search engines not to associate the link with your site, so that it doesn’t affect your rankings.
Enabling the No Follow option is important, especially when you create a temporary link cloak. But this is optional for permanent redirects.
The final option is to enable the tracking option. This is up to you whether you want to track your links or not. If you do, then go ahead and enable it.
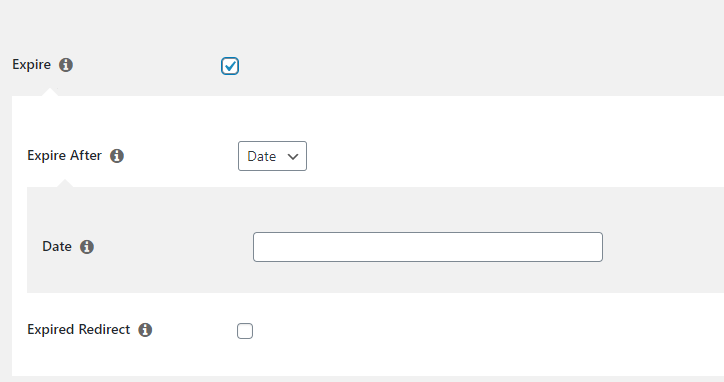
Now scroll further down the screen to find the Pro options. Here you can add an expiry date to your link. Just enable the expire option and you’ll see more options expanding on your screen. Then you simply select a date when you want your link to expire.
The next option is to add keywords. If you want to add keywords to your links, then this feature comes in handy. Just add your keywords in this field separated by commas.
Next, add the links which you want to replace with the short link that you added above. By doing this the plugin will replace all of those links with the cloaked link that you just created. This means you don’t have to find them individually to replace them.
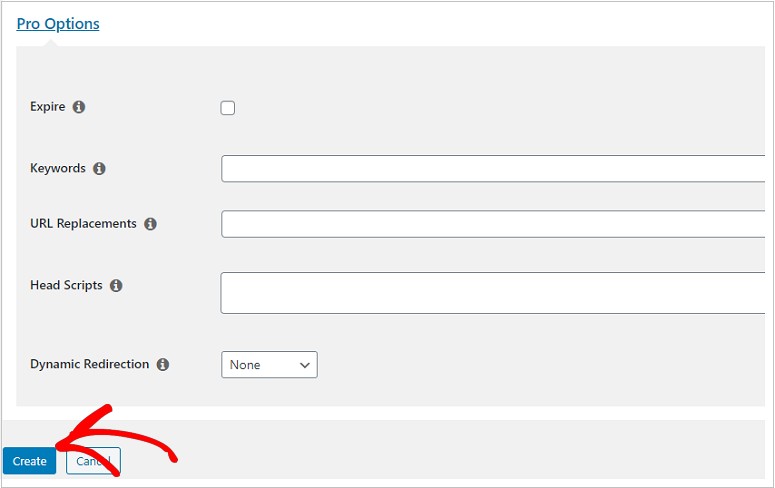
Once you add all of these options click on the create button at the bottom of your screen. And that’s it! Your cloaked link is now ready to be used.
That’s how easy it is to cloak your links with Pretty Links. We hope this article helps you make your affiliate links look pretty.
Meanwhile, you might also want to work on making your website look pretty. In that case, may want to check out our curated list of themes that are designed specifically for affiliate marketers.
You may also want to check out Thirsty Affiliates. Similar to Pretty Links, this plugin lets you cloak long affiliate links. It also makes it easy to insert affiliate links into blog posts and protects your commissions from theft. See our post: ThirstyAffiliates Review.


Comments Leave a Reply