
Do you want to create your own photography website?
A website serves as a central place to showcase your work to clients, get exposure, and share it with the world. Not to mention, a website also makes you look professional.
Most photographers delay in setting up their website because it’s technical, and to be honest, who has the time?
To make it easy for you, we’ve removed all the fluff and narrowed it down to 5 simple steps you need to follow so you can have your website set up quickly.
At the end of this guide, you’ll have a stunning photography website to call your own.
Types of Photography Websites You Can Create
There are different kinds of photography websites you can set up. We’ll touch upon the most popular ones:
Portfolio Website: Create a website where you can display a gallery of your photos in carousels or lightboxes. This will give you a professional space to showcase your photos to clients and the world.

A website like this will also get you more exposure and allow interested people to find you.
Membership Site: Set up a platform where photographers can sign up to be members to contribute their photos to a public gallery or to sell them for a price. You could create a free space for photography, or even charge a membership fee or a commission on each photo.

With membership sites, you could also create a community of photographers who are interested in being hired. So photographers can sign up according to the type of photography they specialize in. Then potential clients can search by style and location to find the right photographer for them.
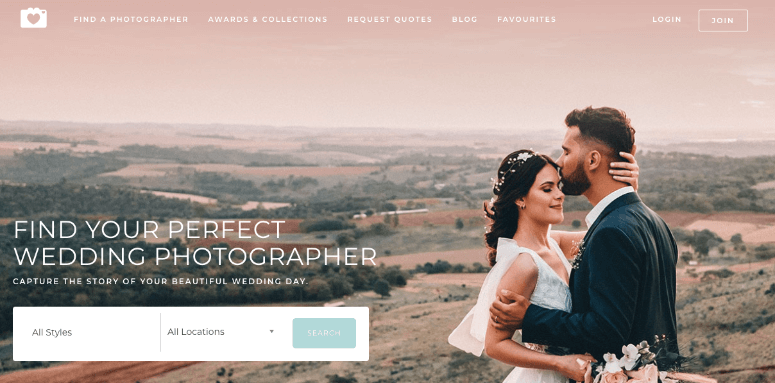
Online Photography Store: Put your photos and art up for sale online on your own website. You can avoid hefty fees and commissions that you’d otherwise be charged if you were to join the popular stock websites. For this, you would need an eCommerce setup or payment gateway on your site to sell your photos.
Online Course Site: If you’re looking to share your expertise, an online course website is perfect for you. You could add course materials, eBooks, tests, tools, and more. You could also allow members to chat in forums to ask questions and discuss topics.
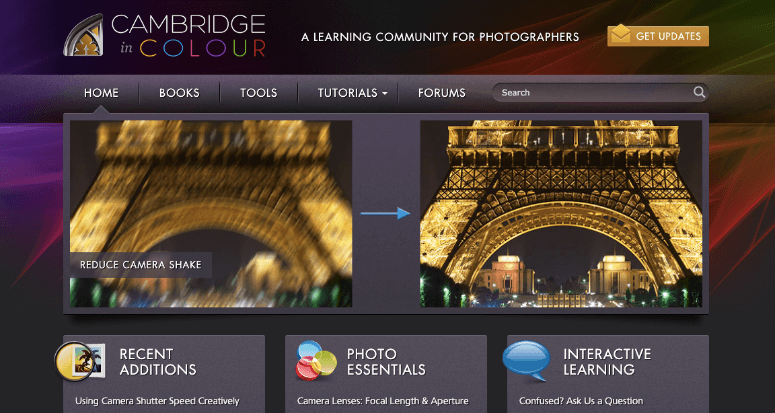
No matter which type of photography site you want to create, this tutorial will help you achieve it.
Getting Started with a Photography Website
You can set up a website in different ways but we won’t confuse you with too many options. Instead, we’ll tell you right off the bat that our #1 recommendation is WordPress.
It is the most flexible and affordable platform that lets you customize and scale your business the way you want at a low cost. There’s a bit of a learning curve to it but it’s easy for anyone to use.
We strongly recommend WordPress.org because you’ll retain control of your site. Not to mention, there are 10,000+ beautiful themes to choose from. You can even import demo websites and change the content and photos to make them your own.
Plus, there are 55,000+ tools and plugins built for WordPress. This lets you add all sorts of features and functionality to your site. You’ll be able to set up any kind of photography website you want.
So for instance, if you’re looking to create a membership platform, we recommend using your WordPress site along with MemberPress. It is the #1 membership plugin for WordPress that will let you set up tiered membership plans and grant access based on the membership level. The platform also allows you to set up one-time or recurring payments.
Next, if you want to sell your prints online, then we recommend using WordPress and the Easy Digital Downloads plugin. It lets you sell any kind of digital file like photos, videos, music, pdfs, and so on.
To drive the point home, with WordPress, you’ll be wanting for nothing. Whatever you want to do with your website, if the feature isn’t already built-in, you’ll find a third-party tool to get the job done.
With that said, let’s see what you need to build your photography website with WordPress.
Things You Need to Set Up Your Photography Website
To set up any kind of website, you’ll need 2 things:
- Web hosting plan gives you access to a server where your website will live. All its files and database will be stored here.
- Domain name is your website’s address like www.isitwp.com.
The best deal out there is Bluehost’s plan where you’ll get a reliable web hosting service + a free 1-year domain registration starting at just $2.75 per month. You’ll also get a free SSL certificate to make your site secure and free CDN (content delivery network) to make your site fast.
The best part is that with this plan, you can install WordPress in just 1 click. So you won’t have to do anything technical to get started.
Click Here to Get the Exclusive BlueHost Deal
If you want to explore other options, see our list of 11 Best Web Hosting Companies. Our top picks are Hostinger and SiteGround.
Below, we’ll show you how to sign up for a web hosting plan and set up your site.
How to Set Up Your Photography Website
In this tutorial, you’ll learn how to create a website complete with stunning photos. And since photos tend to be large files, we’ll pay special attention to make sure your website loads at lightning speeds for the best user experience. Here are the steps you’ll need to take:
- Sign up for BlueHost
- Set up the Basics
- Customize your Site
- Add Helpful WordPress Plugins
- Optimize Speed and Performance
Step 1: Sign up for Bluehost
The first thing you need to do is sign up for a Bluehost plan. If you want the cheaper web hosting plan, visit our Bluehost Exclusive Offer page that lets you get started at $2.75 per month.
You’ll need to click on the Get Started Now button, select your plan, and follow the instructions on screen.

On the next page, you’ll see different plans available along with the pricing and features of each one.
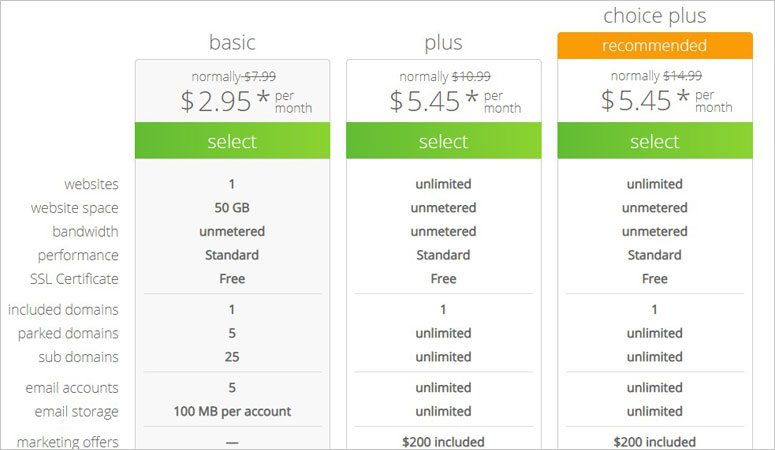
The 36-month plan gives you the highest savings, but when you’re just getting started, the 12-month plan is also an affordable choice with a big discount.
Next, you’ll see an option to set up your domain. You can either create a new domain or use an existing domain. If you don’t have one, simply search for the name you want under ‘Create a new domain’.
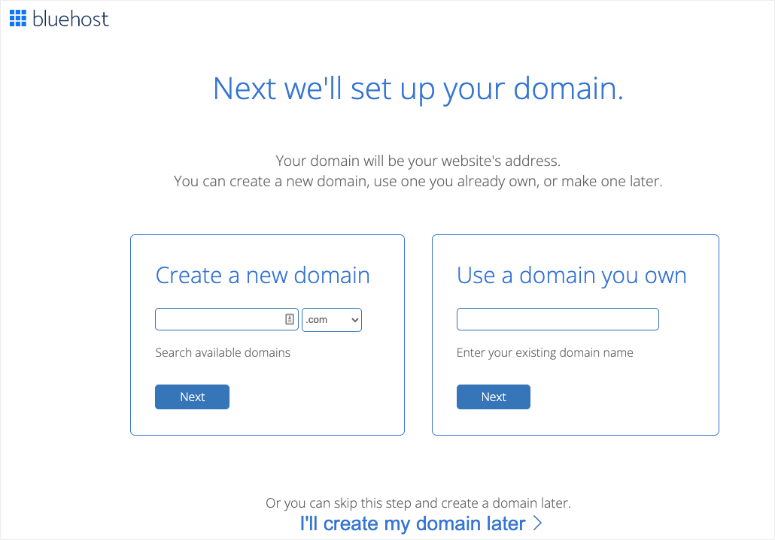
What you need to know here is that there are millions of domains registered already. So unless you’re name is unique, chances are it’s already taken, The best way to find available domain names is using our Free Domain Name Generator tool. It will take your keywords are find domain names that you can register right away.
Once you’ve found your domain name, you’ll need to enter your details such as your name and address.
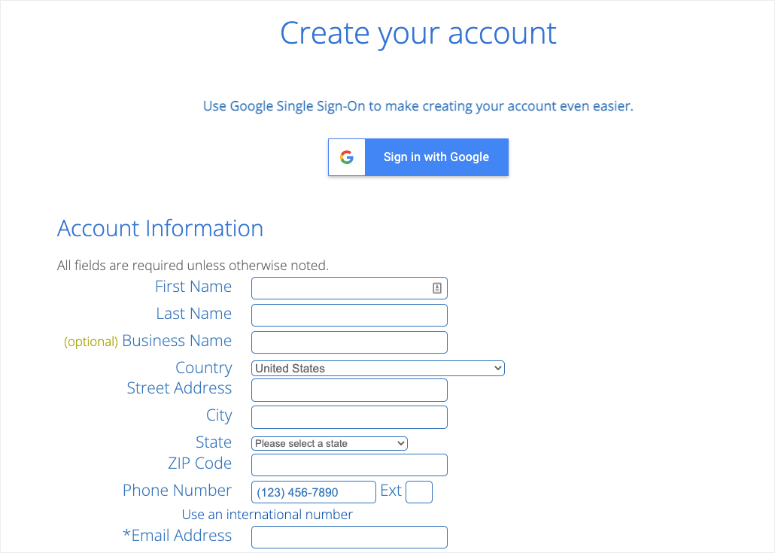
Bluehost lets you see the details of your plan selection and make changes if you want.
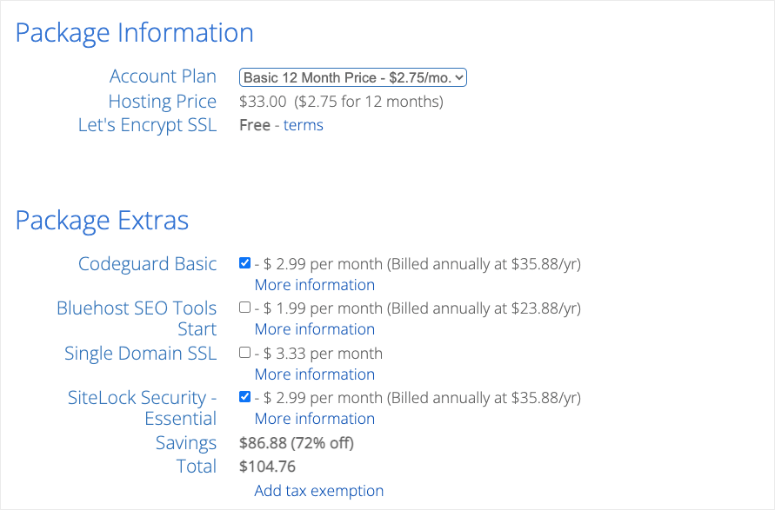
Now, there’s a section called Package Extras underneath this. These are tools that you may find helpful while building and running your website. But we recommend that you uncheck all of this here. This will help you save on your hosting plan and you can buy them later if you like.
The last thing you need to do here is enter your payment details and checkout.
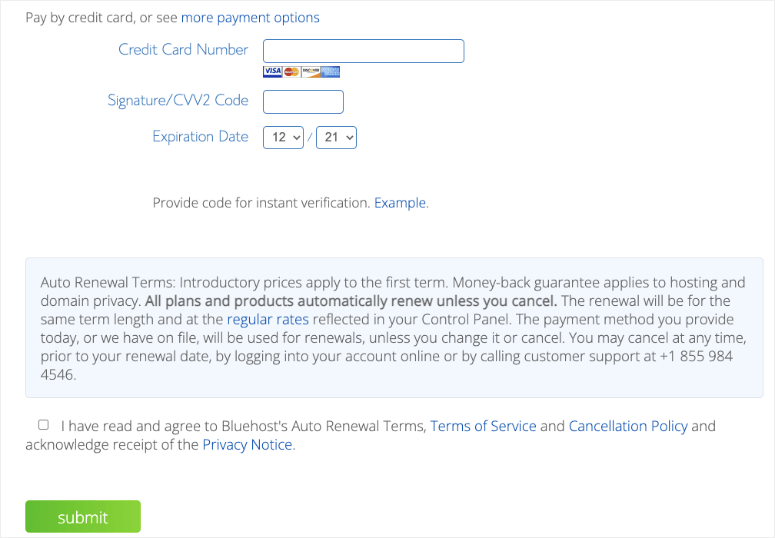
That’s it! You’ve bought yourself a domain and hosting plan.
Step 2: Set Up the Basics
In this step, we’ll cover the following:
- Set Up WordPress
- Configure SSL
1. Set Up WordPress
When you sign up for Bluehost, WordPress is automatically added to your plan. You simply have to install it by clicking a few buttons.
Log into your Bluehost account, and you’ll see a menu on the left where you can navigate to ‘My Sites’ tab.

Here, click on the Create Site button. Follow the instructions onscreen and after that, in your Bluehost dashboard, you’ll get an option to log into WordPress.
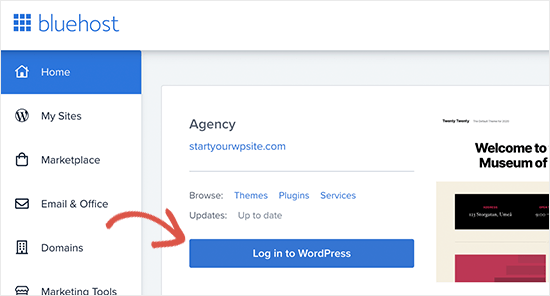
This will take you to your WordPress admin panel where you can manage your website.
2. Configure SSL Certificate
Remember we mentioned that Bluehost gives you a free SSL Certificate. This will encrypt your website data to keep it safe from hackers.
While Bluehost preinstalls the certificate on your domain, you need to make sure you’re site is using HTTPS and not HTTP. If you want to know why, we’ve covered it in our guide: How to Add SSL and HTTPS in WordPress (Step by Step).

In your WordPress menu, head over to the Settings » General page. Under WordPress Address and Site Address, make sure it’s set to HTTPS.
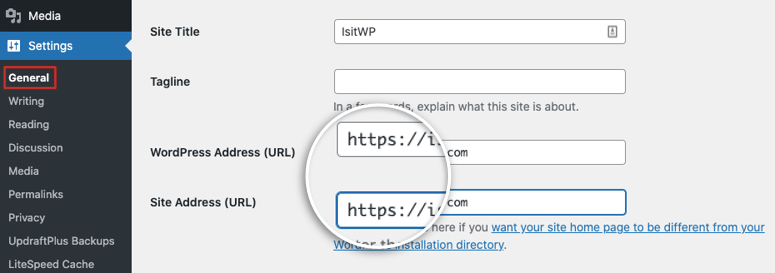
While you’re here, you can also change your site title and tagline if you’d like. All that’s left to do is save your changes.
Step 3: Customize Your Website
WordPress is home to thousands of themes and website designs. It’s why we love it so much. You can choose from free and paid themes, but the sheer volume of choices can leave you confused about which one to pick.
For photography websites, we recommend Oshine, Divi, Photography and Novo Photography. Check out our entire list here: 50 Best Photography Themes for WordPress.
If you’d like to explore new themes on your own, go to the Appearance » Themes page. Select the Add New button to view available themes.
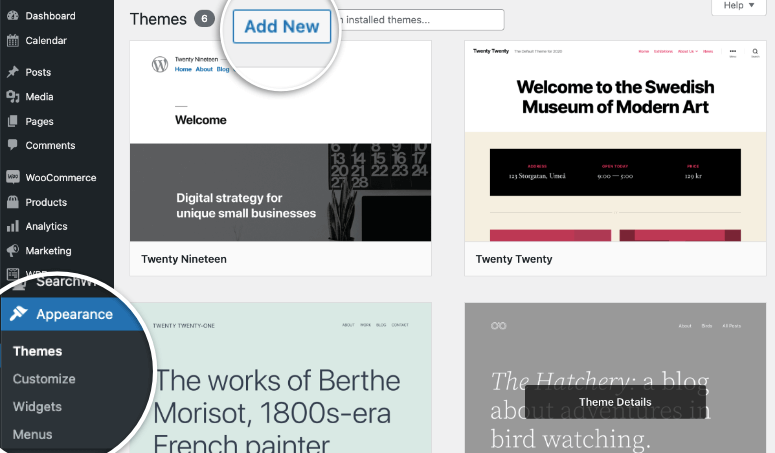
Here, you can filter by popular and latest themes. You can also search for themes that are for photographers. You can also find third party developers who create their own themes and sell them on their websites. If you buy one of these themes, you’ll get a zip file with your purchase that you can upload on this page.
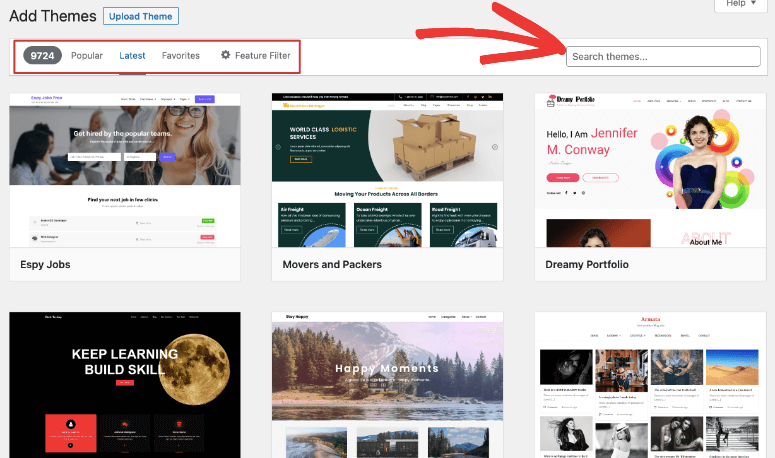
Once you have found the theme you like, you can install and activate it. Never installed a WordPress theme before? No worries, check out our beginner’s guide to installing a WordPress theme.
Most WordPress themes are easy to customize. This means you can change the fonts, colors, header styles, background, and more.
Simply go to the Appearance » Customize page to launch the theme customizer. This will open up a live preview of your site with a customization menu in the left column.
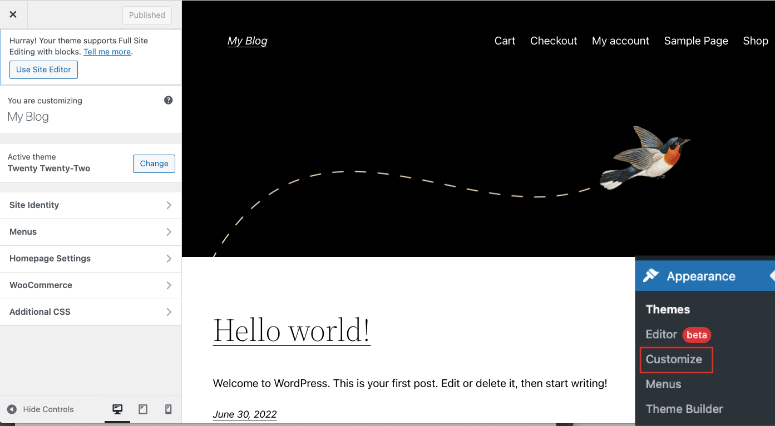
Here, you can customize your site identity, menus, homepage, and more. The options you see here will depend on your theme. So you may also be able to change the footer, header, widgets, buttons, and more.
At the bottom of the menu, you can preview your website on desktop, tablet, and mobile. This way you can make sure your changes look good on all devices.
Once you’ve finished making changes using the theme customizer, you just need to click the Publish button on the top left of the screen. With that, your photography website will go live to the world.
In many cases, the default theme customizer doesn’t have enough options. There are many site builders that you can use on top of WordPress. The most popular ones include SeedProd, Divi, Elementor, WPBakery, and Beaver Builder.
SeedProd is our #1 pick. You’ll get website themes + page templates to customize your site. Plus, it comes with a built-in coming soon and maintenance mode. This lets you hide your website with a beautiful placeholder page while you work on your site behind the scenes. That way, users don’t see a broken website when they visit.
If you need more help with customizing your site, we’ve got you covered: How to Customize a WordPress Website [Beginner’s Guide].
Step 4: Add Helpful WordPress Plugins
WordPress is home to thousands of plugins that can enhance the way your photography website looks and functions. You can add these plugins inside your WordPress admin panel under the Plugins » Add New tab.
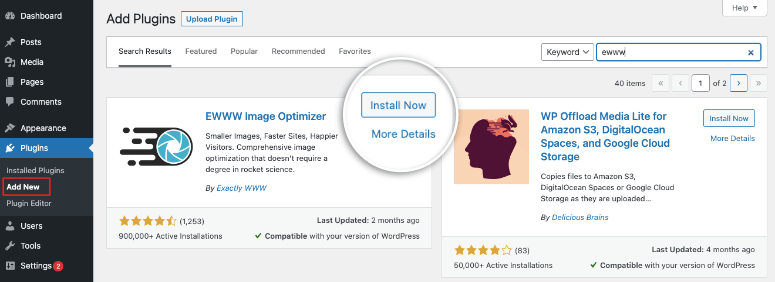
Never installed a plugin before? Just follow our guide: How to Install a WordPress Plugin – 3 Methods (Step by Step)
Now here are the plugins we think all photography sites can benefit from:
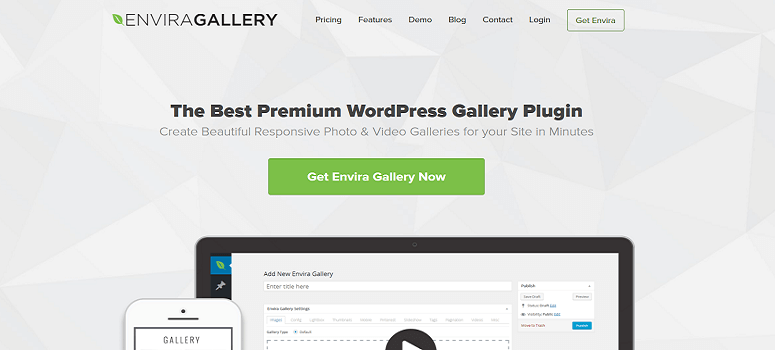
Envira Gallery is the best WordPress gallery plugin available on the market. There’s a simple easy drag and drop builder that lets you create fully responsive image galleries, video galleries, and photo albums for your site in no time.
You can add your photos and get it to appear as a beautiful gallery without ever touching any code. Simply choose from one of the beautiful pre-built gallery templates and customize the look to make it your own.
Once you’ve created the image galleries, you can organize them in albums, sort them with tags, and also add cover photos.
For more gallery plugin options, read our list: Best WordPress Gallery Plugins
2. Soliloquy
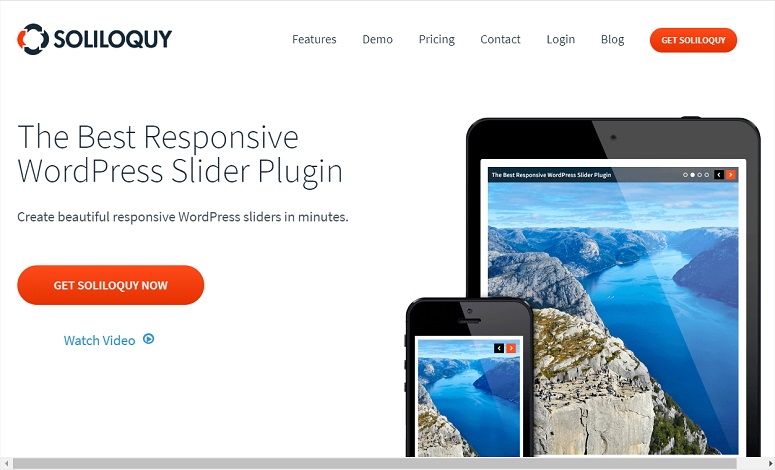
Soliloquy is the best tool to create sliders to showcase your photos. It lets you create full-width sliders or small-size sliders with a drag and drop interface. Then, you can add beautiful animations to elevate the impact your photos have on users.
It comes with tons of features including slider templates, dynamic sliders, product sliders, fullscreen lightbox, importing abilities from Flickr, Instagram, and much more.
If you’re worried about how your photos will look on mobiles, Soliloquy takes care of that. The sliders are fully responsive and mobile-friendly so they’ll look great on all types of screens and devices.
Want to check out more slider plugins? Read our list: 11 Best WordPress Slider Plugins
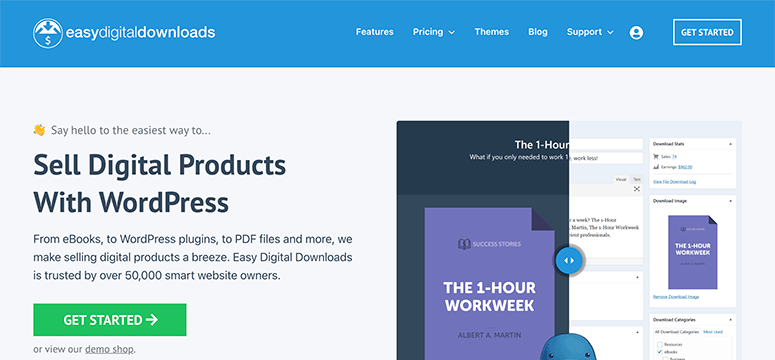
Easy Digital Downloads is a powerful eCommerce plugin for WordPress that helps you sell digital products. You can use this plugin to sell all types of digital products such as images, artworks, videos, and graphics.
Customers can purchase multiple downloads at once using the shopping cart system. Plus, you can set your tax rate, set up discount codes, create a database of your customers, and track all your payment transactions.
4. Instagram Feed Pro by Smash Balloon
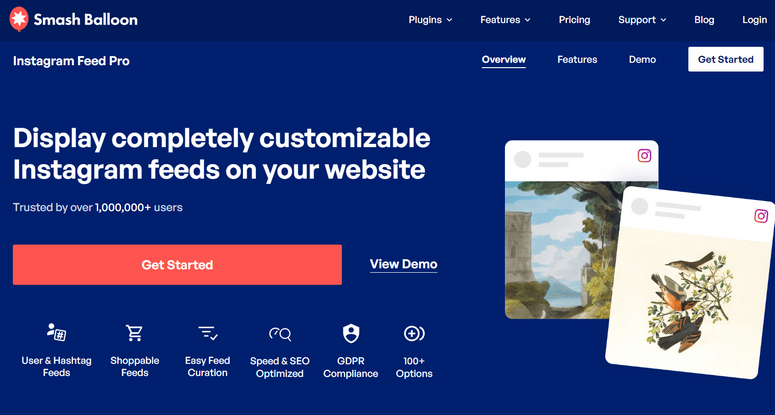
Instagram Feed Pro by Smash Balloon lets you can easily display an Instagram feed anywhere on your WordPress website. If you’re a photographer, Instagram is a gold mine for exposure to get your name out there and let people know who you are.
By showcasing your Instagram content on your site, you can engage your website audience. At the same time, you can also drive your site visitors to follow you on Instagram.
The plugin even lets you turn your Instagram photos into a shoppable feed so people can buy them as their browsing. You can highlight certain posts, and filter the types of photos you want to showcase using tags and filters.
Plus, Smash Balloon embeds your Instagram content directly on your web page which can help you improve your SEO rankings.
5. MemberPress

MemberPress will let you create a membership site where other photographers can join. You can grant them access to a members-only area to view, buy, and contribute photographs and other artwork.
You can charge members a fee for joining, or they can select from different membership plans that give them access to more benefits. Learn more here: MemberPress Review: Is It the Best WordPress Membership Plugin?
A good alternative is Thrive Architect.
6. LearnDash

LearnDash is an LMS (learning management system) platform where you can create photography courses and sell them on your website. You can allow students to sign up for classes or a complete course.
Also, it’s easy to add tests, course material, and create forums for students to discuss. As for revenue, there are options to accept one-time payments and even set automatic renewals.
You’ll be interested to read our complete list of helpful plugins for photographers: 19 Best WordPress Plugins for Photographers.
Other helpful plugins that any WordPress site should have include:
- AIOSEO – The best WordPress SEO plugin that will help your site rank higher in Google and other search engines
- MonsterInsights – The best WordPress analytics plugin helps you easily connect to Google Analytics and track data of your site and user base right inside your WordPress dashboard.
- WPForms – #1 form builder for WordPress, trusted by 6 million websites. You can use it to build registration, login, contact forms, customer review, surveys, polls, etc.
- OptinMonster – #1 conversion optimization toolkit to create campaigns for your target audience that will help you get more subscribers and sales.
- WP Mail SMTP – The best plugin to resolve email deliverability issues. This will make sure emails from and to your website are being delivered. If you’re selling photos, this plugin is essential as you need to make sure customers get their receipt, login information, etc.
- Sucuri – Protect your website and digital media from hackers, data theft, and malware attacks.
- Duplicator – Automated regular backups for your website so that you never lose your media files, customer data, order information, shipping details, and so on.
These plugins should be used on all websites and can be used by individuals, startups, entrepreneurs, small businesses, and large corporations.
Step 5: Optimize Speed and Performance
Most business owners focus on getting the product photography right and displaying it beautifully. But in many cases, they forget to make sure these images can load on the user’s end.
If you use large high resolution files, chances are your images won’t load. So while you want to make sure the pictures look stunning, you also need to optimize them for the internet. This is really important for SEO as well as user experience.
Since you’re using Bluehost, your website is optimized for speed. Bluehost is a reliable web host with servers built for speed and performance.
Plus, they offer free access to a content delivery network. This is a network of servers spread throughout the world that deliver cached static content to your website visitors from the nearest CDN server location. Since CDN serves static content from the nearest server, your site loads faster than it would normally.

Now aside from this, you can use a tool to optimize all your images. See: 6 Best Image Optimization Plugins for WordPress (Compared).
Here are the ones we recommend:
1. WP Rocket is simple and easy for anyone, especially beginners, to set up and use. When you install WP Rocket, it auto enables recommended settings so you don’t have to tweak any of the plugin’s settings. Next, you can enable LazyLoad for media files to improve speed and user experience. Added to this, WP Rocket has a built-in image optimization tool called Imagify. You can use this tool to compress images and reduce file sizes. See our full review: WP Rocket Review.
2. EWWW Image Optimizer is a great image optimization plugin for WordPress. The plugin automatically optimizes your new image uploads and ensures that your images are of the minimum size and best in visual quality. You can also optimize all the images that you’ve already added and convert your images to the best file format. To learn more, you can check out our full EWWW Image Optimizer review.
3. W3 Total Cache offers a set of powerful features to speed up your photography website. It helps to improve your website loading time by caching every aspect of your site including pages, posts, JavaScript, CSS, feeds, etc. in memory, on disk, or on CDN. Plus, it provides a transparent content delivery network (CDN) management with media library, theme files, and core WordPress files to boost your server performance.
And there you have it! You’ve properly set up a stunning photography website to showcase your masterpiece. We hope you found this guide helpful.
Up next, you’ll be interested in reading more of our posts:
- 14 Best Website Builders for Beginners & Small Businesses
- 8 Best Platforms to Sell Downloadables and Digital Products
- How to Accept Credit Card Payments in WordPress
These plugins and tutorials will help you better your photography website.

Comments Leave a Reply