
Do you want to create a welcome gate on your website?
Traditional welcome gates redirect users to a new page, which is bad for SEO and user experience.
We’ll show you how to create a fullscreen mat right on your website that visitors can interact with or simply exit. These campaigns can help grow your email list, boost sales, and improve engagement on your site.
In this tutorial, you’ll learn how to create a fullscreen welcome gate for your site in under 10 minutes.
Adding a Welcome Gate to Your Site Made Easy
If you want to stand out from the crowd, you’ll want to create a welcome gate that’s absolutely stunning. You’ll also want to be able to customize it and choose how you display the campaign on your site.
In this tutorial, we’re going to show you how to create a beautiful campaign like this in less than 10 minutes:
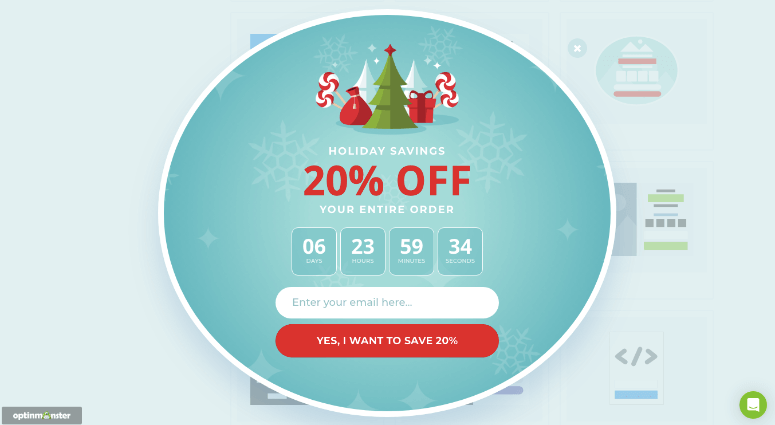
Behind this beautiful design are targeting rules that show the campaign only to new visitors. If a person has already seen or engaged with the campaign, they will never see it again. We’ll even show you how to display it only on specific dates, times, and for certain locations.
To create a powerful welcome gate like this, we’ll use OptinMonster.
We’ve used OptinMonster to run our own campaigns and it’s so easy to use. There are beautiful templates to choose from and a visual editor to make all the changes you need. You never have to use any coding, and even if you’re a beginner, you’ll be able to learn how to use it in no time.
Added to that, OptinMonster comes with powerful targeting rules to show your campaign only to new visitors or recurring visitors. You can even choose to display your welcome mat by location, device, date/time, and so much more.
This lets you create seasonal campaigns, localized offers, and so much more.
What we love is the conversion-optimized elements inside OptinMonster’s builder such as a countdown timer, inline forms, content lockers, and a lot more.
Learn more about OptinMonster here. If you’re looking to create a Splash Page instead, you may want to see this tutorial on How to Create a Stunning Splash Page for Your WordPress Site.
Now let’s get started with our tutorial here. Here are the steps we’ll follow:
- Connect OptinMonster to Your Site
- Create a Fullscreen Welcome Gate
- Customize your Welcome Gate Campaign
- Target Your Audience
- Connect Your Email Service
- Publish the Welcome Gate
Step 1: Connect OptinMonster to Your Site
First off, sign up for OptinMonster and then install the OptinMonster plugin in your WordPress dashboard.
Once you activate the plugin, it will launch the setup wizard. Follow the onscreen instructions to connect the plugin to your OptinMonster account.
You can also connect your account under the OptinMonster » Settings tab.

This will bring up a popup to connect OptinMonster to WordPress.
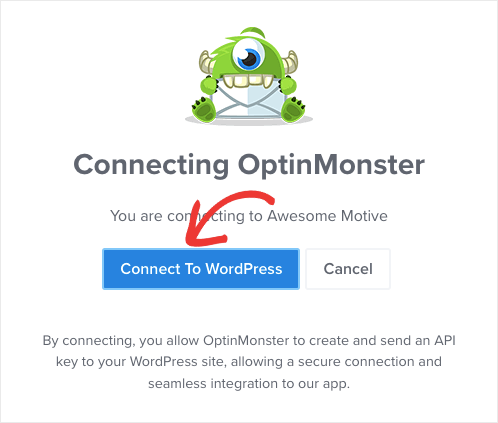
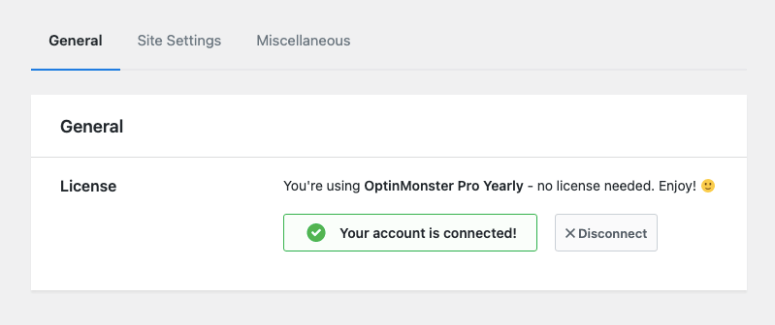
If you are signed into your OptinMonster account in another tab, the plugin will auto-detect your account and connect it. Nothing more is needed. You’ll see a message that your account is connected.
Now you’re ready to create your fullscreen campaign.
Step 2: Create a Fullscreen Welcome Gate
You can create campaigns in your OptinMonster account or right inside your WordPress dashboard. We’ll show you how to start from your OptinMonster account because this will let you create as many campaigns as you need and connect them to different websites.
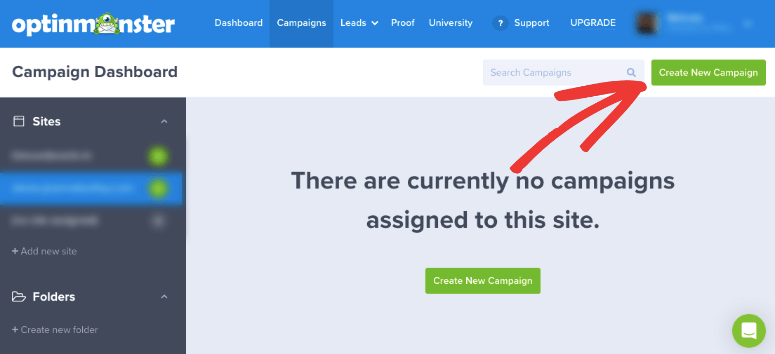
In your account, select the ‘Create New Campaign’ button.
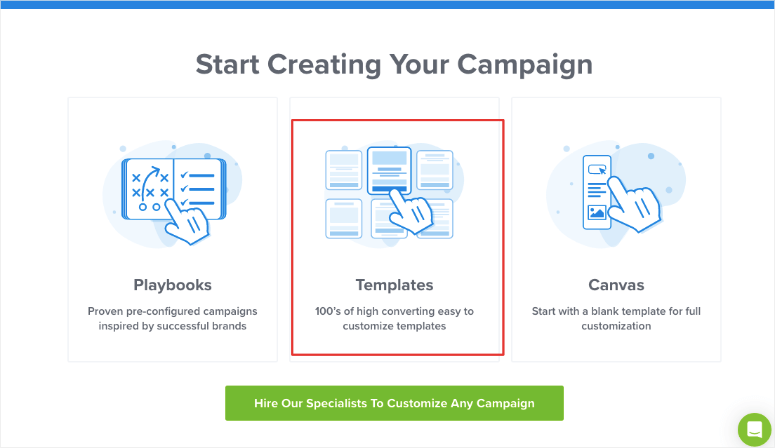
This will open a popup that lets you choose between playbooks, templates, or canvas to start from scratch. Let’s go with creating a campaign using a template.
When you select ‘Templates’, it will open up a template library. You’ll see options to create different kinds of campaigns like popups, floating bars, fullscreen, inline, slide-in, and gamified wheels.
Choose Fullscreen and then browse through the templates below.
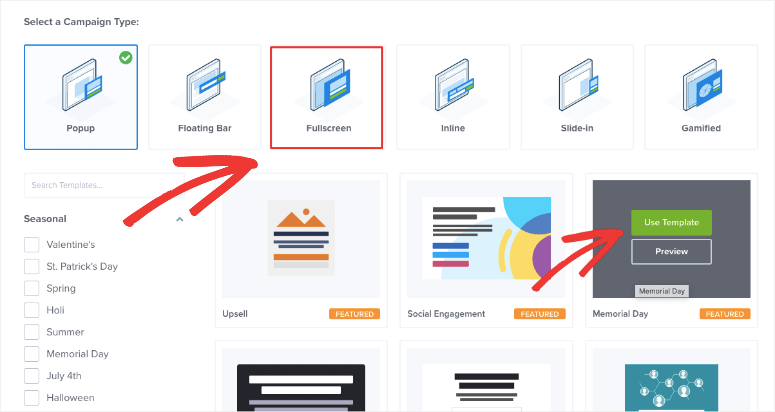
For this tutorial, we’re going to choose the Holiday template. When you choose a template, you need to fill in a name for your campaign. You can also choose which site you want this campaign for.
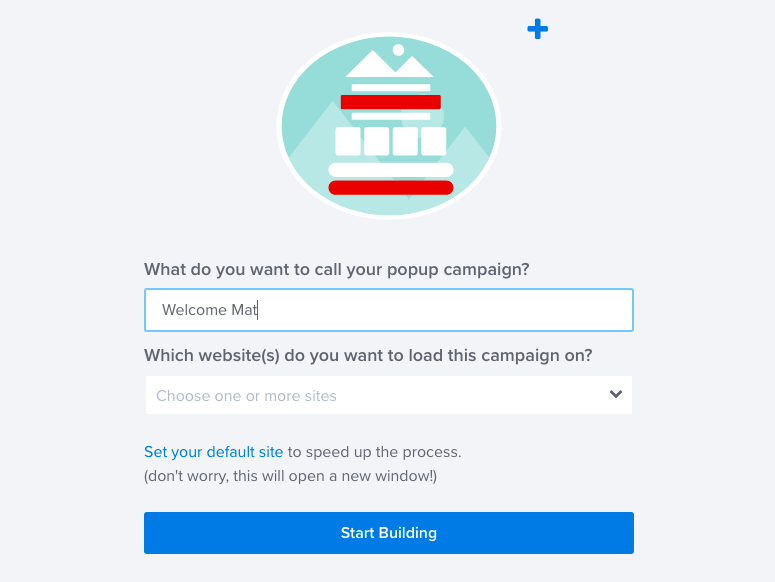
That’s it, now you can start building the campaign.
Step 3: Customize your Welcome Gate Campaign
Now you should be inside the OptinMonster campaign builder. You’ll see a preview of your campaign and a taskbar on the left.
To make changes, you can work directly on the preview. So for instance, you can select the text in the preview and change it right there like this:

You’ll even see a text editor appear to change fonts, alignment, text color, and more.
Need more options? Let’s change the CTA button. Simply click on it and editing options appear on the left.
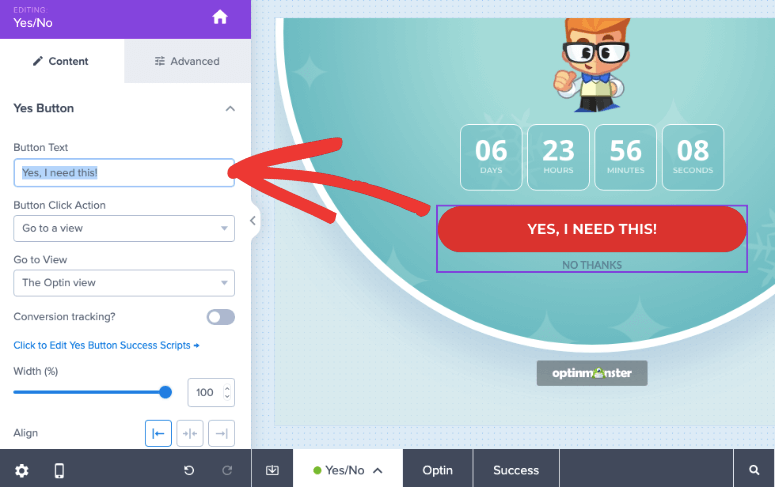
You can customize the text, and what action takes place when the user clicks on it. There are a lot more customization options to change the width, alignment, color, and more.
If you want to add an optin field instead of a yes/no option, you’ll see an option at the bottom taskbar. If you click on Yes/No, you can turn off this option.
If you want to add a new element like an image, simply drag it from the left menu into your design. So easy, right? You can edit your design by just dragging and dropping elements where you want them to be.
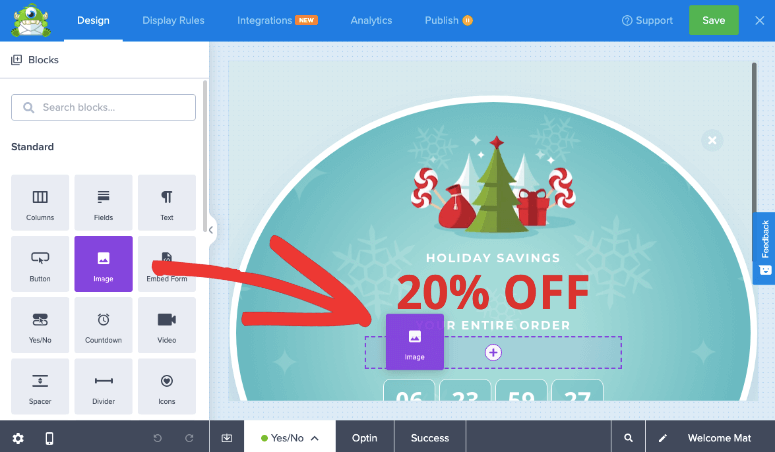
When you add an image block, it will open up a library of images. You can also access the Unsplash image library here with millions of free stock images inside.
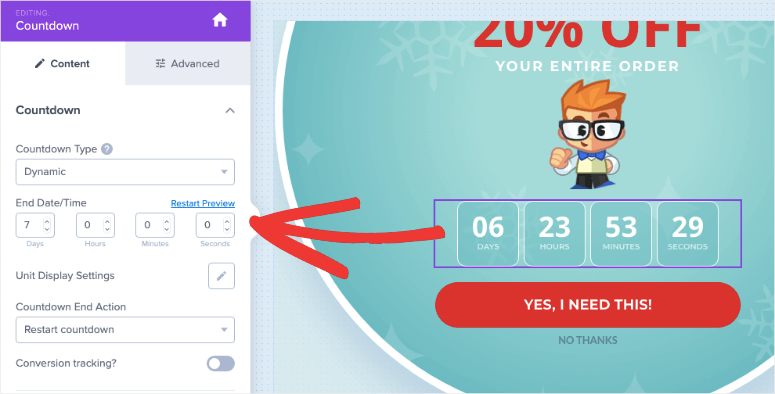
If you’re running a limited-time sale or just want to add a sense of urgency to your campaign, then you can add a countdown timer to the design. By selecting this field, you can select your date and time for the timer. You can also choose to restart the timer automatically once it expires.
When you’re done customizing the design, store your progress by clicking on the Save button at the top right corner of the builder. Now we’ll show you how to target your audience.
Step 4: Target Your Audience
In the OptinMonster builder, head over to the Display Rules tab. Here, you’ll see that by default, OptinMonster displays your campaign after a user has spent 5 seconds on your site. We’ll change that.
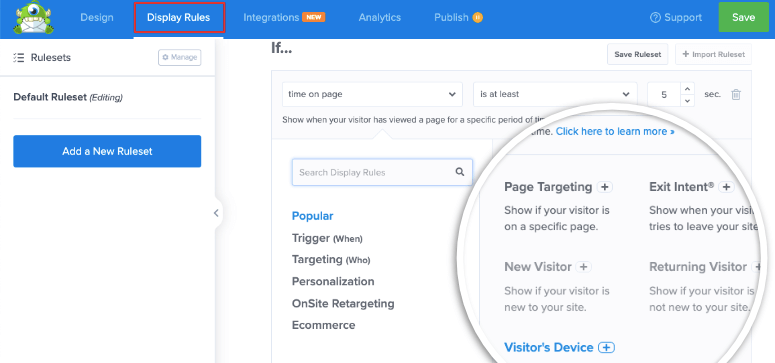
You can choose to target your users differently. Here are some of the rules you can use:
- Onsite Retargeting® – engage with users that have interacted with another campaign
- New Visitor – greet people who are brand new to your site
- Page-level – create targeted campaigns for specific URLs such as your homepage
- Location-based – personalize a visitor’s experience based on their geographical area
- Referral source – show campaigns to visitors coming from a specific website or social media platform
- Time-based – wait till a visitor has spent a certain amount of time on a page or schedule a date and time
- MonsterLink™ – trigger campaigns when a user clicks on a button or link
You simply need to click on the rule to add it. You’ll even get options to customize the settings. There’s never any need for coding or technical knowledge.
On the left-hand panel, you’ll see filter options that include Popular, Trigger, Targeting, and more. You can use these filters to find what you’re looking for faster.
For the welcome gate, we would set the following rules:
- Time on page is immediate
- Current URL Path is the homepage
- Visitor is new
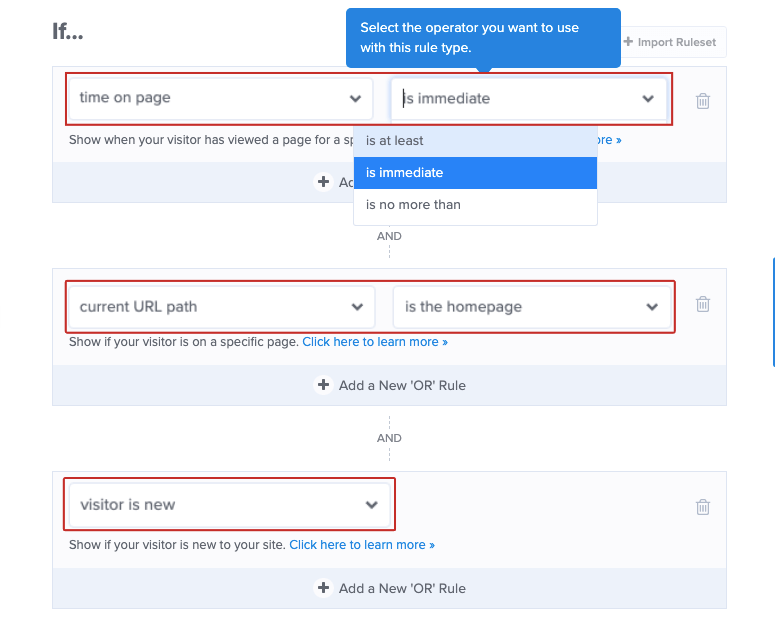
Once you’ve added your targeting rules, we can move on to the next step.
Step 5: Connect Your Email Service
OptinMonster lets you connect your campaign to your favorite email service like Constant Contact, Drip, and Mailchimp. Under the Integrations tab, choose your provider and follow the onscreen instructions to connect your account.
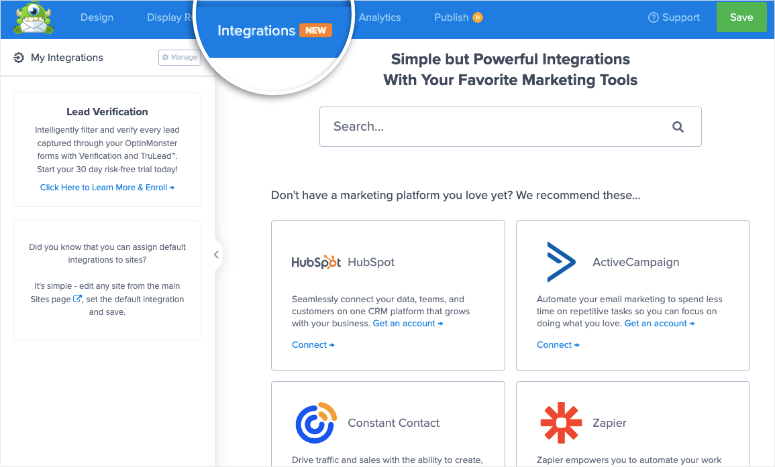
For example, if you want to connect to Constant Contact, click on it and you’ll see options to add your account name and sync it.
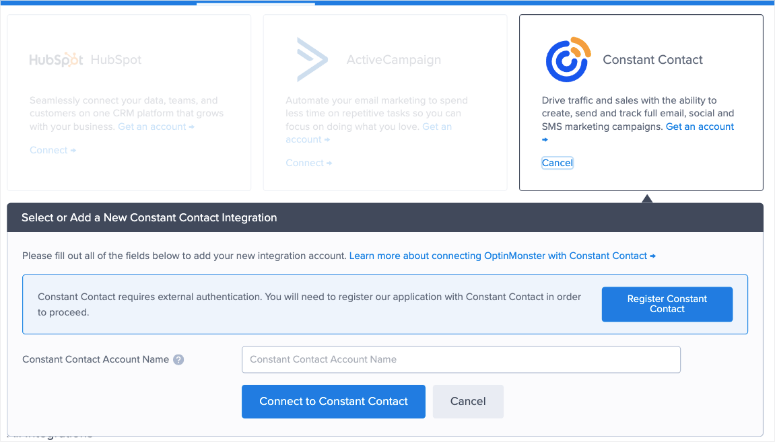
With this integration, you’ll be able to send any new leads directly to your email account. They can be tagged and segmented. This will help you add them to the right emailing list such as newsletter, or sale updates.
So for instance, if you’re using OptinMonster to create an optin popup to get more newsletter subscribers, then you can choose which list you want to add them to.
That’s it. Make sure you save your design and you’re ready to publish the campaign on your website.
Step 6: Publish the Welcome Gate
To go live with your campaign, head over to the Publish tab. Here, you can change the status to Publish.
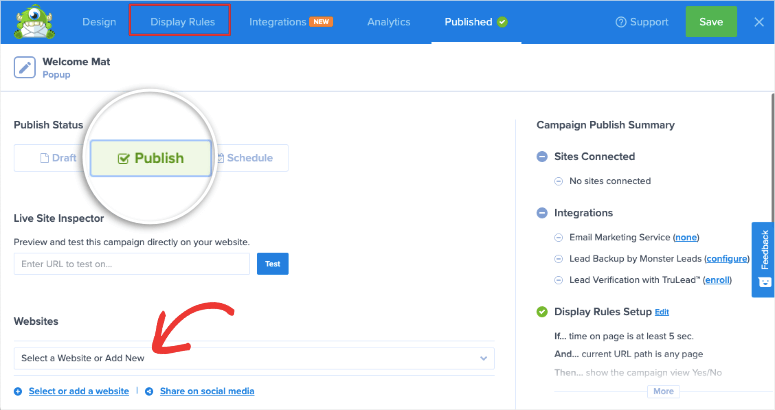
Below that, you can choose which website you want to display this welcome mat on.
Since you’re connected to WordPress, you’ll want to head over to your WordPress dashboard. Inside the OptinMonster » Campaigns tab, make sure your campaign is set to Published here as well.
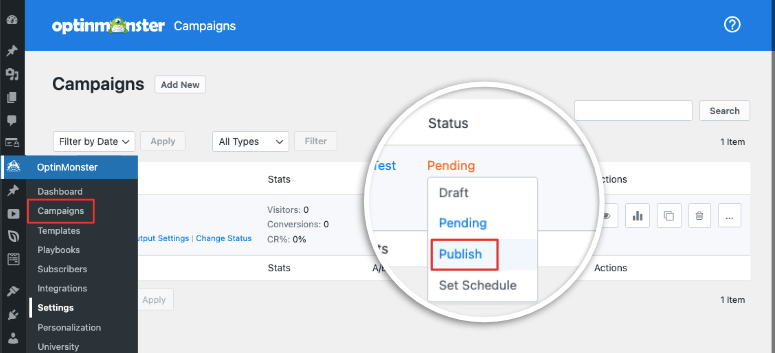
Head over to your website and you should see the campaign appear. We recommend testing in incognito mode or through a new browser with cookies and cache cleared so that you see the campaign as a new visitor.
With that, you’ve learned how to create a stunning targeted welcome mat for your site. You can continue to create more campaigns with OptinMonster.
Need more tutorials to follow? Here are the ones we think you’ll find helpful:
- How to Create a Popup Based on Location
- How to Create Stunning WordPress Optin Forms
- How to Use a Content Locker in WordPress
These guides will help you get more leads, target local audiences, and monetize your content.

Comments Leave a Reply