Are you looking for ways to share your church sermons online?
Sharing church sermons online can be helpful for members of your congregation who aren’t able to attend the service in person. This can be due to an illness, a family emergency, or any other event that might stand in their way.
Online sermons are especially helpful with the COVID-19 pandemic. Even though lockdown restrictions are slowly being lifted, some people may be hesitant to leave their homes and sit in large crowds.
But if you put your sermons online, people can watch them from the comfort of their homes, office, or anywhere else they are throughout the world. That way, they can still get the message they need to hear without being restricted by location.
In this article, we’ll show you how churches can offer sermons online with WordPress in the easiest way.
But before we get into how to offer sermons online, let’s understand how offering a digital sermon can help your church grow.
How Online Sermons Can Help Your Church
Offering sermons online can have multiple advantages. Not only are they helpful for the church-goers, but they can also help your church and its administrative community. Here are some of the key benefits of offering online sermons.
- They can help the community reach out to more people regardless of their physical location.
- Uploading new content can have a positive impact on your SEO and help you rank your church’s website on Google.
- As a result, your website can gain more popularity and see large growth in its traffic.
- Increased traffic can be a great thing if you ever want to raise funds or increase donations through your church website.
Now, let’s check out step-by-step how churches can offer sermons online.
Step 1: Creating a Church Website
If you want to offer your sermons online, the first thing you’ll need is a website. Creating a website with WordPress is easy. But before that, you’ll need a good web hosting service to host your website.
There are many web hosting companies available on the market. But the best among them is Bluehost:

With Bluehost, you can also have a free domain name and free SSL for your website. For more information, read our detailed review of Bluehost.
After selecting your hosting company, it’s time for you to start building your church’s website. If you’ve never done that before, check out this resource on how to create your church website.
To give it a professional look, you can use these church themes. Pre-built themes are a great way for making stunning websites, even for people who aren’t tech-savvy.
You might also want to add a donation form to your church’s website with WPForms. WPForms has a pre-built donation form template you can use and the drag and drop builder makes it easy to customize it. Plus, you can collect donations with PayPal, Stripe, and Authorize.net.
Once you have your church’s site up and running, you can start recording your sermons.
Step 2: Audio Recording Your Sermons
To record your sermons, you’ll need recording software. For that, we’ll use Audacity. This is a free software that lets you edit your audio recordings for noise reduction and enhanced sound quality.
To start using Audacity, you’ll first have to download the software.
When you open Audacity, click on the File » Start a new project menu to start your project. Now click on the Record button for it to start recording your sermons.
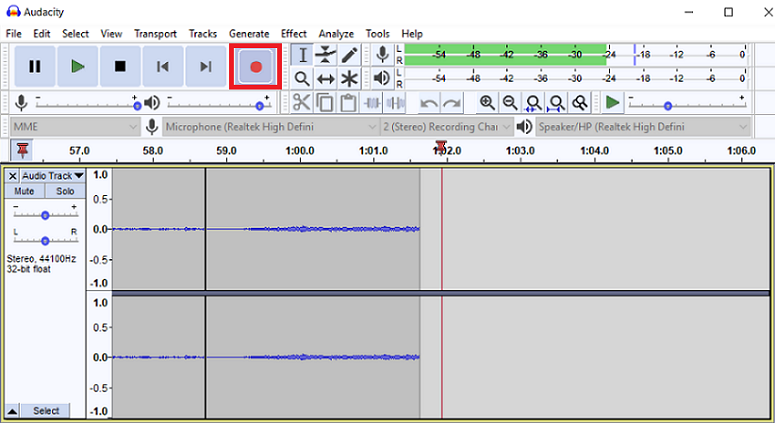
You can fine-tune your recordings and remove all awkward pauses, coughing, sneezing, or anything that you think would enhance your listeners’ experience. To make it sound even more beautiful, you can add soothing background music behind your sermon.
To do that, simply go to File » Import. You can then browse through your music list and add your favorite audio track to the recording of your sermon.
Audacity offers a lot more features, too. If you want to learn how to make the most from Audacity’s software, we suggest reading their wiki tutorials.
Once you’re done recording your sermons with Audacity, you can export them and save the file to your computer. For the best quality, you should download them in an MP3 format.
Step 3: Video Recording Your Sermons
If you want to add a video component, you can do that as well. But for that, you’ll need a high-quality video camera. If you don’t have a camera and you don’t want to spend much on a new one, you can stick to the video camera on your smartphone.
It’s usually not the best quality, but it gets the job done! Then you can import your recording to your laptop.
Step 4: Combine Your Audio and Video Recordings
The next step is to combine your audio and video recordings. For that, you can use the Quicktime software.
Quicktime lets you add audio tracks to your videos and supports various formats of digital video, picture, sound, panoramic images, and interactivity.
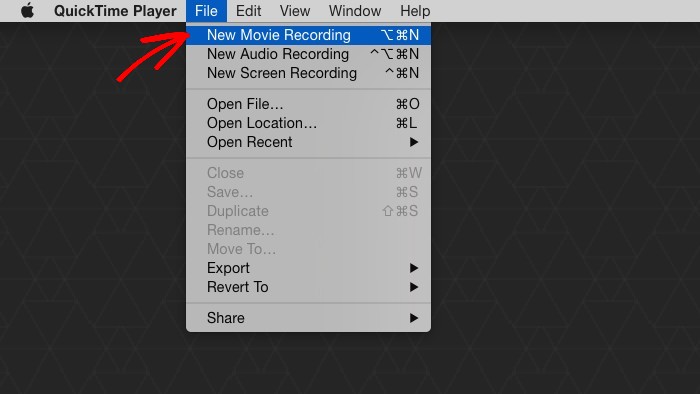
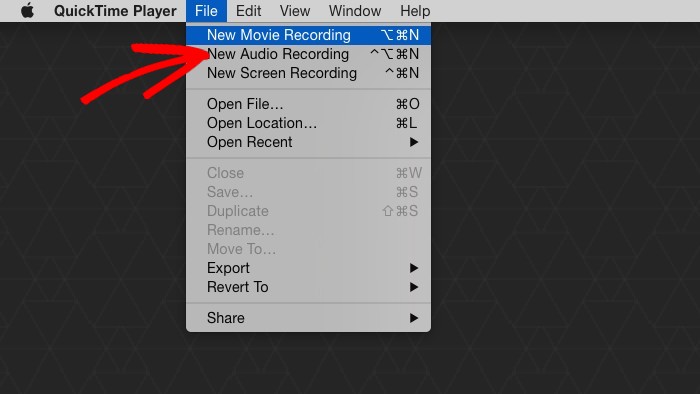
You can also record your videos directly on Quicktime or add your videos first and then upload audio tracks later. If you want to make a video recording of your sermon with this software, just select File » New movie recording.
You can also change your recording settings by clicking on the dropdown arrow next to the Record button.
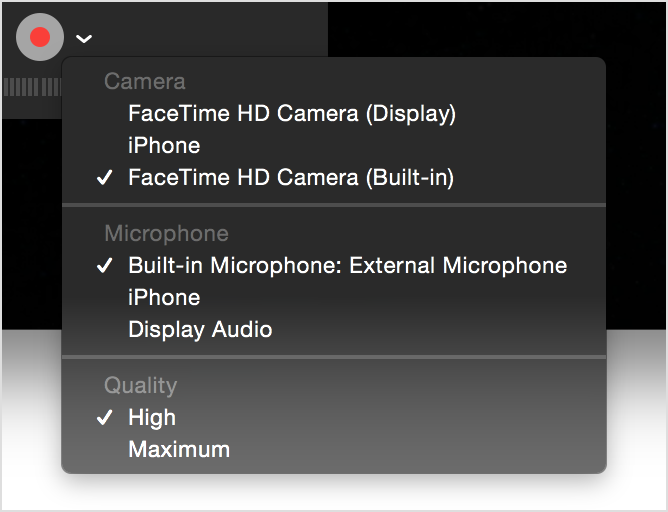
After that, you can edit your recording to make it more presentable.
Quicktime also lets you record only audio. For that, you can go to File » New audio recording. Once you’re done recording, you can edit the file, save it, and upload it on your website.
Step 5: Uploading Your Recordings on WordPress
Now that the recording is ready, it’s time for you to upload it to your WordPress website. But since your sermon recordings are large files, uploading them directly on your website isn’t a good idea.
It’s going to consume a lot of your site’s space and slow down your load times. That will impact your SEO and lead to lower rankings on Google.
If you want to upload your sermon videos, YouTube can be a great platform. If you’ve never worked with YouTube, check out this helpful resource on how to upload videos on YouTube.
If you want to upload your audio files (with no video component), you can opt for podcasting. Here’s an easy guide on how to start podcasting that takes you step-by-step through everything.
These are good options, but there’s a better one out there if you want your sermons to be on your website.
If you want to add your sermons to your WordPress site, you’ll first have to install the Sermon Manager plugin.
Sermon Manager is a free plugin that’s designed specifically for churches to publish their sermons online. Read this post to learn how you can install the plugin.
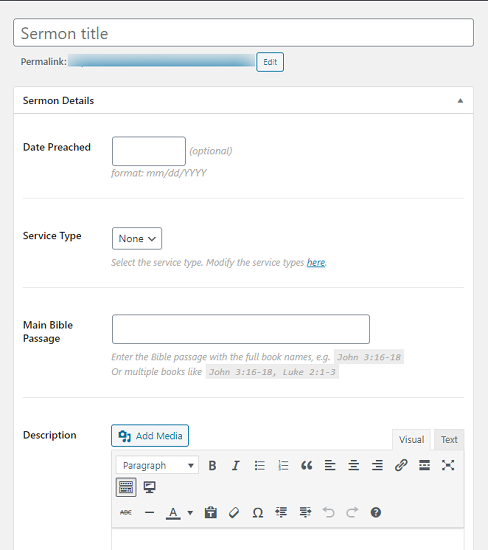
Once you’ve installed and activated Sermon Manager, click on Sermons » Add New. Now add a title for your sermon. You can also add a date of preaching, service type, a bible passage, and a description.
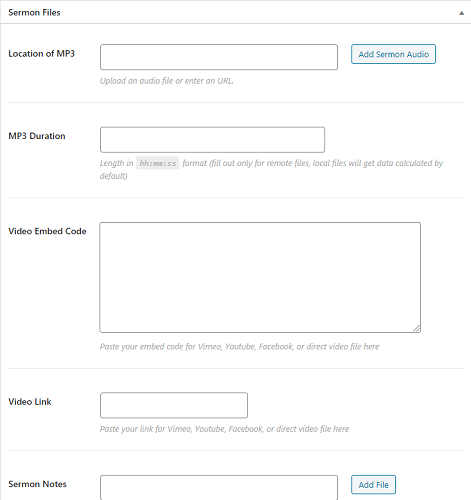
Scrolling further down, you can add your sermon audio, add its duration, embed your video code, add the video link, and more. You can get the video link from a video hosting platform like YouTube, where you will initially upload your video.
When you’ve finished, you can hit the Publish button on your right for your sermon to go live.
Step 6: Submitting Your Podcast to Apple’s iTunes and Google Play
One of the options we discussed earlier was turning your sermon into a podcast. You can submit your feeds to podcasts directly from Sermon Manager. You can do this by going to Sermons » Settings » Podcast.
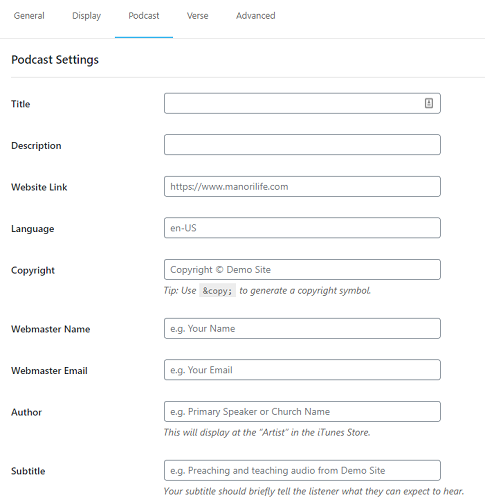
Now just add the details of your podcast episode and hit the Save button at the end of the page.
Step 7: Grow Your Traffic by Livestreaming your Sermons
Another great way to grow your traffic is to live-stream your sermons.
We have a step by step tutorial How To Link Your YouTube Live Stream To Your Site.
You can also use products like OneStream can help you go live across different platforms all at once.
You can also live-stream your pre-recorded videos with the OneStream software.

Once you download the software, you can simply use it to select a video that’s stored in your computer or cloud. Next, you can pick a date and schedule it to go live. Finally, choose the platforms where you want your videos to go live.
This can help you get more viewers and gradually increase your traffic.
For more options, see 7 Best WordPress Video Live Streaming Plugins.
Step 8: Add an Event Calendar to Your Site
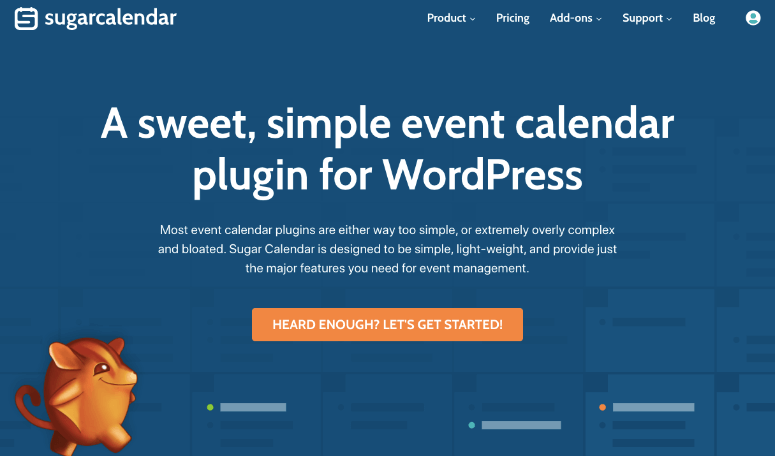
To let members of your congregation know about upcoming sermons or other events, you can display an event calendar on your website using Sugar Calendar.
Sugar Calendar is simple to set up. You can quickly add new events, edit events, and view events on a monthly, weekly, or daily calendar view. It comes with lots of customization options as well so you can create repeating/recurring events, add time zones, assign start and end times, and more.
Displaying calendars on your site only takes a couple of clicks with the ready-made event calendar widgets.
Step 9: Checking your Growth with MonsterInsights

Once you’ve completed all of the steps above, you might want to check how your sermons are performing and whether users are actively watching them. You can easily do that with the MonsterInsights plugin.
MonsterInsights lets you check your website performance right from your WordPress dashboard. You can also have a real-time report of how many users are watching your sermons.
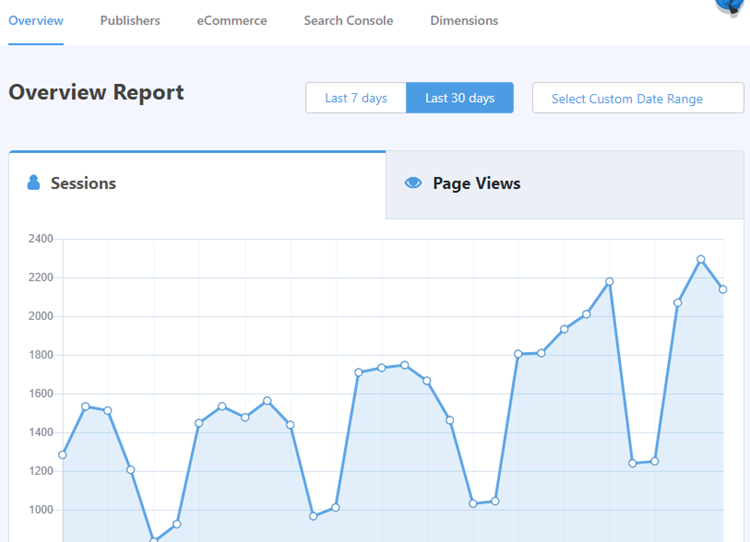
Once the plugin is installed and activated, there’s an easy setup wizard to connect MonsterInsights to your Google Analytics account with your WordPress dashboard without having to edit any code.

All you have to do is follow the onscreen instructions and you’ll have it set up in under 5 minutes. Check out this in-depth guide for more information on how to connect MonsterInsights with Google Analytics.
And that’s it! We hope you enjoyed this article. If you did, you might also want to check out the best themes for church and NGO sites.
That resource will help get your church’s website looking more professional so you can get more traffic and better serve your congregation!


Comments Leave a Reply