
Do you want an easy way to save and manage form entries on your WordPress site?
When someone submits a form on your site, usually you’ll get a notification email sent to your admin account. But even though these emails contain all the form details, this isn’t enough.
You’ll want to store these entries in an organized way.
We’ll show you the easiest way to store form data in WordPress and then view it in a user-friendly dashboard. You can access this data right inside your WordPress admin so you won’t need to log into your hosting account or cPanel.
Before we start, let’s first understand what happens behind the scenes between your forms and database.
How are WordPress Form Entries Stored?
When you install WordPress, a database is automatically created for you This database stores all sorts of information about your website.
You can access your database by logging into your hosting account. Then access cPanel » phpMyAdmin under the Databases section.

If you’re using Bluehost, then you’ll find it under Helpful Links » Advanced » phpMyAdmin.
Now you should see a menu on the left with your database name.
Not sure what your database name is? No worries, you can find your database details in the wp-config.php file. In cPanel, open the File Manager » Public_html folder.

If your website is stored in a different folder, make sure you select that one and you’ll find the wp-config.php file here.
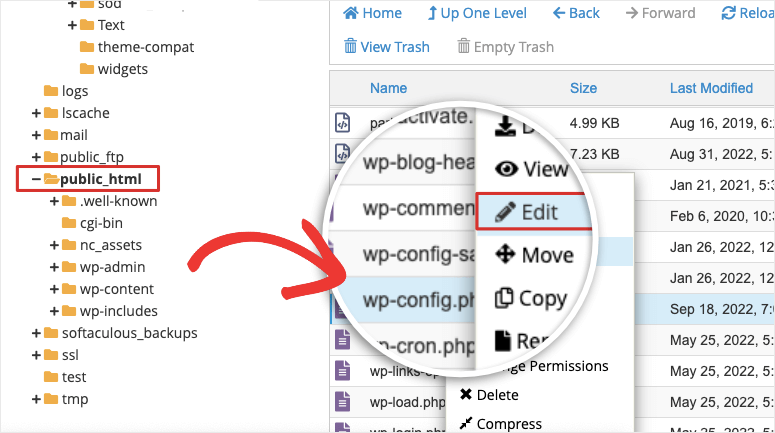
Simply right-click and edit this file and you’ll find your database name inside.
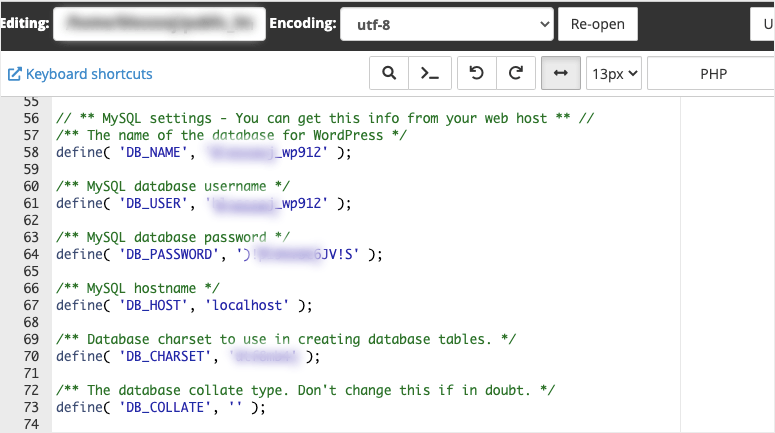
Now back in phpMyAdmin, you can choose the right database and expand it to see a list of tables stored under it.
You’ll find your form data here.
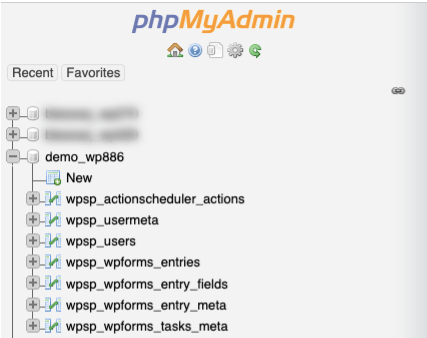
So for instance, if you’re using the WPForms plugin, the form entries are stored under these tables:
- wp_wpforms_entries: The info is the fields (values) of your entries and is stored in this database table.
- wp_wpforms_entry_meta: This table has meta info about your entries like associated IDs and dates.
- wp_wpforms_entry_fields: This table contains encoded entry information from your forms.
- wp_wpforms_tasks_meta: This table stores information about tasks that are processed in the background.
If you’re using any other form builder like Formidable Forms, you should find it in a similar way.
Form data in these tables might be useful to developers but for regular WordPress users, there’s a much easier way to view and manage your form entries.
We’ll show you how to do that next.
How to Manage Form Entries in WordPress
Every time a user submits a form, you may be collecting crucial information like a user’s contact info and their pre-sales queries.
You’ll want an easy way to view this right inside your WordPress admin panel instead of logging into a different account each time.
The best way to do that is using WPForms.

WPForms is the best form builder for WordPress. You can build all sorts of forms including contact, registration, appointment forms, and even surveys and polls.
The reason we love WPForms is that it is so feature-rich. So for instance, when someone submits a form, you can set up an automated email confirmation for the user and notify your team at the same time.
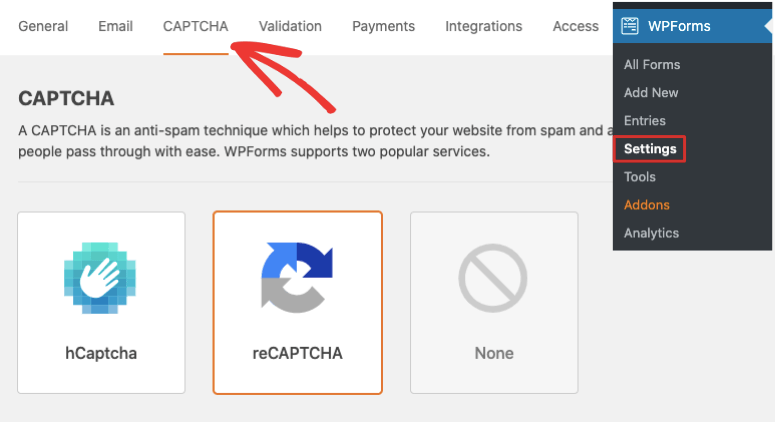
It also comes with built-in spam protection and you can add captcha, so your form entries will be clean. You won’t have to worry about sorting through and deleting tons of spam submissions from bots.
Next, you can also sync WordPress forms to your email account. That way, all new leads can automatically be added to your email lists.
Now every time a form is submitted, all this data is stored under the WPForms entry management page. You’ll be able to view, edit, and delete entries with ease.
And there’s more! You can even see statistics about how your forms are performing.
We must mention that WPForms is free for everyone to build a form for their site. However, the entry management feature is available in the Pro version that starts at $49.50 per year – that comes to just $4 per month which is a steal for the features you get:
- Unlimited forms, submissions, and users
- Form templates and layouts
- Smart conditional logic
- Advanced form fields with field validation
- File uploads
- Form notifications
- Spam protection
- Privacy compliance
- Email summaries
- Multi-page forms
- Import/Export tools
- Entry previews
…and much more. With that said, let’s jump into the tutorial.
Step 1: Create a WordPress Form
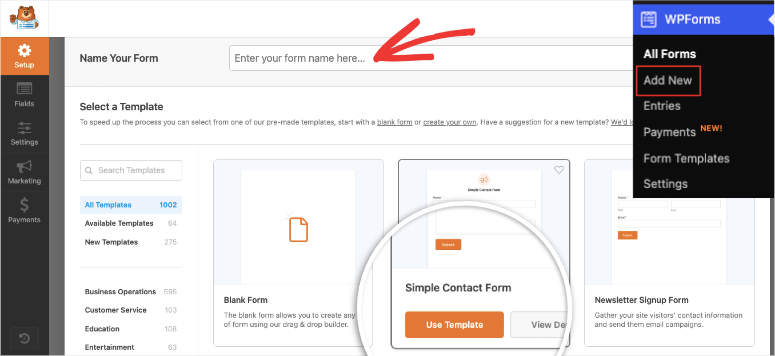
WPForms makes it incredibly simple to create forms. There are tons of templates to choose from.
There’s also a visual drag and drop builder that makes customizing the form easy.
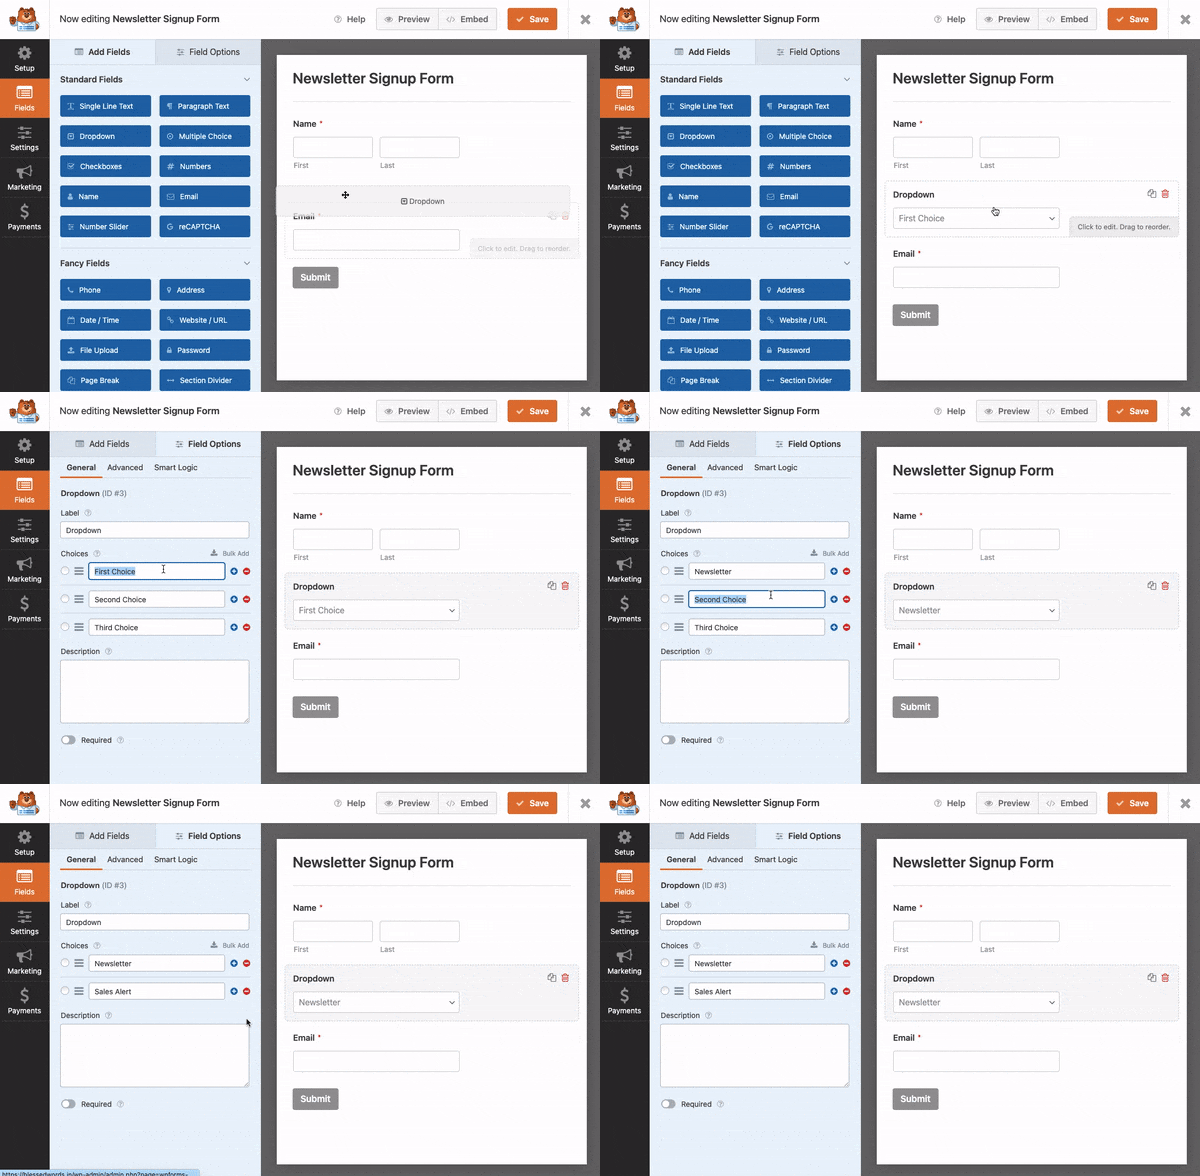
We won’t go into detailed instructions here as we’ve already covered this in our guide: How to Add a Contact Form to Your WordPress Website.
This tutorial will take you through how to install WPForms, create, and customize your form. It will also show you how to enable spam protection, set up automated form notifications, and connect to your email account.
Step 2: Manage Form Entries
Once you’ve added the form to your WordPress site, you can either wait for people to submit entries. For now, we suggest submitting a few test entries.
When you submit a form entry, 2 things will happen:
- You’ll receive an admin email notification
- The data will be stored in the WordPress database
To access this database, go to WPForms » Entries section in your WordPress dashboard.
You’ll be greeted with a dashboard that’s easy to understand, even for beginners.
First, you’ll see a graph with your form’s performance over time. Below this, you can see a list of forms you created.
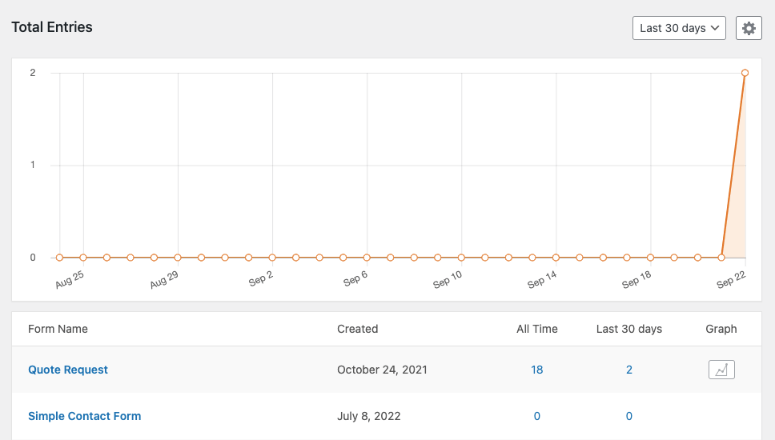
When you click on a form name here, this will open up a new page with all the entries under this form.
You can view each submission’s details. So in this form which is ‘Request to call back’, you’ll see the name, phone, and date/time columns.
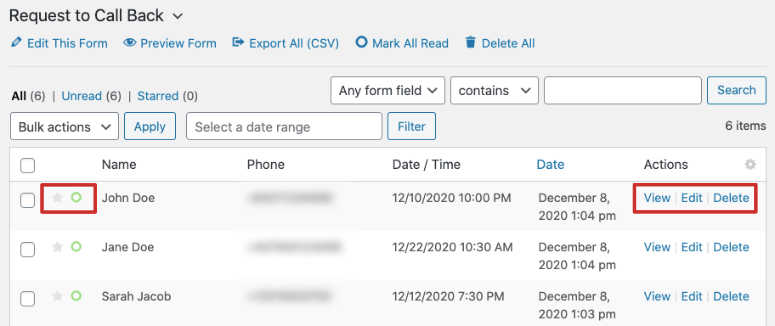
Next to each entry, you can see actions to view, edit, and delete.
Now, WPForms even lets you manage every form submission. Click on any of the entries here and a fresh page will open up.
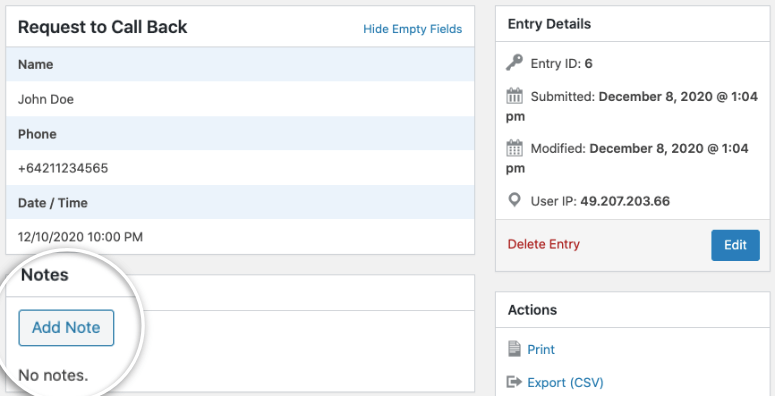
You’ll see all the form details along with a section to add notes. On the right sidebar, you can print, export, resend notifications, mark unread, and highlight the entry.
As you can see, WPForms has a full-fledged form entry management system. You’ll never have to leave your WordPress website to manage form entries.
Step 3: Disable Form Data Being Stored in the Database
To stop form data from being stored in your WordPress database, you need to enable a setting inside WPForms.
Edit the form you want and go to the Settings » General tab inside the builder and scroll to the bottom.
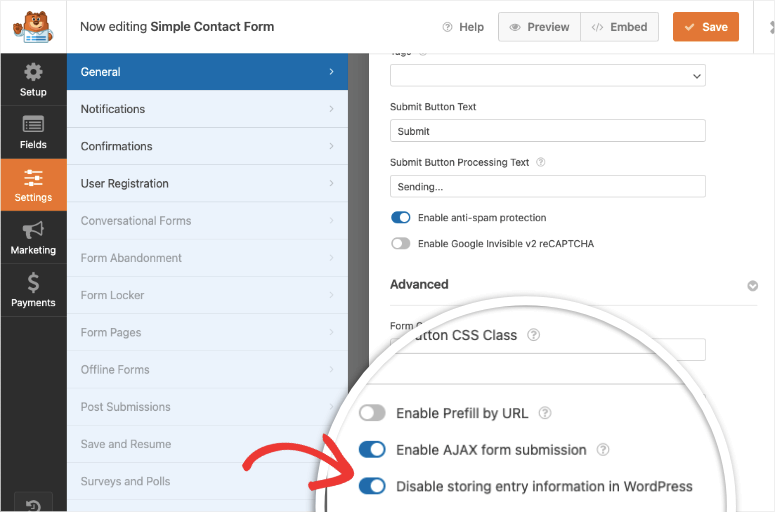
You need to make sure to check the option that says: Disable storing entry information in WordPress. Save your form and that’s it.
We recommend making a test entry to make sure your form email notifications are still working. Since your database won’t store form details, you’ll want to keep a copy of that email.
That brings us to the end of our tutorial. You now know where to find your form entries inside your database as well as view them inside your WordPress dashboard.
FAQs on How to Save Form Data in WordPress Database
Should I save form data in the WordPress database?
Saving form data in the WordPress database allows you to store and manage user-submitted information, enabling you to analyze, retrieve, and display it later. This is particularly useful for contact forms, surveys, and user registrations.
How do I create a form in WordPress to collect data?
You can use a WordPress form plugin like WPForms to easily create forms. Install the plugin, create a new form, add the necessary fields, and embed the form on your website.
Can I save form data without using a plugin?
While using a form plugin is the most straightforward method, you can also manually code a form and use PHP to process and save the data to the database. However, it’s more complex and requires coding skills.
What information can I save from a form in the database?
You can save any information submitted through the form, such as names, email addresses, messages, and any custom fields you include in your form.
How often should I backup my WordPress database with form data?
Regularly back up your WordPress database, especially before making changes to your website or updating plugins. This ensures you can restore your data if anything goes wrong.
Next, you’ll want to read these tutorials on what more you can do with your WordPress forms:
- How to Add ‘Save and Continue Later’ Option to WordPress Forms
- How to Track User Journey Before a User Submits a Form
- How to Set Up WordPress Form Tracking in Google Analytics
These posts will enhance your WordPress form features and give you more data to understand your audience better.

Comments Leave a Reply