Ever wondered if you could create a custom login page in WordPress?
Creating a custom login page helps you display a consistent brand to your users, which gives your site a more professional appearance.
In this article, we’ll show you how to create a custom login page in WordPress.
Creating a Custom WordPress Login Page – Table of Contents
- Why Create a Custom Login Page?
- Choosing the Right Plugin for Creating a Custom Login Page
- Method 1: Using SeedProd to Create a Login Page
- Method 2: Using WPForms to Create a Login Page
- Method 3: Using Theme My Login to Create a Login Page
- Method 4: Customize Existing WordPress Login Page Without a Plugin
- Method 5: Show Login Form Anywhere Without a Plugin
Why Create a Custom Login Page?
If you’re running a community-powered website such as a forum, membership site, niche social network, or any other website that requires users to register an account and log in, then you’ll need to create a custom login page.
The default WordPress login page looks generic and boring. With a custom login page, you can personalize all the elements on the page around the form.
If you have a custom login page, then you can hide the default login page if you want. It can reduce login spam and keep your WordPress site secure.
Choosing the Right Plugin for Creating a Custom Login Page
In the official WordPress plugin repository, you can find dozens of different plugins that help you easily build a custom login page. In this article, we’ll look at 3 different plugins: SeedProd, WPForms, and Theme My Login.
Choose SeedProd if you need an easy-to-use landing page builder to create custom login pages, sales pages, optin pages, coming soon pages, maintenance mode pages, and more.
Here are some standout features of SeedProd:
- Professionally-designed login page templates to get you started.
- Fully customize your login page with elements like social profiles, video, testimonials, star ratings, and more.
- Add a login form to any landing page you create with SeedProd.
Choose WPForms if you need a full-featured WordPress form plugin that helps you build any kinds of online forms with ease, including registration forms, payment forms, contact forms, etc.
A few benefits of WPForms are:
- Customize your login form the way you want without any restrictions.
- Publish your login form on any posts or pages.
- Embed your login form in sidebar or even in widgetized footer.
Choose Theme My Login if you want to create a simple login page with ease.
Below are a few features of Theme My Login:
- No configuration required for building a custom login page.
- Automatically hides the default login page and redirect to the newly created login page.
- Add a login page link in your sidebar with a custom login widget.
The downside is that, unlike SeedProd and WPForms, Theme My Login doesn’t allow you to embed your login form anywhere on your site, and will exclusively show up on your login page. Because it’s not a fully-featured form plugin like the others, the ability to customize your login form is limited.
Method 1: Using SeedProd to Create a Login Page
First, let’s look at how to create a custom login page with SeedProd, step-by-step.
Step 1: Install SeedProd on Your Site
To begin, you need to download the SeedProd plugin. Then, upload and activate the plugin on your WordPress site.
For detailed instructions, follow this tutorial on how to install a WordPress plugin.
After activating the plugin, you’ll see a welcome screen where you’ll need to enter your license key. You can find your license key from your account on the SeedProd website.
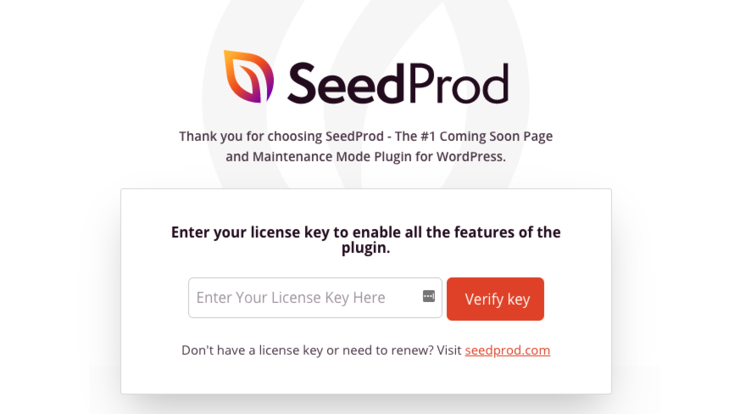 Once your license key is verified, scroll down the page further and click on the Create Your First Page button.

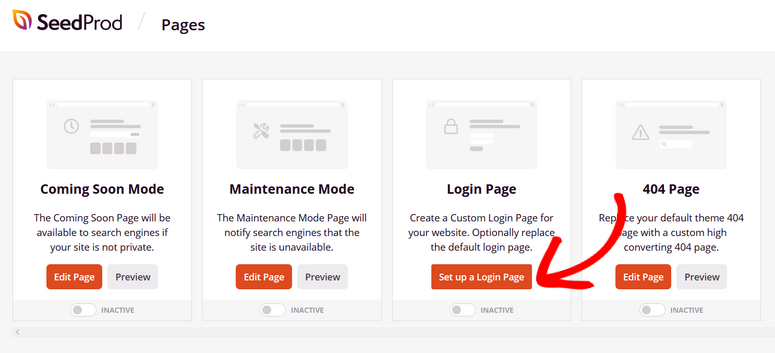
Next, you’ll be taken to the SeedProd dashboard. Here you can see the different types of landing pages you can create. Click on the Setup a Login Page to get started.
Step 2: Choose a Login Page Template
In this step, you’ll be prompted to choose a login page template. SeedProd offers a ton of professionally-designed templates you can choose from.
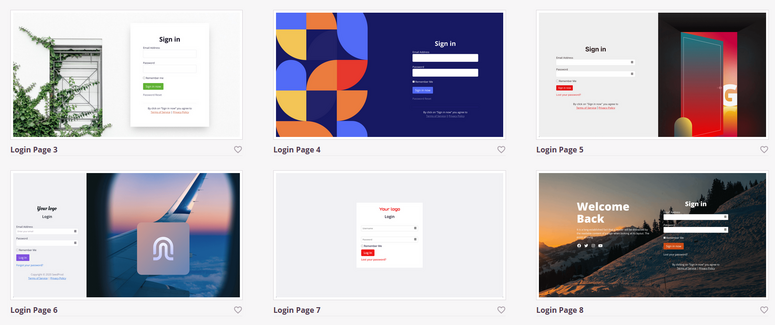
There’s also a Blank template you can use if you want to start your design from scratch.
To choose a login page template, simply hover over it and click on the checkmark icon.
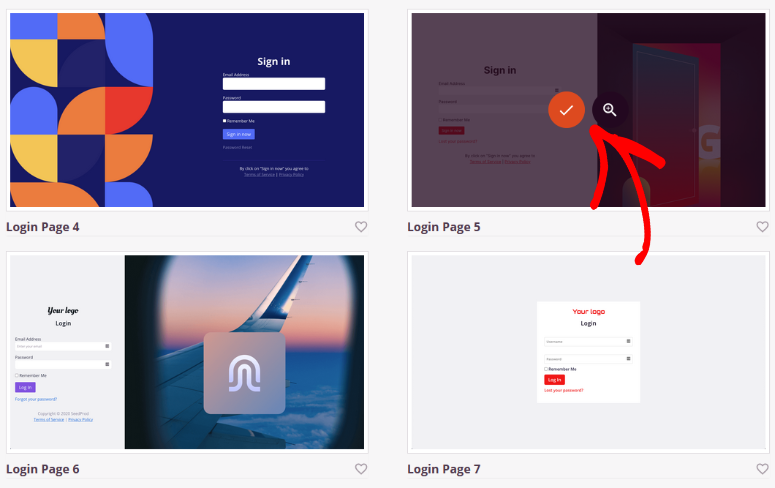
Next, it’s time to customize the template.
Step 3: Customize Your Login Page
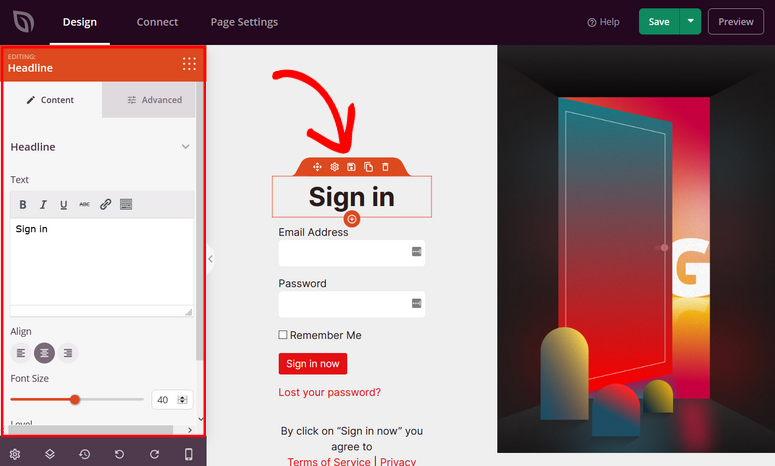
The best part about SeedProd is that you can easily customize your login page using the drag and drop visual builder. First, you can customize any existing element on the template by clicking on it.
For example, you can click on the “Sign In” headline to change the text, size, alignment, typography, and more.
To add new content to your login page, you can use SeedProd’s ready-made landing page blocks.
On the left side of the visual builder, there are landing page blocks like image, video, button, social profiles, countdown timer, progress bar, and more.
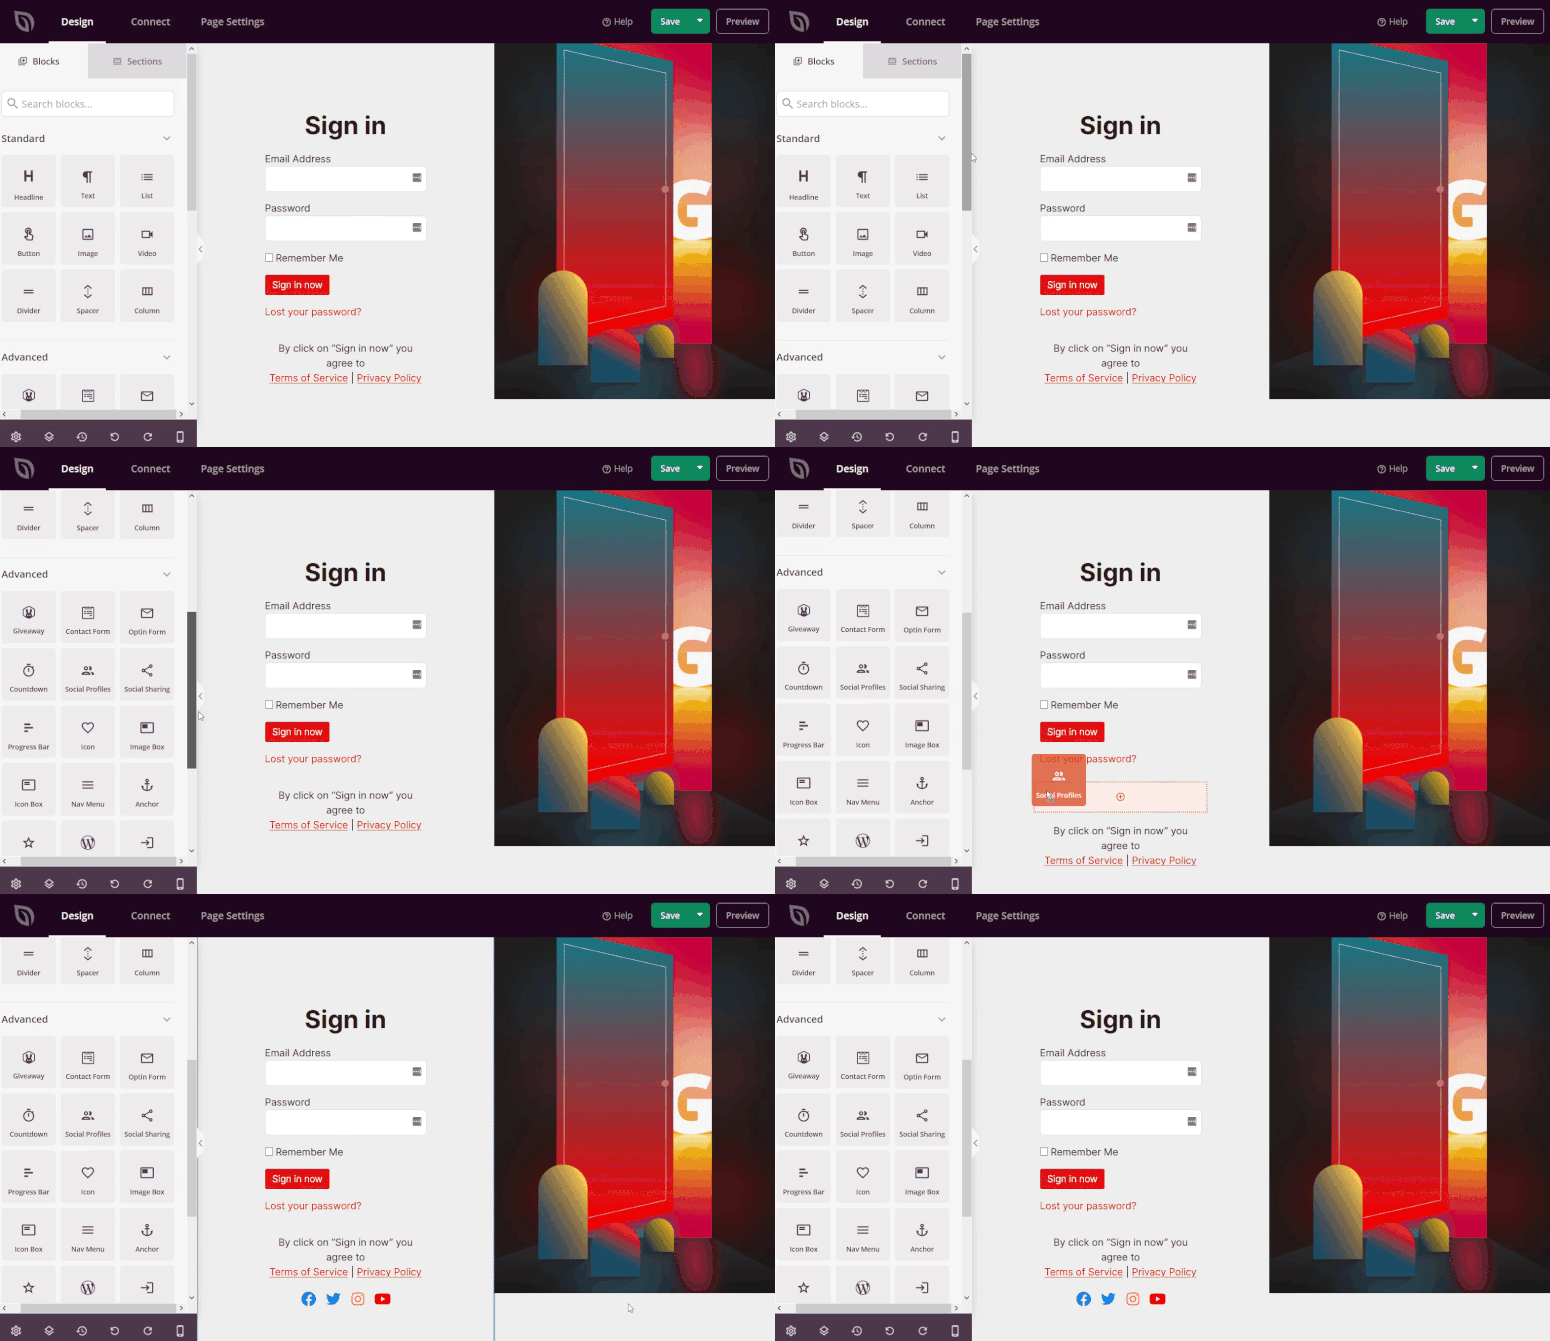
Simply drag the block you want and drop it onto your login page. Again, you can click on the block to customize the style, size, alignment, etc.
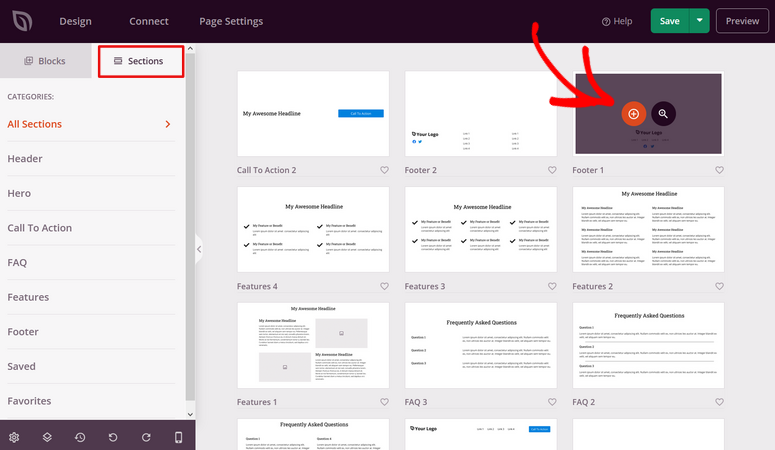
SeedProd also offers pre-built sections like Features, FAQ, Footer, and others, that you can add to your login page.
Simply click on a section and SeedProd will automatically add it to your page.
You can also head to SeedProd’s Global Settings in the bottom corner to change the background image, font, and colors of your entire login page, instead of changing each element individually.
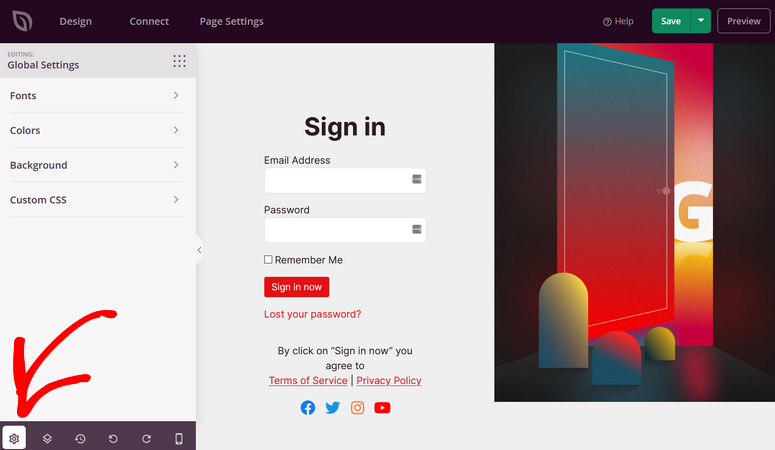
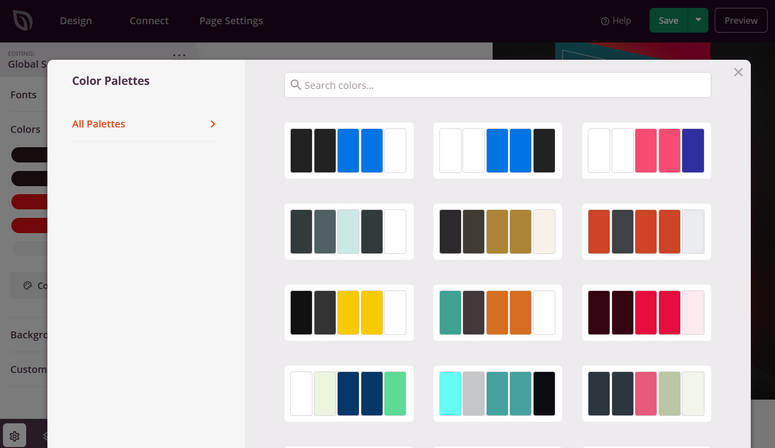
For example, if you want to change the color scheme of your login page, SeedProd offers over 20+ color palettes you can use to create a cohesive look.
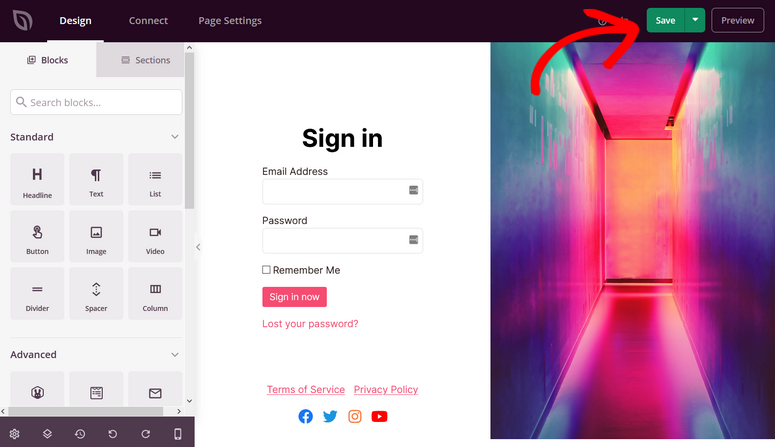
Once you’re happy with how your login page looks, click Save in the top right corner.
Step 4: Configure Your Login Page Settings
If you add an email optin form to your login page, you can connect it with your email marketing service on the Connect tab.
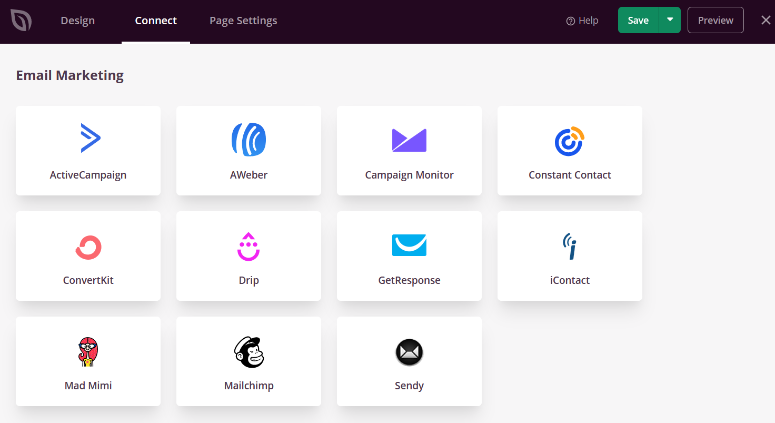
Simply click on your preferred email marketing provider and follow the prompts to connect your account. Now, any time someone provides their email address through the optin form, they’ll be added to your email list automatically.
You can also go to the Page Settings tab to configure other settings.
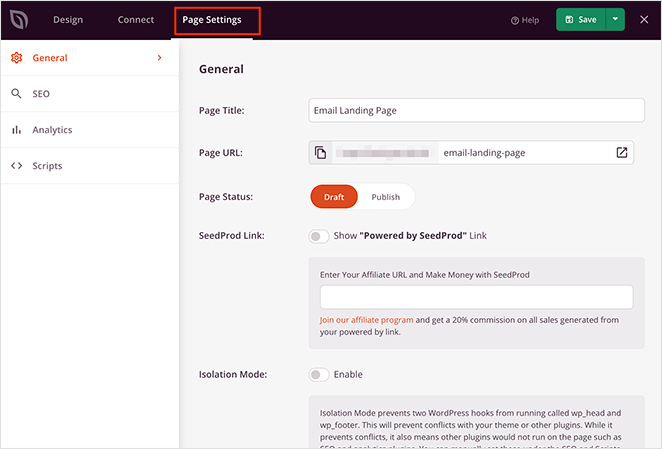
The settings on this page include:
- General – Change your login page name and URL, display a SeedProd affiliate link, and more.
- SEO – Set your page SEO title, meta description, etc. If you’re using an SEO plugin like All in One SEO, you can use this as a shortcut to its settings.
- Analytics – Track the performance of your login page using an analytics plugin like MonsterInsights.
- Scripts – Use tracking and retargeting scripts like cookies or Facebook tracking pixels.
Don’t forget to click the Save button to save your settings.
Step 5: Publish Your Login Page
Now it’s time to publish your custom login page on your site. To do that, click on the dropdown arrow beside the green Save button and hit the Publish button.
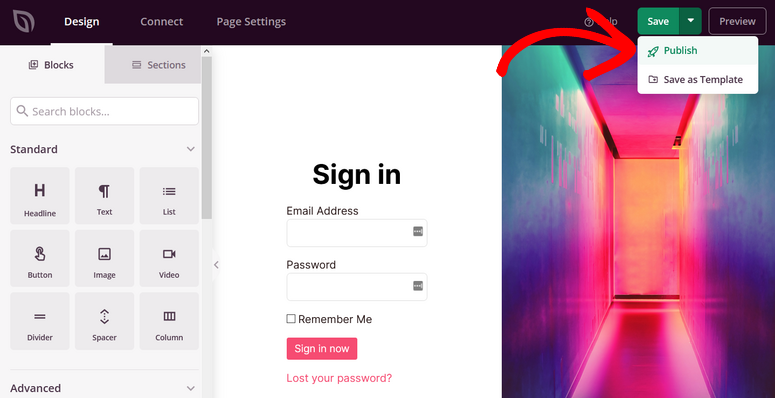
You’ll then see a success message letting you know that the login page is now live.
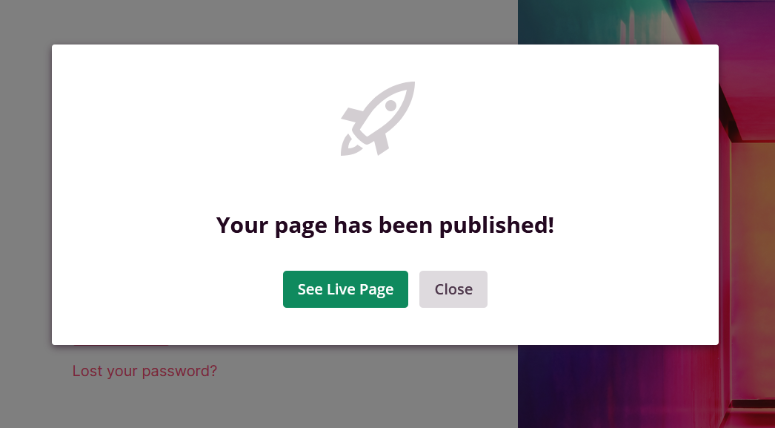
Click on See Live Page to view your new custom login page.

The final step is to enable login page mode in your WordPress admin area. This might sound difficult, but SeedProd makes it super easy.
Simply exit the visual landing page builder and head back to the main SeedProd dashboard. Under the Login Page section, toggle the button from Inactive to Active.
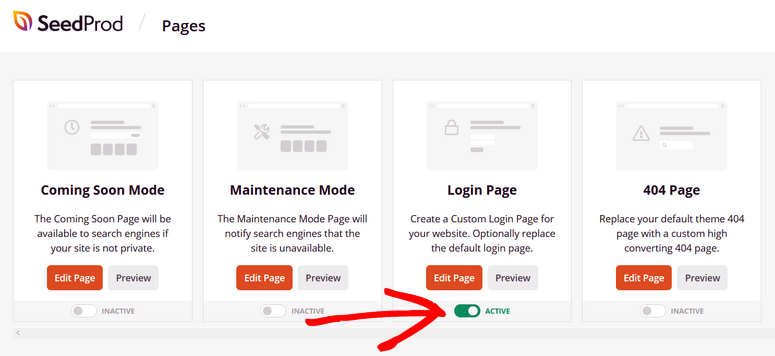
That’s it! Now your WordPress login page has a custom design. If you ever want to disable the login page, you simply need to go back to the same toggle button and deactivate it.
Method 2: Using WPForms to Create a Login Page

Let’s take a look at how to create a login page with WPForms.
Step 1: Install WPForms on Your Site
The first thing you need to do is install and activate the WPForms plugin. Make sure to verify your license key by navigating to WPForms » Settings. You can obtain the license key from your account on the WPForms website.
To be able to create a custom login page with WPForms, you’ll have to install the User Registration addon by going to WPForms » Addons. Click Install Addon next to User Registration Addon and then click Activate.
Once the addon is activated, you can go ahead and create a user login form with WPForms.
Step 2: Create a Custom Login Form
With WPForms’ powerful drag and drop builder, you can build a login form in just a few minutes, not hours, without writing a single line of code.
To create a login form, visit WPForms » Add New. In the form setup page, you’ll need to choose the User Login Form template to create a login form.
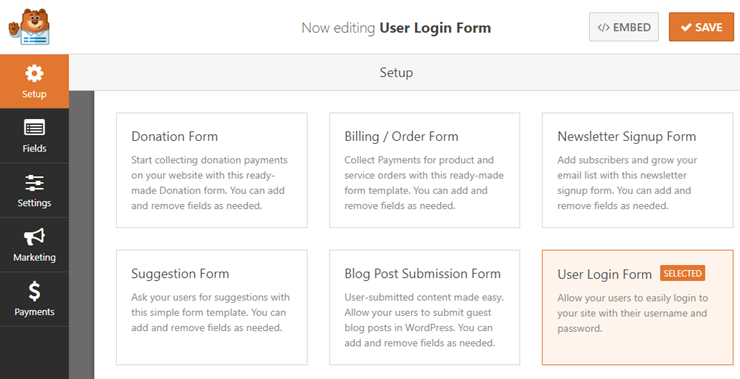
You’ll now see the form builder where you can add, customize, and remove login form fields. By default, the login form template adds the following form fields: Username and Password.
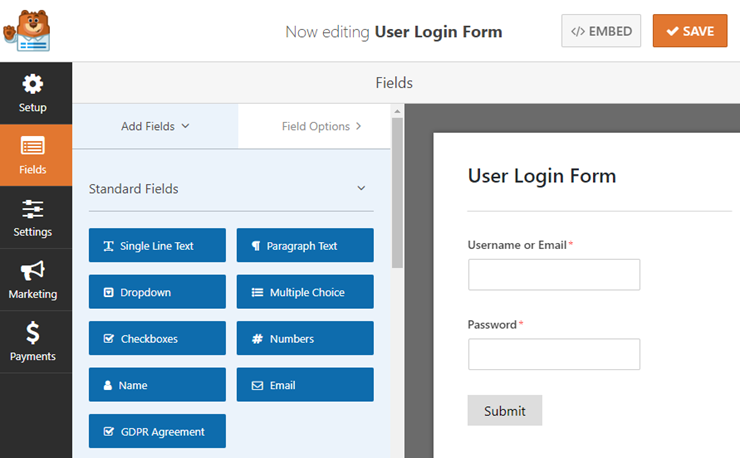
You can customize any field by clicking on it in the page builder. Then, you can make the desired customizations in the left-hand panel.
Step 3: Form Configuration
To configure general settings, you can go to Settings » General. On this page, you can customize the form name, description, submit button text, etc.
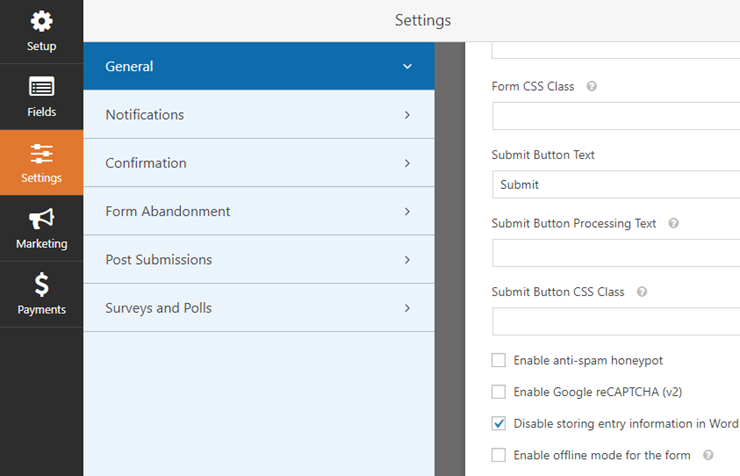
You don’t have to do anything in the Notifications tab for your custom login form. By default, notifications are turned off, so you won’t receive an email whenever someone logs into your site.
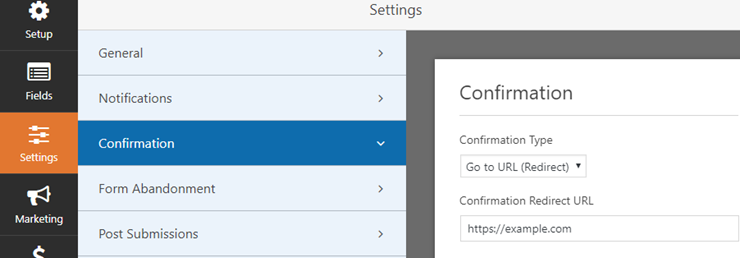
When a user logs in through your custom login form, they’ll land on your website’s homepage. You can change the redirect URL, if you want, in the Confirmation Redirect URL field.
Step 4: Publish Your WordPress Form
One of the main benefits of using WPForms for creating a login form is that it lets you embed your form anywhere on your site, including posts, pages, sidebar widgets, or widgetized footer areas.
Let’s take a look at how to publish your form in posts or pages.
Create a new post or page in WordPress and then click on the + icon in the Gutenberg block editor. You can search for the WPForms block and click on it.
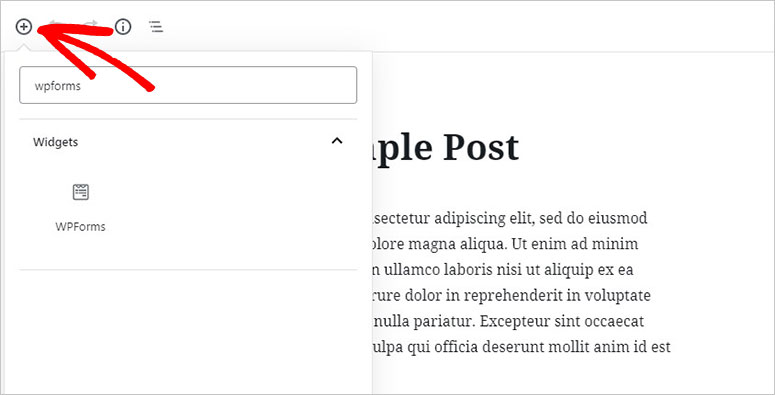
Next, select your login form in the WPForms block and it’ll automatically load in your post / page.
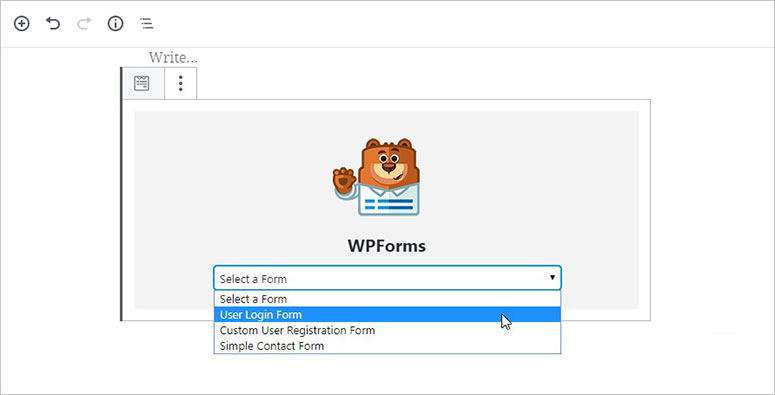
After adding the form, you can publish your post / page.
You can also add the login form to your sidebar widget as follows. Head over to Appearance » Widgets and add the WPForms widget to your sidebar.
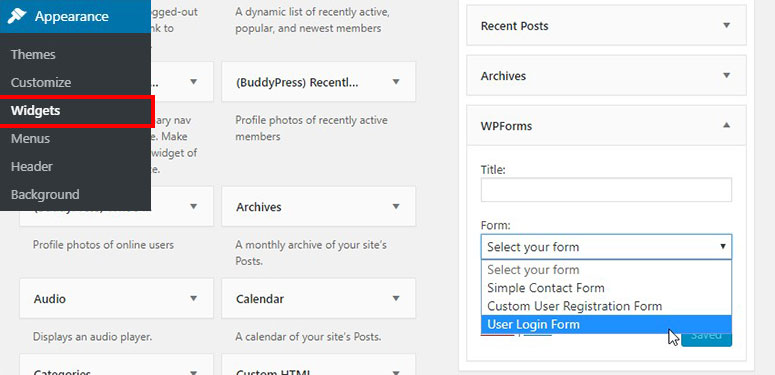
Select your custom login form in the widget’s settings and click on the Save button to save changes.
Method 3: Using Theme My Login to Create a Login Page

The Theme My Login plugin makes it super easy to publish a custom login form on your WordPress site. To create a simple login page, all you have to do is install and activate the Theme My Login plugin.
The plugin works out of the box without any further configuration.
However, if you need to customize the plugin settings, you can click the Theme My Login menu in your WordPress dashboard.
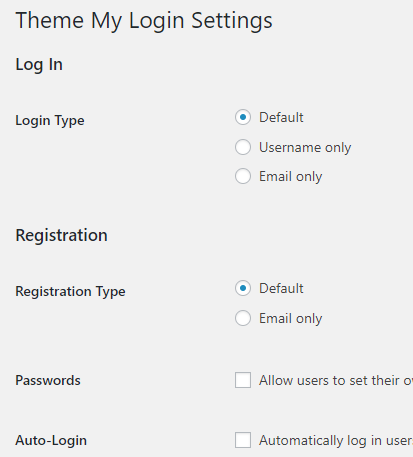
You can then change the login and registration types. You can also adjust the URL slugs for the login, logout, registration, lost password, and reset password pages.
Method 4: Customize Existing WordPress Login Page Without a Plugin
If you’d rather make changes or add custom styling to your existing login page than creating a brand new one, here’s how to do it.
Simply add this code to your theme’s functions.php file or in a site-specific plugin:
//Custom login page
function clp_login_head() {

	echo '<style>'; //Begin custom styles
	echo '.login #nav a, .login #backtoblog a { color: # !important; }'; //Login page link color
	echo '.login h1 a { background:url("' . get_bloginfo('stylesheet_directory') . '/images/IMAGE GOES HERE"); width: px; height: px; }'; //Login page logo
	echo '.login .button-primary { background:#; border-color:#; }'; //Login page button color
	echo '</style>'; //End custom styles

}
add_action('login_head', 'clp_login_head');
You can change the CSS and image URL in the above code to add your custom styling for the WordPress login page.
Method 5: Display WordPress Login Form Anywhere Without a Plugin
If you want to display the WordPress login form on any page, sidebar, or footer area, then you can add this code to your theme’s template file:
<?php
          wp_login_form();
?>
The above code will only display the general WordPress login page on the location where you add the code. In case you want to add a custom WordPress form page with additional fields and options, then you can use this code:
<?php $args = array(
        'echo' => true,
        'redirect' => 'http://wpsnipp.com',
        'form_id' => 'loginform',
        'label_username' => __( 'Username' ),
        'label_password' => __( 'Password' ),
        'label_remember' => __( 'Remember Me' ),
        'label_log_in' => __( 'Log In' ),
        'id_username' => 'user_login',
        'id_password' => 'user_pass',
        'id_remember' => 'rememberme',
        'id_submit' => 'wp-submit',
        'remember' => true,
        'value_username' => NULL,
        'value_remember' => false );
wp_login_form($args);
?>
A few more code snippets that you’ll find helpful:
- Change your login URL via .htaccess file
- Change your login URL via functions.php
- Remove WordPress login shake effect when error occurs
That’s it! If you plan on adding code snippets to your site more often, check out the WPCode plugin. It’s the best solution to add custom code snippets with ease.
We hope this guide helped you create a custom login page in WordPress. If you liked this article, you may also want to learn how to create a password protected page in WordPress. This post will help you restrict your content with a password to earn money or collect user email addresses.
You may also want to limit login attempts on your login page to prevent hackers from carrying out brute force attacks on your site.
Read our complete security guide for WordPress for more info on that.


I have a question how I can go to home page after do login in my project
After installing Theme my login plugin, i tried registring on my site using another browser, it kept saying registration has been disabled. How do i fix it? Thank you for your response