Do you want to sell your products on a website but don’t want to invest in an expensive eCommerce store?
You may dream of selling your art, a handmade product, or an eBook you wrote, but setting up a full-fledged eCommerce store wouldn’t be worth it for just a few products.
We’re going to show you how to sell your products in a way that looks professional and at the same time is affordable and easy to set up. It will make things easy for customers to buy instantly and for you to manage orders and collect payments online without any hassle.
Setting Up Products Without an Online Store
The easiest way to sell as many or as few products as you want is by using a WordPress form on your website.
First things first, if you haven’t already set up a WordPress site, it’s easy. You’ll need a web hosting plan and a domain name.
We recommend using Bluehost. It’s a trusted web hosting company that’s also officially recommended by WordPress. And with our Bluehost coupon, you can get started at just $2.75 per month. You’ll get a hosting plan along with a free domain and SSL certificate for the first year.
Next, you can follow our guide to set up your WordPress website: How to Create a Website in 5 Simple Steps.
Once you have your website ready, you can create your online catalog and payment form. To do this, we’ll be using WPForms.
WPForms is hands down the best form builder for WordPress. It lets you create product order forms with an integrated payment solution.
Then you can easily display the checkout form anywhere on your website so customers can instantly buy your product. WPForms also makes it easy to set up automated notifications. This means you’ll get an email as soon as someone places an order. You can even create auto-reply emails to confirm a customer’s order.
Added to that, you can integrate the form with your email marketing service like Constant Contact. So you can have the customer’s contact information added to your email account where you can engage with them through email marketing campaigns.
In a nutshell, you’ll be able to market and sell products on your website without any hassle because WPForms will take care of everything you need.
Step 1: Install and Activate WPForms
To get started, you’ll want to install and activate the WPForms plugin on your site. If you need more help with that, follow our guide: How to Install a WordPress Plugin.
WPForms has a lite version that’s free to use. You’ll find it in the WordPress repository of plugins. However, to add payment options, you’ll want to subscribe to the WPForms Pro plan. There’s a 14-day risk-free moneyback guarantee so you can try out the tool’s features before you decide to commit.
Once you activate WPForms on your site, the plugin will appear in your WordPress menu inside your admin panel.
Open the WPForms » Settings page and enter your license key here.
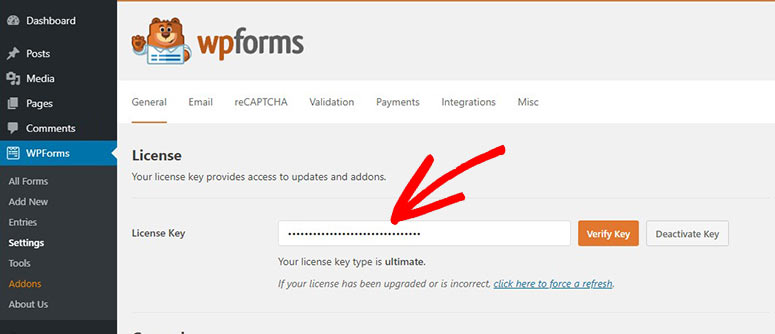
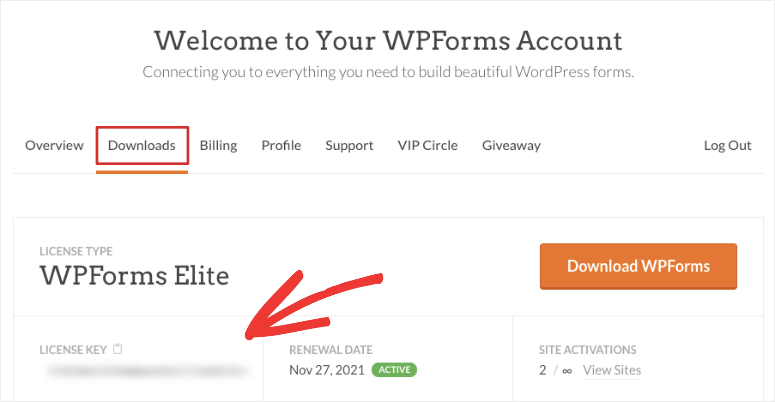
You’ll find this key inside your WPForms account under the Downloads section.
Now you’re ready to create your product order form.
Step 2: Create an Order Form
WPForms has over 1,200+ templates that make it incredibly easy to build forms in minutes.
Navigate to the WPForms » Add New page. Here you’ll see a list of templates that you can use to create any kind of form for your site.
To create a form to sell products, first, add a name for your form and then select the Billing/Order Form template.
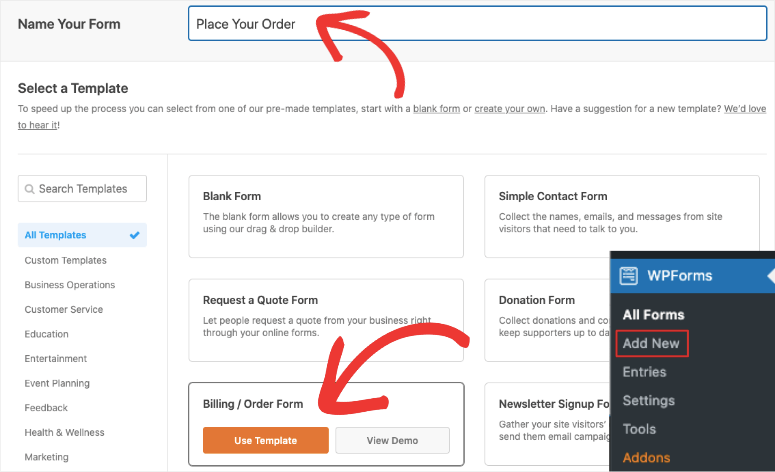
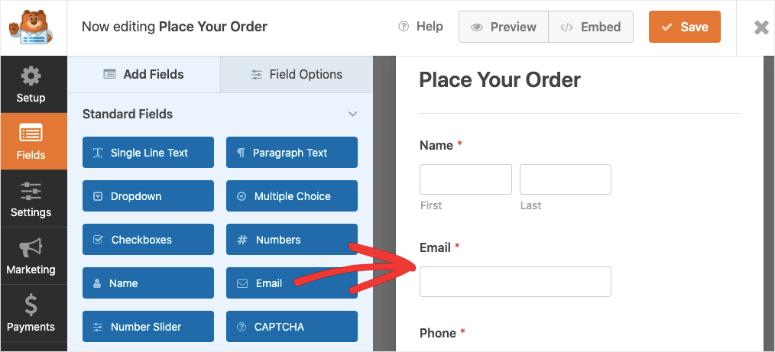
This will open up the form builder where you’ll see a preview of your form along with a settings menu to customize the template.
Step 3: Customize the Order Form
The form template is designed to have all the fields you need to sell your product and collect the right information from the customer. Having said that, WPForms lets you customize every element of your form. You can even add more fields or delete the ones you don’t need.
To add a new field, simply select it and drag and drop it into your form preview.
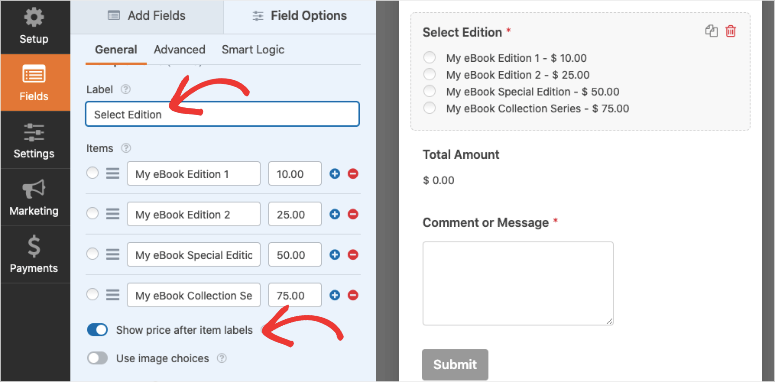
To customize a field, select it and you’ll see options to edit it on the left. Let’s edit the ‘Available Items’ field to add your own products. When you select the field, you’ll get options to:
- Change the label
- Add or delete items
- Change the label of the items
- Add pricing
- Show pricing in the form against each item
You can also add images to improve your customer’s shopping experience. It will help customers see exactly what they’re buying. To include images, switch on the ‘Use Image Choices’ option and then upload your product images.
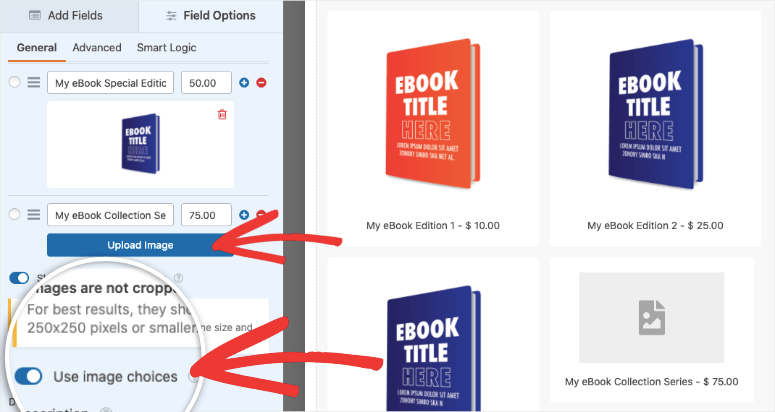
WPForms recommends that your images be resized to 250x250px or smaller for the image to look good in the form.
If you would like to change the layout of your products, open the Advanced tab for this field and you’ll find column and inline options.
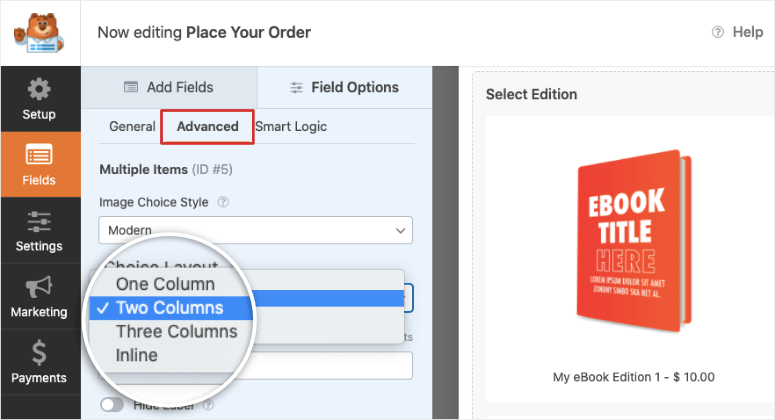
And with that, your product catalog is ready. You can store your progress using the Save button at the top.
Now you can set up the payment gateway to collect payments.
Step 4: Add a Payment Option
From the left taskbar in the WPForms builder, open the Payments tab. You’ll see options to add PayPal, Stripe, and Authorize.net.
For this tutorial, we’ll show you how to set up PayPal. When you click on PayPal, you’ll see a popup to install and activate the PayPal addon. All you need to do is click on the ‘Yes, activate’ button.
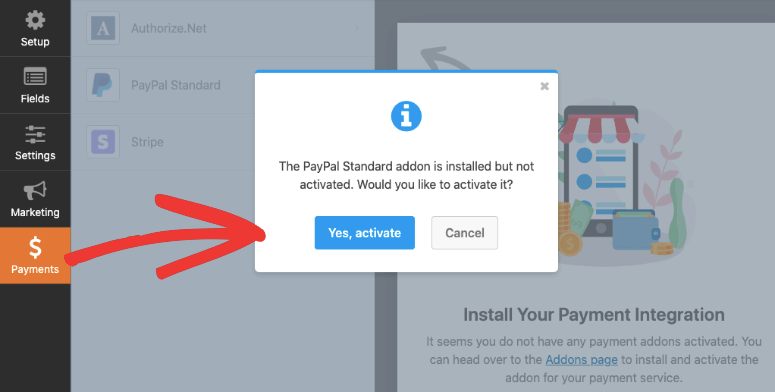
Then WPForms will ask you to refresh the page and you’ll see the PayPal Standard form. You can add in your PayPal account details and you’ll also find more settings to customize your payment integration.
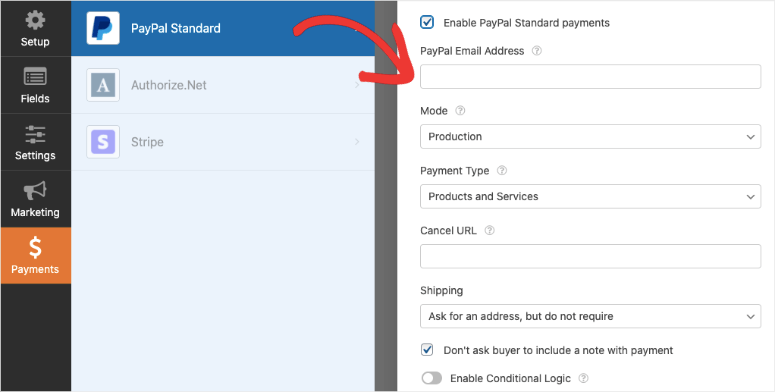
When you’re done, hit the Save button at the top to store your payment settings. Now you’ve successfully created a product order form with payment integration. But before we add it to your website, we want to show you other features of WPForms that you’ll find incredibly useful to manage your online orders.
Step 5: Configure Form Notifications and Confirmations
Once a customer places an order, you can use WPForms to control what happens after that. You can:
- Send yourself an email with the order details
- Send your customer an email to confirm their purchase
- Display a confirmation or thank you message on your website
- Redirect customers to a new page
To create these notifications, open the Settings tab from the menu on the left. You’ll see General settings where you can change the form title, description, and more.
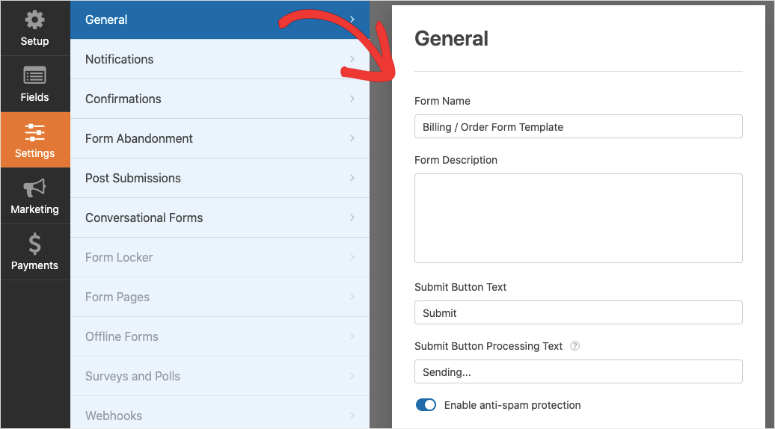
Open the Notifications tab, and you’ll see WPForms has a default notification already set up. This sends an email to your WordPress admin email address with the order details. You can add your preferred email address and even add multiple addresses separated by commas.
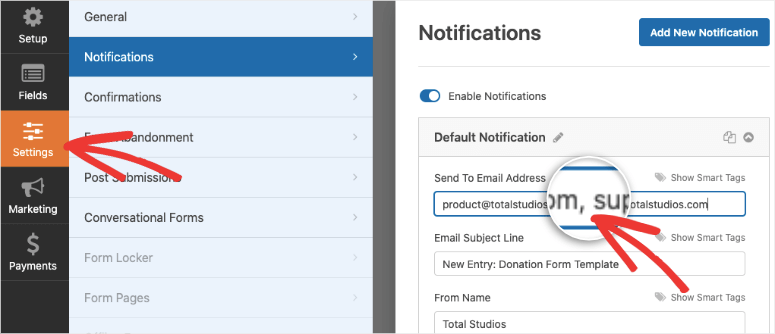
Then you can change the email subject line and content to receive an email that has all the details you want. There’s even an option to enable ‘Smart Conditional Logic’ to send yourself a notification only when certain conditions are met.
Next, you can create a notification that goes out to customers to confirm their order. Use the ‘Add New Notification’ button to create a new notification form. Then you can use the Show Smart Tags button and select the Email option.
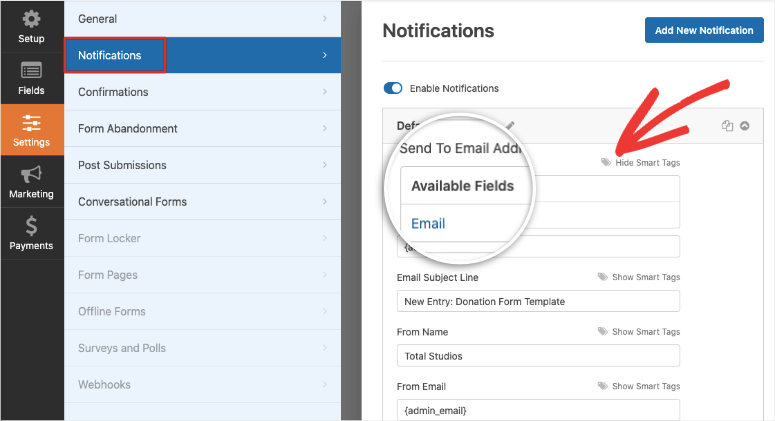
This will send an automated notification to the email address entered by the customer in the ‘Email’ form field. Now you can customize the subject line, from name, and email body.
If you would like to include the details they entered in the form, use the {all_fields} smart tag. This will automatically fetch all the fields from the form and add them to the email message.
And if you’re selling a digital product, you can add a download link here so that the customer can access their downloadable file instantly.
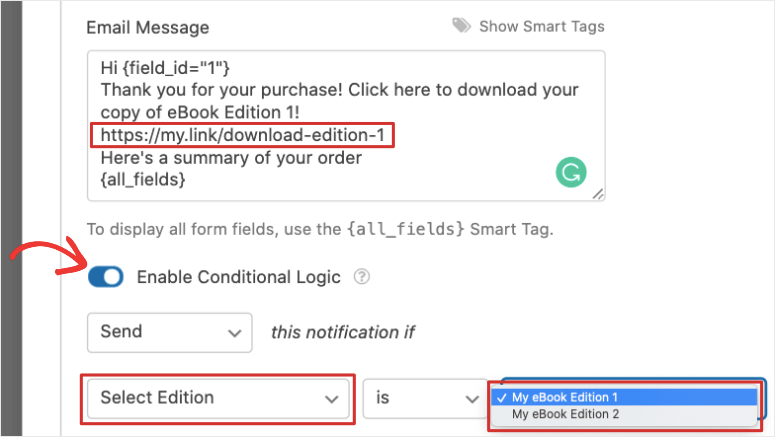
At the bottom of the page, you’ll see an option to enable conditional logic. This will let you send out different notifications based on which product the customer selected.
For more details on this, use our guide on Setting Up the Right Form Notifications.
Now you can add a confirmation message that will display on your website as soon as the order is complete.
Under the Confirmations tab, you’ll see 3 options to show a custom message or redirect the customer to a new page or third-party URL.
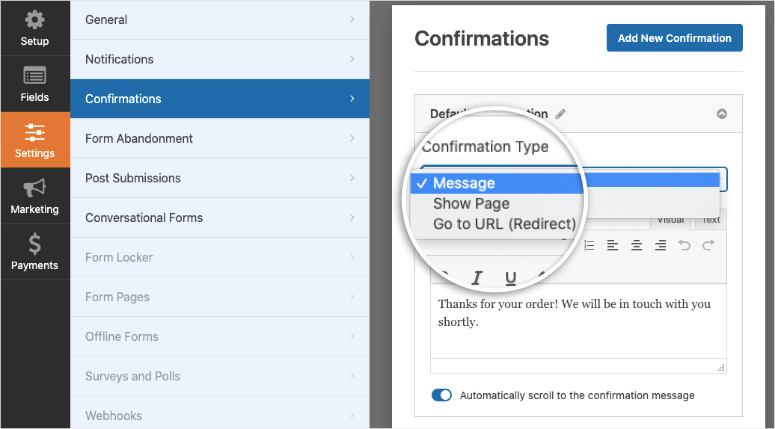
Select the one you want and customize your message or link.
Now your form is properly configured and set up to make your selling process easier. WPForms also lets you connect your form to your email account. We show you how to do that next.
Step 6: Connect to Your Email Account
By syncing the order form to your email account, all your customers will automatically be added to your contact list. You can segment your leads based on what they order from you to keep your list organized.
You can even add your customers to automated drip campaigns to keep them engaged in your brand.
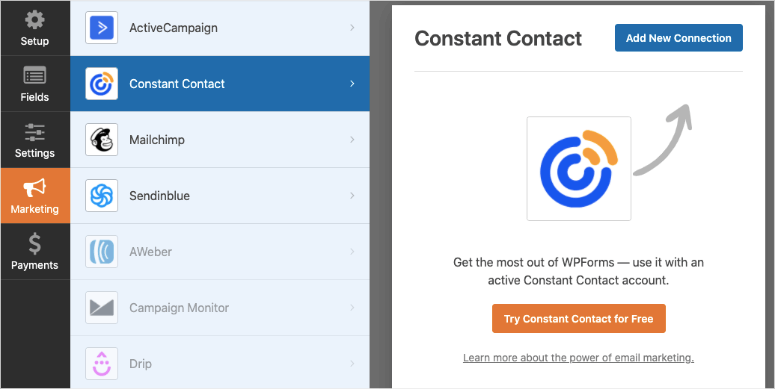
To integrate the form with your email marketing account, open the Marketing tab and select your email provider. You’ll need to install and activate the email marketing addon just like you did with PayPal.
Then you can follow the onscreen instructions to connect your email account.
Now you’re ready to publish the order form on your WordPress site.
Step 7: Add the Order Form to Your Website
WPForms lets you add the product form anywhere on your website. You can add it to posts, pages, or even your sidebar. Keep in mind that you can add the same form to multiple locations on your site so you won’t have to create a new product form every time.
To embed the form in a page or post, when you’re using the WordPress block editor, you can add a WPForms block. Then you’ll get a dropdown to select the form you created.
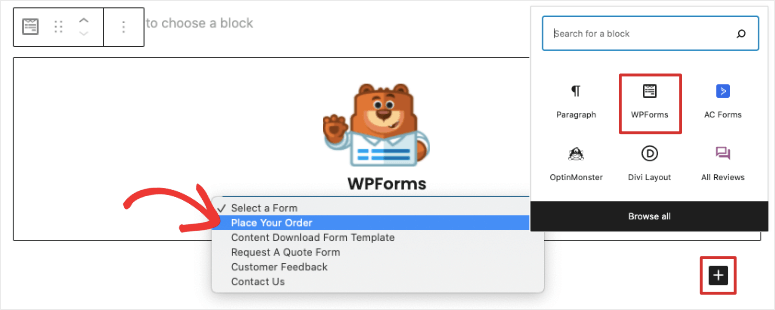
If you’re still using WordPress classic editor, you’ll see an Add Form button that lets you select the form and add it to your page or post.

All you need to do next is preview and publish your post or page. Then you’ll see the product form appear on your website.
If you’d like to add the form to a widget-ready area such as a footer or sidebar, navigate to the Appearance » Widgets page.
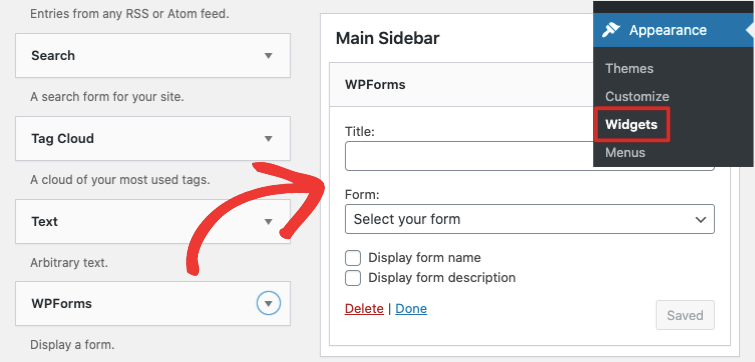
Drag and drop the WPForms widget into your sidebar and then select your form.
That’s it! You’re all set to sell your product without an eCommerce platform! Before we wrap up, we’ll give you a few tools that will help you increase leads, sales, and conversions so that you can grow your online business fast.
Must Have Tools to Sell Products in WordPress
If you want to drive traffic to your site, get more visibility for your products, and target visitors so that they buy from you, you’ll need powerful tools to help you do that. Here are the best of the best WordPress sales and conversion tools in the market:
1. SeedProd: The most powerful landing page builder to create dedicated product and sales pages. There are tons of beautiful templates so it’s a great option for beginners. SeedProd also connects with WPForms easily. So you can embed your WPForms order form using the Contact Form block inside the SeedProd builder.
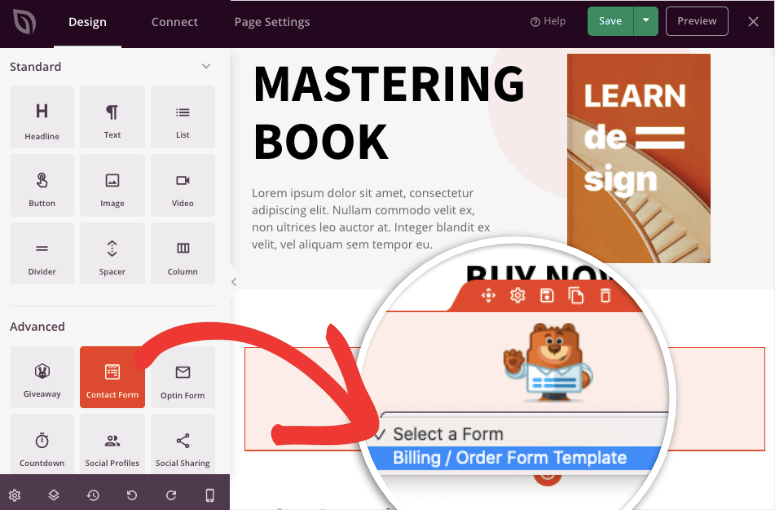
Added to that, you can use this page builder to put your site into coming soon and maintenance mode when you want to hide your website while you work on it behind the scenes.
2. OptinMonster: The best conversion optimization tool to boost your product sales and grow your email subscriber list fast. It lets you create stunning popups, floating bars, slide-ins, and more to grab your visitor’s attention.
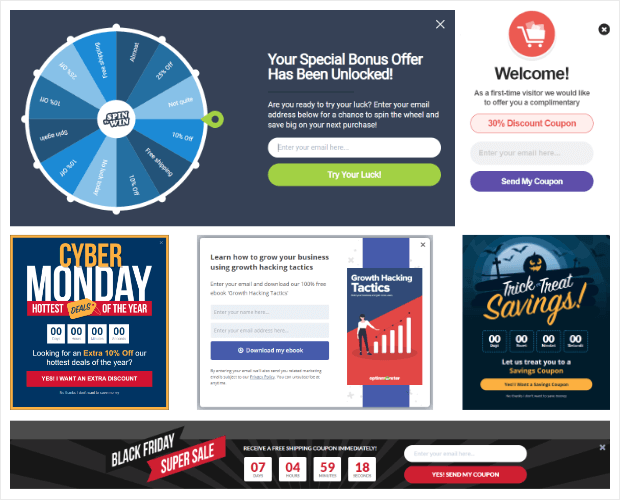
We love OptinMonster’s powerful targeting rules. It lets you set up campaign triggers and zero in on your audience to show your targeted offers at the right time and place when your shopper is most likely to convert.
3. MonsterInsights: The #1 Google Analytics plugin for WordPress. It lets you connect your site to Google Analytics in just a click. Then you can track the performance of your pages and products to optimize sales and revenue.
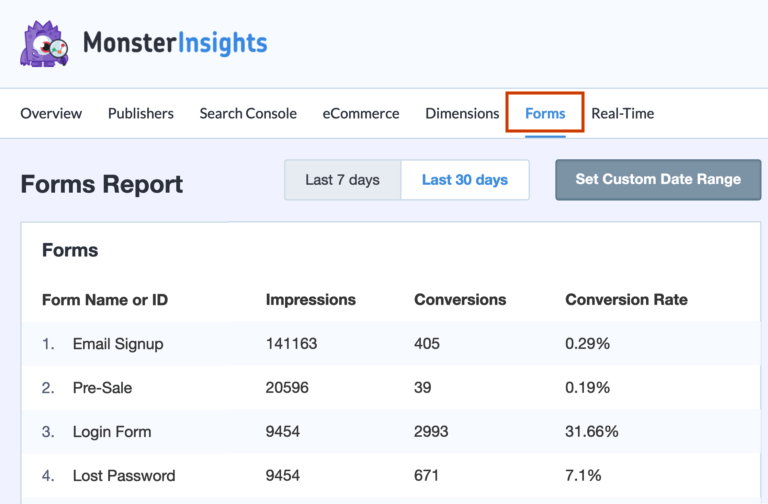
MonsterInsights even has a separate report for WordPress forms on your site. This makes it really easy to see how many people view your order form and how many actually buy your product.
4. All in One SEO: A popular SEO tool to optimize your site for search engines. It lets you add all the recommended SEO measures with just a few clicks.
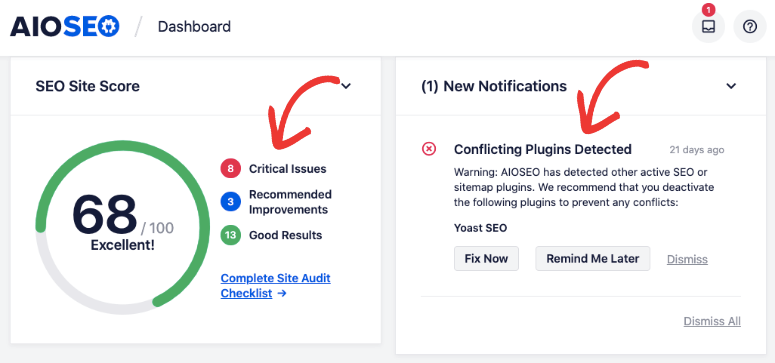
You can even optimize individual product pages so they appear in the top ranks on search engines like Google and Bing. This will help you drive more organic traffic to your site to get more visibility and sales.
5. TrustPulse: The best social proof app in the market. It helps you capture user activity on your site like sales and signups. Then you can showcase this activity on your site for others to see.

This boosts confidence and trust in shoppers so they’ll feel more comfortable buying from you. TrustPulse will give shoppers the nudge they need to get them to checkout.
6. RafflePress: A viral giveaway plugin that helps you boost your email subscribers, social media following, and sales in a short span of time.
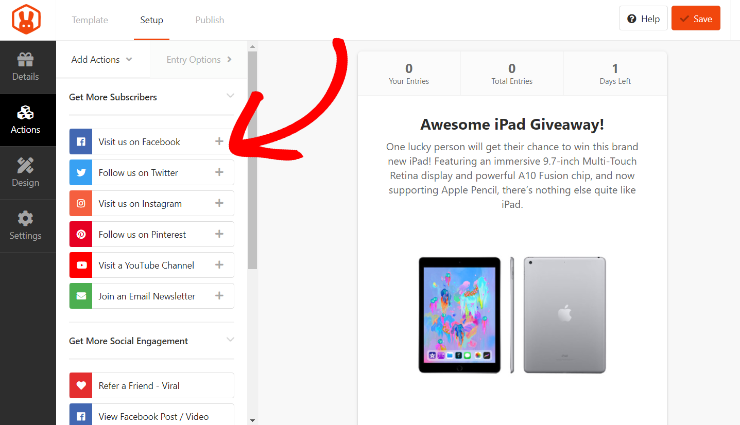
You can create attention-grabbing contests with multiple entry options so visitors can easily participate. This plugin gives you the tools you need for end-to-end contest and giveaway management.
7. WP Mail SMTP: The #1 SMTP plugin for WordPress. This ensures emails sent from your site to your own email address and customers are always delivered. You can be sure they hit the inbox and not the spam folder.
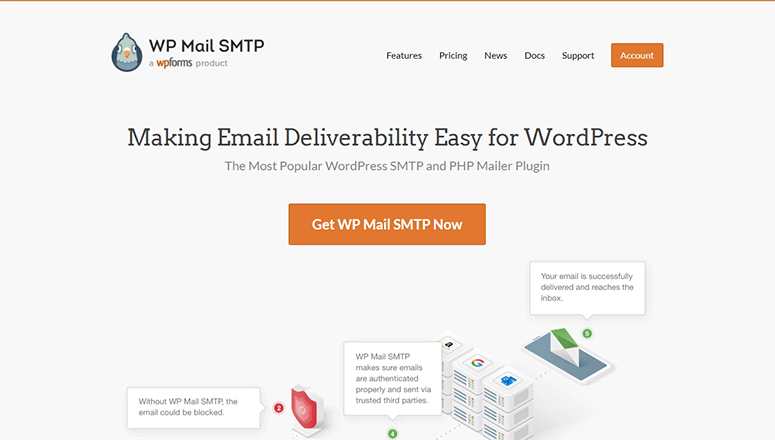
If you’re sending out emails from your WordPress site, you absolutely must have this plugin active on your site. It will fix all email delivery issues and make sure your customers receive their confirmation and update emails.
With these tools, you’ll be equipped to grow your business fast and establish your brand in the market.
That’s all we have for you today. We hope you found this tutorial helpful in selling products in WordPress without setting up an online store.
Now that your store is open for business, you’ll be interested in these resources:
- The Complete WordPress Security Guide (Beginner Friendly)
- Powerful Customer Acquisition Tools For Exponential Growth
- Best Marketing Automation Tools for WordPress
The first post will help you secure your website against hackers. When you’re dealing with payment information and personal data of customers, you’ll want to make sure your website is sealed tight so that you don’t face a data breach or malware attack.
The other guides will give you tools to improve your store and slash admin time so you can focus on building your brand.

Comments Leave a Reply