
Are you looking to embed a YouTube feed into your WordPress website?
One of the best ways to increase engagement and viewership on your site is by embedding a YouTube feed. This can also help you gain more views and subscribers on YouTube as well. So it’s a win-win on both platforms
In this tutorial, we will show you the best way to embed a YouTube feed to your WordPress site.
Why Should You Embed a YouTube Feed in WordPress
Interestingly, over 500 hours of content are uploaded on YouTube every minute. To add to this, YouTube has grown to be the second-largest search engine after Google. This means that Google has one of the largest creator and user bases of any social media platform.
To capitalize on this, many bloggers and businesses create both articles and YouTube videos to widen their reach.
However, there is often a disconnect with this approach since YouTube and site audiences are separate. Embedding YouTube to your site is a quick way to capitalize on the advantages of YouTube and website content at the same time.
To add to that, here are other reasons why you should consider adding a YouTube feed to your site:
- SEO Advantages: The amount of time someone stays on your site and the variety of content you have on it play an important role in SEO. A YouTube feed ensures your readers stay longer on your site, watching videos while having different types of content to look at.
- User Experience: Users having content choices and the ability to decide what form of media type they want to consume often leads to happy site visitors.
- Visual Content: Offering visual content makes a site look modern and practical. Sites with little visual content can look spammy. Images are great, but videos push your site to the next level.
- Easy Communication Channel: Video content is a great way to offer personalized content easily and quickly. Video tutorials, for example, provide a visual step-by-step process, making it a more practical solution than written content.
Now you can manually add each YouTube video to your site. This can take up a lot of your time. Plus, you will need to have basic coding experience. If you’re not able to customize the look and style of your videos with code, it could leave your site looking unprofessional.
There’s an easier way and that’s to use a WordPress plugin! We recommend using Smash Balloon and we’ll tell you why.
Why Use Smash Balloon to Create a YouTube Feed
Smash Balloon is the best WordPress social media feeds Plugin. It lets you embed popular social media feeds on your WordPress site in a matter of minutes.
It has a dedicated plugin for YouTube called Smash Balloon YouTube Feed.
This plugin is so easy to set up and use. Plus, it automates the entire video embedding process.
You don’t need coding experience or to understand how to place different page elements. There are premade layouts and styles that you can apply to your feed.
You can also customize the feed’s color, size, location, properties, and position to match your site’s design. There’s also a live preview to see how your YouTube feed will look.
The best part is that Smash Balloon needs just a one-time setup. Once you’ve configured the settings and filters, the plugin will run on its own. It will automatically check your YouTube channel for new videos and display them on your website feed. This will save you tons of time and effort in manually embedding every new video you publish.
Aside from this, here’s where Smash Balloon shines:
- Easy-to-use dashboard
- Fully responsive mobile-friendly feeds
- Filter by channel, playlist, and more
- Compatible with all popular WordPress themes
- Supports live streams
- Custom video end actions
- Optimized for speed and performance
Now that you can see why we chose Smash Balloon, let’s go straight to the step-by-step tutorial on how to set up Smash Balloon and how to embed the YouTube feed on your WordPress website.
Step 1: Install and Setup YouTube Feed Pro
To get started, you’ll need to sign up for the YouTube Feed Pro plugin by Smash Balloon.
If you want to try the free version first, head over to your WordPress dashboard. Go to Plugins » Add New page and search for Feeds for YouTube. Then simply install and activate it on your site.
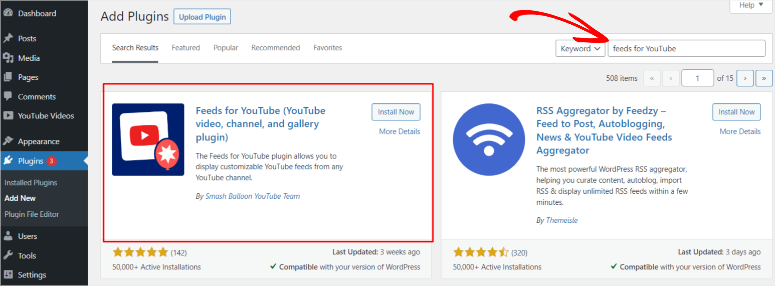
For this tutorial, however, we will use the pro version so that we can show you all the cool features of this plugin.
To get the pro plugin, go to Smash Balloon’s YouTube Feed Pro website. Here you can choose a plan and sign up for an account.
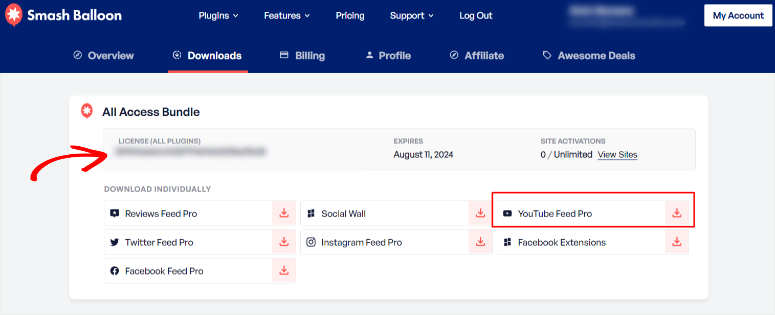
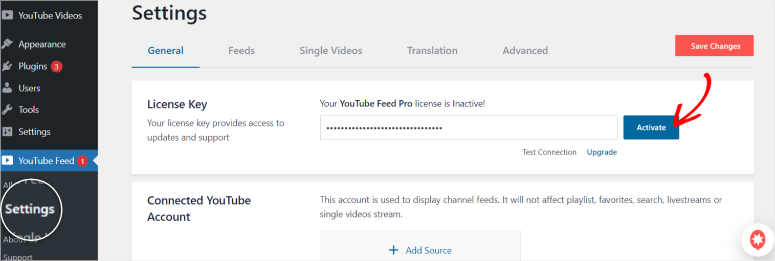
Once done, you can log into your account and you’ll see a Downloads tab. Here, you can download the plugin file to your local computer, and copy the license key.
Now, go to Plugins » Add New in your WordPress dashboard. You’ll see an Upload Plugin button where you can select the plugin file from your computer and upload it.
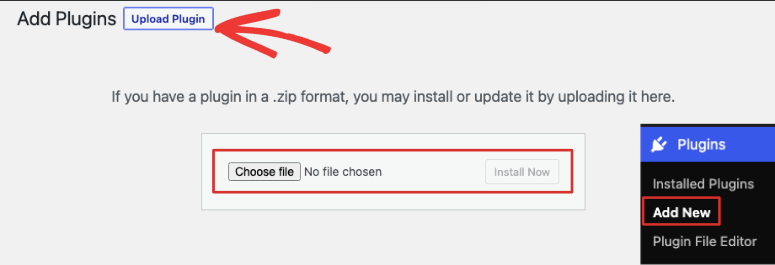
Once installed successfully, you’ll see ‘YouTube Feed’ appear in your WordPress menu on the left.
You should get an option to add your license key right away. You can also access the same under the YouTube Feed » Settings page. Simply paste the key you had copied earlier and activate the license.
Step 2: Connect to Your YouTube Account
To embed the YouTube feed, the first thing you will need to do is connect to a YouTube account. To do this, go to All Feeds » Add New.
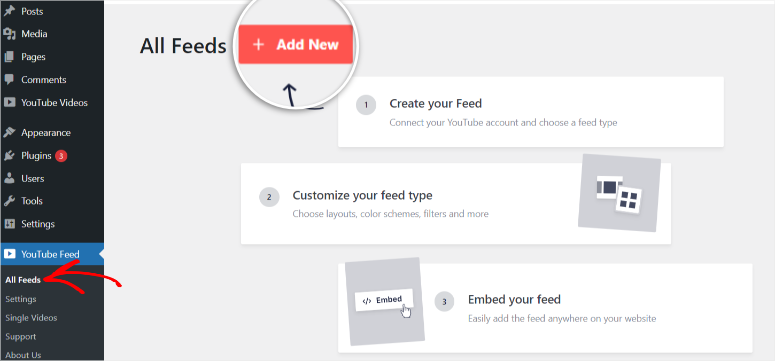
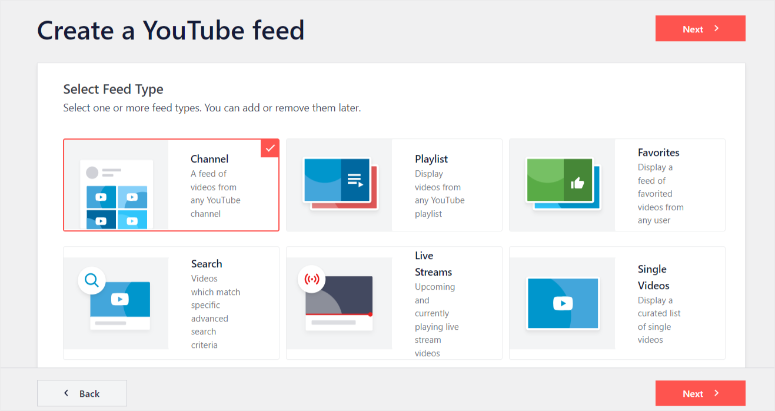
The plugin will ask you to select the Feed Type on the next page. On this page, you can choose to display;
- An entire YouTube channel
- A playlist from YouTube
- Favorited videos from any user
- A search result
- Live streams
- A list of single videos picked by you
Once you select the type of feed you want, a popup window will appear, asking you to connect your YouTube account in one of two ways.
You can either Add an API Key, which will give you more customization options, or Connect a YouTube Account Instead.
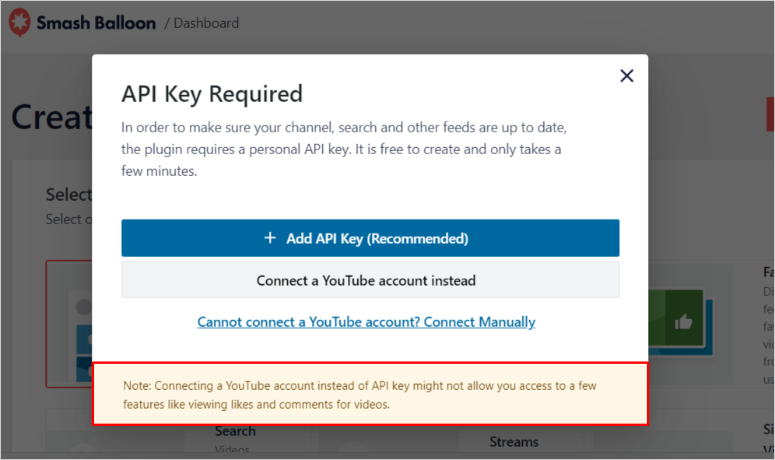
Both options follow a really simple process that doesn’t need any coding!
Connect with an API Key
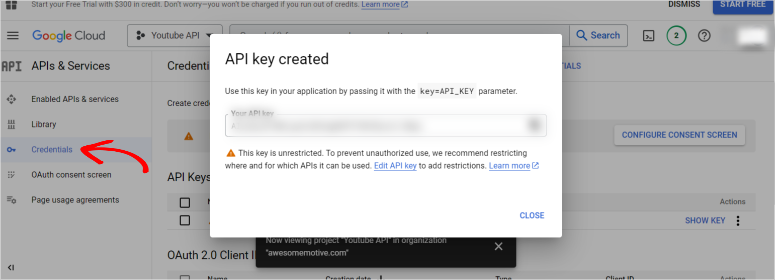
If you don’t already have an API Key, you will need a Google Cloud Console account. This will let you create a Google API Key for your YouTube feed. Smash Balloon has an easy step-by-step tutorial you can follow here: How to set up and use a YouTube API key.
Once you set up your Google API, go to Credentials and copy the API key.
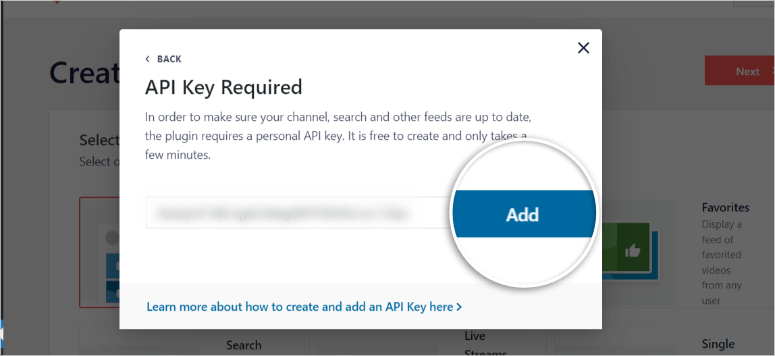
Then, back on the Smash Balloon page, you can click on the Add API Key button and you’ll see a popup appear. Here, you can paste the key you just created.
Connect a YouTube Account
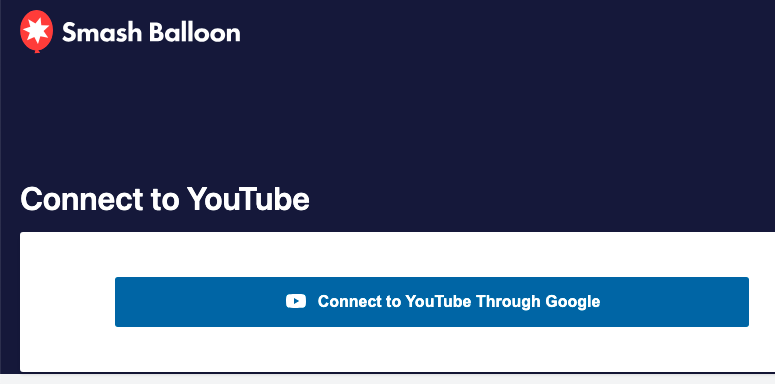
When you select the second option ‘Connect to a YouTube Account Instead’, you will be redirected to a new page where you can log into your Google Account that’s connected to YouTube.
Then, you’ll see a popup asking you to give Smash Balloon access permission.
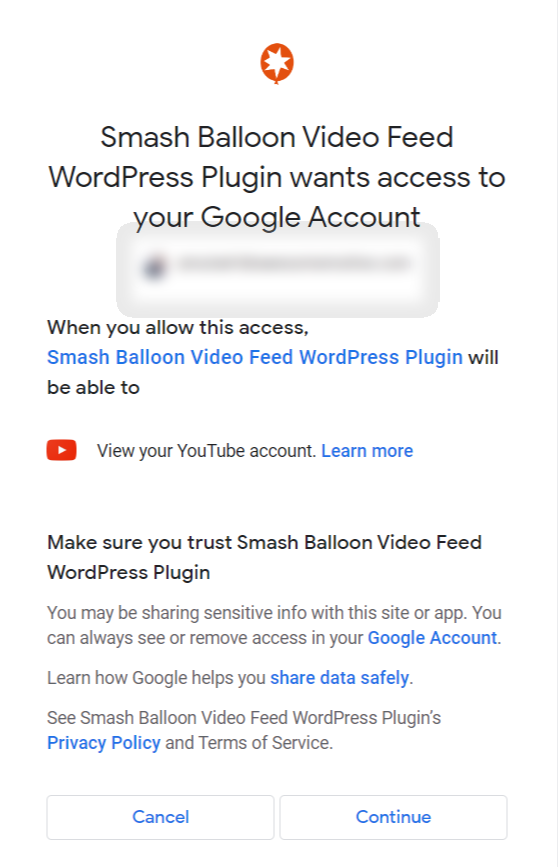
Select the Continue button, and just like that, you have connected your Google account to Smash Balloon.
Now you can create and customize your YouTube Feed.
Step 3: Add a YouTube source
Once you connect your Google account, you’ll see a new page titled ‘Add Source’. This is where you can add the Channel ID or Username for the plugin to fetch content from.
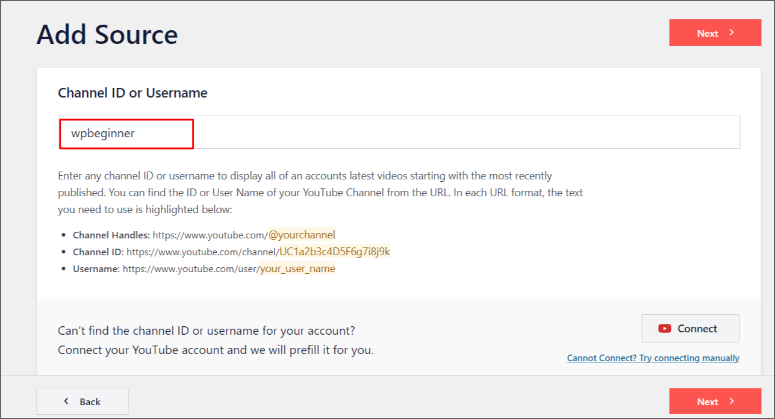
If you’re not sure where to get this ID or username, you can visit the YouTube channel on any browser. In the URL, you’ll see the channel name or ID right after www.youtube.com/
The URL structure of a YouTube channel is www.YouTube.com/{username or channel ID}. You only need to copy the {user name or channel ID}.
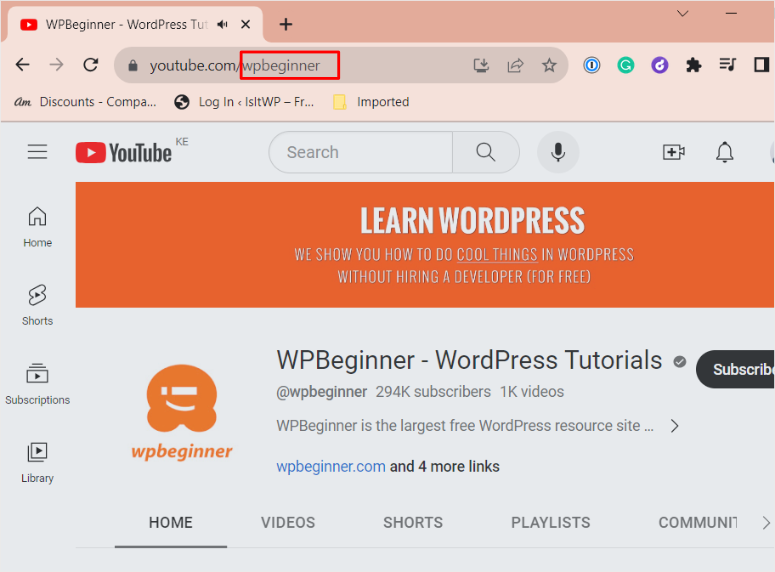
Once added to Smash Balloon, the plugin will know which channel you want to get content from. Now you’re ready to customize the design and settings of the feed.
Step 4: Customize the YouTube Feed
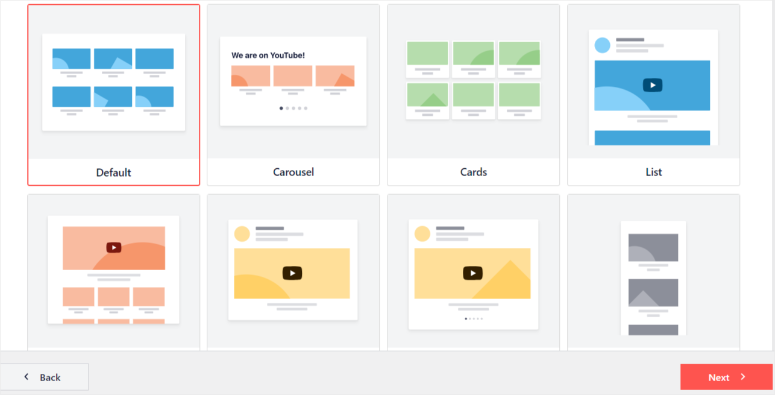
On the next page, select a template to help you create a YouTube feed. Smash Balloon offers you the following options:
- Default
- Carousel
- Cards
- List
- Gallery
- Latest Video
- Showcase Carousel
- Widget
To keep things simple for this tutorial, we will select Default.
Smash Balloon will then redirect you to the live feed editor. On the left, you will see Settings and Customize tabs. Select Customize to get started.
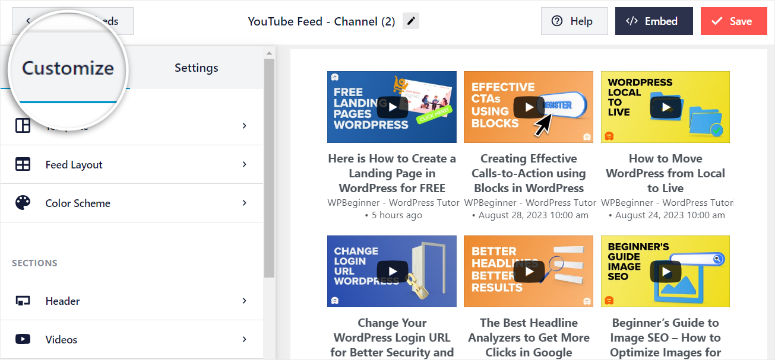
Under the ‘Customize’ tab, a dropdown menu with options to personalize general features like the Template, Feed Layout, and Color Scheme will appear first. Below them, you can edit more specific sections such as the Header, Videos, Load More button, and the Subscribe button.
Take note of the Customize button with a small back arrow that appears every time you select a submenu in the live feed editor; you will use it to go back to the main menu after completing the customization of a feature.
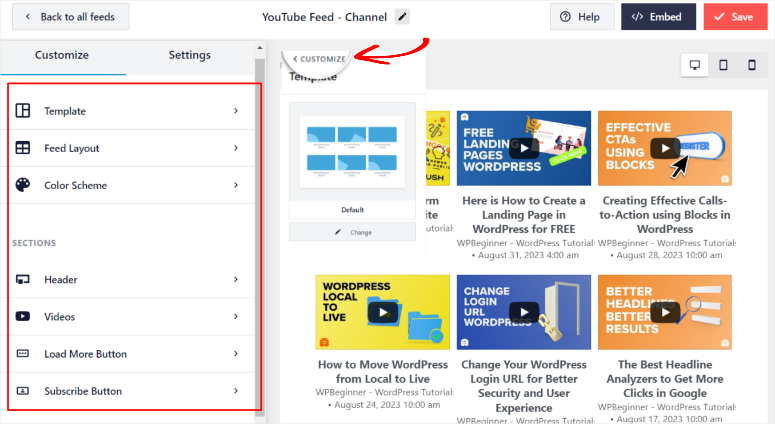
Let us go straight to Feed Layout since we had already selected the template we wanted in the previous step. Remember, you can also change the template in the live feed editor if you change your mind. The process is completely customizable.
You get to choose from the following:
- Grid: This will arrange the videos in rows and columns
- Gallery: Will display one main video with other video thumbnails beneath it
- List: Your videos will appear in a single column; great at utilizing the sidebar on a page
- Carousel: Will display the videos as a slideshow.
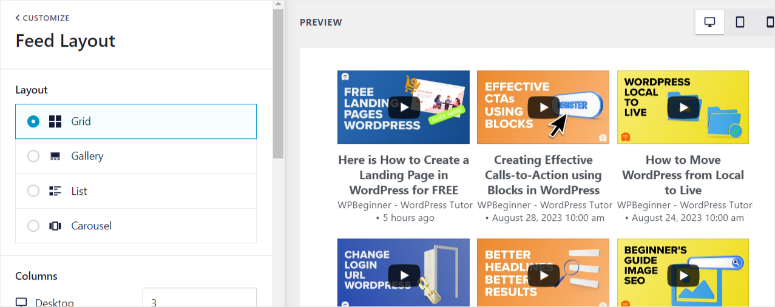
Next, still in the Feed Layout submenu, select the number of columns and rows to be displayed on desktop and mobile devices. By default, Smash Balloon will display fewer columns and rows on smaller screens to give the user a better experience.
Then, decide how many videos will be displayed initially and the space between the videos.
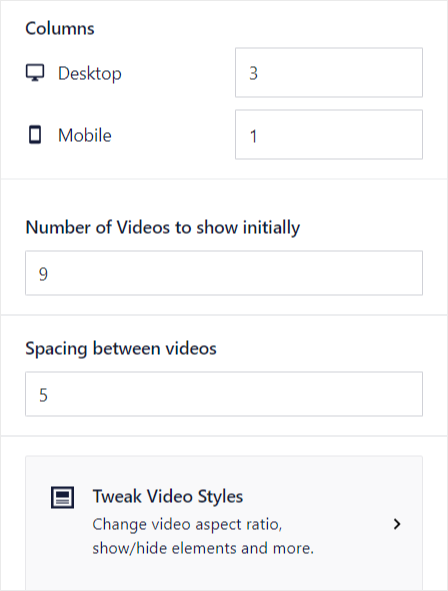
Once you are satisfied with the layout design, hit the Customize button to go back to the main menu.
Now, with the videos placed as you want, it is time to customize the color of your feed.
Go to the Color Scheme submenu and decide if you want to use dark or light modes or customize the colors.
The customize option allows you to change the color of the text, background, links, and buttons. By default, Smash Balloon will inherit colors from the theme.
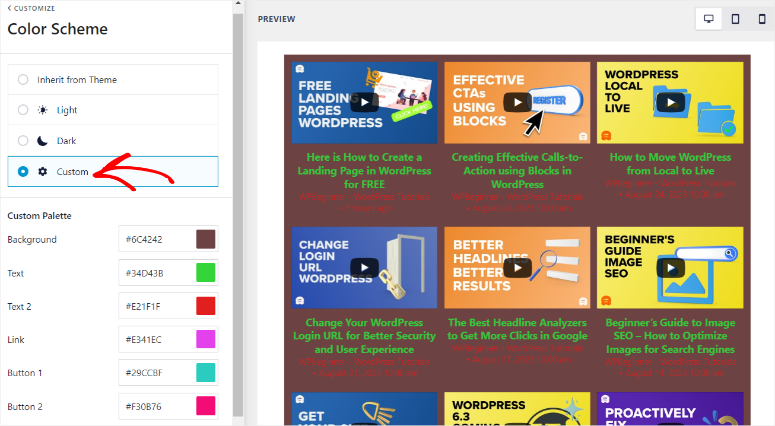
Go back to edit the sections after you are done to edit the Header.
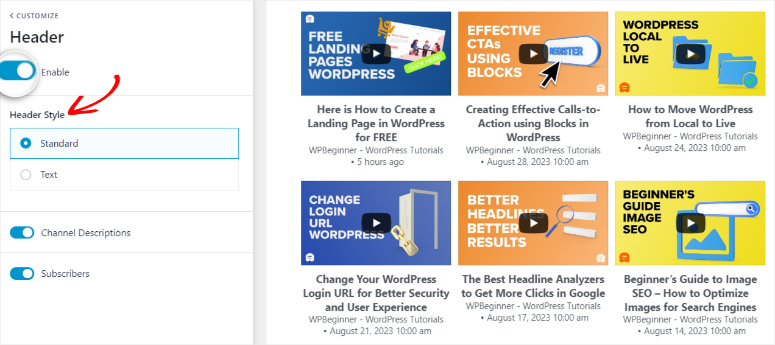
First, you will need to enable the header so that it can be displayed as part of your feed.
Decide if you want to use the standard header, which you can also enable the feed to display the channel description and subscribers. Or the text header, which you can customize the display text, size, and color.
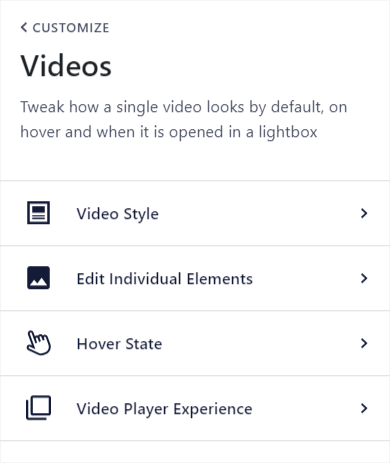
Next, go to the Video menu. Here, you can edit the Video Style, Individual Elements, Hover State, and Video Player Experience. Using the live editor preview screen, you can play around with these options and see which offers the best experience.
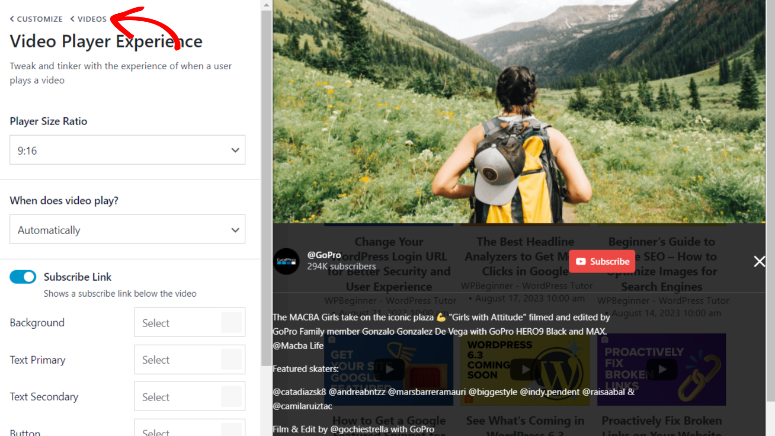
For example, if you go to Videos » Video Play Experience, you can change the player size ratio; if you want the video to play automatically, add a subscribe button and also include a call to action.
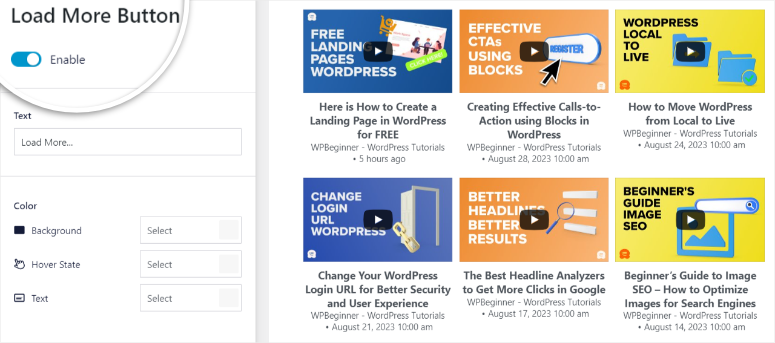
Next, if you want to add the Load More button, first enable it. When your users click the ‘Load More’ button, more of the feed will be displayed to them. You can edit the Load More text to whatever you want as well. You can also customize its color, background, and hover state.
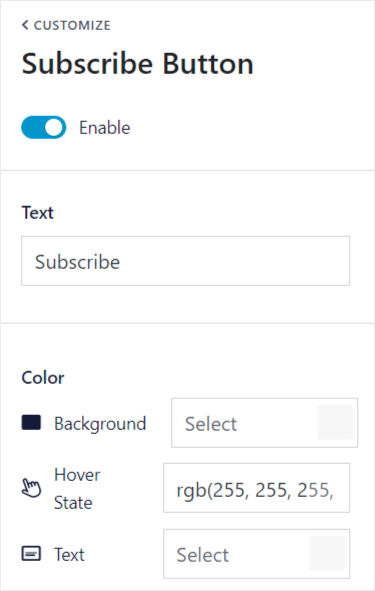
Remember, you can add a Subscribe button as well. You can also edit the text, background hover state, and text color.
Finally, Save your custom YouTube feed using the button on the upper right corner of your live feed editor.
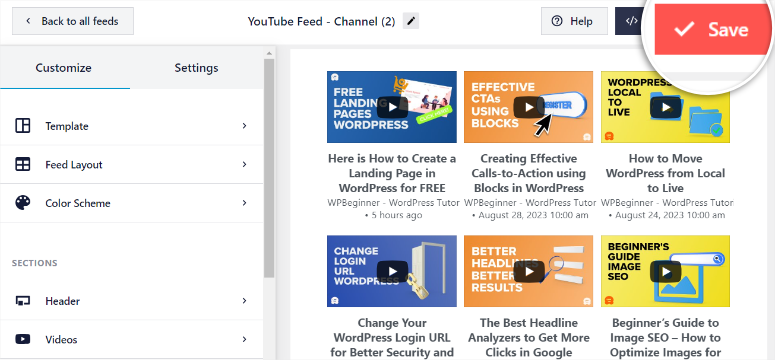
The feed is ready to be added to your site.
Step 5: Embed a YouTube Channel to Your Site
Smash Balloon makes it easy to add the feed to any page, post, or widget-ready area. The choice is yours. You can either use the readymade Smash Balloon block or widget. You can also use shortcodes to embed the feed.
To add the feed to a page or post, let’s edit any existing page in the WordPress block editor.
Select the Plus icon to add a new block and search for “Feeds for YouTube”.
Drag and drop the Feeds for YouTube block onto your page where you would like it to appear.
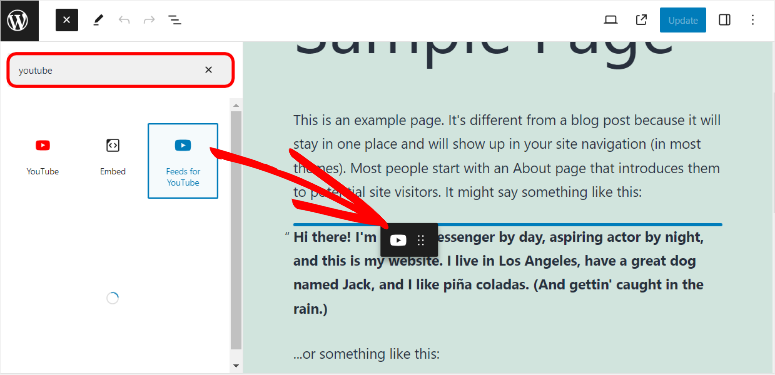
You should see the feed appear instantly. You can preview and publish the page to make it go live on your site.
To embed a YouTube feed on a widget or sidebar, go to Appearance » Widgets page.

Using the Plus icon to add a new block, search for “Feeds for YouTube.”
Next, drag this block to your footer or sidebar where you want the feed to appear.
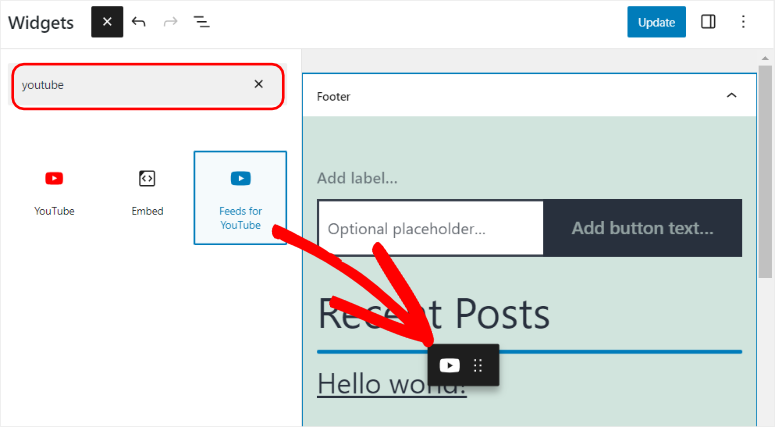
Make sure you save and update this page. That’s it! You’ve learned how to add an automated YouTube feed to your WordPress site.
Now Smash Balloon can do more than just add a YouTube feed. Let’s check that out.
What Else Can Smash Balloon Do?
Smash Balloon is a really powerful plugin for WordPress that you can use to connect your site to Facebook, Instagram, and Twitter as well.
You can pick and choose from individual plugins to set up Facebook, Instagram, and Twitter feeds. You can also choose to sign up for the bundle plan that gives you access to all feeds.
Check out our other tutorials to set this up:
- How to Add Tweets in WordPress to Boost Social Engagement
- How to Embed Instagram Feed in WordPress (5 Easy Steps)
- How to Show a Facebook Feed in WordPress (5 Easy Steps)
There’s also an option to create a powerful social wall that showcases all your social media profiles in one place.
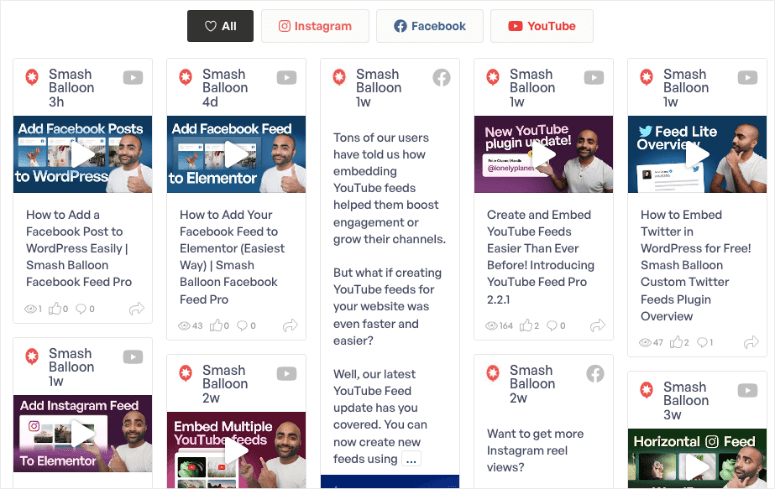
This way, a user never has to leave your site to see what you’re up to on YouTube, Facebook, Instagram, and Twitter. They can view it all at once right on your website.
Next, we answer some common questions about adding a YouTube feed to your WordPress site.
FAQs: How to Embed a YouTube Feed in WordPress
How do I embed a YouTube feed on my website?
You can embed a YouTube feed using the Smash Balloon plugin for WordPress. It’s easy to setup and uses an automated process so it saves you time and effort.
How do I autoplay YouTube embed in WordPress?
With the Smash Balloon plugin, there’s an option to have the video play automatically or on click. You can switch between these options with just the click of your mouse, no coding needed.
Why won’t my YouTube video embed in WordPress?
If you’re trying to embed a YouTube URL directly on your site, you could face issues like the video not loading. We recommend using a plugin like Smash Balloon that will handle all the technical things for you while your videos play smoothly.
Will YouTube videos slow down my website?
It can slow down your site if you embed large videos on your site incorrectly. If you’re using Smash Balloon, it comes with a lazy loading feature. Your site won’t autoplay and it’ll only load a video when a user engages with your YouTube feed, so it’s designed to be ultra-fast.
That’s all we have for you. Next, you may also want to see 7 Incredible Social Media Automation Tools To Instantly Reduce Your Workload.

Comments Leave a Reply