Do you want to stop and prevent brute force attacks on your site?
In a brute force attack, hackers simply try thousands of username and password combinations till they get the right one.
Once they break into your site, they can do all sorts of things like add malicious advertisements, defraud your users, and even take down your site.
This tutorial will show you how to stop and prevent brute force attacks so hackers don’t stand a chance at breaking into your site.
But before we get to the steps, let’s be clear about what a brute force attack is so that you’ll have a better understanding during the tutorial.
What is a Brute Force Attack?
When we say hackers try different password combinations on your site to log in, you may be picturing an actual person sitting at a computer and typing in passwords, right?
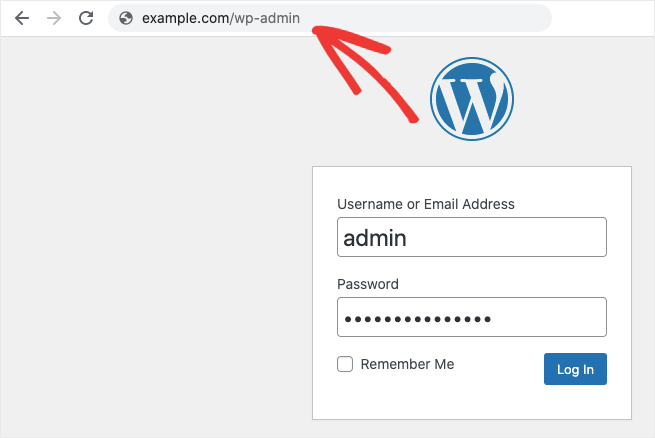
Hackers are far more advanced than that. They program bots to scan the internet and find websites running on WordPress. Then they target the login page which is usually www.example.com/wp-admin.
Once they’re on the login page, these bots run a huge database of commonly used usernames and passwords.
- Common usernames include “admin” or the name of the person that owns the site.
- Common passwords include password1234, 12345678, and qwerty1.
These hacker bots are capable of running thousands of login attempts per minute. And they keep trying over and over again till they get it right or exhaust their database. Hence the name ‘brute force’ attack.
Now you may be thinking all you have to do is set a really strong password and the problem is solved. But that’s not enough.
Thousands of login attempts can slow down your site and even cause it to crash. It can disrupt your user experience which means visitors will leave your site since it won’t load fast enough.
A better way to protect your site would be to stop the hacker from making these attempts. That’s what we’ll be showing you how to do next. Let’s dive right in.
How to Stop Brute Force Attacks in WordPress
Below, we’ll detail 6 important steps you need to take to protect your site against hackers. We’ll be focussing on preventing brute force attacks, but keep in mind that these steps will also help stop other malware attacks.
You’ll be building a robust security system that makes sure hackers have no way of damaging your site from the inside or outside.
Here’s a list of the 6 steps we’ll be covering:
- Install a Firewall Plugin
- Limit Login Attempts
- Restrict Access to Login Page
- Expire Passwords Regularly
- Add 2-Factor Authentication
- Add HTTP Authentication
Step 1: Install a Firewall Plugin
A firewall serves as your first line of defense. It will analyze every visitor coming to your site and block bad bots. This means only good traffic is allowed to view your site.
There are two types of website firewalls that you can use.
- Web Application Firewall: These firewalls sit in front of your WordPress site to scan traffic coming in. They are quite effective but don’t give you server-level protection. This means hackers can still target your server and damage your site.
- DNS Level Website Firewall: This firewall gives you better protection against hackers because it sits in front of your server. So it will scan all traffic before they reach your main website server.
We strongly recommend investing in a DNS firewall to protect your site. Sucuri has one of the best DNS firewalls in the industry.
Sucuri comes with built-in features to block brute force attacks without affecting your website users.
It also blocks automated tools used to scan your website. This helps keep your website off any attacker’s radar.
Then it constantly monitors your site, so if any malicious bots come to your site, they’ll be automatically blocked.
If you want to know more details, read our Sucuri Review.
Step 2: Limit Login Attempts
If you want to specifically block brute force attacks, one of the best ways to do so is by limiting the number of attempts a user gets to log in.
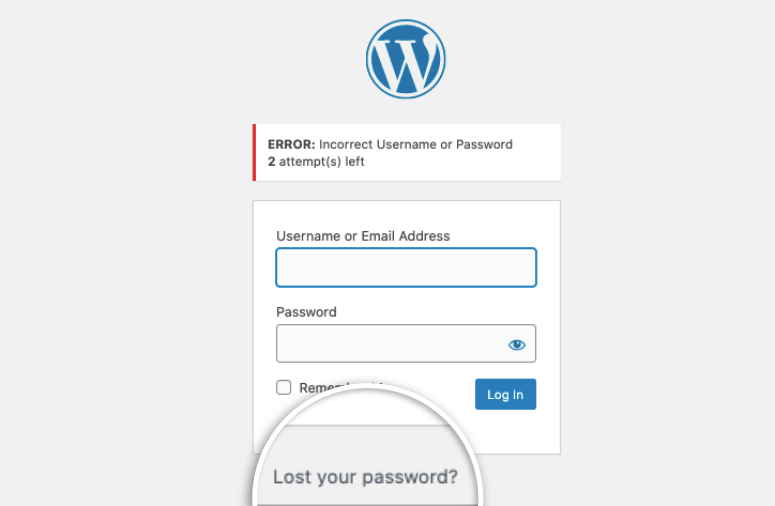
So for instance, you may grant them a maximum of 3 attempts to enter the correct username and password. If they fail to get it right, they can use the ‘Lost your password’ option and recover their credentials.
Any user or bot that tries to brute force your site will give up after 3 attempts and move on to the next target.
You can add a limit login attempts plugin on your WordPress site to add this feature. If you’re using a security plugin like Sucuri, then you should already have limit login attempts automatically added to your site.
Step 2: Restrict Access to Login Page
Another great way to protect your site from brute force attacks is to grant access to the login page URL only to people you trust.
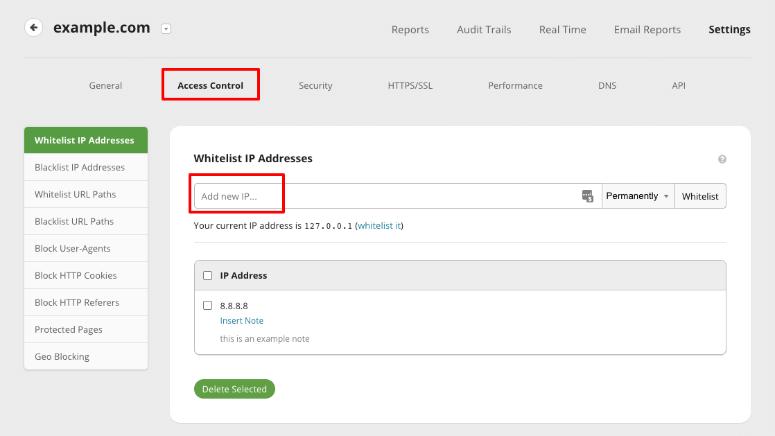
Every device that uses the internet has a unique IP address. You can use a security plugin to universally block all IP addresses from accessing the login page and whitelist only the ones you want.
This way only authorized users can open the login page. This method is called allowlisting and is very effective in keeping hackers out.
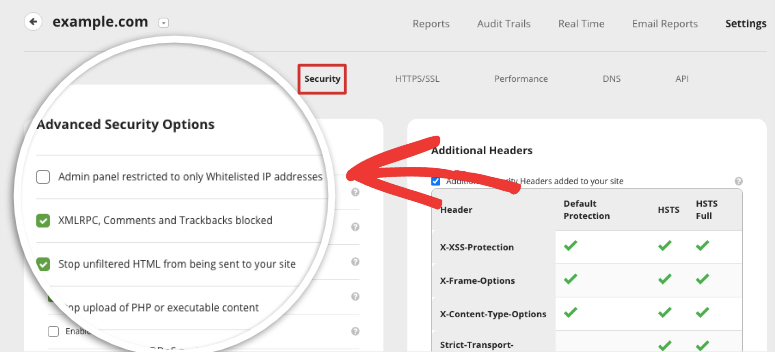
If you’re using Sucuri, under the Access Control tab of your dashboard, you can add whitelisted IP addresses.
Next, switch to the Security tab.
You’ll see an option to enable ‘Admin panel restricted to only Whitelisted IP addresses’.
By checking this box, Sucuri will automatically allow only your trusted users to access the login page.
Step 4: Expire Passwords Regularly
It goes without saying that the best way to protect any account or website on the internet is by using strong usernames and passwords.
Aside from that, you also need to change your password regularly. If you suspect an attack, you need to change it immediately.
Now if you have multiple users that have access to wp-admin, they may not remember to change their passwords regularly.
To overcome this, you can set reminders and force them to reset their password at intervals.
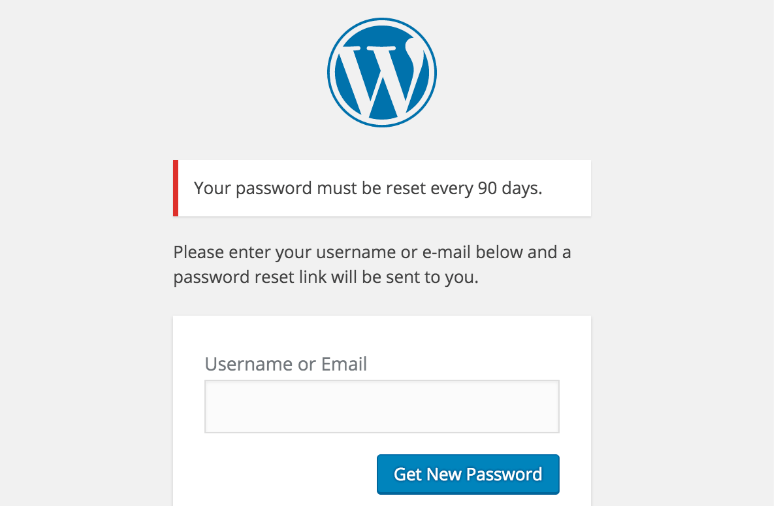
You can use a plugin like Expire User Passwords to help you expire passwords periodically forcing the user to change their password before they can log in again.
Step 5: Add 2-Factor Authentication
You most likely have already seen or have 2-factor authentication on your apps especially email.
Aside from entering your password, you need to provide a one-time passcode that is sent to your mobile phone or email.
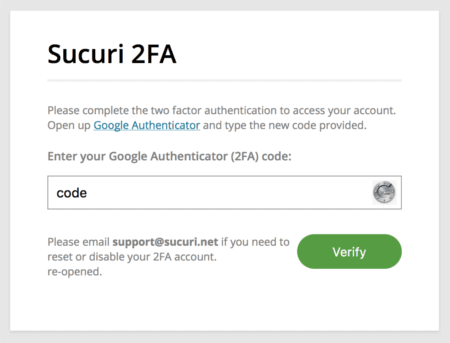
You may receive this code as an SMS or through an authenticator app.
This means a user will have to verify themselves in real-time making it extremely hard for hackers to gain access.
Even if they happen to crack your password, they’ll need the real-time passcode as well.
All popular security plugins like Sucuri and MalCare let you enable 2-factor authentication inside the dashboard.
So you won’t need to touch any coding to add this measure to your site.
Step 6: Add HTTP Authentication
The final step you can take to protect your site from brute force attacks is to add a login page to your login page.
It seems a bit much but this acts as an extra layer of protection and is a sure-shot way of blocking hackers from entering your site through brute force attacks.
HTTP authentication works by hiding your login page and displaying a blank page with a login box.
Once you enter your HTTP credentials, your WordPress login page will appear.
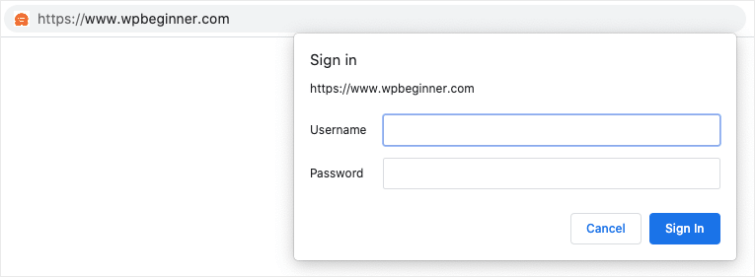
You can add this measure inside your hosting cPanel. If you’ve never used cPanel before, don’t worry. We’ll show you how to do it in a few simple steps.
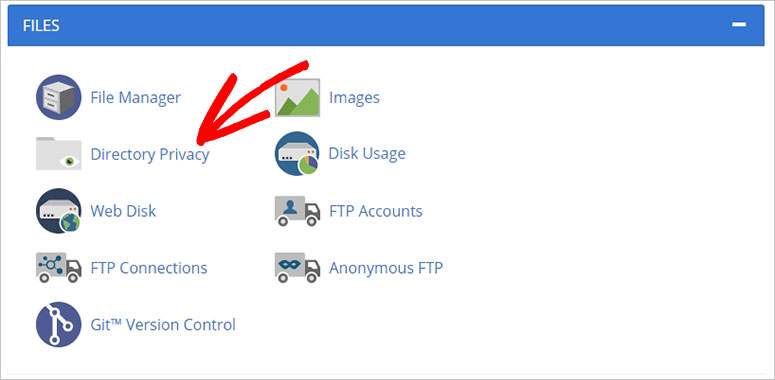
Login to your web hosting account, access cPanel and find ‘Directory Privacy’.
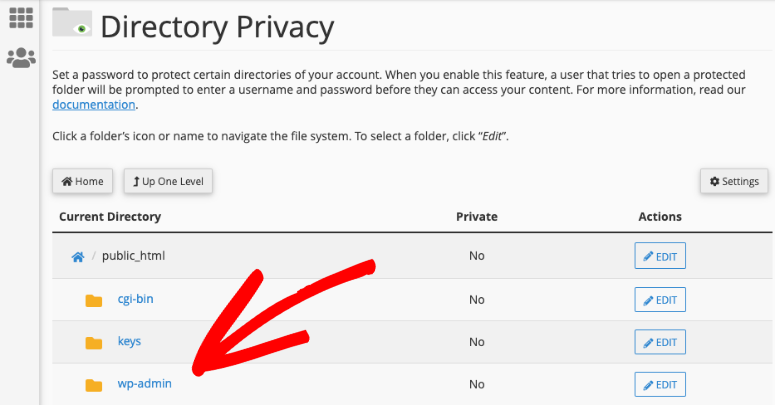
Inside, from the list of folders, locate the wp-admin folder and edit it.
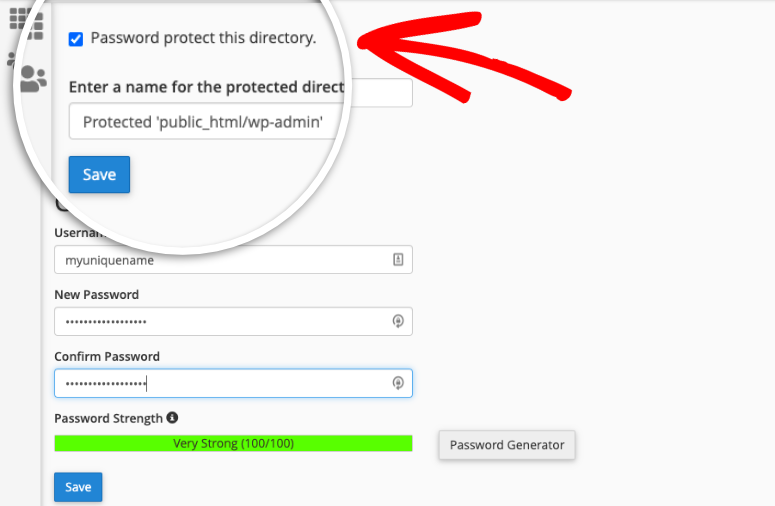
On the next page, first, enable the option ‘Password protect this directory’. Now cPanel will ask you to add a username and password.
Make sure you save your settings before exiting this page. Now your WordPress admin directory is password protected.
When you open your wp-admin page, you’ll see a login prompt to enter the username and password you just created.
In case you run into a 404 error or too many redirect messages, then you need to add the following line to your WordPress .htaccess file.
ErrorDocument 401 default
With that, your website is protected against brute force attacks.
We also recommend taking a backup of your site regularly. When things go wrong, whether it’s a hack or just a human error, you can quickly restore your site and get it back to normal. This lets you minimize damage to your site and user experience.
You can use UpdraftPlus to schedule automated backups that are stored safely.
For more backup options, see our pick of the Best WordPress Backup Plugins.
We hope you found this post on brute force attack prevention helpful. And now that your website is secure, you can focus on growing your site and getting more traffic. Here are a few resources we’ve handpicked for you:
- Boost WordPress Performance & Speed with Expert Advice
- 10 Best SEO Tools to Grow Your Website Traffic, FAST!
- Tools to Grow your Small Business in 2021
These posts will help you improve traffic, engagement, and user experience. The last post will give you the best plugins and tools to smoothen workflows and grow your business exponentially.

Comments Leave a Reply