Want to offer fitness classes online?
While people stay at home during this pandemic, offering online gym classes is a great way to help them stay fit and sane. That way you can teach easy-to-do home exercises to help them shed some pounds and fat and build strength.
In this article, we’ll show you how to teach gym classes online, step by step.
Benefits of Teaching Gym Classes Online
Having a fitness website can have several advantages. Here are some of them.
- Reach out to a large user base irrespective of the geographical boundaries.
- Make a solid passive income by offering different membership levels, each with a specific price.
- It’s extremely helpful in crucial times like the Covid-19 crisis when people across the globe are advised to stay indoors.
Having said that, let’s now have a look at how to create a website for teaching gym classes online.
Step 1: Creating a Fitness / Gym Class Website
The first step is to set up a website where you can create and sell gym classes. Here’s a tutorial that will teach you how to make a website from scratch.
Once your site is ready, it’s time to select a membership plugin.
For the sake of this tutorial, we’ll be using the MemberPress plugin. It’s an amazing plugin that’s loaded with great features. You can use it to accept payments, restrict access to your workout programs, allow program downloads and do a lot more.
Learn more about MemberPress here.
Step 2: Installing and Setting up the MemberPress Plugin
Using a membership plugin, like MemberPress is the best way to create and sell digital fitness courses online. It lets you restrict access to the premium content on your website for regular website visitors. It allows you to hide your content behind a paywall so that not everyone can access the content.
To unlock your content your users need to purchase a membership on your site. Alternatively, you can also create free courses in exchange for their email address.
So go ahead and install this plugin on your site.
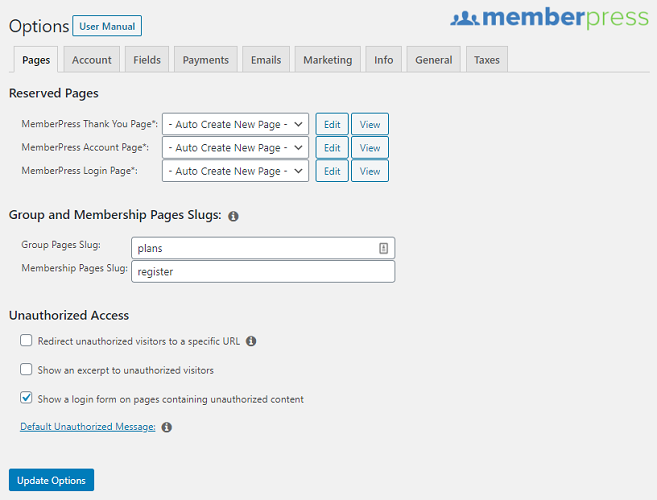
Once the installation and activation are done, go to MemberPress » Options on the left side of your dashboard. You’ll see several tabs here.
Each tab offers different options to customize your settings. You can configure the settings by going to each of these pages individually.
Step 3: Adding Payment Methods
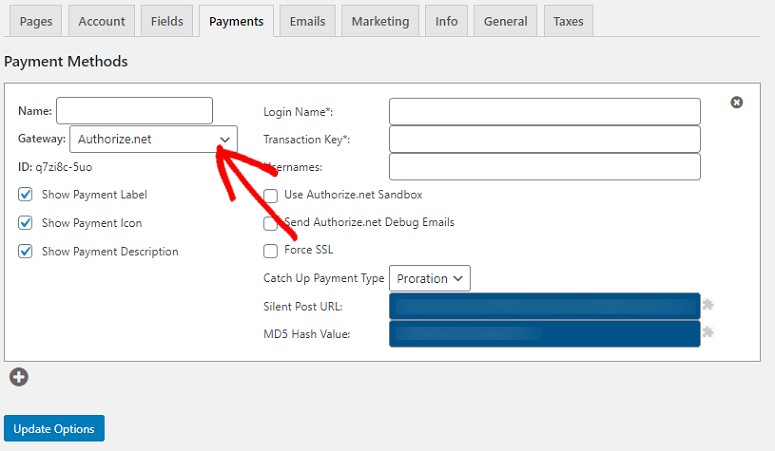
To add a payment method, go to the Payments tab. In the beginning, you’ll see an empty page with a + sign below Payment Methods. Click on it. This will expand the page with different options. Click on the dropdown arrow under Gateway to see the payment options.
You’ll see various options here like Authorize.Net, PayPal Standard, PayPal Payments Pro, etc. Select the option you want to add to your site. Once done, click on the Update button to save your settings.
Step 4: Creating Membership Levels for Your Classes
By adding different membership levels, its easy for you to categorize your course into different pricing plans.
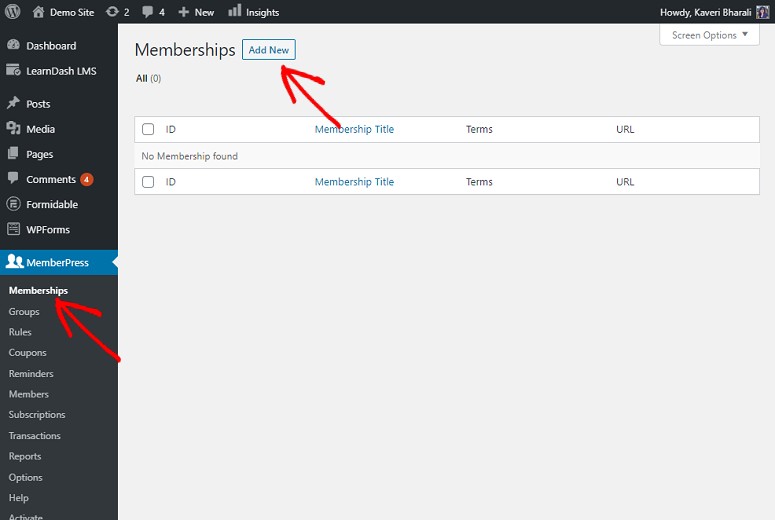
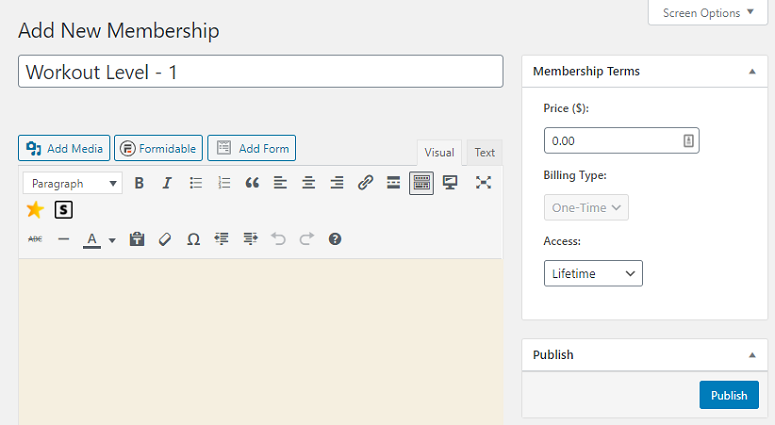
To create a membership level, go to MemberPress » Memberships » Add New.
You can now start creating your membership by adding a title, and a description, for the membership level. Then on the right-hand side, you can set a price, the billing time and accessibility period under Membership Terms.
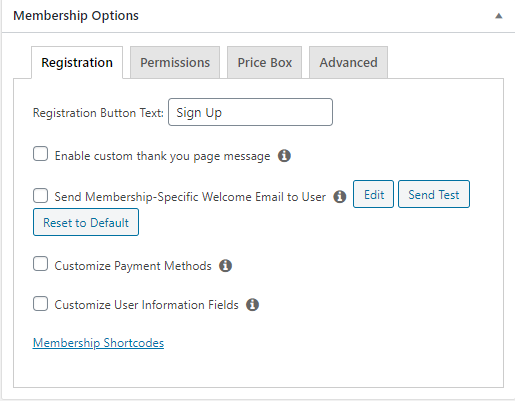
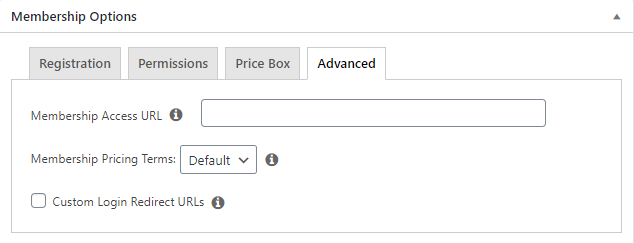
Once done, scroll down the page to find the Membership Options. Here you’ll have 4 different tabs.
- Registration
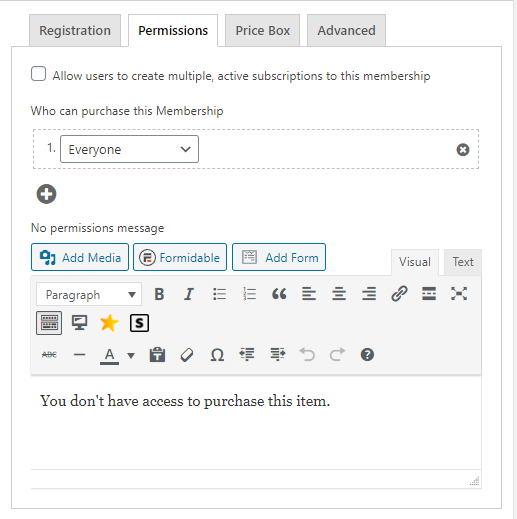
- Permission
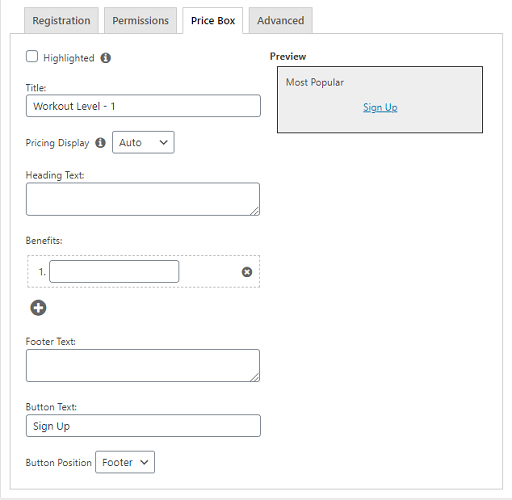
- Price Box
- Advanced
In the Registration tab you can configure the registration button text and have the option to enable a custom thank you message, set whether or not you want to send a welcome message to the user, etc.
Next is the Permission tab. Here you can select who can purchase a membership. You also have the option to set up a No permission message.
Under the Price tab, you can add your membership level prices. You also have the option to add benefits of choosing the level, etc.
Finally, with the Advanced tab, you can add membership access URL, terms of membership pricing, etc.
So depending on your requirements you can use these options to customize your settings.
Step 5: Adding Access Rule
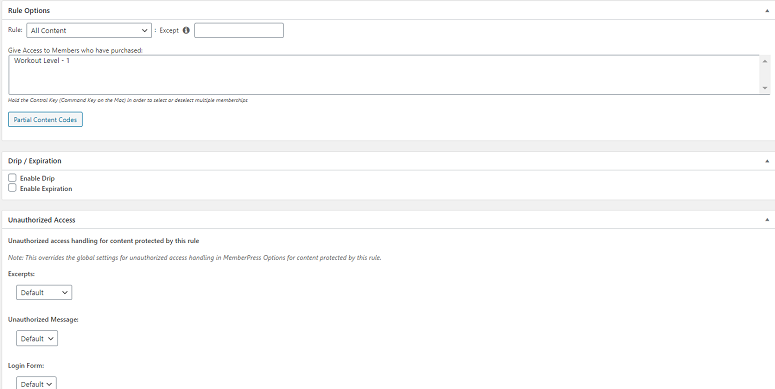
Adding an access rule is a great way to limit the accessibility of your classes to certain users. To add the Access Rules, go to MemberPress » Rules » Add New.
You can keep the accessibility of all your content restricted or select a specific one. If you want to release your content in parts, that’s possible too. You can do that by scrolling further down the screen and selecting the options under Drip/Expiration .
Once you add the rules, go ahead and save your settings. Your site is now ready to publish the content.
Step 6: Adding Your Gym Class Programs for Members
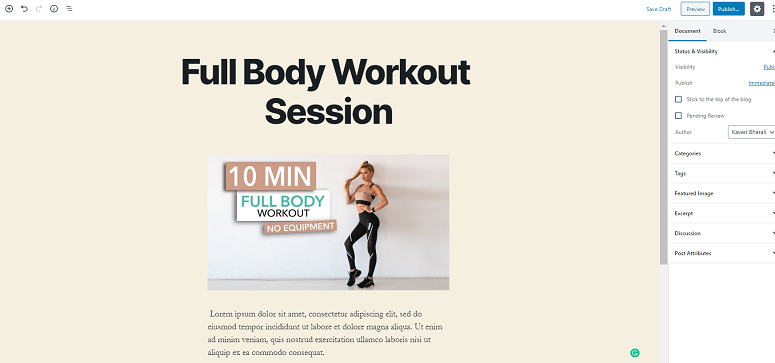
To add a gym class program for your users, go to Post » Add New from your WordPress dashboard. Now add your content using the WordPress editor. If you’re new to WordPress here’s how you can add your content including media files.
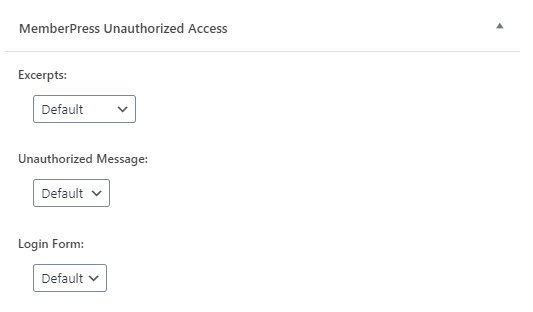
You can also add categories, tags, featured images, etc. to your post. Once done creating your content, scroll down your page and find the MemberPress Unauthorized Access section.
This section lets you configure what your unregistered users see upon trying to access your premium content. You can show them an unauthorized message, a specific login form or an excerpt.
Just click on the dropdown and select the options that best fit your requirements. Once done, hit the Publish button for the post to go live. You can now go to All Post and check your live post. Based on our settings this post will be available to users who have purchased the workout level – 1.

That’s it. Your site is now ready to sell the gym classes online. You might also want to use a good fitness theme on your site. Also, check out how to add a FREE BMI calculator to your site.


Comments Leave a Reply