Do you want to add a content locker to your WordPress website?
Many website owners use content locking to boost lead generation and improve their conversions. Hiding content from visitors can entice them enough to increase their engagement while boosting your sales and lead generation.
In this tutorial, we’re going to break down content locking, what it’s for, and how to easily add it to your WordPress site with OptinMonster.
What Is Content Locking and Why Add It to your WordPress Website?
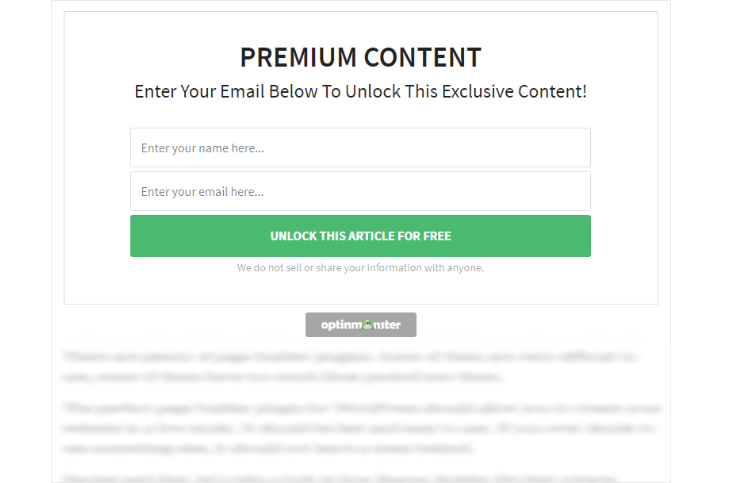
Content locking is exactly what it sounds like: content that visitors can’t access unless they perform a specific action.
Adding a content locker to your website is a great way to build excitement around your content, grow your email list, personalize interactions, and more. Users will feel curious about what they can’t access, which encourages them to take action and submit their information.
You can use a content locker to collect different pieces of information from visitors and personalize future marketing campaigns. Gated content also attracts high-quality subscribers who are interested in moving through the sales funnel.
Adding Content Locking to Your WordPress Site with OptinMonster
For this tutorial, we’re going to use OptinMonster to add a content locker to your WordPress site.
OptinMonster is the best content locking solution on the market for WordPress. With ease, you can create a content locker campaign that boosts lead generation and skyrockets your email list.
OptinMonster is also easy to use, so beginners new to creating a website can still lock their content without a fuss.
Its Plus, Pro, and Growth subscriptions give you access to this valuable feature, which is cost-effective for any business.
To learn more about this powerful plugin, check out our in-depth OptinMonster review.
You may also want check out Thrive Leads that also has a content lock feature.
Without stalling any further, let’s go through the steps to add content locking to your WordPress site with OptinMonster.
Step 1: Create an OptinMonster Account
First, you need to choose the pricing plan for OptinMonster that works for you and create an account.
Then, make sure to install and activate the OptinMonster plugin on WordPress. It’ll connect your OptinMonster account to your WordPress site. If you aren’t sure how, check out our post on how to install a WordPress plugin.
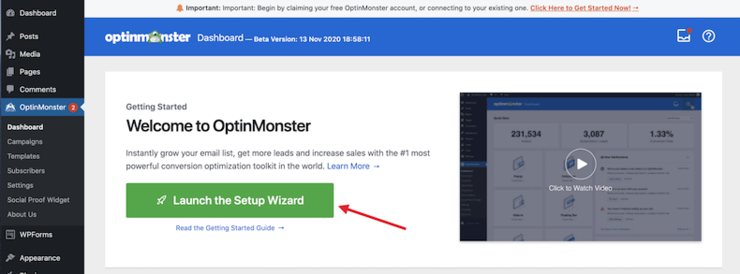
From your WordPress dashboard, click OptinMonster » Launch the Setup Wizard:
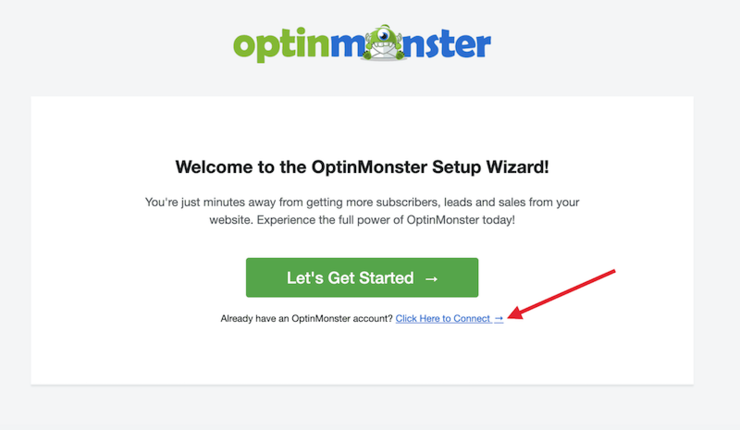
Because you’ve already created an OptinMonster account, tap Click Here to Connect:
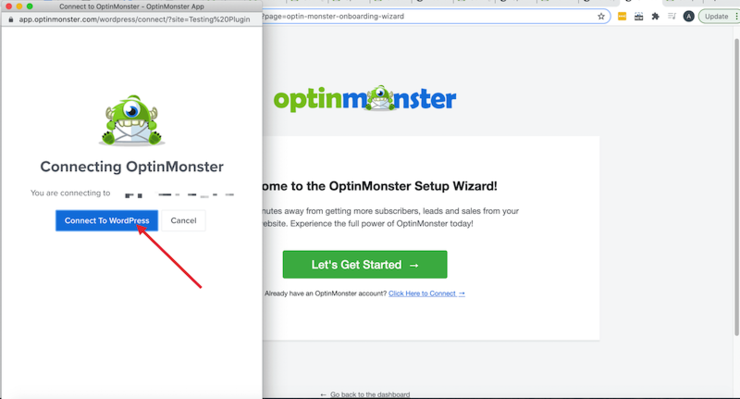
You’ll see a popup asking you to login or connect to an existing account. Click Connect to WordPress:
Once you connect your account, it’ll direct you to the OptinMonster tab from your WordPress dashboard. You’re all set to create your new content locked campaign.
Step 2: Create Your Campaign
Now it’s time to create your campaign. Head over to your OptinMonster dashboard and click Create New Campaign:
Now select a campaign type. For this example, we’ll choose Inline:
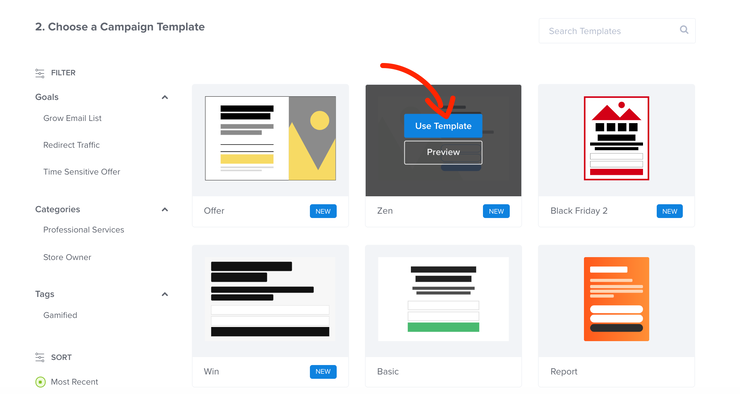
Now you need to select a template. OptinMonster comes with several premade template options that look beautiful on your site. To select one, hover over it and click Use Template:
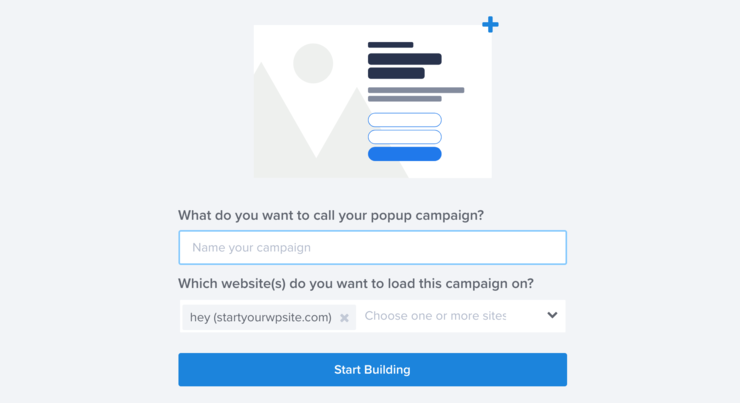
Name your campaign, add your website, and click Start Building:
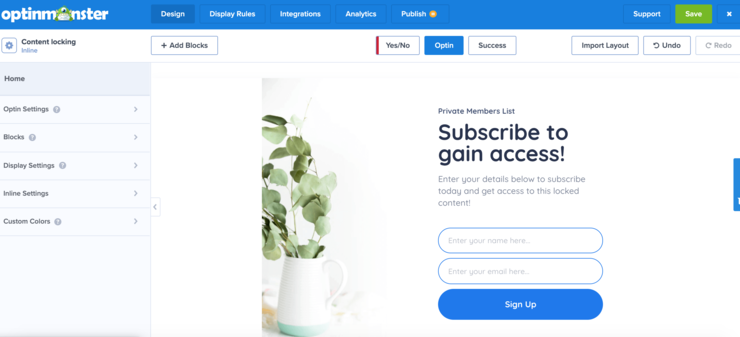
You’ll see the OptinMonster drag-and-drop builder you’ll use to customize and create your campaign:
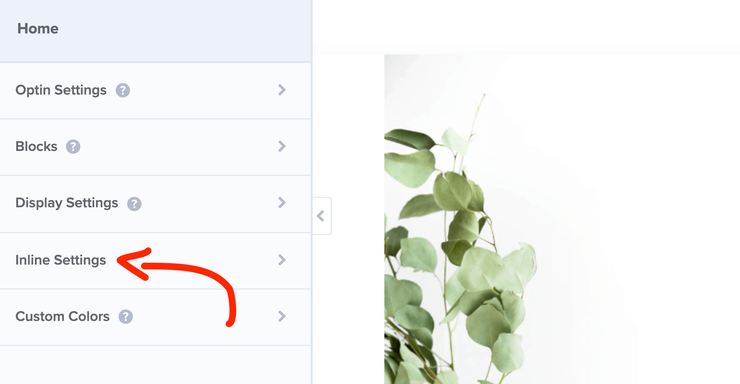
From the lefthand menu, click on Inline Settings:
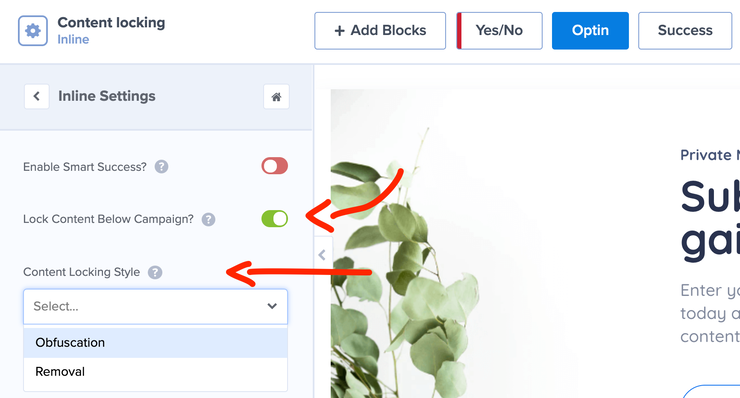
Toggle the option that says Lock Content Below Campaign. From the dropdown menu, select Obfuscation to blur your content or Removal to completely hide it.
Click Save.
Now you need to integrate OptinMonster with your email marketing service by clicking Integrations on the top menu bar:
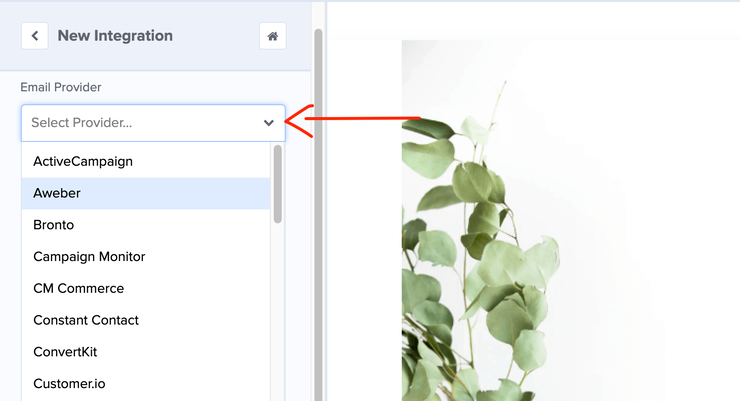
Then select your provider in the dropdown menu:
Follow the prompts for your specific provider and click Save.
Step 3: Embed Your Content Locker into WordPress
Now it’s time to add your content locker to your WordPress site. To do so, you’ll need to publish your campaign.
Select Publish in the top menu bar:
Under Publish Status, click Publish:
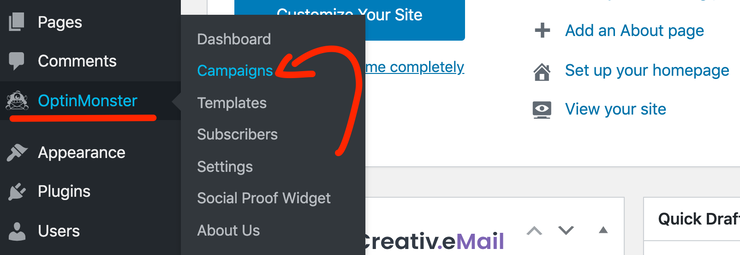
Now, head over to WordPress. Click on OptinMonster » Campaigns:
Here you’ll see your OptinMonster campaigns. Next to the one you just created, click the three dots:
Then, select OutPut Settings:
There are 2 ways you can display your locked content:
- Manual: Use an embed code to manually place your optin on your site
- Automatic: Automatically configure and display your campaign
Choose the option that works best for your campaign and save your changes.
Final Thoughts
And that’s it! Adding a content locker to WordPress is simple and doesn’t take long at all. Using OptinMonster, it’s easy for beginners and experienced WordPress users alike to take advantage of locked content and boost conversions.
If you enjoyed this tutorial, feel free to check out our post on the best email marketing services for WordPress. It’s packed with tools to help you find the perfect email provider for your business.
You may also like to see 30 Ways to Make Money Online Blogging. It’s packed with awesome ideas to monetize your website.








Comments Leave a Reply