Is your website redirecting to an unknown URL? Are you worried that your site is hacked?
Hackers are known to hijack websites and redirect them to their own malicious links. In most cases, such hacks are hidden from site owners and can go unnoticed for a long time.
So you wouldn’t know your site is hacked till users complain of redirects.
Don’t worry though, it’s fixable. In this guide, we’ll explain what’s happening and how to fix a malicious redirect hack.
What is A Malicious WordPress Redirect Hack?
Malicious redirects cause your site visitors to be sent to a different link when they try to access your site. These links are usually phishing and malicious sites that try to defraud the visitor or infect their devices with malware.
The redirects are caused by hackers that have injected scripts into your website. And these scripts can lurk anywhere from your files and database to 3rd party themes and plugins installed on your site.
And the consequences are severe:
- When search engines like Google notice the malicious scripts, they blacklist your site. This will cut off nearly all traffic from visiting your site.
- Naturally, this impacts your site’s SEO and rankings will fall.
- Your reputation gets damaged as you are now a source of infection.
Luckily, you can stop redirect hacks, reverse the damage done, and prevent it from happening again.
How to Fix Malware Redirect Hack in WordPress?
Step 1: Scan Your WordPress Site
The first thing you need to do is make sure your site is hacked and also identify where the hack is placed on your site.
There are plenty of free malware scanners available. We recommend using Sucuri for this. They have two types of malware scanners – a free web scanner and a premium serverside scanner. We’ll explain both in detail.
1. Sucuri Web Malware Scanner
Go to this free malware scanner on IsItWP powered by Sucuri.
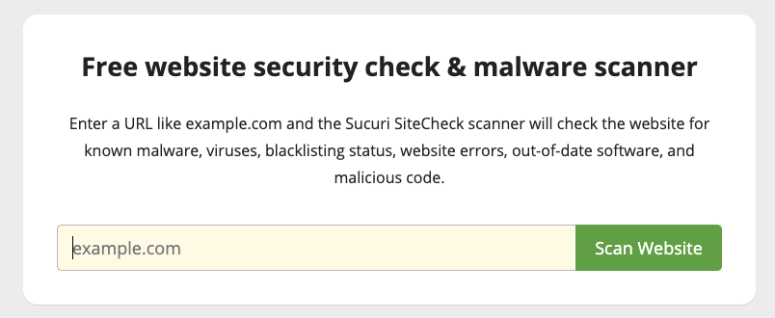
You simply need to enter your website’s URL and it will scan your site. If it detects any malware on your site, you’ll see it in the report like this.
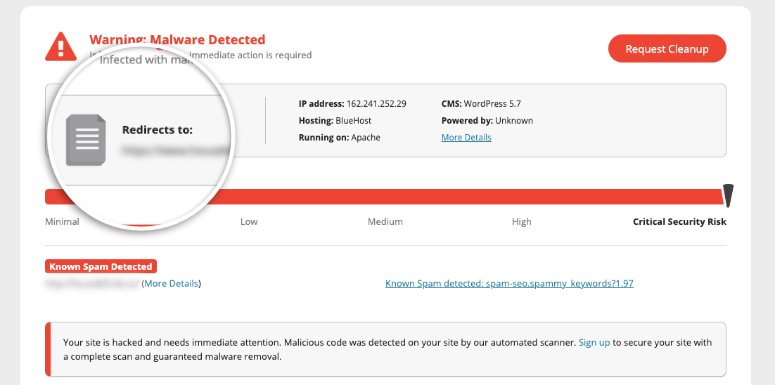
Web scanners can detect malware on your site but they can also show that your site is clean when it’s actually infected. These scanners are very limited in what they can see on your site and only run an external scan.
So you can use it as a first checkpoint. But we don’t recommend completely relying on them.
Instead, it’s better to install a server-side scanner on your WordPress site. These plugins will scan your site internally to check what’s happening on the inside. They run automated scans on a regular basis and monitor activity. So if there’s any malware or suspicious activity detected, you’ll be notified immediately.
2. Sucuri Server-Side Scanner
Sucuri’s server-side scanner will monitor your site for malware and any indicators of compromise. It will comb through your website regularly to make sure there are no signs of a hack.
Here are a few of its highlights:
- Checks for any hidden backdoors created by hackers
- Monitors for spam and malicious scripts
- Checks for blacklists with search engines and other authorities
- Monitors website uptime
- Detect changes made to DNS (domain name system) and SSL
- Instant alerts via email, SMS, Slack, and RSS
Sucuri’s server-side scanner is available in the pro version which starts at $199.99 per year. It also gives you access to unlimited malware removal in case your site is hacked and a firewall to prevent any future attacks.
To get started, you’ll need to sign up for a plan. Then, you’ll get access to the Sucuri dashboard where you can add your website.

You’ll need to enter your FTP credentials and click on the ‘Next’ button to connect your website. If you don’t know your FTP credentials, you can ask your web host for them.
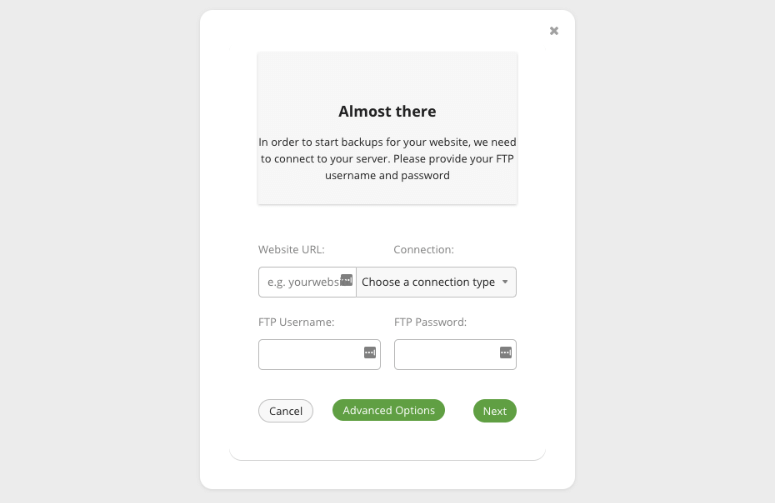
When you add your website to the Sucuri dashboard, it will automatically scan your website thoroughly.
Under the ‘My Sites’ tab, you’ll see the details of your site. You’ll need to click on the ‘Details’ button next to the warning message that your site may be infected.
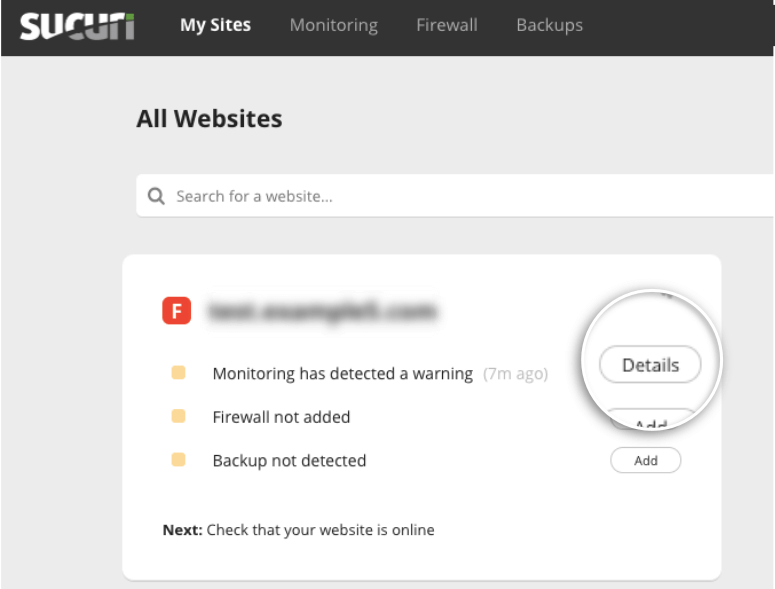
This will take you to the Monitoring page which gives you details of the infection.
Step 2: Request a Malware Cleanup
On the Monitoring page, you’ll be able to see what’s happening with your website. Sucuri will tell you what kind of malware it’s detected and how serious the risk is. It will also show you if your site has been blacklisted by any search engines.
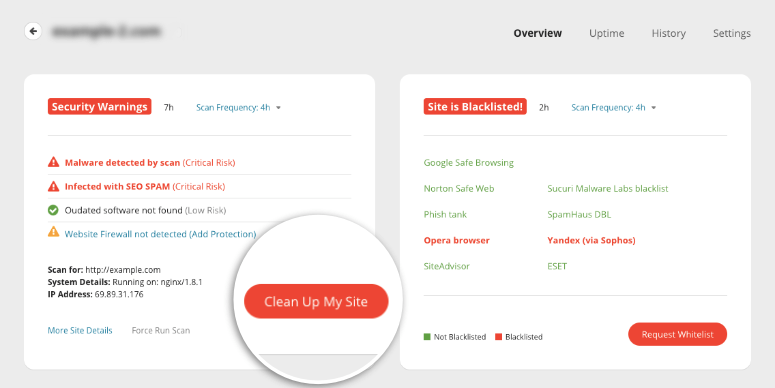
To clean up the hack, you’ll want to click on the ‘Clean Up My Site’ button. On the next page, you can create a malware removal request.
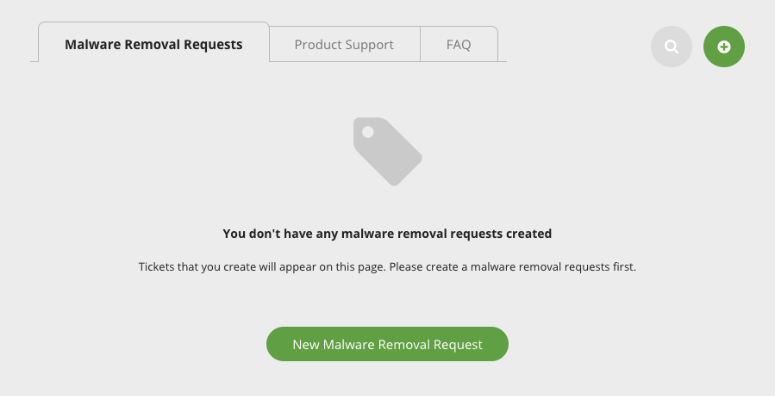
When you click on this button, Sucuri will present you with a form to enter your site’s details.
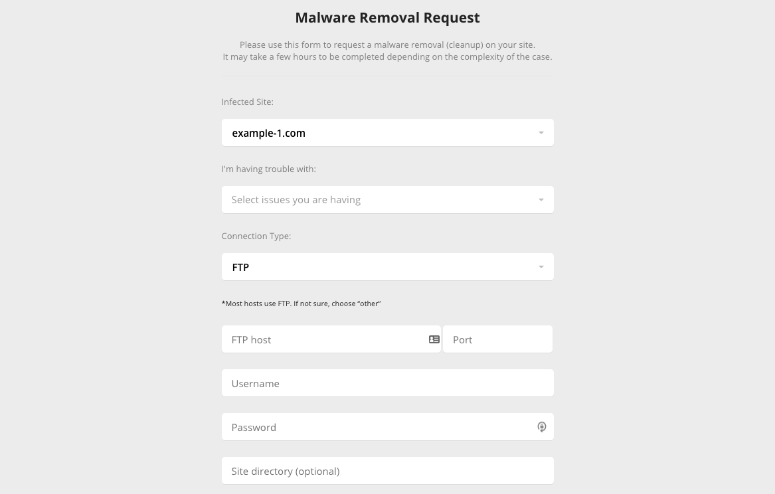
If you don’t know your site’s details, you can ask your web host and they’ll give it to you.
Once done, Sucuri will handle the rest.
If you bought the Business plan, Sucuri will have your site back to normal in 6 hours. For other plans, it greatly depends on how complex your site’s infection is and the volume of requests they have in queue.
Step 4: Whitelist Your Site
Once your website is clean of the WordPress redirect hack, if your site was blacklisted, you can submit it to search engines to review it.
Sucuri gives you an option to start the whitelist process from its dashboard.
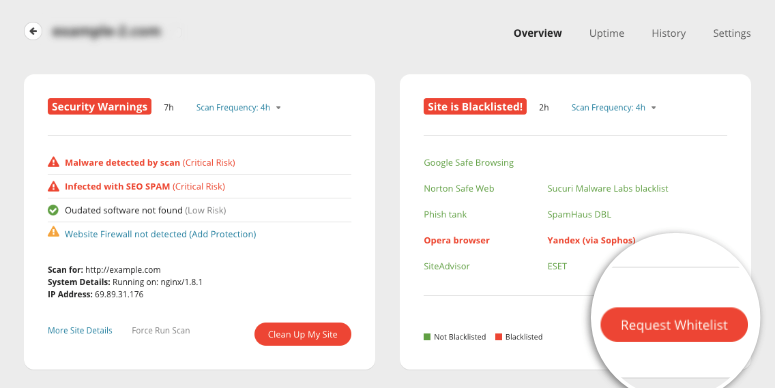
We’ll show you how to request a blacklist removal on Google. You’ll need to have a Google Search Console account for this.
If you don’t, you can sign up now on Google Search Central. For more help on this, use our guide to Submit Your Website to Search Engines.
Once you have access to the Google Search Console dashboard, navigate to ‘Security Issues’ tab from the menu on the left.
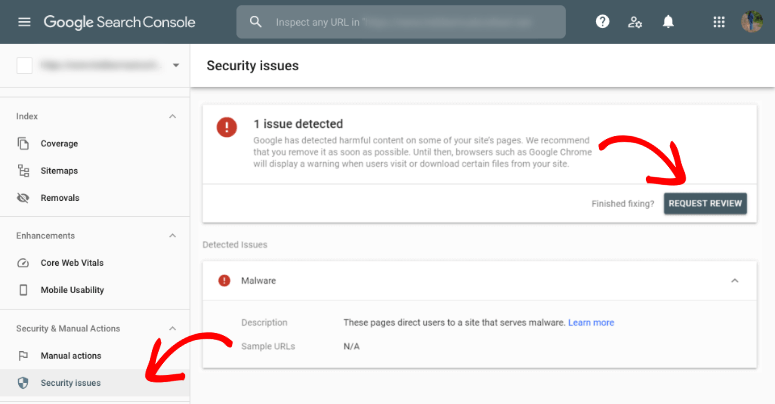
Then, click on the ‘Request Review’ button. Google will ask you for details about what measures you’ve taken to clean your site. You can mention that you used Sucuri and take a screenshot from the Sucuri dashboard to show them your site is clean.
Give Google as much detail as you can and be honest. If you aren’t and Google finds that your request is suspicious, it can become even more difficult to whitelist your site.
We recommend running a few scans on your site just to be doubly sure that it’s clean.
After you submit your request, it can take a few days for them to verify your site is clean and get you back up on search results pages.
With that, your website will be clean and free of any WordPress redirect hacks and blacklists.
Prevent WordPress Redirect Hacks on Your Site
Now, it’s important to take security measures so that this doesn’t happen again.
If your site is hacked repeatedly, search engines like Google won’t allow your site to be back up on their results page so easily. Plus, your web host can suspend your account to protect its servers.
When you sign up for Sucuri’s security solution, it will protect your site all around. But here’s what we recommend for every website owner:
- Always keep a security plugin active on your site. You can rely on Sucuri, iThemes Security, BulletProof Security, or SiteLock. These plugins will scan and monitor your site. This way you’ll be alerted of any suspicious activity immediately.
- Activate a firewall to block hackers and any user with malicious intent from accessing your site. You can enable a firewall with Sucuri itself.
- Use secure forms on your site as many hackers use them as an entry point. We recommend using WPForms as it comes with built-in spam protection. This detects and blocks fraudulent and malicious entries.
- Keep a backup copy of your website so in case something goes wrong, you can restore your site. You can use UpdraftPlus or BlogVault to schedule automatic backups.
- Consider switching over to a secure hosting provider like Bluehost. Many times, if your web host doesn’t secure its servers, hackers can find a way in. It’s best to use a reliable host that takes security seriously.
With these measures in place, your site will be in a better position to fight off hackers and stay clean.
We hope you found this guide helpful and if you’re looking for more ways to secure your website, here are some helpful resources:
- How to Perform a WordPress Security Audit (Step by Step)
- The Complete WordPress Security Guide (Beginner Friendly)
- The Best Dedicated Hosting Companies (Pros & Cons)
These posts have more information on how you can monitor and protect your site at all times.

Comments Leave a Reply