
Looking for an easy way to create a Divi contact form for your WordPress site?
Divi is one of the most popular WordPress themes on the market. It comes with a user-friendly builder that lets you customize your website from the front end. You can add page modules like the call to action button, contact form, and more.
With the Divi Contact Form module, you can create and insert a contact form without any third-party services. This is great if you want an easy way to add a basic contact form on your site.
However, you’ll need a powerful form builder plugin like WPForms for advanced features such as user submissions, email marketing, and more.
This is why Divi Builder also comes with a WPForms module so you can easily add professional contact forms in a few clicks.
In this post, we’ll show you these two methods of creating a Divi contact form in WordPress:
Creating a Contact Form with Divi Builder
If you don’t already have Divi, first, you’ll need to sign up for a Divi Account. Then, you’ll be able to access the dashboard and download your theme file.

After you install and activate the Divi Theme on your WordPress dashboard, open any page or post where you want to add your Divi contact form.
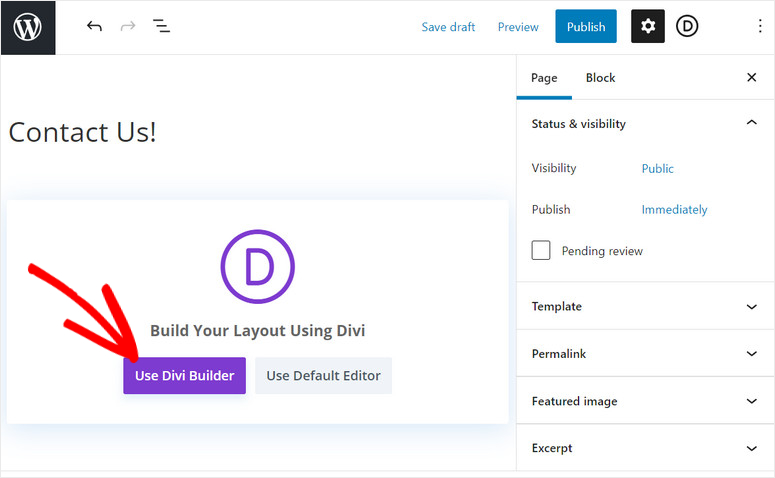
In the post editor, you’ll see the Use Divi Builder button. Click on the button to launch the builder in the front end of your site.
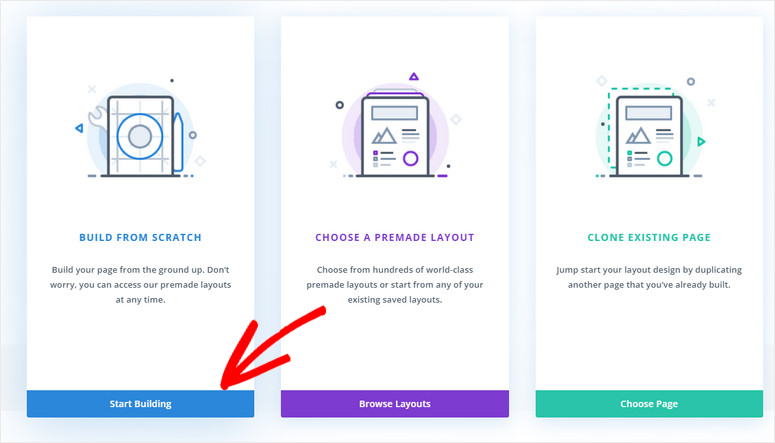
On the next screen, you’ll get to see the options to build a page from scratch, choose a premade layout or clone an existing page.
For this tutorial, we’ll start with the fresh page and add the contact form.
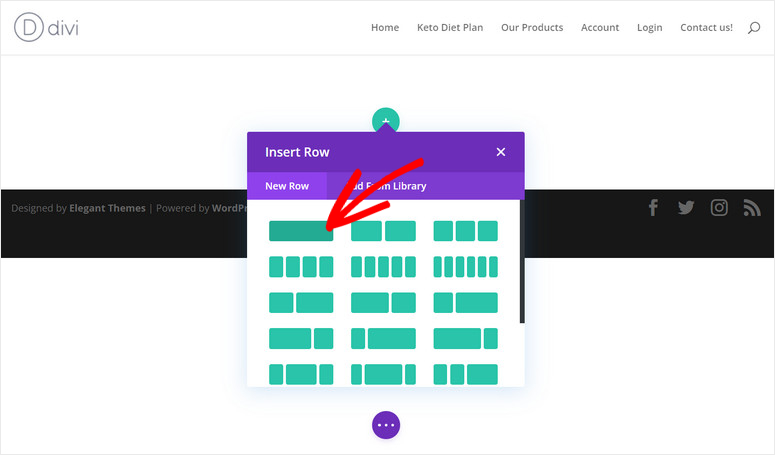
Then you’ll see the Divi builder where you can choose a row template that matches your needs.
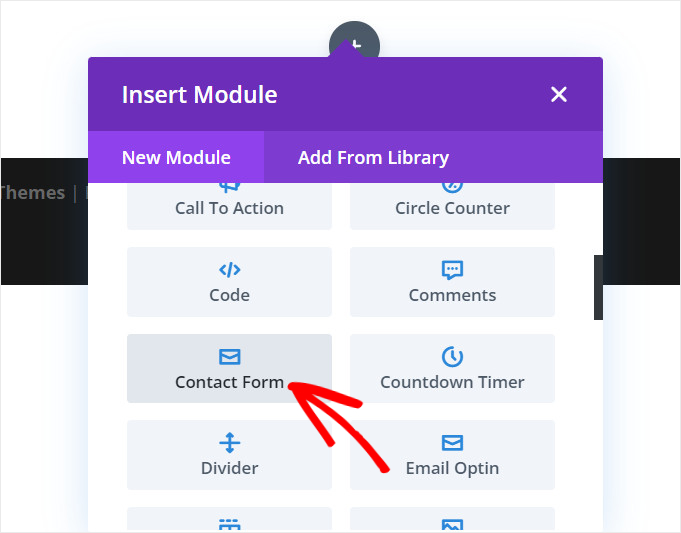
After you add the row, you can see the Insert Module panel that lets you add different types of content modules.
If you scroll down, you’ll find the Contact Form module. Simply click on it to insert the Divi contact form on your site.
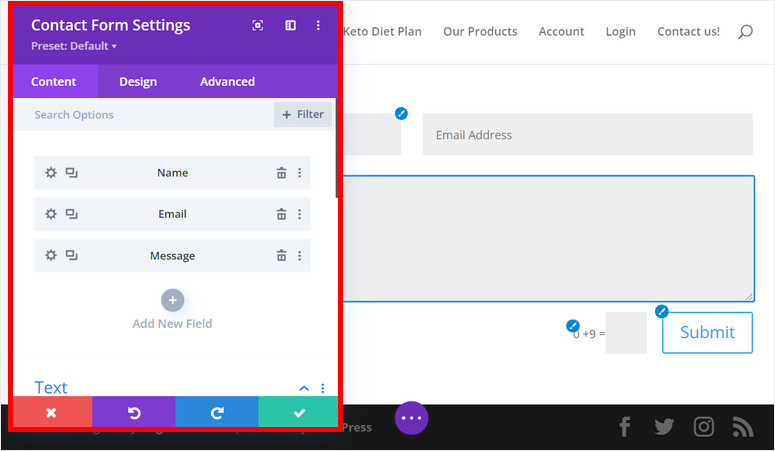
By default, the contact form consists of three form fields: Name, Email, and Message. You can click on the Add New Field button to add other form fields as per your needs.
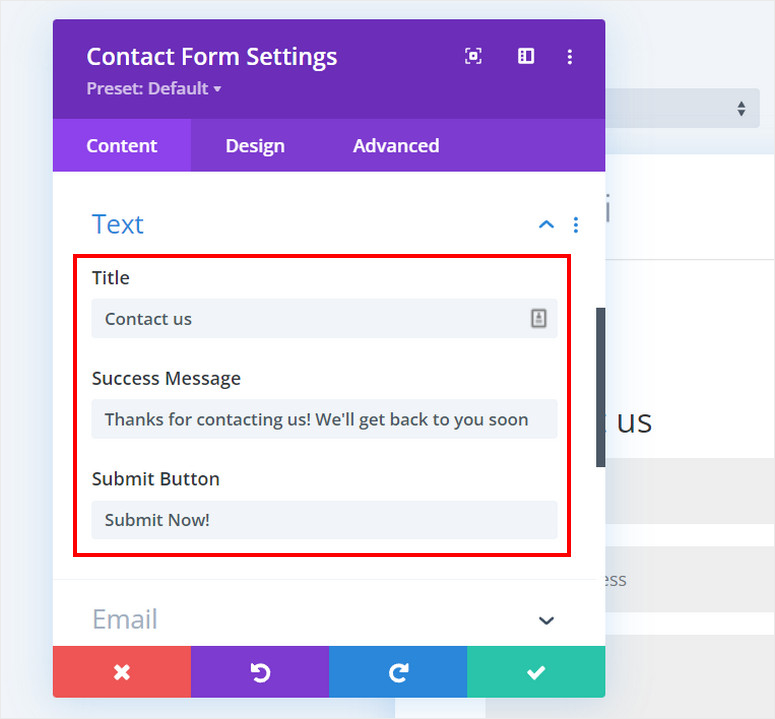
Additionally, you’ll find options to edit the title, submission successful message, and submit button text in the Text settings.
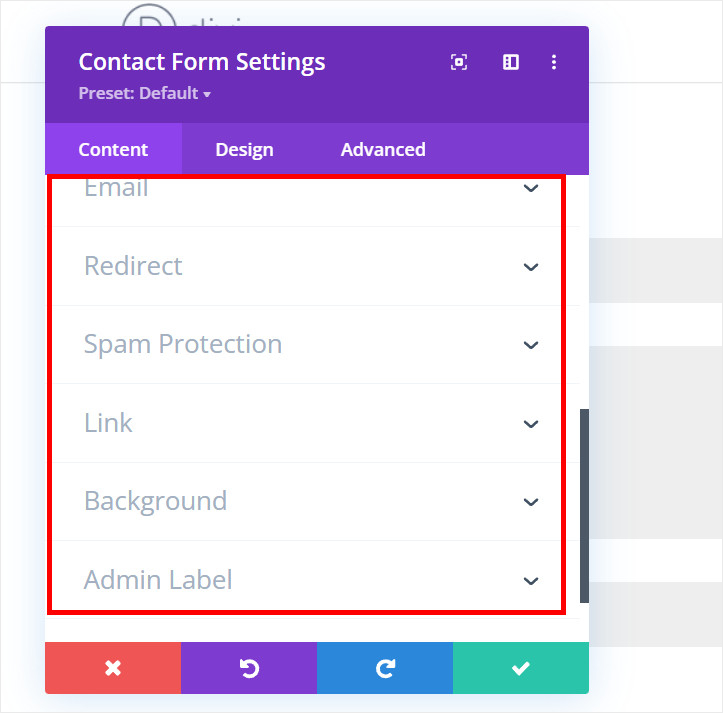
Divi also lets you send email messages so you can get notified about new form submissions.
Furthermore, you’ll find other useful options such as redirect links, spam protection, background settings, and more.
With the Divi contact form module, you can easily add a simple contact form to your WordPress site. There are plenty of customization options so you can match the style of your brand.
If you want to add more advanced features to your Divi contact form, then you’ll need to use a good form builder plugin.
And that’s exactly what we’re going to do in the next method. We’ll show you how to create a Divi contact using the most powerful WordPress form builder, WPForms.
Create a Divi Contact Form with WPForms
WPForms is the best drag and drop form builder plugin for WordPress. It lets you create any type of forms like contact forms, registration forms, download forms, and more in just a few clicks.
WPForms comes with 1,200+ pre-built form templates so you don’t need to create a contact form from scratch. You can add or remove any form fields and customize them as you like. And you don’t even need any coding knowledge for this.
All the contact forms you create with WPForms will be 100% responsive so they’ll display beautifully on any screen size. There’s even a built-in spam protection option so you can prevent spam and fraud form submissions on your site.
With over 6 million active installations, WPForms is loved by all types of businesses around the world. If you’re a Divi user and want to add amazing contact forms to your site then you can also go ahead with WPForms.
Here are some of the reasons why you should build your Divi contact form with WPForms:
- Easy to use and set up
- Advanced form notifications and confirmations
- File upload and content submission functionality
- Built-in form submission management system
- Email marketing integration to grow your email list
- Form abandonment option to capture partial form entries
- Form fields for eCommerce and payment options
And the great news is, there is a WPForms module in the Divi Builder. So you can easily add the contact form you build with WPForms on your site.
Also, you can use WPForms on any WordPress site, with or without Divi. If you ever decide to stop paying for Divi, the forms you create with WPForms will remain intact on your site.
With that said, let’s learn how to create a contact form with WPForms + Divi.
Step 1: Install and Activate WPFroms Plugin
First off, you’ll need to sign up for a WPForms account.
WPForms offers flexible pricing plans that are designed to fit the requirements of all types of businesses. You can choose a plan that is suitable for your business. And there’s a lite version that’s available for free.
After you sign up, you’ll be able to access your WPForms dashboard. You’ll find the plugin file along with your license ley on the Downloads tab.
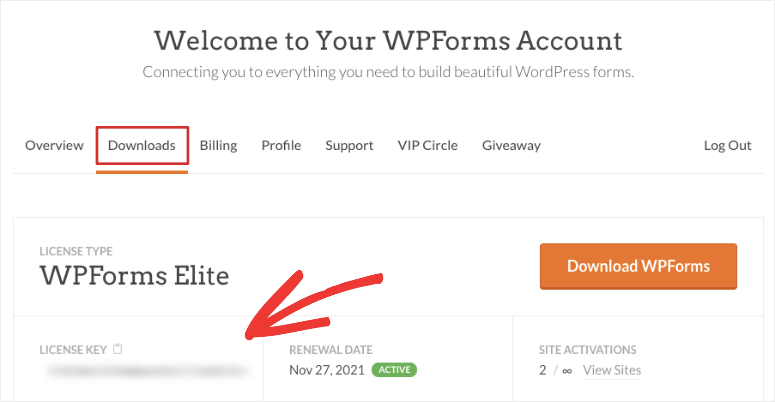
You need to install this plugin file on your WordPress site. For more details on this, you can check our guide on how to install a WordPress plugin.
Once you install and activate WPForms on your site, navigate to the WPForms » Settings tab on your admin dashboard.
Here, you’ll need to enter the license key and click on the Verify Key button.
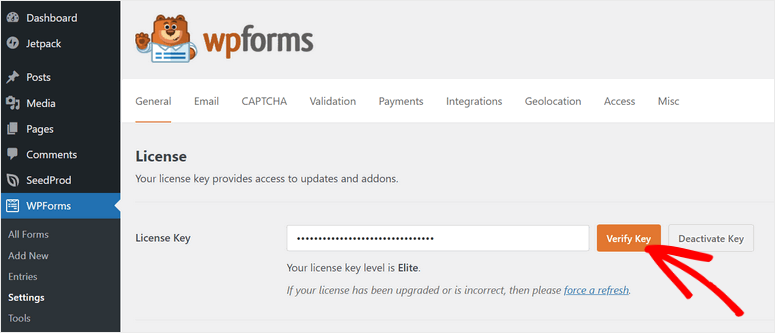
Then, you’ll see the verification successful message. Now you can start creating your contact form using WPForms.
Step 2: Create a Contact Form
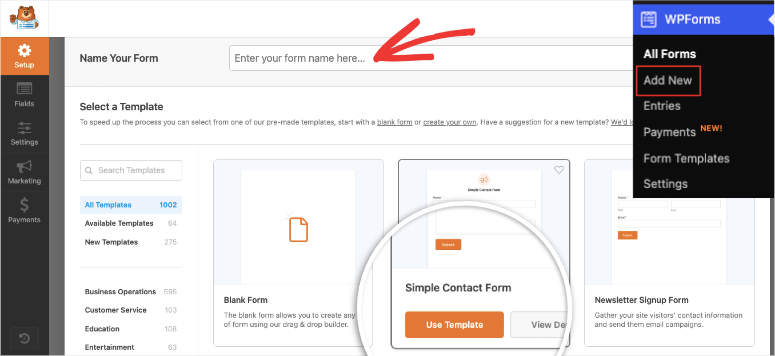
To create a new form, head over to the Add New tab on your WordPress dashboard. This will launch the template library where you can search for a suitable contact form template for your site.
For this tutorial, we’re going to start with the Simple Contact Form template. This template includes all the basic form fields required for a contact form like name, email, and message. You can also preview any other template to see which one is better for you.
Enter a name for your contact form and click on the Use Template button on the form template of your choice.
In the next screen, you’ll see WPForm’s drag and drop form builder. All the form fields are on the left side and the form preview is on the right side of the page.
You’ll find a wide range of useful form fields like numbers, dropdown, multiple-choice, file upload, rating, rich text and so much more.
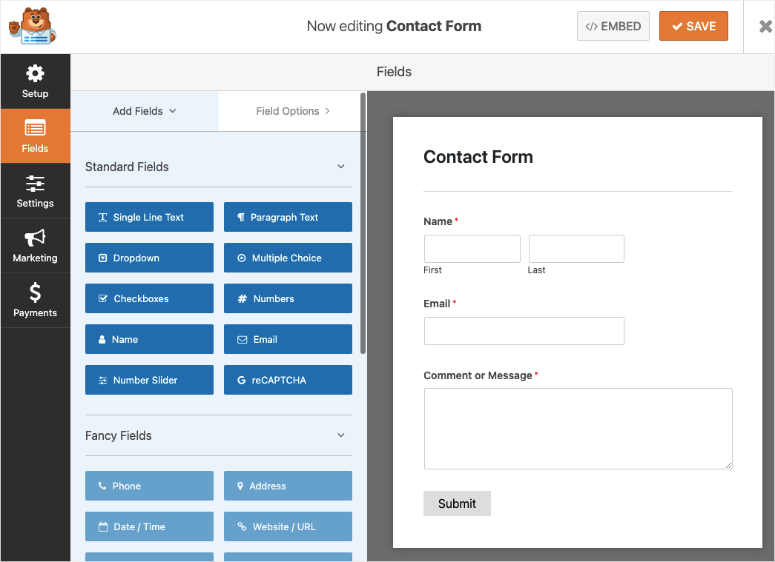
To insert a form field, you only need to drag it from the left side and place it on the form preview.
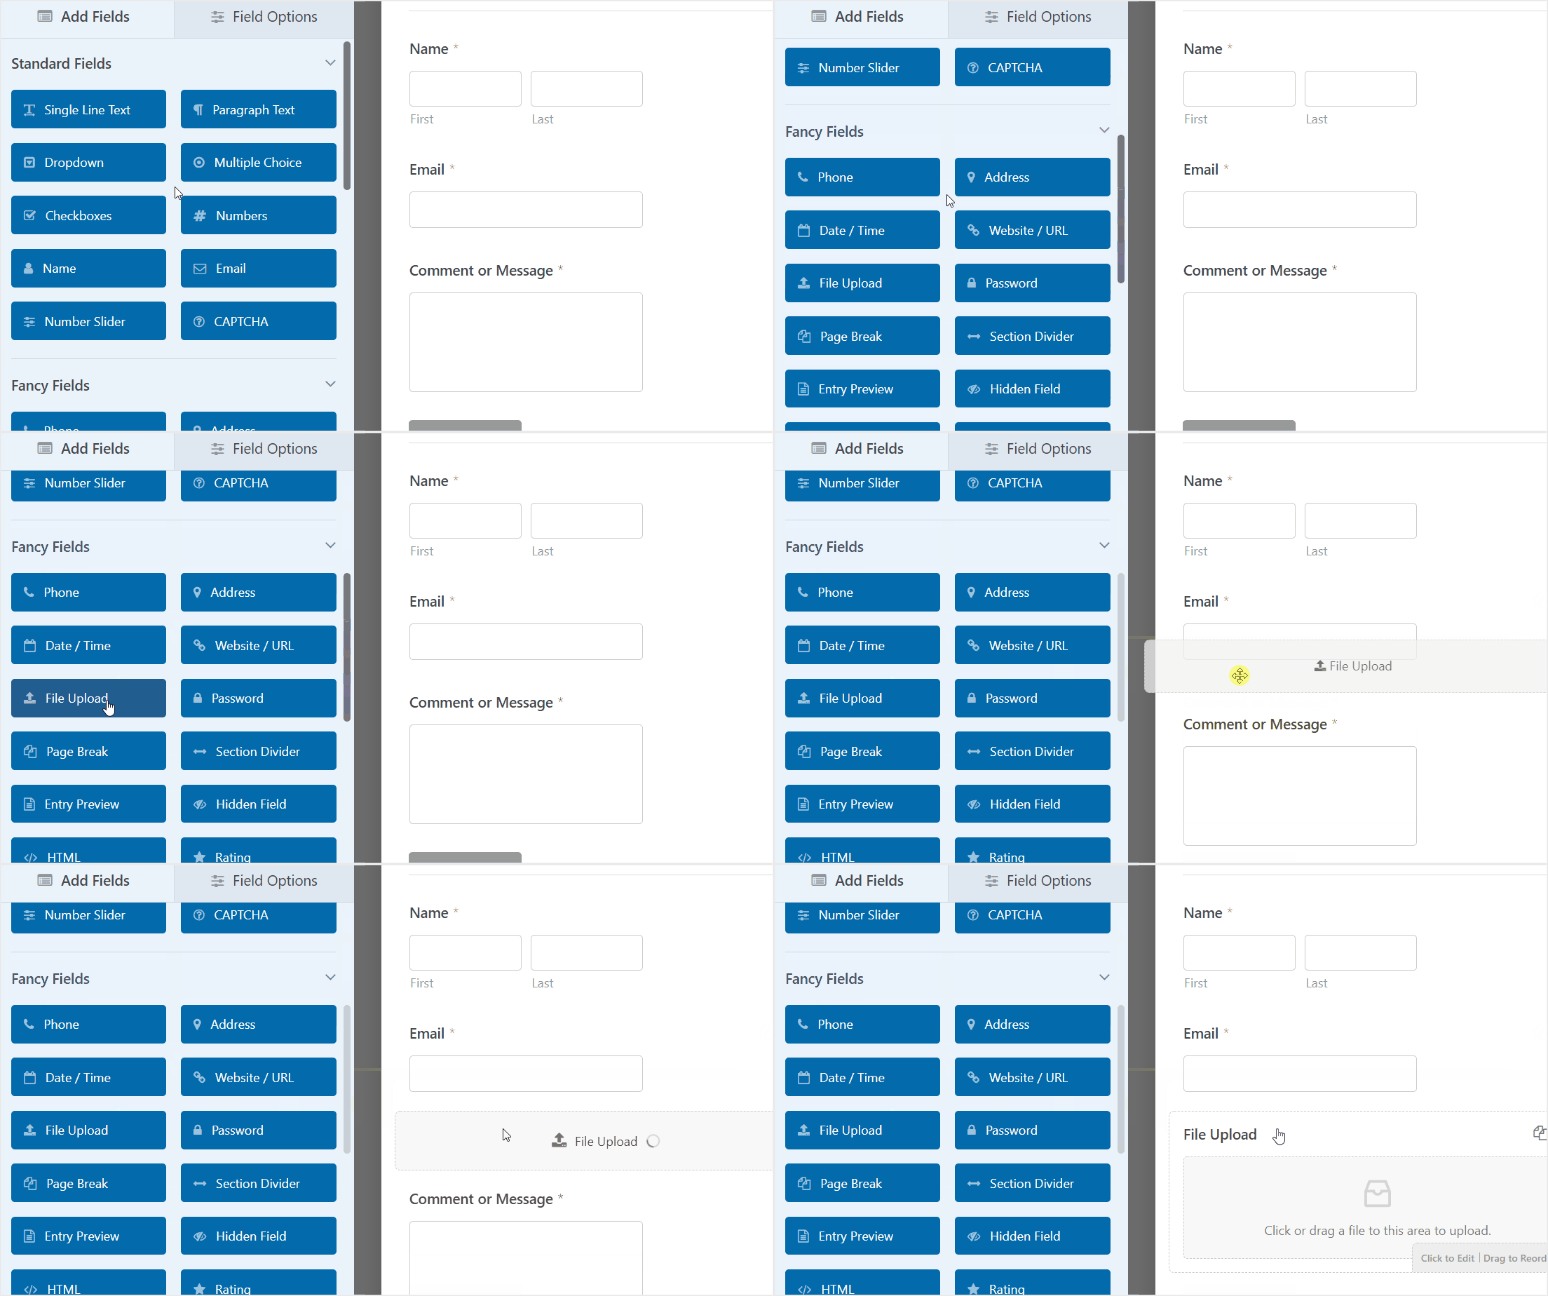
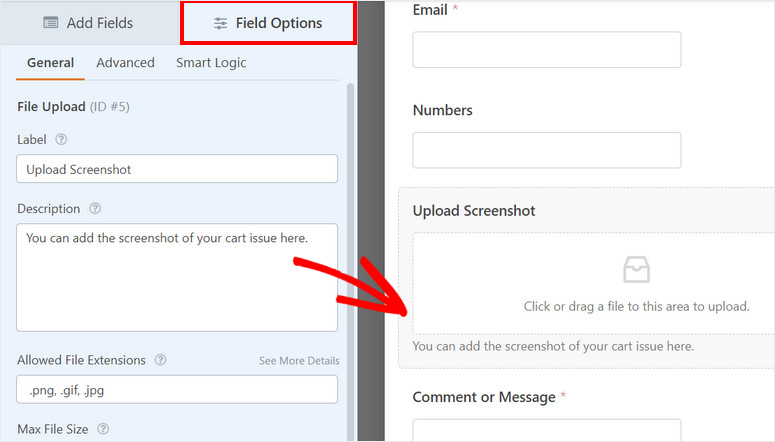
If you want to customize any of these form fields, you can click on them and you’ll see the field options. There are options to change the form label, description, required, and other additional options depending on the form field.
Once you add all the required fields to your Divi contact form, click on the Save button on the top of the form builder.
Next, you’ll need to set up form settings, notifications, and confirmations.
Step 3: Configure Form Settings
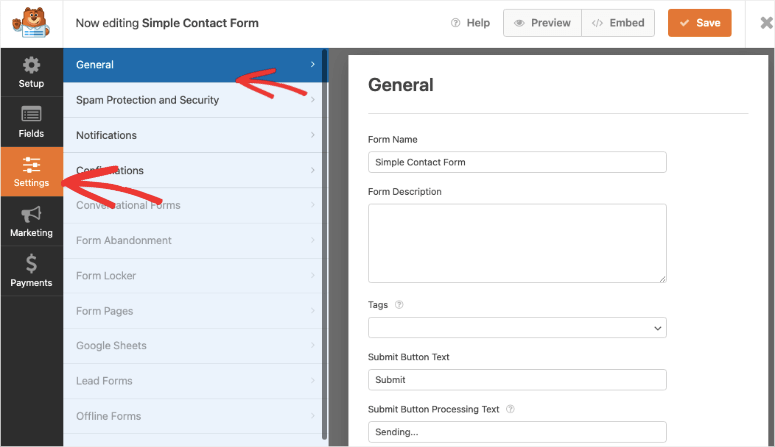
To change form settings, open the Settings » General tab from the left menu panel on the form builder. Here, you can change the form name, form description, submit button text, and more.
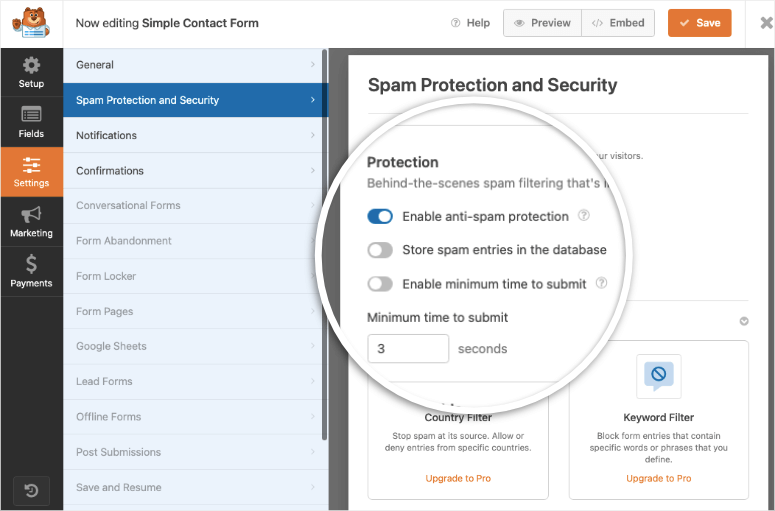
In the next tab called Spam Protection and Security, there is the option to enable anti-spam protection on your site. This will also help you set up Google reCAPTCHA for your contact form.
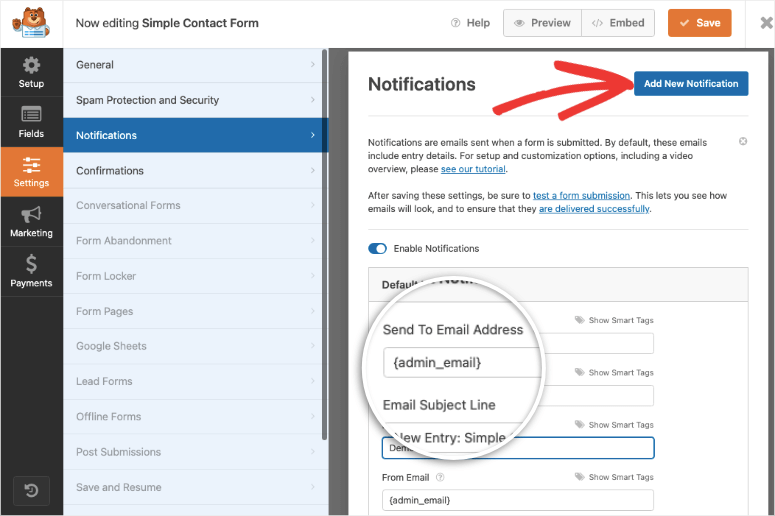
Next, to create automated email notifications, head over to the Settings » Notifications tab to set up email notifications for your Divi contact form. You’ll see there is a default notification that is sent to the admin email address.
You can add multiple email addresses or click on the Add New Notification button to send more than one form notification.
With this, you can notify you and your team members about new form submissions, send customers their submission details, and more.
If you want more information on this, you can check our guide on How to Set Up the Right Form Notifications & Confirmations.
Likewise, WPForms lets you decide what happens after a user submits their contact information on your site. Go to the Settings » Confirmations tab and you’ll see the option to choose the confirmation action.
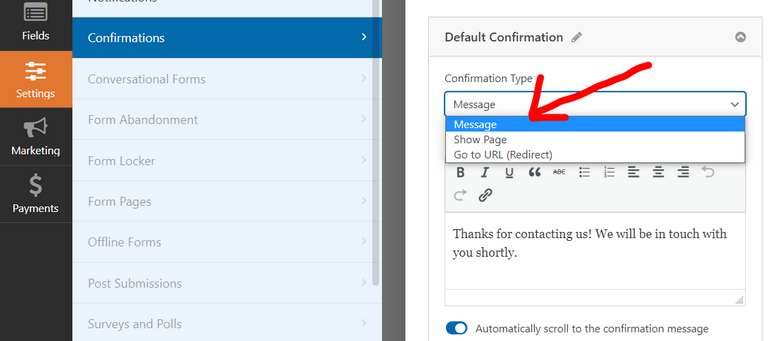
So you can show a custom ‘thank you’ message on the frontend after the user hits the submit button. Or, choose the redirect options to send users to a different page on your site or an external URL.
Once you’re done with the form settings, make sure you click the Save button.
Now that your contact form is ready, you can insert it on your website using Divi Builder.
Step 4: Add WPForms Module in Divi
To add this contact form on any page or post, open the Divi Builder and choose a row layout as we did for the Divi contact form module.
The only difference here is that you’ll need to search for the WPForms module.
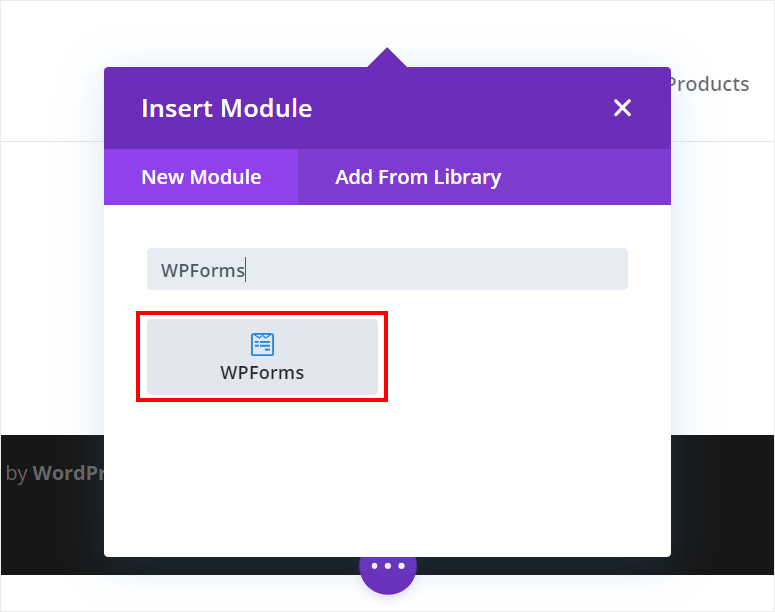
After you insert the WPForms block, you’ll see the settings to choose the contact form you just created. There are options to show the title and description of your contact form as well.
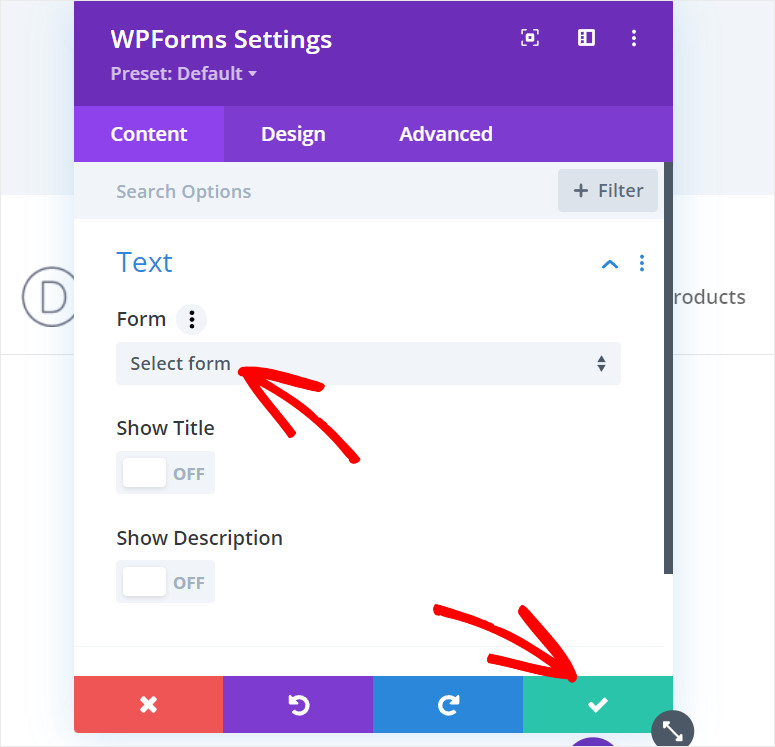
You can even change the design and styling for your contact form with the Divi Builder. When you’re happy with how your Divi contact form looks, click on the right tick mark button.
Step 5: Publish Your Divi Contact Form
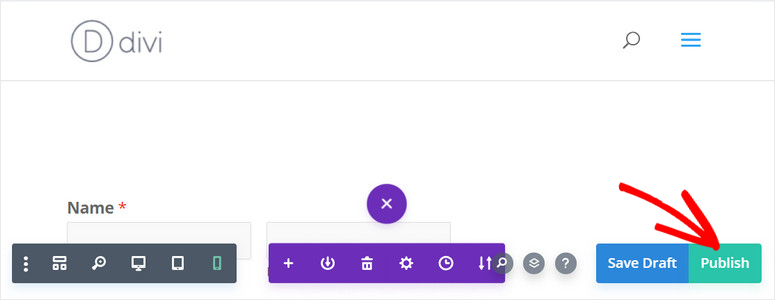
The final step is to publish your contact form. For this, click on the 3 dots button on the bottom of the Divi Builder.
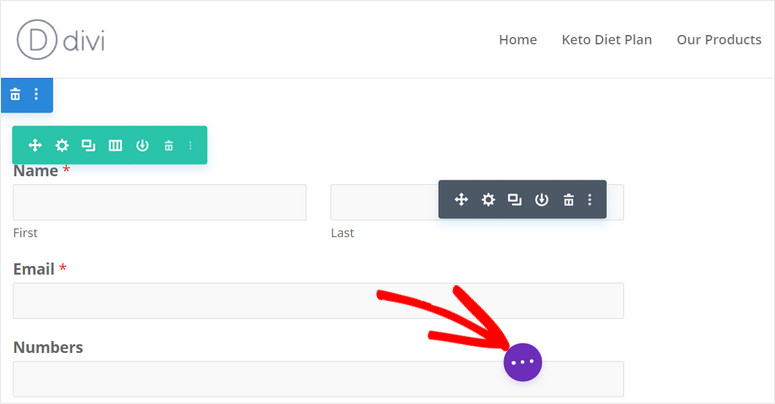
Then, you’ll see the different options such as zoom, responsive preview, and more. On the right side, there are two buttons: Save Draft and Publish.
Click on the Publish button to publish your page and contact form on your WordPress site.
You’ve successfully created a contact form using Divi and WPForms. While Divi does offer a contact form module, it lacks some features like file upload, entry management, and email list integration.
With WPForms, you can easily solve these issues. It is packed with features and functionalities that help you create all types of contact forms from basic to professional.
WPForms also lets you create WordPress forms for any purpose depending upon your requirements. You can build order forms, event registration forms, sign-up forms, and so much more.
And that’s it for today! We hope this tutorial helped you learn how to create a Divi contact form in WordPress with ease.
If you want more help with WordPress forms, you can check these resources out:
- How to Create an Event Registration Form in WordPress
- 8 Best Email Capture Tools & Form Builders for WordPress
- How To Easily Reduce Form Abandonment
These posts will help you register users on your WordPress forms and grow your email lists. The last one will help you reduce abandonment rates on your form and improve your conversions.

Comments Leave a Reply